User's Guide
Page 3
... a network setup page...77 Checking the status of parts and supplies ...77 Saving energy...77 Restoring factory default settings...81 Securing the printer ...82 Using MS810de 86 Learning about the printer...86 Printer configurations ...86 Using the printer control panel...88 Understanding the colors of the indicator and Sleep button lights...
... a network setup page...77 Checking the status of parts and supplies ...77 Saving energy...77 Restoring factory default settings...81 Securing the printer ...82 Using MS810de 86 Learning about the printer...86 Printer configurations ...86 Using the printer control panel...88 Understanding the colors of the indicator and Sleep button lights...

User's Guide
Page 86
... than one input option. If you purchased a printer with a similar configuration, you are using a high-capacity input tray or more information, see www.lexmark.com/multifunctionprinters. Using MS810de 86 Using MS810de Learning about the printer Printer configurations Basic model 1 2 4 3 1 Standard bin 2 Printer control panel 3 Multipurpose feeder 4 Standard 550‑sheet tray (Tray 1) Fully...
... than one input option. If you purchased a printer with a similar configuration, you are using a high-capacity input tray or more information, see www.lexmark.com/multifunctionprinters. Using MS810de 86 Using MS810de Learning about the printer Printer configurations Basic model 1 2 4 3 1 Standard bin 2 Printer control panel 3 Multipurpose feeder 4 Standard 550‑sheet tray (Tray 1) Fully...

User's Guide
Page 87
Using MS810de 87 The following illustration shows the maximum number of optional finishers and trays that can be placed on top. • The high‑capacity output ... the bottom. • The output expander is the only finisher that are supported by the printer. For more information on other configurations, visit http://support.lexmark.com. 8 1 7 2 6 5 4 3 Hardware option Alternative hardware option 1 Staple finisher • Output expander • 4‑bin mailbox 2 4‑bin mailbox • Output expander • High‑capacity...
Using MS810de 87 The following illustration shows the maximum number of optional finishers and trays that can be placed on top. • The high‑capacity output ... the bottom. • The output expander is the only finisher that are supported by the printer. For more information on other configurations, visit http://support.lexmark.com. 8 1 7 2 6 5 4 3 Hardware option Alternative hardware option 1 Staple finisher • Output expander • 4‑bin mailbox 2 4‑bin mailbox • Output expander • High‑capacity...

User's Guide
Page 88
... the following to wake the printer from Sleep Mode: • Press any hard button. • Pull out Tray 1 or load paper in any order. Using MS810de 88 When using optional trays: • Always use a caster base when the printer is configured with the main power switch. • Attach a device to the...
... the following to wake the printer from Sleep Mode: • Press any hard button. • Pull out Tray 1 or load paper in any order. Using MS810de 88 When using optional trays: • Always use a caster base when the printer is configured with the main power switch. • Attach a device to the...

User's Guide
Page 89
Using MS810de 89 Indicator light color and its corresponding printer status Sleep button light Off Solid amber Blinking amber Blinking amber for 1.9 seconds in pulsing pattern Printer ...
Using MS810de 89 Indicator light color and its corresponding printer status Sleep button light Off Solid amber Blinking amber Blinking amber for 1.9 seconds in pulsing pattern Printer ...
User's Guide
Page 90
... intervention to continue processing. • View more information on the printer warning or message, and on how to the printer. 5 Menus Access printer menus. Using MS810de 90 Touch To 4 USB View, select, or print photos and documents from a flash drive. This may vary, depending on the home screen: Touch To Search...
... intervention to continue processing. • View more information on the printer warning or message, and on how to the printer. 5 Menus Access printer menus. Using MS810de 90 Touch To 4 USB View, select, or print photos and documents from a flash drive. This may vary, depending on the home screen: Touch To Search...

User's Guide
Page 91
Open a context-sensitive Help dialog on the printer control panel. Scroll to the home screen. Using MS810de 91 1 2 Touch the To 1 Radio button Select or clear an item. 2 Up arrow Scroll up. 3 Down arrow Scroll down. 4 Accept button Save a setting. 5 Cancel button • Cancel an action or a selection. • Return to the previous screen. 54 3 Other touch-screen buttons Touch To Return to the left. Scroll to the right.
Open a context-sensitive Help dialog on the printer control panel. Scroll to the home screen. Using MS810de 91 1 2 Touch the To 1 Radio button Select or clear an item. 2 Up arrow Scroll up. 3 Down arrow Scroll down. 4 Accept button Save a setting. 5 Cancel button • Cancel an action or a selection. • Return to the previous screen. 54 3 Other touch-screen buttons Touch To Return to the left. Scroll to the right.

User's Guide
Page 92
Using MS810de 92 Setting up these applications, you are supported only in the address field. Some applications are not physically near the printer. 1 Obtain the printer IP address: • From the printer control panel home screen • From the TCP/IP section in the address field. For more information, visit www.lexmark.com...
Using MS810de 92 Setting up these applications, you are supported only in the address field. Some applications are not physically near the printer. 1 Obtain the printer IP address: • From the printer control panel home screen • From the TCP/IP section in the address field. For more information, visit www.lexmark.com...
User's Guide
Page 93
... printer home screen. 1 From the home screen, navigate to: Change Background > select background to http://support.lexmark.com, and then click SELECT YOUR PRODUCT > . 2 Do either of the following : 1 Go to use 2 Touch . Using MS810de 93 For more information on configuring and using the home screen applications, do the following : • Click...
... printer home screen. 1 From the home screen, navigate to: Change Background > select background to http://support.lexmark.com, and then click SELECT YOUR PRODUCT > . 2 Do either of the following : 1 Go to use 2 Touch . Using MS810de 93 For more information on configuring and using the home screen applications, do the following : • Click...

User's Guide
Page 94
... file. From your computer screen and lets you interact with the printer control panel, even when you are not physically near the network printer. Using MS810de 94 Understanding Eco‑Settings Icon Description The application lets you might normally do while standing at the network printer. 1 Open a Web browser, and then...
... file. From your computer screen and lets you interact with the printer control panel, even when you are not physically near the network printer. Using MS810de 94 Understanding Eco‑Settings Icon Description The application lets you might normally do while standing at the network printer. 1 Open a Web browser, and then...
User's Guide
Page 95
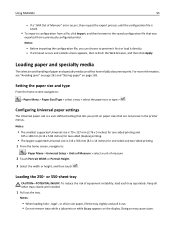
... instability, load each tray separately. Keep all other trays closed until the configuration file is saved. • To import a configuration from a previously configured printer. Using MS810de 95 - If a timeout occurs and a blank screen appears, then refresh the Web browser, and then click Apply. Loading paper and specialty media The selection and...
... instability, load each tray separately. Keep all other trays closed until the configuration file is saved. • To import a configuration from a previously configured printer. Using MS810de 95 - If a timeout occurs and a blank screen appears, then refresh the Web browser, and then click Apply. Loading paper and specialty media The selection and...

User's Guide
Page 96
Using MS810de 96 2 Squeeze and slide the width guide to the correct position for the size of the paper being loaded until it clicks into place. 1 2 Note: Use the paper size indicators on the bottom of the tray to help position the guides.
Using MS810de 96 2 Squeeze and slide the width guide to the correct position for the size of the paper being loaded until it clicks into place. 1 2 Note: Use the paper size indicators on the bottom of the tray to help position the guides.

User's Guide
Page 97
Using MS810de 97 3 Unlock the length guide, and then squeeze and slide the guide to the correct position for the size of the paper being loaded. 1 2 3 Notes: • Lock the length guide for all paper sizes. • Use the paper size indicators on the bottom of the tray to help position the guides.
Using MS810de 97 3 Unlock the length guide, and then squeeze and slide the guide to the correct position for the size of the paper being loaded. 1 2 3 Notes: • Lock the length guide for all paper sizes. • Use the paper size indicators on the bottom of the tray to help position the guides.

User's Guide
Page 98
Straighten the edges on whether an optional staple finisher is installed or not. Note: Make sure the paper or envelope is loaded properly. • There are different ways for loading letterhead depending on a level surface. 5 Load the paper stack with the printable side facedown. Without an optional staple finisher With an optional staple finisher ABC One‑sided printing One‑sided printing Do not fold or crease the paper. Using MS810de 98 4 Flex the sheets back and forth to loosen them.
Straighten the edges on whether an optional staple finisher is installed or not. Note: Make sure the paper or envelope is loaded properly. • There are different ways for loading letterhead depending on a level surface. 5 Load the paper stack with the printable side facedown. Without an optional staple finisher With an optional staple finisher ABC One‑sided printing One‑sided printing Do not fold or crease the paper. Using MS810de 98 4 Flex the sheets back and forth to loosen them.

User's Guide
Page 99
Using MS810de 99 Without an optional staple finisher With an optional staple finisher ABC ABC Two‑sided printing Two‑sided printing • Do not slide the paper into the tray. Load paper as shown in the illustration. • If you are loading envelopes, then make sure that the flap side is facing up and the envelopes are on the left side of the tray.
Using MS810de 99 Without an optional staple finisher With an optional staple finisher ABC ABC Two‑sided printing Two‑sided printing • Do not slide the paper into the tray. Load paper as shown in the illustration. • If you are loading envelopes, then make sure that the flap side is facing up and the envelopes are on the left side of the tray.

User's Guide
Page 100
Using MS810de 100 • Make sure the paper is below the maximum paper fill indicator. Warning-Potential Damage: Overfilling the tray can cause paper jams. 6 For custom‑ or universal‑size paper, adjust the paper guides to lightly touch the sides of the stack, and then lock the length guide. 7 Insert the tray. 8 From the printer control panel, set the paper size and type in the tray. Note: Set the correct paper size and type to match the paper loaded in the Paper menu to avoid paper jams and print quality problems.
Using MS810de 100 • Make sure the paper is below the maximum paper fill indicator. Warning-Potential Damage: Overfilling the tray can cause paper jams. 6 For custom‑ or universal‑size paper, adjust the paper guides to lightly touch the sides of the stack, and then lock the length guide. 7 Insert the tray. 8 From the printer control panel, set the paper size and type in the tray. Note: Set the correct paper size and type to match the paper loaded in the Paper menu to avoid paper jams and print quality problems.

User's Guide
Page 101
Keep all other trays closed until needed. 1 Pull out the tray. 2 Adjust the width and length guides. Using MS810de 101 Loading the 2100‑sheet tray CAUTION-POTENTIAL INJURY: To reduce the risk of equipment instability, load each tray separately. Loading A5‑size paper a Pull up and slide the width guide to the position for A5. 1 LGLOFCFOLLITOR A4 A5 2 LGLOFCFOLLITOR A4 A5 LGLOFCFOLILOTR A4 A5
Keep all other trays closed until needed. 1 Pull out the tray. 2 Adjust the width and length guides. Using MS810de 101 Loading the 2100‑sheet tray CAUTION-POTENTIAL INJURY: To reduce the risk of equipment instability, load each tray separately. Loading A5‑size paper a Pull up and slide the width guide to the position for A5. 1 LGLOFCFOLLITOR A4 A5 2 LGLOFCFOLLITOR A4 A5 LGLOFCFOLILOTR A4 A5

User's Guide
Page 102
Note: Press the A5 length guide until it clicks into its designated slot. Using MS810de 102 b Squeeze and slide the length guide to the position for A5 until it clicks into place. 1 2 c Remove the A5 length guide from its holder. 1 2 d Insert the A5 length guide into place.
Note: Press the A5 length guide until it clicks into its designated slot. Using MS810de 102 b Squeeze and slide the length guide to the position for A5 until it clicks into place. 1 2 c Remove the A5 length guide from its holder. 1 2 d Insert the A5 length guide into place.

User's Guide
Page 103
Using MS810de 103 Loading A4‑, letter‑, legal‑, oficio‑, and folio‑size paper a Pull up and slide the width guide to the correct position for the size of the paper being loaded. 1 LGLOFCFOLLITOR A4 A5 2 LGLOFCFOLLITOR A4 A5 LGLOFCFOLILOTR A4 A5
Using MS810de 103 Loading A4‑, letter‑, legal‑, oficio‑, and folio‑size paper a Pull up and slide the width guide to the correct position for the size of the paper being loaded. 1 LGLOFCFOLLITOR A4 A5 2 LGLOFCFOLLITOR A4 A5 LGLOFCFOLILOTR A4 A5

User's Guide
Page 104
Using MS810de 104 b If the A5 length guide is not attached, then proceed to the length guide, then remove it from its holder. 1 2 If the A5 length guide is still attached to step d. c Put the A5 length guide in its place.
Using MS810de 104 b If the A5 length guide is not attached, then proceed to the length guide, then remove it from its holder. 1 2 If the A5 length guide is still attached to step d. c Put the A5 length guide in its place.
