
User's Guide
Page 2
...an Internal Solutions Port...16 Installing a printer hard disk ...22 Removing a printer hard disk...25 Installing hardware options...26 Installing optional trays ...26 Setting up the printer software...28 Installing the printer software ...28 Updating available options in the printer driver 28 Networking...29 ...Fi Protected Setup 32 Connecting the printer to a wireless network using the Embedded Web Server 33 Verifying printer setup...34 Using MS510dn and MS610dn 35 Learning about the printer...35 Printer configurations ...35 Using the printer control panel...36 Understanding the colors of ...
...an Internal Solutions Port...16 Installing a printer hard disk ...22 Removing a printer hard disk...25 Installing hardware options...26 Installing optional trays ...26 Setting up the printer software...28 Installing the printer software ...28 Updating available options in the printer driver 28 Networking...29 ...Fi Protected Setup 32 Connecting the printer to a wireless network using the Embedded Web Server 33 Verifying printer setup...34 Using MS510dn and MS610dn 35 Learning about the printer...35 Printer configurations ...35 Using the printer control panel...36 Understanding the colors of ...

User's Guide
Page 35
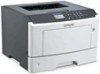
Keep all other trays closed until needed. MS510dn printer model 23 4 1 5 6 8 7 1 Printer control panel 2 Paper stop 3 Standard bin 4 Front door release button 5 Controller board access door 6 100‑sheet multipurpose feeder 7 Standard 250‑sheet tray 8 Optional 250‑ or 550‑sheet trays Using MS510dn and MS610dn 35 Using MS510dn and MS610dn Learning about the printer Printer configurations CAUTION-POTENTIAL INJURY: To reduce the risk of equipment instability, load each tray separately.
Keep all other trays closed until needed. MS510dn printer model 23 4 1 5 6 8 7 1 Printer control panel 2 Paper stop 3 Standard bin 4 Front door release button 5 Controller board access door 6 100‑sheet multipurpose feeder 7 Standard 250‑sheet tray 8 Optional 250‑ or 550‑sheet trays Using MS510dn and MS610dn 35 Using MS510dn and MS610dn Learning about the printer Printer configurations CAUTION-POTENTIAL INJURY: To reduce the risk of equipment instability, load each tray separately.

User's Guide
Page 36
Using MS510dn and MS610dn 36 MS610dn printer model 1 23 4 5 6 8 7 1 Printer control panel 2 Paper stop 3 Standard bin 4 Front door release button 5 Controller board access door 6 100‑sheet multipurpose feeder 7 Standard 550‑sheet tray 8 Optional 250‑ or 550‑sheet trays Using the printer control panel 1 2 34 5 6 7 Use the 1 Display 2 Left arrow button 3 Select button 4 Up arrow button 13 12 11 10 To View the printer status and messages. Scroll to the left. Select menu options. Save settings. Scroll up and operate the printer. Set up . 98
Using MS510dn and MS610dn 36 MS610dn printer model 1 23 4 5 6 8 7 1 Printer control panel 2 Paper stop 3 Standard bin 4 Front door release button 5 Controller board access door 6 100‑sheet multipurpose feeder 7 Standard 550‑sheet tray 8 Optional 250‑ or 550‑sheet trays Using the printer control panel 1 2 34 5 6 7 Use the 1 Display 2 Left arrow button 3 Select button 4 Up arrow button 13 12 11 10 To View the printer status and messages. Scroll to the left. Select menu options. Save settings. Scroll up and operate the printer. Set up . 98

User's Guide
Page 37
... is waking from the computer • Performing a power‑on reset using the main power switch • Attaching a device in Hibernate mode. Using MS510dn and MS610dn 37 Use the To 5 Right arrow button Scroll to the printer. The printer is warming up, processing data, or printing. The following actions... wake the printer from Sleep mode: • Pressing any hard button • Opening a tray or the front door • Sending a print job from or entering Hibernate mode. The printer requires user intervention.
... is waking from the computer • Performing a power‑on reset using the main power switch • Attaching a device in Hibernate mode. Using MS510dn and MS610dn 37 Use the To 5 Right arrow button Scroll to the printer. The printer is warming up, processing data, or printing. The following actions... wake the printer from Sleep mode: • Pressing any hard button • Opening a tray or the front door • Sending a print job from or entering Hibernate mode. The printer requires user intervention.

User's Guide
Page 40
Using the standard bin and paper stop that keeps paper from sliding out the front of 20‑lb paper. Using MS510dn and MS610dn 40 Loading paper and specialty media The selection and handling of 2 Select Portrait Width or Portrait Height, and then press . 3 Press the left ... and type 1 From the printer control panel, navigate to: > Settings > > Paper Menu > > Paper Size/Type > 2 Press the up or down arrow button to select the tray or feeder, and then press . 3 Press the up or down arrow button to select the paper type, and then press to change the setting, and...
Using the standard bin and paper stop that keeps paper from sliding out the front of 20‑lb paper. Using MS510dn and MS610dn 40 Loading paper and specialty media The selection and handling of 2 Select Portrait Width or Portrait Height, and then press . 3 Press the left ... and type 1 From the printer control panel, navigate to: > Settings > > Paper Menu > > Paper Size/Type > 2 Press the up or down arrow button to select the tray or feeder, and then press . 3 Press the up or down arrow button to select the paper type, and then press to change the setting, and...

User's Guide
Page 41
Keep all other trays closed until needed. 1 Pull the tray completely out. Doing so may cause a jam. Note: Do not remove trays while a job prints or while Busy appears on the printer display. Loading trays CAUTION-POTENTIAL INJURY: To reduce the risk of equipment instability, load each tray separately. A4 LTR EXEC B5 A5 A6 Using MS510dn and MS610dn 41 To open the paper stop when moving the printer to another location. Note: Close the paper stop , pull it so that it flips forward.
Keep all other trays closed until needed. 1 Pull the tray completely out. Doing so may cause a jam. Note: Do not remove trays while a job prints or while Busy appears on the printer display. Loading trays CAUTION-POTENTIAL INJURY: To reduce the risk of equipment instability, load each tray separately. A4 LTR EXEC B5 A5 A6 Using MS510dn and MS610dn 41 To open the paper stop when moving the printer to another location. Note: Close the paper stop , pull it so that it flips forward.

User's Guide
Page 43
Using MS510dn and MS610dn 43 • When loading legal‑size paper, the length guide extends beyond the base leaving the paper exposed to loosen them, and then fan them. To protect the paper from dust, you are loading A6-size paper in the standard tray, then squeeze and then slide the length... guide tab toward the center of the tray to the A6‑size position. • Make sure the width and length guides are aligned with the...
Using MS510dn and MS610dn 43 • When loading legal‑size paper, the length guide extends beyond the base leaving the paper exposed to loosen them, and then fan them. To protect the paper from dust, you are loading A6-size paper in the standard tray, then squeeze and then slide the length... guide tab toward the center of the tray to the A6‑size position. • Make sure the width and length guides are aligned with the...

User's Guide
Page 44
... below the maximum paper fill indicator located on the top edge toward the front of the tray. • Load letterhead facedown, with the bottom edge of the sheet toward the front of the width guide. Using MS510dn and MS610dn 44 5 Load the paper stack. Notes: • Load with the printable ...side facedown when using recycled or preprinted paper. • Load prepunched paper with the holes on the side of the tray.
... below the maximum paper fill indicator located on the top edge toward the front of the tray. • Load letterhead facedown, with the bottom edge of the sheet toward the front of the width guide. Using MS510dn and MS610dn 44 5 Load the paper stack. Notes: • Load with the printable ...side facedown when using recycled or preprinted paper. • Load prepunched paper with the holes on the side of the tray.

User's Guide
Page 45
You can also use it for single‑page print jobs on different paper sizes and types or specialty media, such as card stock, transparencies, paper labels, and envelopes. Note: Set the correct paper size and type to match the paper loaded in the tray. Using MS510dn and MS610dn 45 6 Insert the tray. 7 From the printer control panel, set the paper size and type in the Paper menu to avoid paper jams and print quality problems. Loading the multipurpose feeder Use the multipurpose feeder when printing on letterhead. 1 Open the multipurpose feeder. 1 2
You can also use it for single‑page print jobs on different paper sizes and types or specialty media, such as card stock, transparencies, paper labels, and envelopes. Note: Set the correct paper size and type to match the paper loaded in the tray. Using MS510dn and MS610dn 45 6 Insert the tray. 7 From the printer control panel, set the paper size and type in the Paper menu to avoid paper jams and print quality problems. Loading the multipurpose feeder Use the multipurpose feeder when printing on letterhead. 1 Open the multipurpose feeder. 1 2

User's Guide
Page 48
... the printer IP address on loading transparencies, see the packaging that the transparencies came in the TCP/IP section under the Network/Ports menu. Using MS510dn and MS610dn 48 • Load paper, transparencies, and card stock with stamps, clasps, snaps, windows, coated linings, or self‑stick adhesives. ... facedown with the bottom edge entering the printer first. • Load envelopes with the top edge entering the printer first. Linking and unlinking trays Linking and unlinking trays 1 Open a Web browser, and then type the printer IP address in the multipurpose feeder.
... the printer IP address on loading transparencies, see the packaging that the transparencies came in the TCP/IP section under the Network/Ports menu. Using MS510dn and MS610dn 48 • Load paper, transparencies, and card stock with stamps, clasps, snaps, windows, coated linings, or self‑stick adhesives. ... facedown with the bottom edge entering the printer first. • Load envelopes with the top edge entering the printer first. Linking and unlinking trays Linking and unlinking trays 1 Open a Web browser, and then type the printer IP address in the multipurpose feeder.

User's Guide
Page 49
...name has replaced the custom name. Creating a custom name for the tray match that of the fuser varies according to the specified paper type. Warning-Potential Damage: Paper loaded in the... tray should match the paper type name assigned in the address field. Assigning a custom paper... size and type settings for the trays you are linking. • To link trays, make sure the paper size or type for the tray does not match that of the other tray. 4 Click Submit. Using MS510dn and MS610dn 49 • If...
...name has replaced the custom name. Creating a custom name for the tray match that of the fuser varies according to the specified paper type. Warning-Potential Damage: Paper loaded in the... tray should match the paper type name assigned in the address field. Assigning a custom paper... size and type settings for the trays you are linking. • To link trays, make sure the paper size or type for the tray does not match that of the other tray. 4 Click Submit. Using MS510dn and MS610dn 49 • If...

User's Guide
Page 51
... address in the TCP/IP section in the address field. If necessary, click the disclosure triangle to match the paper loaded, or select the appropriate tray or feeder. 3 Click Print. Using the printer control panel 1 From the printer control panel, navigate to load the Web page correctly. 2 Click ...Settings > Print Settings > Quality Menu > Toner Darkness. 3 Adjust the toner darkness, and then click Submit. Using MS510dn and MS610dn 51 b Customize the settings in the Page Setup dialog if necessary: 1 With a document open, choose File > Print.
... address in the TCP/IP section in the address field. If necessary, click the disclosure triangle to match the paper loaded, or select the appropriate tray or feeder. 3 Click Print. Using the printer control panel 1 From the printer control panel, navigate to load the Web page correctly. 2 Click ...Settings > Print Settings > Quality Menu > Toner Darkness. 3 Adjust the toner darkness, and then click Submit. Using MS510dn and MS610dn 51 b Customize the settings in the Page Setup dialog if necessary: 1 With a document open, choose File > Print.


