
Quick Reference
Page 1
... insert letterhead face down before inserting the paper tray into the printer: 1 Open the printer cover. 2 Remove the print cartridge (the print cartridge may damage the print cartridge. overfilling the tray may cause jams. 4 Slide the paper guides against the edges of the page entering the printer first. ...optional 250sheet tray: 1 Pull the tray all four sides, and flex them vertically, flap side down , facing you . 4 Reinstall the print cartridge. 5 Close the printer cover to resume printing. 6 Press Continue to clear the message. Exposing the photoconductor to light may be hot! 4 If...
... insert letterhead face down before inserting the paper tray into the printer: 1 Open the printer cover. 2 Remove the print cartridge (the print cartridge may damage the print cartridge. overfilling the tray may cause jams. 4 Slide the paper guides against the edges of the page entering the printer first. ...optional 250sheet tray: 1 Pull the tray all four sides, and flex them vertically, flap side down , facing you . 4 Reinstall the print cartridge. 5 Close the printer cover to resume printing. 6 Press Continue to clear the message. Exposing the photoconductor to light may be hot! 4 If...

Quick Reference
Page 2
...Continue light is on solid, the printer prompts you that the toner is data. To use the remaining toner, remove the print cartridge, gently shake it back and forth, and reinsert it. Refer to the Publications CD to display the secondary error code. When ... detects a jam. Press Continue to the Publications CD for additional data. Lexmark International, Inc. When the Load Paper light and the Press Continue lights are on solid, the printer is unsatisfactory, replace the print cartridge. waiting for more information about operator panel light sequences. © Copyright ...
...Continue light is on solid, the printer prompts you that the toner is data. To use the remaining toner, remove the print cartridge, gently shake it back and forth, and reinsert it. Refer to the Publications CD to display the secondary error code. When ... detects a jam. Press Continue to the Publications CD for additional data. Lexmark International, Inc. When the Load Paper light and the Press Continue lights are on solid, the printer is unsatisfactory, replace the print cartridge. waiting for more information about operator panel light sequences. © Copyright ...

Setup Guide
Page 3
... information vii Step 1: Unpack the printer 1 Attaching an operator panel overlay 2 Step 2: Install the optional 250-sheet drawer 3 Step 3: Install printer supplies 5 Installing the print cartridge 5 Step 4: Install memory cards 8 Removing the printer side cover 8 Removing the system board shield 10 Installing a memory card 10 Reinstalling the system board shield 12...
... information vii Step 1: Unpack the printer 1 Attaching an operator panel overlay 2 Step 2: Install the optional 250-sheet drawer 3 Step 3: Install printer supplies 5 Installing the print cartridge 5 Step 4: Install memory cards 8 Removing the printer side cover 8 Removing the system board shield 10 Installing a memory card 10 Reinstalling the system board shield 12...

Setup Guide
Page 8
...have the following items: • Printer with print cartridge installed • Power cord • Setup Guide with a 1,500-page starter print cartridge. Free of air conditioners, heaters, or ventilators -... Away from the box except the printer. A firm, level surface - Unpack the printer 1 1 Select a location for proper ventilation. • Provide the proper environment: - Step 1: Unpack the printer Power cord Overlay Drivers CD Setup Guide and publications CD Quick Reference card Note: The Lexmark E220...
...have the following items: • Printer with print cartridge installed • Power cord • Setup Guide with a 1,500-page starter print cartridge. Free of air conditioners, heaters, or ventilators -... Away from the box except the printer. A firm, level surface - Unpack the printer 1 1 Select a location for proper ventilation. • Provide the proper environment: - Step 1: Unpack the printer Power cord Overlay Drivers CD Setup Guide and publications CD Quick Reference card Note: The Lexmark E220...

Setup Guide
Page 12
Step 3: Install printer supplies Installing the print cartridge Removing print cartridge packaging 1 Use the finger tab to pull down the printer cover. Install printer supplies 5 Cartridge handle 2 Grasp the cartridge handle and pull the print cartridge straight up. 3 Remove the protective foam packaging from the print cartridge.
Step 3: Install printer supplies Installing the print cartridge Removing print cartridge packaging 1 Use the finger tab to pull down the printer cover. Install printer supplies 5 Cartridge handle 2 Grasp the cartridge handle and pull the print cartridge straight up. 3 Remove the protective foam packaging from the print cartridge.

Setup Guide
Page 13
4 Pull off the plastic piece attached to the ends of the print cartridge. 5 Shake the cartridge to distribute the toner evenly. Note: Do not touch the photoconductor drum on the bottom of the print cartridge. Discard the plastic piece, foam, and paper. Install printer supplies 6
4 Pull off the plastic piece attached to the ends of the print cartridge. 5 Shake the cartridge to distribute the toner evenly. Note: Do not touch the photoconductor drum on the bottom of the print cartridge. Discard the plastic piece, foam, and paper. Install printer supplies 6

Setup Guide
Page 14
What do I do next? Task Install memory cards Load paper Go to page... 8 14 Install printer supplies 7 c Push down and guide it is firmly in the printer. b Holding the cartridge by the handle, tilt the cartridge down on either side of the cartridge with the corresponding arrows in place. 7 Close the printer cover. 6 Insert the print cartridge: a Align the colored arrows on the cartridge until it between the print cartridge grooves.
What do I do next? Task Install memory cards Load paper Go to page... 8 14 Install printer supplies 7 c Push down and guide it is firmly in the printer. b Holding the cartridge by the handle, tilt the cartridge down on either side of the cartridge with the corresponding arrows in place. 7 Close the printer cover. 6 Insert the print cartridge: a Align the colored arrows on the cartridge until it between the print cartridge grooves.

Setup Guide
Page 49
... "Understanding the Operator Panel Lights" section in the publications CD for information on if the 1,500-page starter print cartridge is getting low. Continue Cancel Note: On the Lexmark E220, the Toner Low light does not come on what the light sequence means and what you can do not have ...a replacement cartridge, order one now. Continue Cancel Understanding the operator panel lights 42 Ready/Data Toner Low Load Paper Paper ...
... "Understanding the Operator Panel Lights" section in the publications CD for information on if the 1,500-page starter print cartridge is getting low. Continue Cancel Note: On the Lexmark E220, the Toner Low light does not come on what the light sequence means and what you can do not have ...a replacement cartridge, order one now. Continue Cancel Understanding the operator panel lights 42 Ready/Data Toner Low Load Paper Paper ...

Setup Guide
Page 51
Troubleshooting tips Problem: What to be low on solid. The printer is on, but pages • The print cartridge has an error. printer and at are properly positioned against the edges of paper. • Remove the paper from tray 1 or optional 250-sheet tray... is turned on the page. • Make sure the paper is installed. The paper sticks together/printer feeds multiple sheets of the paper. Replace the cartridge. Jobs are blank. The paper skews or buckles. • Do not overfill tray 1 or the optional 250-sheet tray. • Make sure the paper ...
Troubleshooting tips Problem: What to be low on solid. The printer is on, but pages • The print cartridge has an error. printer and at are properly positioned against the edges of paper. • Remove the paper from tray 1 or optional 250-sheet tray... is turned on the page. • Make sure the paper is installed. The paper sticks together/printer feeds multiple sheets of the paper. Replace the cartridge. Jobs are blank. The paper skews or buckles. • Do not overfill tray 1 or the optional 250-sheet tray. • Make sure the paper ...
Setup Guide
Page 54
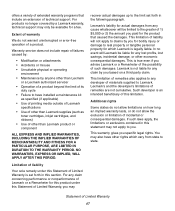
...liability Your sole remedy under this limitation. This limitation of liability will not apply to claims by anyone other than Lexmark product or component ALL EXPRESS AND IMPLIED WARRANTIES, INCLUDING THE IMPLIED WARRANTIES OF MERCHANTABILITY AND FITNESS FOR A PARTICULAR ...media outside of Lexmark specifications • Use of other than Lexmark supplies (such as toner cartridges, inkjet cartridges, and ribbons) • Use of other than Lexmark or a Lexmark authorized servicer • Operation of a product beyond the limit of a product. Lexmark's liability for a fee. Lexmark's and the ...
...liability Your sole remedy under this limitation. This limitation of liability will not apply to claims by anyone other than Lexmark product or component ALL EXPRESS AND IMPLIED WARRANTIES, INCLUDING THE IMPLIED WARRANTIES OF MERCHANTABILITY AND FITNESS FOR A PARTICULAR ...media outside of Lexmark specifications • Use of other than Lexmark supplies (such as toner cartridges, inkjet cartridges, and ribbons) • Use of other than Lexmark or a Lexmark authorized servicer • Operation of a product beyond the limit of a product. Lexmark's liability for a fee. Lexmark's and the ...

User's Reference
Page 3
... the Local Printer Setup Utility 73 Chapter 6: Maintenance 74 Conserving supplies 74 Ordering supplies 74 Recycling the print cartridge 75 Replacing the print cartridge 76 Removing the old print cartridge 76 Installing the new print cartridge 77 Chapter 7: Troubleshooting 79 Solving printing problems 79 Additional troubleshooting menus 85 Calling for service 85 Index 86...
... the Local Printer Setup Utility 73 Chapter 6: Maintenance 74 Conserving supplies 74 Ordering supplies 74 Recycling the print cartridge 75 Replacing the print cartridge 76 Removing the old print cartridge 76 Installing the new print cartridge 77 Chapter 7: Troubleshooting 79 Solving printing problems 79 Additional troubleshooting menus 85 Calling for service 85 Index 86...

User's Reference
Page 12
... light is blinking is on prompts you to press the Continue button to resume printing. Error light is on cover is open or the print cartridge is on Printing 12 Load Paper light is getting low. Press Continue light is not installed.
... light is blinking is on prompts you to press the Continue button to resume printing. Error light is on cover is open or the print cartridge is on Printing 12 Load Paper light is getting low. Press Continue light is not installed.

User's Reference
Page 41
...! 4 If the media is jammed tightly behind the roller, or if you take it out of the printer for an extended period of the print cartridge may be damaged if it is no more media in a clean, dark place if you cannot get a grip on the bottom of time. Paper handling... If the jam occurs in the fuser: 1 Open the printer cover. 2 Remove the print cartridge (it may be warm). Note: The photoconductor drum on it in the printer. Clearing jams 41 Photoconductor drum 3 Gently pull out the media. Cover the...
...! 4 If the media is jammed tightly behind the roller, or if you take it out of the printer for an extended period of the print cartridge may be damaged if it is no more media in a clean, dark place if you cannot get a grip on the bottom of time. Paper handling... If the jam occurs in the fuser: 1 Open the printer cover. 2 Remove the print cartridge (it may be warm). Note: The photoconductor drum on it in the printer. Clearing jams 41 Photoconductor drum 3 Gently pull out the media. Cover the...

User's Reference
Page 42
.... If the jam occurs as the paper exits the optional 250-sheet tray into the printer: 1 Open the printer cover. 2 Remove the print cartridge (the cartridge may occur if adhesive labels remain in the fuser. If a jam occurs while printing labels from the top output bin. 2 Clear the jam.... See Calling for service. Clearing jams 42 Paper handling 6 Reinstall the print cartridge. 7 Close the printer cover to the backing sheet after clearing the jam. 2 Before resuming label printing, load paper in or on the fuser. Warning...
.... If the jam occurs as the paper exits the optional 250-sheet tray into the printer: 1 Open the printer cover. 2 Remove the print cartridge (the cartridge may occur if adhesive labels remain in the fuser. If a jam occurs while printing labels from the top output bin. 2 Clear the jam.... See Calling for service. Clearing jams 42 Paper handling 6 Reinstall the print cartridge. 7 Close the printer cover to the backing sheet after clearing the jam. 2 Before resuming label printing, load paper in or on the fuser. Warning...

User's Reference
Page 43
Paper handling 3 Gently pull the paper toward you cannot reach the paper easily: 1 Turn off the support unit. 3 Clear the jam. If you . 4 Reinstall the print cartridge. 5 Close the printer cover to resume printing. Clearing jams 43 Note: You will lose the rest of the print job. 2 Lift the printer off the printer.
Paper handling 3 Gently pull the paper toward you cannot reach the paper easily: 1 Turn off the support unit. 3 Clear the jam. If you . 4 Reinstall the print cartridge. 5 Close the printer cover to resume printing. Clearing jams 43 Note: You will lose the rest of the print job. 2 Lift the printer off the printer.

User's Reference
Page 46
... Remove paper from Page 57 output bin Print side two of Page 57 your duplex print job • Top cover open Page 58 • Print cartridge is not installed Print cartridge error Page 58 Change invalid print Page 59...
... Remove paper from Page 57 output bin Print side two of Page 57 your duplex print job • Top cover open Page 58 • Print cartridge is not installed Print cartridge error Page 58 Change invalid print Page 59...

User's Reference
Page 50
...Note: The Toner Low light does not come on if the 1,500-page starter print cartridge is not ready to reset the printer. What you do not have a replacement cartridge, order one now. • Replace the print cartridge. • Press and hold Cancel to receive or process data, or the printer ports ... Ready or Busy state. • Press and release Cancel to cancel the print job. • Press and hold Cancel to extend the life of the cartridge. What you can do : • Send a print job. • Press and release Continue to print the menu settings page for a list of current ...
...Note: The Toner Low light does not come on if the 1,500-page starter print cartridge is not ready to reset the printer. What you do not have a replacement cartridge, order one now. • Replace the print cartridge. • Press and hold Cancel to receive or process data, or the printer ports ... Ready or Busy state. • Press and release Cancel to cancel the print job. • Press and hold Cancel to extend the life of the cartridge. What you can do : • Send a print job. • Press and release Continue to print the menu settings page for a list of current ...

User's Reference
Page 51
.../Data Toner Low Load Paper Paper Jam Error Press Continue Continue Cancel Understanding the operator panel lights 51 In addition, the toner in the print cartridge is not ready to reset the printer. What you do : • Press and release Continue to return to the Ready or Busy state. •... Press and release Cancel to cancel the print job. • Remove the print cartridge and shake it to extend the life of the cartridge. Understanding the operator panel lights What this light sequence means: The printer is getting low.
.../Data Toner Low Load Paper Paper Jam Error Press Continue Continue Cancel Understanding the operator panel lights 51 In addition, the toner in the print cartridge is not ready to reset the printer. What you do : • Press and release Continue to return to the Ready or Busy state. •... Press and release Cancel to cancel the print job. • Remove the print cartridge and shake it to extend the life of the cartridge. Understanding the operator panel lights What this light sequence means: The printer is getting low.

User's Reference
Page 53
...and release Cancel to clear. - Press and hold Cancel to reset the printer. Press and release Cancel to extend the life of the cartridge. Ready/Data Toner Low Load Paper Paper Jam Error Press Continue Continue Cancel Understanding the operator panel lights 53 Press and hold Cancel to... reset the printer. What you do not have a replacement cartridge, order one now. • Replace the print cartridge. • Press and release Cancel to cancel the print job. • Press and hold Cancel to reset the printer....
...and release Cancel to clear. - Press and hold Cancel to reset the printer. Press and release Cancel to extend the life of the cartridge. Ready/Data Toner Low Load Paper Paper Jam Error Press Continue Continue Cancel Understanding the operator panel lights 53 Press and hold Cancel to... reset the printer. What you do not have a replacement cartridge, order one now. • Replace the print cartridge. • Press and release Cancel to cancel the print job. • Press and hold Cancel to reset the printer....

User's Reference
Page 54
.... • Press and release Continue to reset the printer. Note: The Toner Low light does not come on if the 1,500-page starter print cartridge is getting low. Understanding the operator panel lights What this light sequence means: The printer is waiting until a print timeout occurs, or until it receives... sequence means: The printer is waiting until a print timeout occurs, or until it receives additional data. What you can do: • Remove the print cartridge and shake it to extend the life of the print buffer. • Press and hold Cancel to print the contents of the...
.... • Press and release Continue to reset the printer. Note: The Toner Low light does not come on if the 1,500-page starter print cartridge is getting low. Understanding the operator panel lights What this light sequence means: The printer is waiting until a print timeout occurs, or until it receives... sequence means: The printer is waiting until a print timeout occurs, or until it receives additional data. What you can do: • Remove the print cartridge and shake it to extend the life of the print buffer. • Press and hold Cancel to print the contents of the...

