User's Guide
Page 10
... Help on a Macintosh operating system. Introduction Finding information about the printer Publications See the For Quick Setup sheet Initial setup instructions. Note: If you have support for using the printer software on the menu bar to view the main page of the Help. The correct menu bar does not appear if...
... Help on a Macintosh operating system. Introduction Finding information about the printer Publications See the For Quick Setup sheet Initial setup instructions. Note: If you have support for using the printer software on the menu bar to view the main page of the Help. The correct menu bar does not appear if...
User's Guide
Page 11
... the most recent telephone numbers available, see the printed warranty that came with your printer. E-mail support For e-mail support, visit our Web site: www.lexmark.com. 1 Click SUPPORT. 2 Click Technical Support. 3 Select your printer family. 4 Select your printer. - E-mail support varies by country or region. Monday-Friday (8:00 AM-11:00 PM ET), Saturday (Noon...
... the most recent telephone numbers available, see the printed warranty that came with your printer. E-mail support For e-mail support, visit our Web site: www.lexmark.com. 1 Click SUPPORT. 2 Click Technical Support. 3 Select your printer family. 4 Select your printer. - E-mail support varies by country or region. Monday-Friday (8:00 AM-11:00 PM ET), Saturday (Noon...
User's Guide
Page 12
...Limited Warranty included with your this limited warranty, see the Statement of Limited Warranty for a www.lexmark.com. period of the printer), and have it ready when you contact customer support so that came with this warranty that they may serve you faster: • Machine Type number...where purchased 12 Record the following information (located on the store receipt and the back of 12 months after the 1 Click SUPPORT. original date of purchase. 2 Click Warranty Information. 3 Click Statement of country or region. this printer will be free of Warranty information ...
...Limited Warranty included with your this limited warranty, see the Statement of Limited Warranty for a www.lexmark.com. period of the printer), and have it ready when you contact customer support so that came with this warranty that they may serve you faster: • Machine Type number...where purchased 12 Record the following information (located on the store receipt and the back of 12 months after the 1 Click SUPPORT. original date of purchase. 2 Click Warranty Information. 3 Click Statement of country or region. this printer will be free of Warranty information ...

User's Guide
Page 14
WI F I PRINTING 5 Connect the power cord to the printer, and then to an electrical outlet that is easily accessible and near the printer. 2 1 14 W I F I PRINTING 4 Extend the paper guides. 2 1 W I F I PRINTING 3 Raise the paper support, and then extend the paper exit tray. 2 Remove all tape and packing material from all areas of the printer.
WI F I PRINTING 5 Connect the power cord to the printer, and then to an electrical outlet that is easily accessible and near the printer. 2 1 14 W I F I PRINTING 4 Extend the paper guides. 2 1 W I F I PRINTING 3 Raise the paper support, and then extend the paper exit tray. 2 Remove all tape and packing material from all areas of the printer.
User's Guide
Page 20
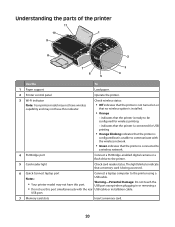
... light Check card reader status. indicates that the printer is connected for wireless printing - Understanding the parts of the printer 11 10 1 9 8 WI F I PRINTING 2 7 6 5 3 4 Use the To 1 Paper support Load paper. 2 Printer control panel Operate the printer. 3 Wi-Fi... indicator Note: Your printer model may not have wireless capability and may not have this port simultaneously with the wireless network. • Green indicates that the printer is installed....
... light Check card reader status. indicates that the printer is connected for wireless printing - Understanding the parts of the printer 11 10 1 9 8 WI F I PRINTING 2 7 6 5 3 4 Use the To 1 Paper support Load paper. 2 Printer control panel Operate the printer. 3 Wi-Fi... indicator Note: Your printer model may not have wireless capability and may not have this port simultaneously with the wireless network. • Green indicates that the printer is installed....
User's Guide
Page 33
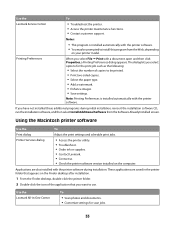
.... 2 Double-click the icon of copies to be prompted to use. Use the Lexmark Service Center To • Troubleshoot the printer. • Access the printer maintenance functions. • Contact customer support. If you select File Œ Print with the printer software. These applications are ...print settings and schedule print jobs. • Access the printer utility. • Troubleshoot. • Order ink or supplies. • Contact Lexmark. • Contact us. • Check the printer software version installed on your printer model. The dialog lets you want to install this ...
.... 2 Double-click the icon of copies to be prompted to use. Use the Lexmark Service Center To • Troubleshoot the printer. • Access the printer maintenance functions. • Contact customer support. If you select File Œ Print with the printer software. These applications are ...print settings and schedule print jobs. • Access the printer utility. • Troubleshoot. • Order ink or supplies. • Contact Lexmark. • Contact us. • Check the printer software version installed on your printer model. The dialog lets you want to install this ...
User's Guide
Page 34
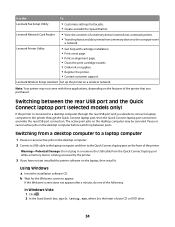
Lexmark Wireless Setup Assistant Set up the printer on the desktop computer may not come with cartridge installation. • Print a test page. • Print an alignment page. • Clean the print cartridge nozzles. • Order ink or supplies. • Register the printer. • Contact customer support. Note: Your printer may be canceled. Switching from...
Lexmark Wireless Setup Assistant Set up the printer on the desktop computer may not come with cartridge installation. • Print a test page. • Print an alignment page. • Clean the print cartridge nozzles. • Order ink or supplies. • Register the printer. • Contact customer support. Note: Your printer may be canceled. Switching from...
User's Guide
Page 36
... Equivalent Privacy (WEP) security, the WEP key should be : • Exactly 10 or 26 hexadecimal characters. If your wireless access point (wireless router) is connected to know: • The name of your system support person. 36 Use the table provided below to use your network resources without your network. Information you are Wi...
... Equivalent Privacy (WEP) security, the WEP key should be : • Exactly 10 or 26 hexadecimal characters. If your wireless access point (wireless router) is connected to know: • The name of your system support person. 36 Use the table provided below to use your network resources without your network. Information you are Wi...
User's Guide
Page 38
...printer is not properly connected. The printer is trying to use the printer without a computer - The printer is out of the range of the wireless access point (wireless router). - b Choose the network you want to communicate with the box, or from the list of the Wi-Fi indicator light mean. ... from the box Web page. If you want to use on your system support person. Note: Your WEP, WPA, or WPA2 key may indicate that came with the wireless access point (wireless router), but the wireless access point (wireless router) may indicate that the printer is off, the printer is in the...
...printer is not properly connected. The printer is trying to use the printer without a computer - The printer is out of the range of the wireless access point (wireless router). - b Choose the network you want to communicate with the box, or from the list of the Wi-Fi indicator light mean. ... from the box Web page. If you want to use on your system support person. Note: Your WEP, WPA, or WPA2 key may indicate that came with the wireless access point (wireless router), but the wireless access point (wireless router) may indicate that the printer is off, the printer is in the...

User's Guide
Page 50
... is receiving a strong signal from your printer and access point so that are too dense for the signal to pass through most indoor wireless networks, the maximum distance between the access point and the printer. Drops in signal strength can block the signal, including: • ...Cubicle walls • Ducts • Window frames • Poles and interior support columns • Metal office furniture and cabinets • Elevators • Steel doors • Walls and other devices on your access point and the...
... is receiving a strong signal from your printer and access point so that are too dense for the signal to pass through most indoor wireless networks, the maximum distance between the access point and the printer. Drops in signal strength can block the signal, including: • ...Cubicle walls • Ducts • Window frames • Poles and interior support columns • Metal office furniture and cabinets • Elevators • Steel doors • Walls and other devices on your access point and the...

User's Guide
Page 51
...same time? If another wireless network is the name that allows printers and computers to pass through too many objects, it passes through them, but certain types of people • Objects containing water, such as fish tanks • Plants Place your system support person. ARRANGE THE ...NETWORK TO REDUCE SIGNAL ABSORPTION Even when the wireless signal is able to join your wireless network. Sometimes, the SSID is slightly weakened. The password allows you will not be...
...same time? If another wireless network is the name that allows printers and computers to pass through too many objects, it passes through them, but certain types of people • Objects containing water, such as fish tanks • Plants Place your system support person. ARRANGE THE ...NETWORK TO REDUCE SIGNAL ABSORPTION Even when the wireless signal is able to join your wireless network. Sometimes, the SSID is slightly weakened. The password allows you will not be...

User's Guide
Page 55
... into the printer. 2 Before loading paper the first time, slide the paper guides out toward the edges of the paper support. 3 Load the paper vertically in the center of the paper support, and adjust the paper guides to 100 sheets (depending on the thickness). Make sure: • The glossy or printable... guides. Loading paper Loading paper 1 Make sure: • You use with inkjet printers. • The paper is loaded in the center of the paper support. • The paper guides rest against the edges of the paper. Note: To avoid paper jams, make sure the paper does not buckle when you...
... into the printer. 2 Before loading paper the first time, slide the paper guides out toward the edges of the paper support. 3 Load the paper vertically in the center of the paper support, and adjust the paper guides to 100 sheets (depending on the thickness). Make sure: • The glossy or printable... guides. Loading paper Loading paper 1 Make sure: • You use with inkjet printers. • The paper is loaded in the center of the paper support. • The paper guides rest against the edges of the paper. Note: To avoid paper jams, make sure the paper does not buckle when you...

User's Guide
Page 56
... more drying time. Make sure: • The print side of the labels faces you . • The stamp location is in the center of the paper support. • The paper guides rest against the edges of the paper. Transparencies You can load up to within 1 mm of the edge of the label... envelopes with inkjet printers. • The envelopes are loaded in the upper left corner. • The envelopes are loaded in the center of the paper support. • The paper guides rest against the edges of the label sheets. Remove each envelope as it exits, and then allow it to dry to...
... more drying time. Make sure: • The print side of the labels faces you . • The stamp location is in the center of the paper support. • The paper guides rest against the edges of the paper. Transparencies You can load up to within 1 mm of the edge of the label... envelopes with inkjet printers. • The envelopes are loaded in the upper left corner. • The envelopes are loaded in the center of the paper support. • The paper guides rest against the edges of the label sheets. Remove each envelope as it exits, and then allow it to dry to...

User's Guide
Page 57
...to 25 cards. 1 Make sure: • The print side of the cards faces you. • The cards are loaded in the center of the paper support. • The paper guides rest against the edges of the transparencies. Note: For best results, load transfers one at a time. Custom-size paper You can... these dimensions: 57 Make sure: • You follow the loading instructions that came with paper backing sheets are loaded in the center of the paper support. • The paper guides rest against the edges of the transfers. Remove each photo card as it exits, and then allow it to dry to...
...to 25 cards. 1 Make sure: • The print side of the cards faces you. • The cards are loaded in the center of the paper support. • The paper guides rest against the edges of the transparencies. Note: For best results, load transfers one at a time. Custom-size paper You can... these dimensions: 57 Make sure: • You follow the loading instructions that came with paper backing sheets are loaded in the center of the paper support. • The paper guides rest against the edges of the transfers. Remove each photo card as it exits, and then allow it to dry to...

User's Guide
Page 58
...; The paper guides rest against the edges of the paper. 58 WI F I PRINTING Make sure: • You remove all the paper from the paper support before loading the banner paper. • You tear off only the number of the paper. Banner paper You can load up to print the banner. &#... printer. • The leading edge of the banner paper feeds into the printer first. • The paper is loaded in the center of the paper support. • The paper guides rest against the edges of pages needed to 20 sheets.
...; The paper guides rest against the edges of the paper. 58 WI F I PRINTING Make sure: • You remove all the paper from the paper support before loading the banner paper. • You tear off only the number of the paper. Banner paper You can load up to print the banner. &#... printer. • The leading edge of the banner paper feeds into the printer first. • The paper is loaded in the center of the paper support. • The paper guides rest against the edges of pages needed to 20 sheets.
User's Guide
Page 61
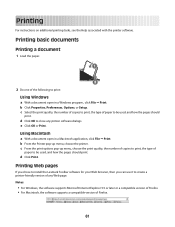
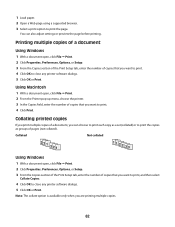
...print. e Click OK or Print. d Click Print. Notes: • For Windows, the software supports Microsoft Internet Explorer 5.5 or later or a compatible version of Firefox. • For Macintosh, the software supports a compatible version of any printer software dialogs. b Click Properties, Preferences, Options, or Setup. ...pages should print. c From the print options pop-up menu, choose the printer. Printing Web pages If you chose to install the Lexmark Toolbar software for your Web browser, then you can use it to print: Using Windows a With a document open in a Windows...
...print. e Click OK or Print. d Click Print. Notes: • For Windows, the software supports Microsoft Internet Explorer 5.5 or later or a compatible version of Firefox. • For Macintosh, the software supports a compatible version of any printer software dialogs. b Click Properties, Preferences, Options, or Setup. ...pages should print. c From the print options pop-up menu, choose the printer. Printing Web pages If you chose to install the Lexmark Toolbar software for your Web browser, then you can use it to print: Using Windows a With a document open in a Windows...
User's Guide
Page 62
... the Printer pop-up menu, choose the printer. 3 In the Copies field, enter the number of pages (not collated). 1 Load paper. 2 Open a Web page using a supported browser. 3 Select a print option to close any printer software dialogs. 5 Click OK or Print.
... the Printer pop-up menu, choose the printer. 3 In the Copies field, enter the number of pages (not collated). 1 Load paper. 2 Open a Web page using a supported browser. 3 Select a print option to close any printer software dialogs. 5 Click OK or Print.

User's Guide
Page 64
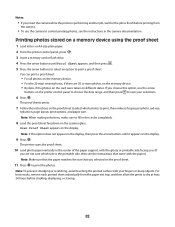
... the memory device, then the printer automatically switches to close any printer software dialogs. 6 Click OK or Print. If document files and image files are supported by the printer. • The computer must contain applications that you want the page images to print on one sheet. • If you want to... the memory device, then press to select Documents. 3 Do one sheet. • From the Layout Direction area, click the icon that shows the order that support the file types in the memory device. 1 Insert a memory card or flash drive.
... the memory device, then the printer automatically switches to close any printer software dialogs. 6 Click OK or Print. If document files and image files are supported by the printer. • The computer must contain applications that you want the page images to print on one sheet. • If you want to... the memory device, then press to select Documents. 3 Do one sheet. • From the Layout Direction area, click the icon that shows the order that support the file types in the memory device. 1 Insert a memory card or flash drive.

User's Guide
Page 75
...memory device to mass storage mode. 2 From the printer control panel, press . 3 Press the arrow buttons until Network appears, and then press . Wireless connection (selected models only) a Press the arrow buttons until Save Photos appears, and then press . 4 Do one of the following: USB connection a...by that computer). 1 Insert a memory card, flash drive, or digital camera set to a computer through an external network adapter that does not support memory device connection. • The printer may be prompted to the computer. c On the computer screen, select an option to recognize. d...
...memory device to mass storage mode. 2 From the printer control panel, press . 3 Press the arrow buttons until Network appears, and then press . Wireless connection (selected models only) a Press the arrow buttons until Save Photos appears, and then press . 4 Do one of the following: USB connection a...by that computer). 1 Insert a memory card, flash drive, or digital camera set to a computer through an external network adapter that does not support memory device connection. • The printer may be prompted to the computer. c On the computer screen, select an option to recognize. d...
User's Guide
Page 82
... sheet: • For all photos on the printer control panel to choose the date range, and then press to print, the number of the paper support, with the glossy or printable side facing you. (If you selected on different dates. For best results, remove each printed sheet individually from the camera...
... sheet: • For all photos on the printer control panel to choose the date range, and then press to print, the number of the paper support, with the glossy or printable side facing you. (If you selected on different dates. For best results, remove each printed sheet individually from the camera...


