Background and Idle Screen Admin Guide
Page 6
...installation files to a temporary directory from which the license server resides. Installing the Lexmark License Server Note: Lexmark License Server is required to generate the license file. Licensing the printer Installing ... for network licensing. For network licensing The server Host ID is located in \esf-license-app. 2 Click Next. 3 Select the installation method you want the server installed in the ...and request the MAC address of the application you do not want to use with Windows operating systems. 1 From the application package, launch the LicenseServer.exe file. This ...
...installation files to a temporary directory from which the license server resides. Installing the Lexmark License Server Note: Lexmark License Server is required to generate the license file. Licensing the printer Installing ... for network licensing. For network licensing The server Host ID is located in \esf-license-app. 2 Click Next. 3 Select the installation method you want the server installed in the ...and request the MAC address of the application you do not want to use with Windows operating systems. 1 From the application package, launch the LicenseServer.exe file. This ...

Eco-Settings Admin Guide
Page 9
Then contact your Lexmark representative, and provide the Host ID. This executable file is located in \esf-license-app. 2 Click Next. 3 Select the installation method you do not want to obtain the license file. You have the option to unpack the installation ...use , and then click Next. The Host ID is complete, or to specify a location where the files will remain after Serial=. 5 Contact your Lexmark representative, and provide the host ID to use with Windows operating systems. 1 From the application package, launch the LicenseServer.exe file. 4 Record the host ID (serial number).
Then contact your Lexmark representative, and provide the Host ID. This executable file is located in \esf-license-app. 2 Click Next. 3 Select the installation method you do not want to obtain the license file. You have the option to unpack the installation ...use , and then click Next. The Host ID is complete, or to specify a location where the files will remain after Serial=. 5 Contact your Lexmark representative, and provide the host ID to use with Windows operating systems. 1 From the application package, launch the LicenseServer.exe file. 4 Record the host ID (serial number).
Eco-Settings Admin Guide
Page 10
...is installed. 2 Click Settings > Embedded Solutions > Solutions Management. 3 Under the appropriate application, click Update License. 4 In the Update License window, select Use a local license file. 5 Click Browse to locate the license file. 7 Click Update License. You can enter values for up...the Heartbeat Period field, enter a value of times the printer can attempt to the following directory on the network license server: C:\Program Files\Lexmark\LicenseServer\Licenses 2 On the host computer, open the Control Panel. 3 Under Administrative Tools, click Services. 4 Select License Server. 5 ...
...is installed. 2 Click Settings > Embedded Solutions > Solutions Management. 3 Under the appropriate application, click Update License. 4 In the Update License window, select Use a local license file. 5 Click Browse to locate the license file. 7 Click Update License. You can enter values for up...the Heartbeat Period field, enter a value of times the printer can attempt to the following directory on the network license server: C:\Program Files\Lexmark\LicenseServer\Licenses 2 On the host computer, open the Control Panel. 3 Under Administrative Tools, click Services. 4 Select License Server. 5 ...
Eco-Settings Admin Guide
Page 11
... do not start until a print job is installed. 2 Click Settings > Embedded Solutions > Solutions Management. 3 Under the appropriate application, click Update License. 4 In the Update License window, select Use a network license server. 5 Click Update License. Updating the network license Using the Embedded Web Server 1 Click Solutions. 2 Under Installed Solutions, click the appropriate...
... do not start until a print job is installed. 2 Click Settings > Embedded Solutions > Solutions Management. 3 Under the appropriate application, click Update License. 4 In the Update License window, select Use a network license server. 5 Click Update License. Updating the network license Using the Embedded Web Server 1 Click Solutions. 2 Under Installed Solutions, click the appropriate...
Accessibility Solution
Page 3
... user access...6 Creating a browser shortcut to the Lexmark Accessibility Solution 6 Creating a desktop shortcut to the Lexmark Accessibility Solution in Windows 6 Creating a desktop shortcut to the Lexmark Accessibility Solution in Mac OS 7 Disabling printer functions...7 Using the application 9 Using Lexmark Accessibility Solution...9 Managing shortcuts...9 Using screen readers with the Lexmark Accessibility Solution 10 Using screen magnifiers with...
... user access...6 Creating a browser shortcut to the Lexmark Accessibility Solution 6 Creating a desktop shortcut to the Lexmark Accessibility Solution in Windows 6 Creating a desktop shortcut to the Lexmark Accessibility Solution in Mac OS 7 Disabling printer functions...7 Using the application 9 Using Lexmark Accessibility Solution...9 Managing shortcuts...9 Using screen readers with the Lexmark Accessibility Solution 10 Using screen magnifiers with...
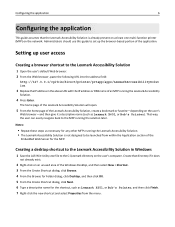
Accessibility Solution
Page 6
... address field: http://127.0.0.1/cgi‑bin/direct/printer/prtapp/apps/LexmarkAccessibilitySolut ion 3 Replace the IP address in Windows 1 Save the LAS‑Win‑Utility.exe file to the MFP running the Lexmark Accessibility Solution. 4 Press Enter. The home page of the Lexmark Accessibility Solution will open. 5 From the home page of the...
... address field: http://127.0.0.1/cgi‑bin/direct/printer/prtapp/apps/LexmarkAccessibilitySolut ion 3 Replace the IP address in Windows 1 Save the LAS‑Win‑Utility.exe file to the MFP running the Lexmark Accessibility Solution. 4 Press Enter. The home page of the Lexmark Accessibility Solution will open. 5 From the home page of the...

Accessibility Solution
Page 12
Troubleshooting 12 "Scan to PC" job cannot write files to drive C on Windows 7 TURN OFF USER ACCOUNT CONTROL 1 Click >Control Panel. 2 In the search box, type uac, and then press Enter. 3 Click Change User Account Control settings. 4 Select Never notify, and then click OK.
Troubleshooting 12 "Scan to PC" job cannot write files to drive C on Windows 7 TURN OFF USER ACCOUNT CONTROL 1 Click >Control Panel. 2 In the search box, type uac, and then press Enter. 3 Click Change User Account Control settings. 4 Select Never notify, and then click OK.
Accessibility Solution
Page 17
...shortcut creating in Mac OS 7 creating in Windows 6 disabling printer functions 7 E Embedded Solutions Framework checking version number 13 F functions disabling 7 L language of the application in the EWS changing 11 Lexmark Accessibility Solution overview 5 using other browser&#... creating in Windows 6 shortcuts adding 9 deleting 9 managing 9 U using Lexmark Accessiblity Solution 9 Using other browser‑capable devices with the Lexmark Accessibility Solution 10 Using screen magnifiers with the Lexmark Accessibility Solution 10 Using screen readers with the Lexmark Accessibility Solution 10...
...shortcut creating in Mac OS 7 creating in Windows 6 disabling printer functions 7 E Embedded Solutions Framework checking version number 13 F functions disabling 7 L language of the application in the EWS changing 11 Lexmark Accessibility Solution overview 5 using other browser&#... creating in Windows 6 shortcuts adding 9 deleting 9 managing 9 U using Lexmark Accessiblity Solution 9 Using other browser‑capable devices with the Lexmark Accessibility Solution 10 Using screen magnifiers with the Lexmark Accessibility Solution 10 Using screen readers with the Lexmark Accessibility Solution 10...
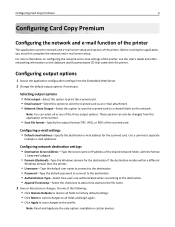
Card Copy Premium Administrator's Guide
Page 4
...8209;mail settings • Default email address-Specify the destination e‑mail address for the destination if the destination resides within a different Windows domain than the printer. • Username-Type the default user name to connect to the destination. • Password-Type the default ... only options available on the Software and Documentation CD that came with the format \\server\share. • Domain (Optional)-Type the Windows domain for the scanned card. Note: Reset and Apply are authenticated when connecting to the destination. • Append Timestamp-Select the...
...8209;mail settings • Default email address-Specify the destination e‑mail address for the destination if the destination resides within a different Windows domain than the printer. • Username-Type the default user name to connect to the destination. • Password-Type the default ... only options available on the Software and Documentation CD that came with the format \\server\share. • Domain (Optional)-Type the Windows domain for the scanned card. Note: Reset and Apply are authenticated when connecting to the destination. • Append Timestamp-Select the...

Card Copy Premium Administrator's Guide
Page 13
...VALID Verify that the destination is available only on purchasing a license, contact your printer comes with hard disks. To check if your Lexmark representative. If the destination has been moved, then the network address may have changed. The destination network address can be accessed from ...AND DESTINATION RESIDE IN DIFFERENT DOMAINS, THEN MAKE SURE THE DOMAIN INFORMATION IS SPECIFIED If the destination exists within a different Windows domain than the printer, then enter the appropriate Windows domain information in the Domain field in the application configuration settings.
...VALID Verify that the destination is available only on purchasing a license, contact your printer comes with hard disks. To check if your Lexmark representative. If the destination has been moved, then the network address may have changed. The destination network address can be accessed from ...AND DESTINATION RESIDE IN DIFFERENT DOMAINS, THEN MAKE SURE THE DOMAIN INFORMATION IS SPECIFIED If the destination exists within a different Windows domain than the printer, then enter the appropriate Windows domain information in the Domain field in the application configuration settings.

Card Copy Premium Administrator's Guide
Page 14
... printer, see the Networking Guide on the Software and Documentation CD that the network settings of the Windows operating system (Windows XP or later), and Windows Firewall is entered. For more information, contact your system support person. Windows Firewall must be set up on different subnets. MAKE SURE USERS HAVE PERMISSION TO SAVE SCANS...
... printer, see the Networking Guide on the Software and Documentation CD that the network settings of the Windows operating system (Windows XP or later), and Windows Firewall is entered. For more information, contact your system support person. Windows Firewall must be set up on different subnets. MAKE SURE USERS HAVE PERMISSION TO SAVE SCANS...
Eco-Copy
Page 9
...Windows operating systems. 1 From the application package, launch the LicenseServer.exe file. For network licensing The server Host ID is complete. 4 If you want the server installed in the default directory, then click Browse to select an alternate location. 5 Click Finish to complete the installation. 6 After the Lexmark...ID (MAC address) to generate the license file. To collect the Host ID, contact your Lexmark representative, and provide the Host ID. This executable file is located in \esf-license-app. 2 Click Next. 3 Select the installation method you do not want to a temporary ...
...Windows operating systems. 1 From the application package, launch the LicenseServer.exe file. For network licensing The server Host ID is complete. 4 If you want the server installed in the default directory, then click Browse to select an alternate location. 5 Click Finish to complete the installation. 6 After the Lexmark...ID (MAC address) to generate the license file. To collect the Host ID, contact your Lexmark representative, and provide the Host ID. This executable file is located in \esf-license-app. 2 Click Next. 3 Select the installation method you do not want to a temporary ...
Eco-Copy
Page 10
... can attempt to locate the license file. 6 Click Update License. Using a network license Copying the license file to the Lexmark License Server Note: Before installing a network license using either the Embedded Web Server or MarkVision Professional, copy the license files .... 3 Under the appropriate application, click Update License. 4 In the Update License window, select Use a local license file. 5 Click Browse to the following directory on the network license server: C:\Program Files\Lexmark\LicenseServer\Licenses 2 On the host computer, open the Control Panel. 3 Under Administrative...
... can attempt to locate the license file. 6 Click Update License. Using a network license Copying the license file to the Lexmark License Server Note: Before installing a network license using either the Embedded Web Server or MarkVision Professional, copy the license files .... 3 Under the appropriate application, click Update License. 4 In the Update License window, select Use a local license file. 5 Click Browse to the following directory on the network license server: C:\Program Files\Lexmark\LicenseServer\Licenses 2 On the host computer, open the Control Panel. 3 Under Administrative...

Eco-Copy
Page 11
... only when the Paper Saver option is installed. 2 Click Settings > Embedded Solutions > Solutions Management. 3 Under the appropriate application, click Update License. 4 In the Update License window, select Use a network license server. 5 Click Update License. Updating the network license Using the Embedded Web Server 1 Click Solutions. 2 Under Installed Solutions, click the appropriate...
... only when the Paper Saver option is installed. 2 Click Settings > Embedded Solutions > Solutions Management. 3 Under the appropriate application, click Update License. 4 In the Update License window, select Use a network license server. 5 Click Update License. Updating the network license Using the Embedded Web Server 1 Click Solutions. 2 Under Installed Solutions, click the appropriate...
Fax Forward
Page 7
... to select an alternate location. 5 Click Finish to complete the installation. 6 After the Lexmark License Server installation is complete. 4 If you do not want the server installed in \esf‑license‑app. 2 Click Next. 3 Select the installation method you want to locate the license file.... 6 Click Update License. The host ID is selected, and then click Browse to use with Windows operating systems. 1 From the application package, launch...
... to select an alternate location. 5 Click Finish to complete the installation. 6 After the Lexmark License Server installation is complete. 4 If you do not want the server installed in \esf‑license‑app. 2 Click Next. 3 Select the installation method you want to locate the license file.... 6 Click Update License. The host ID is selected, and then click Browse to use with Windows operating systems. 1 From the application package, launch...
Fax Forward
Page 8
...to 5 to set the maximum number of times the printer can attempt to the following directory on the network license server: C:\Program Files\Lexmark\LicenseServer\Licenses 2 On the host computer, click , or click Start and then click Run. 3 In the Start Search or Run box... is installed. 2 Click Settings > Embedded Solutions > Solutions Management. 3 Under the appropriate application, click Update License. 4 In the Update License window, select Use a local license file. 5 Click Browse to locate the license file. 6 Click Update License. Using MarkVision Professional 1 In MarkVision Professional...
...to 5 to set the maximum number of times the printer can attempt to the following directory on the network license server: C:\Program Files\Lexmark\LicenseServer\Licenses 2 On the host computer, click , or click Start and then click Run. 3 In the Start Search or Run box... is installed. 2 Click Settings > Embedded Solutions > Solutions Management. 3 Under the appropriate application, click Update License. 4 In the Update License window, select Use a local license file. 5 Click Browse to locate the license file. 6 Click Update License. Using MarkVision Professional 1 In MarkVision Professional...

Fax Forward
Page 9
... the application, make sure fax forwarding is installed. 2 Click Settings > Embedded Solutions > Solutions Management. 3 Under the appropriate application, click Update License. 4 In the Update License window, select Use a network license server. 5 Click Update License. Configuring the application 9 3 Click License > Update License > Network > Update License.
... the application, make sure fax forwarding is installed. 2 Click Settings > Embedded Solutions > Solutions Management. 3 Under the appropriate application, click Update License. 4 In the Update License window, select Use a network license server. 5 Click Update License. Configuring the application 9 3 Click License > Update License > Network > Update License.

Fax Forward
Page 10
..., then faxes may be lost. If the test fails, then a validation error message will appear next to Status in the lower left side of the window. Exporting and importing a configuration using the following format for the type of destination you want to use. Use the following format: \\Device_Name_or_IP\Share_Name. Exporting and...
..., then faxes may be lost. If the test fails, then a validation error message will appear next to Status in the lower left side of the window. Exporting and importing a configuration using the following format for the type of destination you want to use. Use the following format: \\Device_Name_or_IP\Share_Name. Exporting and...

Multi Send Administrator's Guide
Page 11
...THE PRINTER AND DESTINATION RESIDE IN DIFFERENT DOMAINS, THEN MAKE SURE THE DOMAIN INFORMATION IS SPECIFIED If the destination exists within a different Windows domain than the printer, then you can also add the domain name to allow communication with the subnet the printer resides on,... the destination if the destination and the printer reside on the left, click Settings or Configuration, and then do one of the following: • Click Apps > Apps Management. • Click Device Solutions > Solutions (eSF). • Click Embedded Solutions. 4 Click the System tab > Log. 5 From the Filter ...
...THE PRINTER AND DESTINATION RESIDE IN DIFFERENT DOMAINS, THEN MAKE SURE THE DOMAIN INFORMATION IS SPECIFIED If the destination exists within a different Windows domain than the printer, then you can also add the domain name to allow communication with the subnet the printer resides on,... the destination if the destination and the printer reside on the left, click Settings or Configuration, and then do one of the following: • Click Apps > Apps Management. • Click Device Solutions > Solutions (eSF). • Click Embedded Solutions. 4 Click the System tab > Log. 5 From the Filter ...
MyShortcut Administrator's Guide
Page 6
... use the application with Windows operating systems. 1 From the application package, launch the LicenseServer.exe file. Then contact your Lexmark representative. For network licensing The server Host ID is required to generate the license file for the application, contact your Lexmark representative, and provide the...Record only the string that appears after the installation is complete. 4 If you do not want the server installed in \esf-license-app. 2 Click Next. 3 Select the installation method you want to use with several printers, then you must install them locally on ...
... use the application with Windows operating systems. 1 From the application package, launch the LicenseServer.exe file. Then contact your Lexmark representative. For network licensing The server Host ID is required to generate the license file for the application, contact your Lexmark representative, and provide the...Record only the string that appears after the installation is complete. 4 If you do not want the server installed in \esf-license-app. 2 Click Next. 3 Select the installation method you want to use with several printers, then you must install them locally on ...

