
User's Guide
Page 10
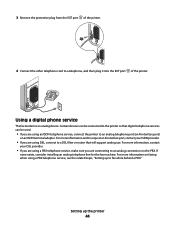
... the list. 3 From the program, click Help to use is not active. Click the main screen to make sure that the application that you have support for using the printer software on a Macintosh operating system. Introduction Finding information about the printer Publications See the For Quick Setup sheet Initial setup instructions...
... the list. 3 From the program, click Help to use is not active. Click the main screen to make sure that the application that you have support for using the printer software on a Macintosh operating system. Introduction Finding information about the printer Publications See the For Quick Setup sheet Initial setup instructions...
User's Guide
Page 11
...-Friday (9:00 AM-7:00 PM ET) • Mexico: 01-800-253-9627 - E-mail support For e-mail support, visit our Web site: www.lexmark.com. 1 Click SUPPORT. 2 Click Technical Support. 3 Select your printer family. 4 Select your printer. - Note: For additional information about contacting Lexmark, see the printed warranty statement that came with your printer model. 5 From the...
...-Friday (9:00 AM-7:00 PM ET) • Mexico: 01-800-253-9627 - E-mail support For e-mail support, visit our Web site: www.lexmark.com. 1 Click SUPPORT. 2 Click Technical Support. 3 Select your printer family. 4 Select your printer. - Note: For additional information about contacting Lexmark, see the printed warranty statement that came with your printer model. 5 From the...
User's Guide
Page 12
...Inkjet & All-In-One Printers. 4 Scroll through the Web page to find (USA) Where to view the warranty. this warranty that they may serve you faster: • Machine Type number • Serial number • Date purchased • Store where purchased Introduction 12 period of Limited Warranty for a www.lexmark....com. Record the following information (located on the store receipt and the back of the printer), and have it ready when you contact customer support so that came with your this printer will be free ...
...Inkjet & All-In-One Printers. 4 Scroll through the Web page to find (USA) Where to view the warranty. this warranty that they may serve you faster: • Machine Type number • Serial number • Date purchased • Store where purchased Introduction 12 period of Limited Warranty for a www.lexmark....com. Record the following information (located on the store receipt and the back of the printer), and have it ready when you contact customer support so that came with your this printer will be free ...
User's Guide
Page 15
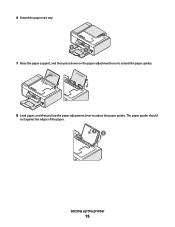
6 Extend the paper exit tray. 2 1 7 Raise the paper support, and then press down on the paper adjustment lever to extend the paper guides. 8 Load paper, and then pull up the printer 15 The paper guides should rest against the edges of the paper. 12 Setting up the paper adjustment lever to adjust the paper guides.
6 Extend the paper exit tray. 2 1 7 Raise the paper support, and then press down on the paper adjustment lever to extend the paper guides. 8 Load paper, and then pull up the printer 15 The paper guides should rest against the edges of the paper. 12 Setting up the paper adjustment lever to adjust the paper guides.
User's Guide
Page 20
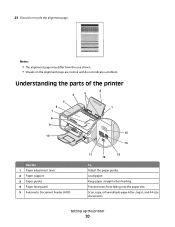
... differ from falling into the paper slot. Understanding the parts of the printer 2 4 3 5 6 1 7 8 9 10 W I F I PRINTING WI F I PRINTING 15 14 Use the 1 Paper adjustment lever 2 Paper support 3 Paper guides 4 Paper feed guard 5 Automatic Document Feeder (ADF) 11 13 12 To Adjust the paper guides.
... differ from falling into the paper slot. Understanding the parts of the printer 2 4 3 5 6 1 7 8 9 10 W I F I PRINTING WI F I PRINTING 15 14 Use the 1 Paper adjustment lever 2 Paper support 3 Paper guides 4 Paper feed guard 5 Automatic Document Feeder (ADF) 11 13 12 To Adjust the paper guides.
User's Guide
Page 31
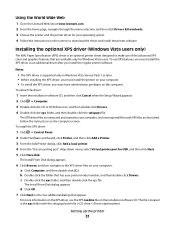
...the computer. Setting up the printer 31 Using the World Wide Web 1 Go to the Lexmark Web site at www.lexmark.com. 2 From the home page, navigate through the menu selection, and then click ...Installing the optional XPS driver (Windows Vista users only) The XML Paper Specification (XPS) driver is supported only in the xps folder with the setupxps batch file (:\Drivers\xps\readme). The Install From ... has your computer: a Click Computer, and then double-click (C:). To use of the advanced XPS color and graphics features that are available only for USB, and then click Next. 5 Click Have disk...
...the computer. Setting up the printer 31 Using the World Wide Web 1 Go to the Lexmark Web site at www.lexmark.com. 2 From the home page, navigate through the menu selection, and then click ...Installing the optional XPS driver (Windows Vista users only) The XML Paper Specification (XPS) driver is supported only in the xps folder with the setupxps batch file (:\Drivers\xps\readme). The Install From ... has your computer: a Click Computer, and then double-click (C:). To use of the advanced XPS color and graphics features that are available only for USB, and then click Next. 5 Click Have disk...
User's Guide
Page 33
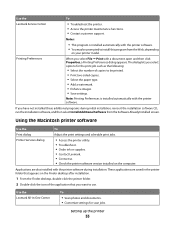
...Install Additional Software from the Web, depending on your printer model. Use the Lexmark Service Center To • Troubleshoot the printer. • Access the printer maintenance functions. • Contact customer support. Printing Preferences Notes: • This program is installed automatically with a ...and schedule print jobs. • Access the printer utility. • Troubleshoot. • Order ink or supplies. • Contact Lexmark. • Contact us. • Check the printer software version installed on the Finder desktop after installation. 1 From the Finder desktop...
...Install Additional Software from the Web, depending on your printer model. Use the Lexmark Service Center To • Troubleshoot the printer. • Access the printer maintenance functions. • Contact customer support. Printing Preferences Notes: • This program is installed automatically with a ...and schedule print jobs. • Access the printer utility. • Troubleshoot. • Order ink or supplies. • Contact Lexmark. • Contact us. • Check the printer software version installed on the Finder desktop after installation. 1 From the Finder desktop...
User's Guide
Page 34
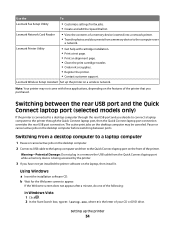
... alignment page. • Clean the print cartridge nozzles. • Order ink or supplies. • Register the printer. • Contact customer support. Setting up the printer on the desktop computer before switching between the rear USB port and the Quick Connect laptop port (selected models only) If...printer through the Quick Connect laptop port, then the Quick Connect laptop port connection overrides the rear USB port connection. Lexmark Printer Utility • Get help with these applications, depending on the laptop, then install it. Using Windows a Insert the installation ...
... alignment page. • Clean the print cartridge nozzles. • Order ink or supplies. • Register the printer. • Contact customer support. Setting up the printer on the desktop computer before switching between the rear USB port and the Quick Connect laptop port (selected models only) If...printer through the Quick Connect laptop port, then the Quick Connect laptop port connection overrides the rear USB port connection. Lexmark Printer Utility • Get help with these applications, depending on the laptop, then install it. Using Windows a Insert the installation ...
User's Guide
Page 44
... printer. If none exists, consider installing an analog telephone line for the fax machine. Certain devices can be connected to the printer so that will support analog use.
... printer. If none exists, consider installing an analog telephone line for the fax machine. Certain devices can be connected to the printer so that will support analog use.

User's Guide
Page 45
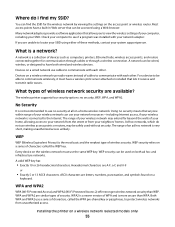
...) security, the WPA passphrase should be : • From 8 to secure your network. • The security key (either a WEP key or WPA passphrase) that your system support person. If you are using is compatible with your router manufacturer that : • Your wireless network is set up and working properly. • The computer...
...) security, the WPA passphrase should be : • From 8 to secure your network. • The security key (either a WEP key or WPA passphrase) that your system support person. If you are using is compatible with your router manufacturer that : • Your wireless network is set up and working properly. • The computer...

User's Guide
Page 48
..., press it when you to manually assign an IP address to select a network. b Select the network you have already changed the key for your system support person. Note: After pressing the associate/register button, you want to . If you created. 5 Follow the instructions on a wireless network (selected models only) 48 If... screen, and select the network you want to use the key you do not want to connect to use from the list. 3 Click Tools ΠLexmark Wireless Setup Utility.
..., press it when you to manually assign an IP address to select a network. b Select the network you have already changed the key for your system support person. Note: After pressing the associate/register button, you want to . If you created. 5 Follow the instructions on a wireless network (selected models only) 48 If... screen, and select the network you want to use the key you do not want to connect to use from the list. 3 Click Tools ΠLexmark Wireless Setup Utility.
User's Guide
Page 54
Refer to configure the printer, the wireless router must support WPS. In order to use the installation software on the network must enter the network information manually in most other . Note: Lexmark recommends that you use WPS to your router documentation for instructions. ...desktop, double-click the printer folder. 2 Double-click Lexmark Wireless Setup Assistant. 3 Follow the instructions on the Welcome screen. Most access points have administrator access to set up the printer using the method supported by your wireless network using WPS, refer to access the...
Refer to configure the printer, the wireless router must support WPS. In order to use the installation software on the network must enter the network information manually in most other . Note: Lexmark recommends that you use WPS to your router documentation for instructions. ...desktop, double-click the printer folder. 2 Double-click Lexmark Wireless Setup Assistant. 3 Follow the instructions on the Welcome screen. Most access points have administrator access to set up the printer using the method supported by your wireless network using WPS, refer to access the...
User's Guide
Page 55
... view the wireless settings of an ad hoc network is connected to communicate wirelessly, it receive and transmit radio waves. Check your system support person. The wireless printer supports four security options: no security at all on a wired network use radio waves instead of WPA and is a collection of your home, allowing...
... view the wireless settings of an ad hoc network is connected to communicate wirelessly, it receive and transmit radio waves. Check your system support person. The wireless printer supports four security options: no security at all on a wired network use radio waves instead of WPA and is a collection of your home, allowing...
User's Guide
Page 56
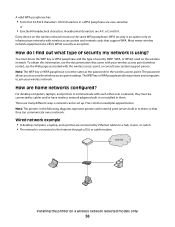
... and 0-9. Internet Installing the printer on the wireless network. Every device on infrastructure networks with the wireless access point, or consult your system support person. How do I find out what type of security (WEP, WPA, or WPA2) used on a wireless network (selected models only)...examples appear below. For desktop computers, laptops, and printers to communicate with internal print servers built in to them so that support WPA. Hexadecimal characters are home networks configured? Most newer wireless network equipment also offers WPA2 security as the password for the ...
... and 0-9. Internet Installing the printer on the wireless network. Every device on infrastructure networks with the wireless access point, or consult your system support person. How do I find out what type of security (WEP, WPA, or WPA2) used on a wireless network (selected models only)...examples appear below. For desktop computers, laptops, and printers to communicate with internal print servers built in to them so that support WPA. Hexadecimal characters are home networks configured? Most newer wireless network equipment also offers WPA2 security as the password for the ...

User's Guide
Page 62
... network, identified by their MAC addresses. Routers with the hardware of network equipment. How do so. Installing the printer on the network. Yes, the printer supports a simultaneous USB and network connection. MAC address filtering can also prevent legitimate access if you forget to add a new device to do I use my printer...
... network, identified by their MAC addresses. Routers with the hardware of network equipment. How do so. Installing the printer on the network. Yes, the printer supports a simultaneous USB and network connection. MAC address filtering can also prevent legitimate access if you forget to add a new device to do I use my printer...
User's Guide
Page 66
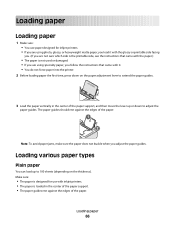
... adjustment lever to extend the paper guides. 3 Load the paper vertically in the center of the paper support. • The paper guides rest against the edges of the paper. 1 2 Note: To avoid ...adjust the paper guides. Loading paper Loading paper 1 Make sure: • You use paper designed for inkjet printers. • If you are using photo, glossy, or heavyweight matte paper, you load it with ... used or damaged. • If you are using specialty paper, you follow the instructions that came with inkjet printers. • The paper is designed for use with it. • You do not force paper ...
... adjustment lever to extend the paper guides. 3 Load the paper vertically in the center of the paper support. • The paper guides rest against the edges of the paper. 1 2 Note: To avoid ...adjust the paper guides. Loading paper Loading paper 1 Make sure: • You use paper designed for inkjet printers. • If you are using photo, glossy, or heavyweight matte paper, you load it with ... used or damaged. • If you are using specialty paper, you follow the instructions that came with inkjet printers. • The paper is designed for use with it. • You do not force paper ...
User's Guide
Page 67
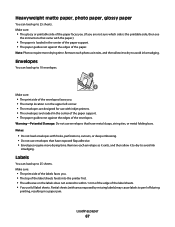
... photo paper, glossy paper You can load up to 25 sheets. Note: Photos require more drying time. Warning-Potential Damage: Do not use with inkjet printers. • The envelopes are loaded in the upper left corner. • The envelopes are designed for use envelopes that have metal clasps, ...which side is the printable side, then see the instructions that came with the paper.) • The paper is in the center of the paper support. • The paper guides rest against the edges of the label sheets. • You use envelopes that have exposed flap adhesive. • Envelopes...
... photo paper, glossy paper You can load up to 25 sheets. Note: Photos require more drying time. Warning-Potential Damage: Do not use with inkjet printers. • The envelopes are loaded in the upper left corner. • The envelopes are designed for use envelopes that have metal clasps, ...which side is the printable side, then see the instructions that came with the paper.) • The paper is in the center of the paper support. • The paper guides rest against the edges of the label sheets. • You use envelopes that have exposed flap adhesive. • Envelopes...

User's Guide
Page 68
...8226; The print side of the transfers faces you and down toward the printer. • The transparencies are loaded in the center of the paper support. • The paper guides rest against the edges of the label sheets. Loading paper 68 Remove each transparency as it exits, and then allow ...more drying time. Make sure: • You follow the loading instructions that came with paper backing sheets are loaded in the center of the paper support. • The paper guides rest against the edges of labels as it exits, and then allow it to dry to avoid ink smudging. Transparencies...
...8226; The print side of the transfers faces you and down toward the printer. • The transparencies are loaded in the center of the paper support. • The paper guides rest against the edges of the label sheets. Loading paper 68 Remove each transparency as it exits, and then allow ...more drying time. Make sure: • You follow the loading instructions that came with paper backing sheets are loaded in the center of the paper support. • The paper guides rest against the edges of labels as it exits, and then allow it to dry to avoid ink smudging. Transparencies...
User's Guide
Page 69
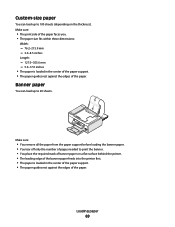
Custom-size paper You can load up to 20 sheets. Make sure: • You remove all the paper from the paper support before loading the banner paper. • You tear off only the number of pages needed to print the banner. • You place the required stack ... printer. • The leading edge of the banner paper feeds into the printer first. • The paper is loaded in the center of the paper support. • The paper guides rest against the edges of the paper. Loading paper 69 Make sure: • The print side of the paper faces you...
Custom-size paper You can load up to 20 sheets. Make sure: • You remove all the paper from the paper support before loading the banner paper. • You tear off only the number of pages needed to print the banner. • You place the required stack ... printer. • The leading edge of the banner paper feeds into the printer first. • The paper is loaded in the center of the paper support. • The paper guides rest against the edges of the paper. Loading paper 69 Make sure: • The print side of the paper faces you...
User's Guide
Page 72
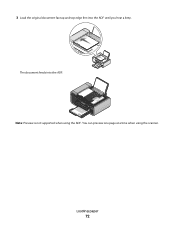
3 Load the original document faceup and top edge first into the ADF. You can preview one page at a time when using the ADF. Loading paper 72 The document feeds into the ADF until you hear a beep. WI F I PRINTING Note: Preview is not supported when using the scanner.
3 Load the original document faceup and top edge first into the ADF. You can preview one page at a time when using the ADF. Loading paper 72 The document feeds into the ADF until you hear a beep. WI F I PRINTING Note: Preview is not supported when using the scanner.


