Wireless Setup Guide
Page 8
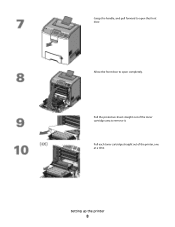
Pull the protective sheet straight out of the printer, one at a time. Setting up the printer 8 Allow the front door to remove it. Pull each toner cartridge straight out of the toner cartridge area to open the front door. Grasp the handle, and pull forward to open completely.
Pull the protective sheet straight out of the printer, one at a time. Setting up the printer 8 Allow the front door to remove it. Pull each toner cartridge straight out of the toner cartridge area to open the front door. Grasp the handle, and pull forward to open completely.
Wireless Setup Guide
Page 9
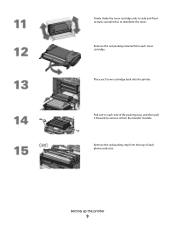
Place each photoconductor. Remove the red packing strip from the transfer module. Remove the red packing material from each side of the packing strip, and then pull it forward to distribute the toner. Pull out on each toner cartridge. Firmly shake the toner cartridge side-to-side and frontto-back several times to remove it from the top of each toner cartridge back into the printer. Setting up the printer 9
Place each photoconductor. Remove the red packing strip from the transfer module. Remove the red packing material from each side of the packing strip, and then pull it forward to distribute the toner. Pull out on each toner cartridge. Firmly shake the toner cartridge side-to-side and frontto-back several times to remove it from the top of each toner cartridge back into the printer. Setting up the printer 9
Quick Reference
Page 1
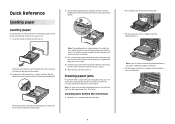
...step that corresponds to remove it from behind the front door 1 Remove Tray 1, and then open longer than 10 minutes. Straighten the edges on the printer control panel. Load the stack toward the back of paper being loaded. Note: To avoid overexposing the photoconductors, do not leave the front door open... width guide tabs as shown, and then slide the guide to the correct position for the size of the tray. Clearing jams behind the toner cartridge area. To unlock the tray, slide the button on the left as shown. 6 Align the tray, and then reinsert it. To lock the tray ...
...step that corresponds to remove it from behind the front door 1 Remove Tray 1, and then open longer than 10 minutes. Straighten the edges on the printer control panel. Load the stack toward the back of paper being loaded. Note: To avoid overexposing the photoconductors, do not leave the front door open... width guide tabs as shown, and then slide the guide to the correct position for the size of the tray. Clearing jams behind the toner cartridge area. To unlock the tray, slide the button on the left as shown. 6 Align the tray, and then reinsert it. To lock the tray ...
Menu Map
Page 1
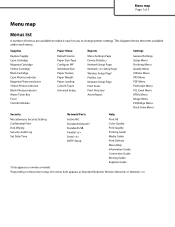
... map Menus list A number of menus are available to make it easy for you to change printer settings. Supplies Replace Supply Cyan Cartridge Magenta Cartridge Yellow Cartridge Black Cartridge Cyan Photoconductor Magenta Photoconductor Yellow Photoconductor Black Photoconductor Waste Toner Box Fuser Transfer Module Paper Menu Default... Wiping Security Audit Log Set Date/Time Active NIC Standard Network2 Standard USB Parallel Serial SMTP Setup Print All Color Quality Print Quality Printing Guide Media Guide Print Defects Menu Map Information Guide Connection Guide Moving Guide Supplies Guide ...
... map Menus list A number of menus are available to make it easy for you to change printer settings. Supplies Replace Supply Cyan Cartridge Magenta Cartridge Yellow Cartridge Black Cartridge Cyan Photoconductor Magenta Photoconductor Yellow Photoconductor Black Photoconductor Waste Toner Box Fuser Transfer Module Paper Menu Default... Wiping Security Audit Log Set Date/Time Active NIC Standard Network2 Standard USB Parallel Serial SMTP Setup Print All Color Quality Print Quality Printing Guide Media Guide Print Defects Menu Map Information Guide Connection Guide Moving Guide Supplies Guide ...

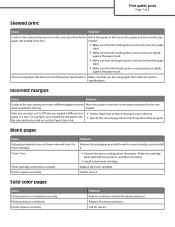
Print Quality
Page 1
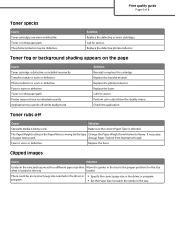
... and then press . Use the following table to find solutions to high humidity. Resetting the Printer appears briefly, followed by replacing a supply or maintenance item that is worn or defective. A toner cartridge, the transfer module, or the fuser is approaching the end of its intended life. Replace ...the print cartridge, the transfer module, or the fuser. ABC) D)E ABCDE ABCDE You are using paper that you are using. Make sure that the Paper Type and Paper Weight settings match the type of paper that does not meet the printer specifications. Load paper from ...
... and then press . Use the following table to find solutions to high humidity. Resetting the Printer appears briefly, followed by replacing a supply or maintenance item that is worn or defective. A toner cartridge, the transfer module, or the fuser is approaching the end of its intended life. Replace ...the print cartridge, the transfer module, or the fuser. ABC) D)E ABCDE ABCDE You are using paper that you are using. Make sure that the Paper Type and Paper Weight settings match the type of paper that does not meet the printer specifications. Load paper from ...
Print Quality
Page 4
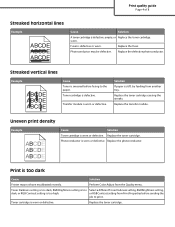
... ABCDE Cause Toner is smeared before sending the job to the paper. Perform Color Adjust from Print Properties before fusing to print. Fuser is stiff, try feeding from another tray. Solution If paper is defective or worn. Replace the toner cartridge causing the streaks. Print is defective, empty, or Replace the toner... setting from the Quality menu. Transfer module is too high. Print quality guide Page 4 of 8 Streaked horizontal lines Example ABCDE ABCDE ABCDE Cause Solution A toner cartridge is too dark Cause Solution Printer may be defective.
... ABCDE Cause Toner is smeared before sending the job to the paper. Perform Color Adjust from Print Properties before fusing to print. Fuser is stiff, try feeding from another tray. Solution If paper is defective or worn. Replace the toner cartridge causing the streaks. Print is defective, empty, or Replace the toner... setting from the Quality menu. Transfer module is too high. Print quality guide Page 4 of 8 Streaked horizontal lines Example ABCDE ABCDE ABCDE Cause Solution A toner cartridge is too dark Cause Solution Printer may be defective.
Print Quality
Page 5
.... Toner is worn or defective. other than Transparency. Turn Color Saver off in the printer software before sending the job to Transparency. The paper weight or Paper Weight setting in the Quality menu. type of paper that you are using . Replace the toner cartridge. Toner Darkness setting is too light, RGB Brightness setting...
.... Toner is worn or defective. other than Transparency. Turn Color Saver off in the printer software before sending the job to Transparency. The paper weight or Paper Weight setting in the Quality menu. type of paper that you are using . Replace the toner cartridge. Toner Darkness setting is too light, RGB Brightness setting...
Print Quality
Page 6
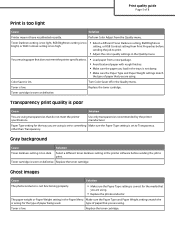
.... There could be defective. Toner is worn or defective. Transfer module is in the driver or program. Printer may be an incorrect page size selected in the driver or • Specify the correct page size in ... to match the media in the paper path. Toner fog or background shading appears on the page Cause Toner cartridge is worn or defective. Photoconductor is defective or installed incorrectly. Check the application. Print quality guide Page 6... may specify off Cause Solution Specialty media is being used . Perform color adjust from Normal to Rough. loaded.
.... There could be defective. Toner is worn or defective. Transfer module is in the driver or program. Printer may be an incorrect page size selected in the driver or • Specify the correct page size in ... to match the media in the paper path. Toner fog or background shading appears on the page Cause Toner cartridge is worn or defective. Photoconductor is defective or installed incorrectly. Check the application. Print quality guide Page 6... may specify off Cause Solution Specialty media is being used . Perform color adjust from Normal to Rough. loaded.
Print Quality
Page 7
.... For example, you inserted A4-size paper into the selected tray but you loaded a different size paper in a tray. Toner cartridge is defective. Solution Remove the packaging materials from the paper stack. • Make sure that the length guide is set to the... photoconductor. Blank pages Cause Packaging materials have not been removed from the printer. Solid color pages Cause Photoconductor is low. Make sure that you are using paper that meets the printer specifications. Call for service. Printer requires servicing. loaded. • Make sure that the width guide is...
.... For example, you inserted A4-size paper into the selected tray but you loaded a different size paper in a tray. Toner cartridge is defective. Solution Remove the packaging materials from the paper stack. • Make sure that the length guide is set to the... photoconductor. Blank pages Cause Packaging materials have not been removed from the printer. Solid color pages Cause Photoconductor is low. Make sure that you are using paper that meets the printer specifications. Call for service. Printer requires servicing. loaded. • Make sure that the width guide is...
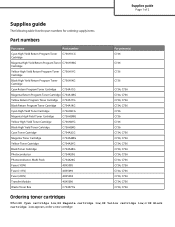
Supplies Guide
Page 1
... Yield Toner Cartridge C736H2MG Yellow High Yield Toner Cartridge C736H2YG Black High Yield Toner Cartridge C736H2KG Cyan Toner Cartridge C734A2CG Magenta Toner Cartridge C734A2MG Yellow Toner Cartridge C734A2YG Black Toner Cartridge C734A2KG Photoconductor C734X20G Photoconductor, Multi-Pack C734X24G Fuser (100V) 40X5095 Fuser (115V) 40X5093 Fuser (230V) 40X5094 Transfer Module 40X5096 Waste Toner Box C734X77G For printer(s) C736 C736...
... Yield Toner Cartridge C736H2MG Yellow High Yield Toner Cartridge C736H2YG Black High Yield Toner Cartridge C736H2KG Cyan Toner Cartridge C734A2CG Magenta Toner Cartridge C734A2MG Yellow Toner Cartridge C734A2YG Black Toner Cartridge C734A2KG Photoconductor C734X20G Photoconductor, Multi-Pack C734X24G Fuser (100V) 40X5095 Fuser (115V) 40X5093 Fuser (230V) 40X5094 Transfer Module 40X5096 Waste Toner Box C734X77G For printer(s) C736 C736...
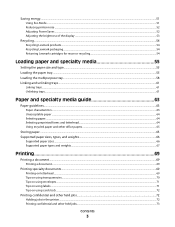
User's Guide
Page 3
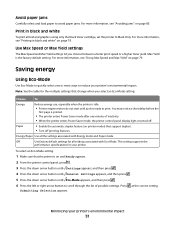
Saving energy...51 Using Eco-Mode ...51 Reducing printer noise ...52 Adjusting Power Saver...52 Adjusting the brightness of the display ...53 Recycling...54 Recycling Lexmark products...54 Recycling Lexmark packaging...54 Returning Lexmark cartridges for reuse or recycling...54 Loading paper and specialty media 55 Setting the paper size and type...55 Loading the paper... using envelopes...71 Tips on using labels...71 Tips on using card stock ...72 Printing confidential and other held jobs...72 Holding jobs in the printer ...72 Printing confidential and other held jobs...73 Contents 3
Saving energy...51 Using Eco-Mode ...51 Reducing printer noise ...52 Adjusting Power Saver...52 Adjusting the brightness of the display ...53 Recycling...54 Recycling Lexmark products...54 Recycling Lexmark packaging...54 Returning Lexmark cartridges for reuse or recycling...54 Loading paper and specialty media 55 Setting the paper size and type...55 Loading the paper... using envelopes...71 Tips on using labels...71 Tips on using card stock ...72 Printing confidential and other held jobs...72 Holding jobs in the printer ...72 Printing confidential and other held jobs...73 Contents 3
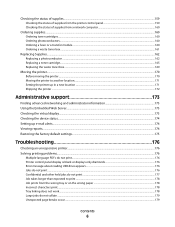
User's Guide
Page 6
... the status of supplies...159 Checking the status of supplies from the printer control panel 159 Checking the status of supplies from a network computer 160 Ordering supplies...160 Ordering toner cartridges...160 Ordering photoconductors...160 Ordering a fuser or a transfer module...160 ...photoconductor ...162 Replacing a toner cartridge...165 Replacing the waste toner box ...169 Moving the printer...170 Before moving the printer...170 Moving the printer to another location...171 Setting the printer up in a new location ...171 Shipping the printer ...172 Administrative support 173 Finding ...
... the status of supplies...159 Checking the status of supplies from the printer control panel 159 Checking the status of supplies from a network computer 160 Ordering supplies...160 Ordering toner cartridges...160 Ordering photoconductors...160 Ordering a fuser or a transfer module...160 ...photoconductor ...162 Replacing a toner cartridge...165 Replacing the waste toner box ...169 Moving the printer...170 Before moving the printer...170 Moving the printer to another location...171 Setting the printer up in a new location ...171 Shipping the printer ...172 Administrative support 173 Finding ...
User's Guide
Page 51
...1 Make sure that change when you choose between a faster print speed or a higher toner yield. Minimizing your printer. Use Max Speed or Max Yield settings The Max Speed and Max Yield settings let you select an Eco-Mode... setting. Max Yield is on and Ready appears. 2 From the printer control panel, press . 3 Press the down arrow button until Settings appears, and then press . 4 Press the down...78. Energy/Paper Use all text and graphics using only the black toner cartridge, set the printer to Black Only. Submitting Selection appears.
...1 Make sure that change when you choose between a faster print speed or a higher toner yield. Minimizing your printer. Use Max Speed or Max Yield settings The Max Speed and Max Yield settings let you select an Eco-Mode... setting. Max Yield is on and Ready appears. 2 From the printer control panel, press . 3 Press the down arrow button until Settings appears, and then press . 4 Press the down...78. Energy/Paper Use all text and graphics using only the black toner cartridge, set the printer to Black Only. Submitting Selection appears.
User's Guide
Page 52
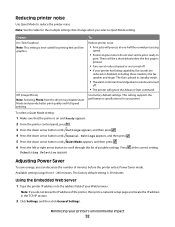
...Click Settings, and then click General Settings. Reducing printer noise Use Quiet Mode to scroll through the list of the printer, then print a network setup page and locate the IP address in standby mode. • The alarm control and cartridge alarm sounds are reduced or disabled, including those ...made by the fax speaker and ringer. To Reduce printer noise. • Print jobs...
...Click Settings, and then click General Settings. Reducing printer noise Use Quiet Mode to scroll through the list of the printer, then print a network setup page and locate the IP address in standby mode. • The alarm control and cartridge alarm sounds are reduced or disabled, including those ...made by the fax speaker and ringer. To Reduce printer noise. • Print jobs...
User's Guide
Page 54
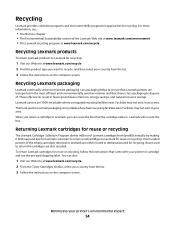
... Lexmark Web site at www.lexmark.com/environment • The Lexmark recycling program at www.lexmark.com/recycle Recycling Lexmark products To return Lexmark products to Lexmark for reuse or recycling The Lexmark Cartridge Collection Program diverts millions of the empty cartridges returned to return the cartridges are transported in your printer or cartridge and use the pre-paid shipping label. Recycling Lexmark packaging Lexmark...
... Lexmark Web site at www.lexmark.com/environment • The Lexmark recycling program at www.lexmark.com/recycle Recycling Lexmark products To return Lexmark products to Lexmark for reuse or recycling The Lexmark Cartridge Collection Program diverts millions of the empty cartridges returned to return the cartridges are transported in your printer or cartridge and use the pre-paid shipping label. Recycling Lexmark packaging Lexmark...

User's Guide
Page 72
...the manufacturer or vendor to verify that can significantly impact print quality. Print samples on the card stock being considered for laser printers. Printing 72 Label adhesives, face sheet (printable stock), and topcoats can specify in the Print Properties that may be ...zone coating of the adhesive at the printer are called held jobs. Preprinting introduces semi-liquid and volatile components into the printer. • Use grain short card stock when possible. Adhesive material contaminates the printer and could void the printer and cartridge warranties. • Do not use...
...the manufacturer or vendor to verify that can significantly impact print quality. Print samples on the card stock being considered for laser printers. Printing 72 Label adhesives, face sheet (printable stock), and topcoats can specify in the Print Properties that may be ...zone coating of the adhesive at the printer are called held jobs. Preprinting introduces semi-liquid and volatile components into the printer. • Use grain short card stock when possible. Adhesive material contaminates the printer and could void the printer and cartridge warranties. • Do not use...
User's Guide
Page 78
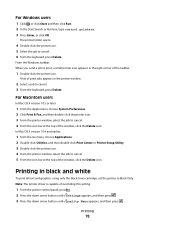
...the Delete icon. Printing in black and white To print all text and graphics using only the black toner cartridge, set the printer to cancel. 6 From the keyboard, press Delete. Note: The printer driver is capable of the window, click the Delete icon. In Mac OS X version 10.4 and ...earlier: 1 From the Go menu, choose Applications. 2 Double-click Utilities, and then double-click Print Center or Printer Setup Utility. 3 Double-click the printer icon. 4 From the printer window, select the job to cancel. 4 From the icon bar at the top of overriding this setting. 1 From the...
...the Delete icon. Printing in black and white To print all text and graphics using only the black toner cartridge, set the printer to cancel. 6 From the keyboard, press Delete. Note: The printer driver is capable of the window, click the Delete icon. In Mac OS X version 10.4 and ...earlier: 1 From the Go menu, choose Applications. 2 Double-click Utilities, and then double-click Print Center or Printer Setup Utility. 3 Double-click the printer icon. 4 From the printer window, select the job to cancel. 4 From the icon bar at the top of overriding this setting. 1 From the...

User's Guide
Page 81
... name]. Leave paper in bin. 24n.yy Paper jam, check [area name]. Leave paper in bin. 200 paper jams If paper jams behind the toner cartridge area. CAUTION-HOT SURFACE: The fuser and the inside of the printer near the fuser may be hot.
... name]. Leave paper in bin. 24n.yy Paper jam, check [area name]. Leave paper in bin. 200 paper jams If paper jams behind the toner cartridge area. CAUTION-HOT SURFACE: The fuser and the inside of the printer near the fuser may be hot.

User's Guide
Page 91
Supplies Replace Supply Cyan Cartridge Magenta Cartridge Yellow Cartridge Black Cartridge Cyan Photoconductor Magenta Photoconductor Yellow ... Set Date/Time Active NIC Standard Network2 Standard USB Parallel Serial SMTP Setup Print All Color Quality Print Quality Printing Guide Media Guide Print Defects Menu Map Information Guide Connection Guide ... 2Depending on the printer setup, this menu item appears as Standard Network, Wireless Network, or Network . Understanding printer menus 91 This diagram shows the items available under each menu. Understanding printer menus Menus list ...
Supplies Replace Supply Cyan Cartridge Magenta Cartridge Yellow Cartridge Black Cartridge Cyan Photoconductor Magenta Photoconductor Yellow ... Set Date/Time Active NIC Standard Network2 Standard USB Parallel Serial SMTP Setup Print All Color Quality Print Quality Printing Guide Media Guide Print Defects Menu Map Information Guide Connection Guide ... 2Depending on the printer setup, this menu item appears as Standard Network, Wireless Network, or Network . Understanding printer menus 91 This diagram shows the items available under each menu. Understanding printer menus Menus list ...
User's Guide
Page 92
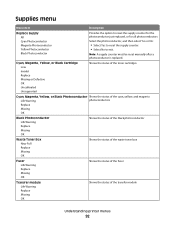
... Invalid Replace Missing or Defective OK Uncalibrated Unsupported Shows the status of the toner cartridges Cyan, Magenta, Yellow, or Black Photoconductor Shows the status of the cyan, yellow, and magenta Life Warning photoconductors Replace Missing OK Black ... Warning Replace Missing OK Shows the status of the fuser Transfer module Life Warning Replace Missing OK Shows the status of the transfer module Understanding printer menus 92 Note: A supply counter must be reset manually after a photoconductor is replaced. Supplies menu Menu item Description Replace Supply All Cyan ...
... Invalid Replace Missing or Defective OK Uncalibrated Unsupported Shows the status of the toner cartridges Cyan, Magenta, Yellow, or Black Photoconductor Shows the status of the cyan, yellow, and magenta Life Warning photoconductors Replace Missing OK Black ... Warning Replace Missing OK Shows the status of the fuser Transfer module Life Warning Replace Missing OK Shows the status of the transfer module Understanding printer menus 92 Note: A supply counter must be reset manually after a photoconductor is replaced. Supplies menu Menu item Description Replace Supply All Cyan ...


