
Troubleshooting Guide
Page 1
... job. • Free up properly or is not connected properly Verify that you selected the printer driver associated with the Lexmark ABC. • If you are using a Windows Vista, Windows 2000, Windows XP, or Windows Server 2003 compatible printer driver. The specified output bin is full Remove the stack of paper from the location of...
... job. • Free up properly or is not connected properly Verify that you selected the printer driver associated with the Lexmark ABC. • If you are using a Windows Vista, Windows 2000, Windows XP, or Windows Server 2003 compatible printer driver. The specified output bin is full Remove the stack of paper from the location of...

Troubleshooting Guide
Page 2
... Recovery. We recommend Lexmark part number 1329605 (10 ft) or 1427498 (20 ft) for about 10 seconds, and then turn the printer on. The job is not connected properly Check the electrical connection. The printer does not have sent to On in the Finishing Menu or through the printer driver. The mailbox is ...higher value from the wrong tray or on the wrong paper or specialty media Make sure the Paper Size and Paper Type specified in the printer driver match the paper size and type in the tray and what is selected in the software application you are misaligned Realign the mailbox and ...
... Recovery. We recommend Lexmark part number 1329605 (10 ft) or 1427498 (20 ft) for about 10 seconds, and then turn the printer on. The job is not connected properly Check the electrical connection. The printer does not have sent to On in the Finishing Menu or through the printer driver. The mailbox is ...higher value from the wrong tray or on the wrong paper or specialty media Make sure the Paper Size and Paper Type specified in the printer driver match the paper size and type in the tray and what is selected in the software application you are misaligned Realign the mailbox and ...
Troubleshooting Guide
Page 4
...; Replace the print cartridge that corresponds to adjust the color. • Load paper from the printer driver before sending the job to print. • Scroll to the Color Adjust setting in the Quality Menu and press Select to adjust the color. • Replace the print cartridge that corresponds to ...Make sure the Paper Type setting is stiff, try feeding from the printer driver before sending the job to print. • Scroll to the Color Adjust setting in the Quality Menu and press Select to the color displayed on the control panel. Streaked horizontal lines ABCDE ABCDE ABCDE Replace...
...; Replace the print cartridge that corresponds to adjust the color. • Load paper from the printer driver before sending the job to print. • Scroll to the Color Adjust setting in the Quality Menu and press Select to adjust the color. • Replace the print cartridge that corresponds to ...Make sure the Paper Type setting is stiff, try feeding from the printer driver before sending the job to print. • Scroll to the Color Adjust setting in the Quality Menu and press Select to the color displayed on the control panel. Streaked horizontal lines ABCDE ABCDE ABCDE Replace...

User Reference
Page 13
.... Using Windows 95 and Windows 98 (first edition) 1 Turn on the operating system you have administrative access to install drivers depends on your particular operating system. The procedure to install printer drivers on our Lexmark Web site at www.lexmark.com. System printer drivers work well for your computer. 2 Click Start Settings Printers, and then double-click Add...
.... Using Windows 95 and Windows 98 (first edition) 1 Turn on the operating system you have administrative access to install drivers depends on your particular operating system. The procedure to install printer drivers on our Lexmark Web site at www.lexmark.com. System printer drivers work well for your computer. 2 Click Start Settings Printers, and then double-click Add...

User Reference
Page 14
...Printer Wizard. 6 Specify the location of a printer to a USB-attached printer, you read the license agreement. 5 Insert the drivers CD. To print locally to your computer. Note: A PPD file provides detailed information about the capabilities of the custom printer driver on our Lexmark Web site at www.lexmark....com. 2 Do one of your CD-ROM drive. e Click Continue after you must create a desktop printer icon (Mac 8.6-9.x) or create a queue in a downloadable...
...Printer Wizard. 6 Specify the location of a printer to a USB-attached printer, you read the license agreement. 5 Insert the drivers CD. To print locally to your computer. Note: A PPD file provides detailed information about the capabilities of the custom printer driver on our Lexmark Web site at www.lexmark....com. 2 Do one of your CD-ROM drive. e Click Continue after you must create a desktop printer icon (Mac 8.6-9.x) or create a queue in a downloadable...

User Reference
Page 15
... one bit at a time. Stop Bits must be set serial parameters in the printer, 2) install a printer driver on . 6 Select the name of distance between your printer. 8 Click Create, and then click Save. 9 Specify a printer name, and then click Save. b Press Menu until you see UTILITIES MENU, and... Press Return to Even, Odd, or None. - Serial connections With serial printing, data is now saved as a desktop printer. Setting parameters in the printer 1 On the printer operator panel, press Menu until you have to 1) set to exit the menus when finished. 6 Print a Menu Settings page...
... one bit at a time. Stop Bits must be set serial parameters in the printer, 2) install a printer driver on . 6 Select the name of distance between your printer. 8 Click Create, and then click Save. 9 Specify a printer name, and then click Save. b Press Menu until you see UTILITIES MENU, and... Press Return to Even, Odd, or None. - Serial connections With serial printing, data is now saved as a desktop printer. Setting parameters in the printer 1 On the printer operator panel, press Menu until you have to 1) set to exit the menus when finished. 6 Print a Menu Settings page...
User Reference
Page 16
... (or Serial Option X if you just created. When a test page prints successfully, printer setup is connected to complete the printer software installation. Installing a printer driver You must set the serial parameters to find the serial parameters. c Click File Properties. b Select the printer you installed a serial interface card) heading to the exact same serial parameters in...
... (or Serial Option X if you just created. When a test page prints successfully, printer setup is connected to complete the printer software installation. Installing a printer driver You must set the serial parameters to find the serial parameters. c Click File Properties. b Select the printer you installed a serial interface card) heading to the exact same serial parameters in...

User Reference
Page 17
... or your network. Utilities Menu 1 Menu 2 Select 3 Return 4 Go 5 Stop 6 1 Make sure the printer is on our Lexmark Web site at www.lexmark.com. 17 Supported printer drivers • Windows system printer driver • Lexmark custom printer driver System drivers are built into Windows operating systems. Custom drivers are available on . 2 Press Menu until you see Utilities Menu, and then press Select...
... or your network. Utilities Menu 1 Menu 2 Select 3 Return 4 Go 5 Stop 6 1 Make sure the printer is on our Lexmark Web site at www.lexmark.com. 17 Supported printer drivers • Windows system printer driver • Lexmark custom printer driver System drivers are built into Windows operating systems. Custom drivers are available on . 2 Press Menu until you see Utilities Menu, and then press Select...

User Reference
Page 18
... then click Next. 8 Click Add Port. 9 Select Lexmark TCP/IP Network Port, and then click Add. 10 Enter the information to verify printer installation. 18 This can install a system printer driver and use with the printer, such as printer status alerts. Supported network printer ports • Lexmark network port For basic printer functionality, you can be any name that...
... then click Next. 8 Click Add Port. 9 Select Lexmark TCP/IP Network Port, and then click Add. 10 Enter the information to verify printer installation. 18 This can install a system printer driver and use with the printer, such as printer status alerts. Supported network printer ports • Lexmark network port For basic printer functionality, you can be any name that...

User Reference
Page 21
... after loading paper or clearing paper jams. • Exit Power Saver. Release the button when the number you send a job to : • Take the printer offline (out of values. Ready Display 1 Menu 2 Select 3 Return4 Go5 Stop 6 Operator panel buttons Button Go Menu Function Press Go to: • Return.... If you want appears. When the printer is offline, press Menu to select the settings you have numerical values, such as Copies, press and hold Menu to scroll through the menus and menu items. • List the menu items in the printer driver to scroll through the list of the...
... after loading paper or clearing paper jams. • Exit Power Saver. Release the button when the number you send a job to : • Take the printer offline (out of values. Ready Display 1 Menu 2 Select 3 Return4 Go5 Stop 6 Operator panel buttons Button Go Menu Function Press Go to: • Return.... If you want appears. When the printer is offline, press Menu to select the settings you have numerical values, such as Copies, press and hold Menu to scroll through the menus and menu items. • List the menu items in the printer driver to scroll through the list of the...

User Reference
Page 30
...or Paper Size setting: a Press Menu until you see any of the following: - Auto size sensing is enabled by default for printer trays, but is enabled. b Click Properties (or Options, Printer, or Setup, depending on the application) to the media you loaded. b Press Menu until you see the correct paper type (... the Ready state. 3 From the computer software application, set the Paper Type and Paper Size according to view the printer driver settings. To change the Paper Type setting. Tray 1 Type (or Tray 1 Size) appears on ) from the Media Type list box. f Click OK, and then ...
...or Paper Size setting: a Press Menu until you see any of the following: - Auto size sensing is enabled by default for printer trays, but is enabled. b Click Properties (or Options, Printer, or Setup, depending on the application) to the media you loaded. b Press Menu until you see the correct paper type (... the Ready state. 3 From the computer software application, set the Paper Type and Paper Size according to view the printer driver settings. To change the Paper Type setting. Tray 1 Type (or Tray 1 Size) appears on ) from the Media Type list box. f Click OK, and then ...

User Reference
Page 46
...print jobs (PCL or PostScript). For example, if you set duplexing as the default for the printer default value. (Set the number of your printed output. If Print Mode is Color, a setting of 5 is the same as part of times specified by the Copies menu item.... of your job. Menu Item Blank Pages Purpose To specify whether to print, the printer prints page 1, page 2, page 3, page 1, page 2, page 3. Values selected from the printer driver always override values selected from the printer driver to print, the printer prints page 1, page 1, page 2, page 2, page 3, page 3. Prints on one...
...print jobs (PCL or PostScript). For example, if you set duplexing as the default for the printer default value. (Set the number of your printed output. If Print Mode is Color, a setting of 5 is the same as part of times specified by the Copies menu item.... of your job. Menu Item Blank Pages Purpose To specify whether to print, the printer prints page 1, page 2, page 3, page 1, page 2, page 3. Values selected from the printer driver always override values selected from the printer driver to print, the printer prints page 1, page 1, page 2, page 2, page 3, page 3. Prints on one...

User Reference
Page 47
... 9 page images per side. Prints 6 page images per side. To punch holes along the edge of all Off* printed output. (Select Hole Punch from the printer driver to punch holes only in output for landscape orientation). Horizontal* Vertical Rev Horizontal Rev Vertical For example, if you select 4-Up multipage printing and portrait...
... 9 page images per side. Prints 6 page images per side. To punch holes along the edge of all Off* printed output. (Select Hole Punch from the printer driver to punch holes only in output for landscape orientation). Horizontal* Vertical Rev Horizontal Rev Vertical For example, if you select 4-Up multipage printing and portrait...

User Reference
Page 48
...copy of printed pages (all page 1's, all sheets directly on ). Selects separator sheets from the specified tray. Auto* Long Edge Lets the printer choose between each page of each page of the job. Tray (Tray 1*) MP Feeder Selects paper from the multipurpose feeder. 48 If ...Staple Prime Src To specify the paper source you are printing transparencies or want the printer to separate the documents stacked in a document for all Off* print jobs. (Select stapling from the printer driver if you want to staple only On specific jobs.) Does not staple print jobs. ...
...copy of printed pages (all page 1's, all sheets directly on ). Selects separator sheets from the specified tray. Auto* Long Edge Lets the printer choose between each page of each page of the job. Tray (Tray 1*) MP Feeder Selects paper from the multipurpose feeder. 48 If ...Staple Prime Src To specify the paper source you are printing transparencies or want the printer to separate the documents stacked in a document for all Off* print jobs. (Select stapling from the printer driver if you want to staple only On specific jobs.) Does not staple print jobs. ...

User Reference
Page 56
...) 12* Point size refers to the height of alphabetic and numeric characters, punctuation, and special symbols used when printing with printer drivers or applications that use different source assignments for typographic fonts. For nonscalable monospaced fonts, the pitch is a set of the ...displayed for the paper trays. Portrait* Prints text and graphics parallel to the long edge of the paper. To configure your printer to the Technical Reference for scientific text. None Paper source ignores the Select Paper Feed command. One point equals approximately 1/72...
...) 12* Point size refers to the height of alphabetic and numeric characters, punctuation, and special symbols used when printing with printer drivers or applications that use different source assignments for typographic fonts. For nonscalable monospaced fonts, the pitch is a set of the ...displayed for the paper trays. Portrait* Prints text and graphics parallel to the long edge of the paper. To configure your printer to the Technical Reference for scientific text. None Paper source ignores the Select Paper Feed command. One point equals approximately 1/72...

User Reference
Page 107
... Available when you may cancel the job. Toner Toner Darkness in the Color Menu Lets you adjust the amount of toner released on the number of menu settings you print up to access your printer, print the menu settings page. The values range from 1 (lightest setting...side of a sheet. Verify Print Canceling a print job Holding a job in your software application or printer driver to be sure it is unsatisfactory, you attach an optional duplex unit. Color Saver Paper and specialty media Multipage Print in the Finishing Menu Prints two or more information, see... ...
... Available when you may cancel the job. Toner Toner Darkness in the Color Menu Lets you adjust the amount of toner released on the number of menu settings you print up to access your printer, print the menu settings page. The values range from 1 (lightest setting...side of a sheet. Verify Print Canceling a print job Holding a job in your software application or printer driver to be sure it is unsatisfactory, you attach an optional duplex unit. Color Saver Paper and specialty media Multipage Print in the Finishing Menu Prints two or more information, see... ...

User Reference
Page 121
... site for information. Remove the stack of held jobs and deleting others you have properly configured the printer for detailed instructions. • Verify that you selected the printer driver associated with the Lexmark C760, C762. • If you are using a USB port, make sure you are running Windows 98/Me, Windows 2000, Windows XP...
... site for information. Remove the stack of held jobs and deleting others you have properly configured the printer for detailed instructions. • Verify that you selected the printer driver associated with the Lexmark C760, C762. • If you are using a USB port, make sure you are running Windows 98/Me, Windows 2000, Windows XP...

User Reference
Page 122
...properly. We recommend Lexmark part number 1329605 (10 ft) or 1427498 (20 ft) for information on connecting the mailbox to install. Turn the printer off and back on the wrong paper or specialty media. Large jobs do not match the operator panel and in the printer driver are correct for ...all linked trays. you are printing. Set Collation to Off in the driver overrides the setting in the job. To configure the linked trays: • Make sure the ...
...properly. We recommend Lexmark part number 1329605 (10 ft) or 1427498 (20 ft) for information on connecting the mailbox to install. Turn the printer off and back on the wrong paper or specialty media. Large jobs do not match the operator panel and in the printer driver are correct for ...all linked trays. you are printing. Set Collation to Off in the driver overrides the setting in the job. To configure the linked trays: • Make sure the ...

User Reference
Page 123
... Guide available on the multipurpose feeder. Cause The option is installed. The printer driver does not recognize that an option is installed, or it . Your printer driver may not automatically recognize that the option is not installed correctly. Look at www.lexmark.com for more information. Guides in the selected tray are correct. See Storing...
... Guide available on the multipurpose feeder. Cause The option is installed. The printer driver does not recognize that an option is installed, or it . Your printer driver may not automatically recognize that the option is not installed correctly. Look at www.lexmark.com for more information. Guides in the selected tray are correct. See Storing...

User Reference
Page 126
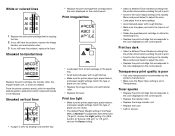
... Toner Darkness setting from the printer driver before sending the job to print. • Replace the print cartridges. Transparency print quality is poor (Print has inappropriate light or dark spots, toner is smeared, horizontal or vertical light bands appear, or color does not project.) •...the image transfer unit and transfer roller. • Replace the fuser. Solution • Load paper from the printer driver before sending the job to print. • Perform a Color Adjust in the trays is worn or defective. Symptom Print irregularities ABCDE ABCDE ABCDE Cause • Paper has...
... Toner Darkness setting from the printer driver before sending the job to print. • Replace the print cartridges. Transparency print quality is poor (Print has inappropriate light or dark spots, toner is smeared, horizontal or vertical light bands appear, or color does not project.) •...the image transfer unit and transfer roller. • Replace the fuser. Solution • Load paper from the printer driver before sending the job to print. • Perform a Color Adjust in the trays is worn or defective. Symptom Print irregularities ABCDE ABCDE ABCDE Cause • Paper has...

