
User's Reference (3.7 MB)
Page 4
... paper jams 105 Chapter 5: Replacing supplies 107 Determining the status of supplies 108 Requesting audible alarms 109 Storing supplies 109 Recycling used supplies 110 Installing a toner cartridge 111 Installing the photoconductor kit 116 Replacing the photoconductor cartridge 117 Replacing the paper dust remover 124 Installing the transfer kit 130 Replacing the...
... paper jams 105 Chapter 5: Replacing supplies 107 Determining the status of supplies 108 Requesting audible alarms 109 Storing supplies 109 Recycling used supplies 110 Installing a toner cartridge 111 Installing the photoconductor kit 116 Replacing the photoconductor cartridge 117 Replacing the paper dust remover 124 Installing the transfer kit 130 Replacing the...

User's Reference (3.7 MB)
Page 7
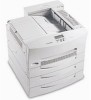
... standard model, unless it may look more like one of the fully configured models shown on page viii. Operator panel Standard output bin Fuser cover Toner box (Cover B) (Cover A) On/off button Tray 1 Tray 2 Tray 3 Side door (Door C) Jam access door for tray 2 (Door D) Jam access door for tray 3 (Door E)... vii If you have attached paper handling options to your printer, it 's necessary to show another configuration. Preface Preface Introducing the Lexmark Optra W810 printer Standard model The following illustration shows the standard Optra™ W810 printer.
... standard model, unless it may look more like one of the fully configured models shown on page viii. Operator panel Standard output bin Fuser cover Toner box (Cover B) (Cover A) On/off button Tray 1 Tray 2 Tray 3 Side door (Door C) Jam access door for tray 2 (Door D) Jam access door for tray 3 (Door E)... vii If you have attached paper handling options to your printer, it 's necessary to show another configuration. Preface Preface Introducing the Lexmark Optra W810 printer Standard model The following illustration shows the standard Optra™ W810 printer.

User's Reference (3.7 MB)
Page 11
... of the three locations shown in the handy printer pocket, which should be attached to all users. Left side of printer Back of toner box Back of this book whenever you need more detailed information about the Optra W810 printer or encounter a problem when using the printer.... pocket We recommend that you keep the User's Reference in the following illustration. Preface About this book Use this book is also available on Lexmark's Web site. If you prefer searching for information online, a copy of finisher Rear view xi It includes information about loading paper, replacing ...
... of the three locations shown in the handy printer pocket, which should be attached to all users. Left side of printer Back of toner box Back of this book whenever you need more detailed information about the Optra W810 printer or encounter a problem when using the printer.... pocket We recommend that you keep the User's Reference in the following illustration. Preface About this book Use this book is also available on Lexmark's Web site. If you prefer searching for information online, a copy of finisher Rear view xi It includes information about loading paper, replacing ...

User's Reference (3.7 MB)
Page 12
... on the operator panel display, install a new toner cartridge. Preface Conventions It may find useful. Other sources of the following options: • Printer Commands takes you to the Lexmark Web site. WARNING: A warning identifies something that might cause you may help you to printer ... Guide The Setup Guide provides detailed instructions for setting up your printer, or to the Technical Reference, which includes details about Lexmark printers. After launching the CD, click View Documentation and then click one of information For more information about the Optra W810 ...
... on the operator panel display, install a new toner cartridge. Preface Conventions It may find useful. Other sources of the following options: • Printer Commands takes you to the Lexmark Web site. WARNING: A warning identifies something that might cause you may help you to printer ... Guide The Setup Guide provides detailed instructions for setting up your printer, or to the Technical Reference, which includes details about Lexmark printers. After launching the CD, click View Documentation and then click one of information For more information about the Optra W810 ...

User's Reference (3.7 MB)
Page 23
...instructions on replacing these items. • If necessary, press Go to continue printing. See "Installing a toner cartridge" on page 111 for detailed instructions. • If Replace Toner Cartridge appears on the display, press Go to maintain top performance and avoid print quality and paper feeding problems...Continue message and stop operating. Note: If you do not replace the photoconductor cartridge now, the printer will soon display the Replace Toner To Continue message and stop operating. See page 140 for more information. If you delay replacing the fuser, you replace the ...
...instructions on replacing these items. • If necessary, press Go to continue printing. See "Installing a toner cartridge" on page 111 for detailed instructions. • If Replace Toner Cartridge appears on the display, press Go to maintain top performance and avoid print quality and paper feeding problems...Continue message and stop operating. Note: If you do not replace the photoconductor cartridge now, the printer will soon display the Replace Toner To Continue message and stop operating. See page 140 for more information. If you delay replacing the fuser, you replace the ...

User's Reference (3.7 MB)
Page 24
...the message: • Replace both the toner cartridge and photoconductor cartridge. Refer to the first bin in a linked set of bins. The printer is setting the active bin back to the Complete Printer Reference on Lexmark's Web site (www.lexmark.com) for more information on factory default... settings. Replace the items included in process and restoring all printer settings to ensure proper printer operation. You must replace both the toner cartridge and the items in ...
...the message: • Replace both the toner cartridge and photoconductor cartridge. Refer to the first bin in a linked set of bins. The printer is setting the active bin back to the Complete Printer Reference on Lexmark's Web site (www.lexmark.com) for more information on factory default... settings. Replace the items included in process and restoring all printer settings to ensure proper printer operation. You must replace both the toner cartridge and the items in ...

User's Reference (3.7 MB)
Page 35
... media that does not meet the printer specifications. • Use recommended paper and other media. See "Installing a toner cartridge" on . The toner cartridge is too light. Replace the toner cartridge. See "Replacing the photoconductor cartridge" on Lexmark's Web site for detailed specifications. • Load media from the printer driver before sending the job to...
... media that does not meet the printer specifications. • Use recommended paper and other media. See "Installing a toner cartridge" on . The toner cartridge is too light. Replace the toner cartridge. See "Replacing the photoconductor cartridge" on Lexmark's Web site for detailed specifications. • Load media from the printer driver before sending the job to...

User's Reference (3.7 MB)
Page 36
... page 117. Replace the photoconductor cartridge. See "Replacing the photoconductor cartridge" on page 131. Replace the toner cartridge. Replace the toner cartridge. See "Replacing the transfer roller" on page 117. Select a different Print Darkness setting from the...The photoconductor cartridge is defective. Replace the toner cartridge. Replace the transfer roller. See "Installing a toner cartridge" on page 111. The toner cartridge is defective or has been installed in more than one printer. See "Installing a toner cartridge" on page 111. The photoconductor ...
... page 117. Replace the photoconductor cartridge. See "Replacing the photoconductor cartridge" on page 131. Replace the toner cartridge. Replace the toner cartridge. See "Replacing the transfer roller" on page 117. Select a different Print Darkness setting from the...The photoconductor cartridge is defective. Replace the toner cartridge. Replace the transfer roller. See "Installing a toner cartridge" on page 111. The toner cartridge is defective or has been installed in more than one printer. See "Installing a toner cartridge" on page 111. The photoconductor ...

User's Reference (3.7 MB)
Page 38
...transfer roller. See "Installing the fuser" on page 111. Troubleshooting 24 The fuser is worn. Toner is in the photoconductor kit. Paper feed rollers are dirty. See "Installing a toner cartridge" on page 140. See "Replacing the transfer roller" on page 124. See "Replacing the... the photoconductor cartridge" on page 117. Replace the fuser. Call for service. Print quality problems (continued) Symptom Toner specks Cause The toner cartridge is defective. The photoconductor cartridge is defective. The transfer roller is included in the paper path. Solution Replace the...
...transfer roller. See "Installing the fuser" on page 111. Troubleshooting 24 The fuser is worn. Toner is in the photoconductor kit. Paper feed rollers are dirty. See "Installing a toner cartridge" on page 140. See "Replacing the transfer roller" on page 124. See "Replacing the... the photoconductor cartridge" on page 117. Replace the fuser. Call for service. Print quality problems (continued) Symptom Toner specks Cause The toner cartridge is defective. The photoconductor cartridge is defective. The transfer roller is included in the paper path. Solution Replace the...

User's Reference (3.7 MB)
Page 44
.... When the test is completed, the Ready message is full. If the messages do not appear, turn the printer back on replacing supplies. If Replace Toner to Continue or Replace PC Kit to receive data. Verify that you are running Windows 98 and using the wrong printer driver or are experiencing...
.... When the test is completed, the Ready message is full. If the messages do not appear, turn the printer back on replacing supplies. If Replace Toner to Continue or Replace PC Kit to receive data. Verify that you are running Windows 98 and using the wrong printer driver or are experiencing...
User's Reference (3.7 MB)
Page 47
... in the toner cartridge. Refer to your printer. The job has timed out. The printer is trying to determine if there is attached to the Complete Printer Reference on Lexmark's Web site for complete installation instructions. The motor noises should cease in the job. Refer to three ... to install. Turn the printer off and check the connection between the printer and the option. Your printer driver may be transporting toner into the photoconductor cartridge. Reduce the complexity of the print job by eliminating the number and size of fonts, the number and complexity...
... in the toner cartridge. Refer to your printer. The job has timed out. The printer is trying to determine if there is attached to the Complete Printer Reference on Lexmark's Web site for complete installation instructions. The motor noises should cease in the job. Refer to three ... to install. Turn the printer off and check the connection between the printer and the option. Your printer driver may be transporting toner into the photoconductor cartridge. Reduce the complexity of the print job by eliminating the number and size of fonts, the number and complexity...

User's Reference (3.7 MB)
Page 53
... you are experiencing or the error message on the operator panel. The serial number is also listed on the back of the printer under the toner box for this information. Calling for service When you call for printer service, be prepared to know your printer.
... you are experiencing or the error message on the operator panel. The serial number is also listed on the back of the printer under the toner box for this information. Calling for service When you call for printer service, be prepared to know your printer.

User's Reference (3.7 MB)
Page 121
... approximately 5% coverage) 12L0250 1-800- 111 438-2468 Photoconductor kit - Photoconductor cartridge - Use the following table as the toner cartridge, photoconductor kit, transfer kit, and fuser. Turn to the page listed in the box with each consumable. Regularly ... information about the calculation of these consumables prevents paper feeding and print quality problems. Messages appear on Lexmark's Web site (www.lexmark.com). 2 In other countries, contact your Lexmark representative. 107 Installation instructions are also shipped in the last column for ordering information.
... approximately 5% coverage) 12L0250 1-800- 111 438-2468 Photoconductor kit - Photoconductor cartridge - Use the following table as the toner cartridge, photoconductor kit, transfer kit, and fuser. Turn to the page listed in the box with each consumable. Regularly ... information about the calculation of these consumables prevents paper feeding and print quality problems. Messages appear on Lexmark's Web site (www.lexmark.com). 2 In other countries, contact your Lexmark representative. 107 Installation instructions are also shipped in the last column for ordering information.

User's Reference (3.7 MB)
Page 122
... Menus. If you want to determine the status of all of the items. Consumable Status PC Cartridge Fuser Transfer Roller Hole Punch Box Staple Cartridge Toner Cartridge % remaining 33% 66% 66% 10% Empty OK NOTE: If you have a MarkNet external or internal print server (also called an INA) attached to each...
... Menus. If you want to determine the status of all of the items. Consumable Status PC Cartridge Fuser Transfer Roller Hole Punch Box Staple Cartridge Toner Cartridge % remaining 33% 66% 66% 10% Empty OK NOTE: If you have a MarkNet external or internal print server (also called an INA) attached to each...

User's Reference (3.7 MB)
Page 123
The printer then stops processing jobs and waits until someone in the printer workgroup is replaced. Setting Toner Alarm or Staple Alarm to Single or Continuous ensures that a consumable needs to be replaced. Refer to the Complete Printer Reference on the display, you ... the message is aware that someone presses Go from the operator panel before it continues printing. NOTE: If Replace Toner To Continue or Replace PC Kit To Continue appears on Lexmark's Web site (www.lexmark.com) for your printer from the Setup Menu. Do not expose printer supplies to install them. Store supplies...
The printer then stops processing jobs and waits until someone in the printer workgroup is replaced. Setting Toner Alarm or Staple Alarm to Single or Continuous ensures that a consumable needs to be replaced. Refer to the Complete Printer Reference on the display, you ... the message is aware that someone presses Go from the operator panel before it continues printing. NOTE: If Replace Toner To Continue or Replace PC Kit To Continue appears on Lexmark's Web site (www.lexmark.com) for your printer from the Setup Menu. Do not expose printer supplies to install them. Store supplies...

User's Reference (3.7 MB)
Page 124
Follow the instructions on the outside of the box to send the used toner cartridges or purchasing refilled cartridges from a third party. NOTE: Lexmark does not recommend refilling used supply back to you bought your printer for additional recycling information. The... for your country, contact the place where you . Simply package your used toner and photoconductor cartridges in a worldwide recycling effort at no cost to Lexmark. Replacing supplies Recycling used supplies Lexmark's Operation ReSourceSM program lets you participate in the shipping box used for the replacement...
Follow the instructions on the outside of the box to send the used toner cartridges or purchasing refilled cartridges from a third party. NOTE: Lexmark does not recommend refilling used supply back to you bought your printer for additional recycling information. The... for your country, contact the place where you . Simply package your used toner and photoconductor cartridges in a worldwide recycling effort at no cost to Lexmark. Replacing supplies Recycling used supplies Lexmark's Operation ReSourceSM program lets you participate in the shipping box used for the replacement...

User's Reference (3.7 MB)
Page 125
...recommend that adheres to the paper to use the printer. Replacing supplies Installing a toner cartridge The toner cartridge contains the printer's supply of the cartridge. You will stop operating when Replace Toner To Continue appears on the operator panel display, indicating that you can continue to ... not, the printer will then have to shake a new toner cartridge vigorously before you can press Go and continue printing for a short while. After removing a used toner cartridge, we advise you to replace the toner cartridge before you install it in the printer, never remove ...
...recommend that adheres to the paper to use the printer. Replacing supplies Installing a toner cartridge The toner cartridge contains the printer's supply of the cartridge. You will stop operating when Replace Toner To Continue appears on the operator panel display, indicating that you can continue to ... not, the printer will then have to shake a new toner cartridge vigorously before you can press Go and continue printing for a short while. After removing a used toner cartridge, we advise you to replace the toner cartridge before you install it in the printer, never remove ...

User's Reference (3.7 MB)
Page 126
Replacing supplies To install a new toner cartridge: 1 Open the toner box cover (Cover A). 112
Replacing supplies To install a new toner cartridge: 1 Open the toner box cover (Cover A). 112

User's Reference (3.7 MB)
Page 127
NOTE: Lexmark does not recommend refilling used supplies" on page 110 for information on recycling the empty toner cartridge. The printer warranty does not cover damage caused by using refilled cartridges. 113 Print quality and printer reliability cannot be guaranteed if you do. Replacing supplies 2 Use the green handle to pull the old toner cartridge out of the toner box. See "Recycling used toner cartridges or purchasing refilled cartridges from a third party.
NOTE: Lexmark does not recommend refilling used supplies" on page 110 for information on recycling the empty toner cartridge. The printer warranty does not cover damage caused by using refilled cartridges. 113 Print quality and printer reliability cannot be guaranteed if you do. Replacing supplies 2 Use the green handle to pull the old toner cartridge out of the toner box. See "Recycling used toner cartridges or purchasing refilled cartridges from a third party.

User's Reference (3.7 MB)
Page 128
Replacing supplies 3 Remove the new toner cartridge from its packing materials. 4 Turn the toner cartridge over so the handle is on top. 5 Vigorously shake the cartridge in all directions to distribute the toner. 114
Replacing supplies 3 Remove the new toner cartridge from its packing materials. 4 Turn the toner cartridge over so the handle is on top. 5 Vigorously shake the cartridge in all directions to distribute the toner. 114

