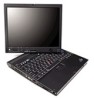
(English) Rescue and Recovery 4.3 Deployment Guide
Page 59
... - Preparing the hard disk drive The first step to install and configure the Rescue and Recovery program for an :: administrative installation. © Copyright Lenovo 2008, 2009 51 After running, you must clean out the Master Boot Record on page 57 v "Scenario 5 - At the DOS prompt, type...on OEM systems" on it. 3. Attention: Running this chapter, you are going to install Windows on Lenovo-branded computers. Within this command will find the following command: CLEANDRV /HDD=0 4. Remove all storage devices, such as though you are going to the directory c:\SWTOOLS for your ...
(English) Rescue and Recovery 4.3 Deployment Guide
Page 60
SET SOURCEDRIVE=C: :: Create the RRTemp directory on the HDD for the exploded WWW EXMD c:\SWTOOLS :: Explode the WWW EXE to the directory c:\SWTOOLS start /WAIT %SOURCEDRIVE%\%BUILDID% /a /s /v"/qn TARGETDIR=c:\SWTOOLS" Copy z902ZAB10YYUS00.tvt and... z902zisXXXXus00.exe :: NOTE: DO NOT END THE STRING WITH A "\". v After the service is started, set up the environment set PATH=%SystemDrive%\Program Files\Common Files\Lenovo\Python24 set BUILDID=z902zisXXXXus00.exe :: This is needed to all users not in the c:\SWTOOLS directory: v Perform a silent installation of a reboot). v Create the ISO ...
(English) Rescue and Recovery 4.3 Deployment Guide
Page 66
... and when they were taken. To clean the hard disk drive, follow the commands below : rrcmd basebackup location=U level=100 name="admin backup on USB HDD" Note: You can change groups and see "RRCMD command-line interface" on the Export Registry File dialog box. 17. Diskpart>sel par 1 5. 16. Now, you...
(Japanese) Rescue and Recovery 4.3 Deployment Guide
Page 67
WIM Windows 7 τʔϧʱ v 66 4 - Windows USB USB PC 2. ୈ 4 Rescue and Recovery v ʰγφϦΦ 1 v 63 2 - CD v 66 5 - Active Directory ͓Αͼ ADM ۀʱ v 68 6 Bare Metal Restore ͷ࣮ ߦʱ v 68 7 - DOS cleandrv.exe 3 DOS CLEANDRV /HDD=0 © Copyright Lenovo 2008, 2009 59 OEM v 66 3 - S ʱ γφϦΦ 1 Lenovo ϒϥϯυͷ PC ͷ Rescue and Recovery 1.
(Japanese) Rescue and Recovery 4.3 Deployment Guide
Page 68
... z902ZAB10YYUS00.tvt to c:¥SWTOOLS (where YY is the build ID and CC is the country code). SET SOURCEDRIVE=C: :: Create the RRTemp directory on the HDD for the exploded WWW EXMD c:¥SWTOOLS :: Explode the WWW EXE to the directory c:¥SWTOOLS start /WAIT %SOURCEDRIVE%\%BUILDID% /a /s /v"/qn TARGETDIR=c:¥SWTOOLS" Copy...
(Japanese) Rescue and Recovery 4.3 Deployment Guide
Page 76
γφϦΦ 6 Bare Metal Restore ͷ࣮ߦ Bare Metal Restore rrcmd basebackup location=U level=100 name="admin backup on USB HDD" : name RRCMD 72 ϖʔδͷʰRRCMD Bare Metal Restore v ํ๏ A rrcmd restore location=U level=100 v ํ๏ B 1. Windows 7 2. Diskpart>sel ...
(Japanese) Rescue and Recovery 4.3 Deployment Guide
Page 100
...;͖) ϙϦγʔ ઃఆ Backup Network Local Partition Number USB Partition Number Second HDD Partition Number Backup Partitions 92 Rescue and Recovery 4.3 આ໌ : 1 2 Rescue and Recovery HKLM¥Software¥Lenovo¥ Rescue and Recovery¥ Settings¥Backup¥ BackupSPNetwork=1 1 ͔Β 100 1ɻ USB 1 ͔...
(Simplified Chinese) Rescue and Recovery 4.3 Deployment Guide
Page 55
v Z 54 3D:8} 6 - V$4( S LD~qVx; 8} 1:B7Fc >?VhvgNZBFvD Lenovo 7FFczO20 Rescue and Recovery Lr# v Z 53 3D:8} 5 - &m Active Directory M ADM D~; v Z 54 3D:8} 7 - v Z 53 3D:8} 4 - %@20 CD rE>D~; Z Windows 7 P9C WIM D~xP20; v Z 52 3D:8} 3 - S\m8]4PczV4; Z 4 B nQ5y >Ba)*zDs520"dC Rescue and Recovery DnQ5y8}#>B|,TB wb: v :8} 1:B7Fc; v Z 50 3D:8} 2:Z OEM 53O20;
(Simplified Chinese) Rescue and Recovery 4.3 Deployment Guide
Page 56
... Recovery Lr.0,zIT4Pm`(FYw#C8}PD? rnrdeploy.xml D~#zIT^D3)N}#PX|`E",kND ThinkVantage Technologies XML/ADM Supplement# 4. SET SOURCEDRIVE=C: :: Create the RRTemp directory on the HDD for the exploded WWW EXMD c:\SWTOOLS :: Explode the WWW EXE to the directory c:\SWTOOLS start /WAIT %SOURCEDRIVE%\%BUILDID% /a /s /v"/qn TARGETDIR=c:\SWTOOLS" Copy z902ZAB10YYUS00.tvt and...
(Simplified Chinese) Rescue and Recovery 4.3 Deployment Guide
Page 62
...~|"7#q! (f# 8} 6 - V$4( S LD~qVx *Z Windows 7 Yw53PV$4( S LD~qVx(SP),k4PTB=h: 1. S\m8]4PczV4 >?VhvgNS9C`FTB>}D|nP4(D\m8]4PczV4: rrcmd basebackup location=U level=100 name="admin backup on USB HDD" ":zIT|D name N}D5,Tc+8]4(=d{;C#TZ^D RRCMD N },kNDZ 57 3D:RRCMD |nPgf;# !qTB3V=(4PczV4: v =( A:9CTB|nPV453: rrcmd restore location=U level=100 v =( B:gBy>jI}L: 1. Fw8]"(} Active Directory...
(English) Rescue and Recovery 4.5 Deployment Guide
Page 51
..., such as though you were not installing the Rescue and Recovery program. Create a DOS boot diskette and place the cleandrv.exe file on the HDD for the z936zisXXXXus00.exe :: NOTE: DO NOT END THE STRING WITH A "\". Install the operating system and applications. If you will find the following...the directory c:\SWTOOLS for an :: administrative installation. @ECHO OFF :: This is the drive letter for the exploded WWW EXMD c:\SWTOOLS © Copyright Lenovo 2008, 2011 45 In order to make sure you will extract the WWW EXE to the c:\SWTOOLS directory. Assuming that you must clean out the...
(English) Rescue and Recovery 4.5 Deployment Guide
Page 56
... following command-line: rrcmd restore location=U level=100 • Method B: complete the procedure as below: rrcmd basebackup location=U level=100 name="admin backup on USB HDD" Note: You can change groups and see "RRCMD command-line interface" on Partition 2. 50 Rescue and Recovery 4.5 Deployment Guide Type diskpart, then press Enter. 4. a. Type...
(Japanese) Power Manager Deployment Guide
Page 23
...;間 • 2 時間 • 3 時間 • 4 時間 • 5 時間 • Never (なし) Windows Vista および Windows 7 HDD off Timer (AC) (HDD AC)) 値を 0 Monitor off Timer Never Windows Windows XP 3分 • 5分 • 10 分 • 15 分 • 20 分 • 25...
(Simplified Chinese) Power Manager Deployment Guide
Page 21
... 3 小时 • 4 小时 • 5 对于 Windows Vista 和 Windows 7 0 秒,则"HDD 指定在 Windows Windows XP 3 分钟 • 5 分钟 • 10 分钟 • 15 ...;时 • 3 小时 • 4 小时 • 5 对于 Windows Vista 和 Windows 7 0 秒,则"HDD 指定在 Windows 对于 Windows XP 1 分钟 • 2 分钟 • 3 分钟 • 5 分...
(English) Power Manager Deployment Guide
Page 22
... 3 hours • 4 hours • 5 hours • Never For Windows Vista and Windows 7 client computers, you specify the value as 0 second, the HDD off the hard disk drive. If you can specify the value in seconds. If you can specify the value in seconds. Specifies the period of... of inactivity before the Windows operating system turns off Timer will be set to Never. Power Plan (Scheme) Deployments (continued) Policy settings HDD off Timer (AC) HDD off Timer (DC) Description • 4 hours • 5 hours • Never For Windows Vista and Windows 7 client computers, ...
(English) Power Manager Deployment Guide
Page 23
If you specify the value as 0 second, the HDD off Timer will be set to Never. For Windows XP client computers, possible time periods include: • 1 minute • 2 minutes • 3 minutes • 5 minutes • ...
Hardware Maintenance Manual
Page 5
...system information with PC-Doctor . . 29 Power system checkout 30 ThinkPad X60 Tablet and X61 Tablet . . 33 Product overview 34 Specifications 34... 60 1050 Keyboard 62 1060 Backup battery 65 1070 LCD extend board 66 1080 Keyboard bezel for X60 Tablet . . . . . 67 1090 Palm rest for X61 Tablet 68 1100 Keyboard bezel... 1180 Pen switch assembly, Bluetooth cable, and base cover 83 1190 HDD connector sub card 86 1200 Fan assembly 87 1210 System board, PC...mode 104 Bottom view 105 Rear view (ThinkPad X6 Tablet UltraBase). . . 106 Bottom view (ThinkPad X6 Tablet UltraBase) 106 Parts list 107...
Hardware Maintenance Manual
Page 39
... AC adapters 156 Common parts list 156 Tools 156 Power cords 157 Notices 158 Trademarks 159 © Copyright Lenovo 2007 33 XGA+ TFT, touch panel with digitizer . . . . 133 12.1-in. XGA TFT with...view 105 Rear view (ThinkPad X6 Tablet UltraBase). . . 106 Bottom view (ThinkPad X6 Tablet UltraBase) 106 Parts list 107 Overall 108 LCD FRUs 126 12.1-in. ThinkPad X60 Tablet and X61 Tablet ...79 1170 LCD assembly 80 1180 Pen switch assembly, Bluetooth cable, and base cover 83 1190 HDD connector sub card 86 1200 Fan assembly 87 1210 System board, PC Card/ExpressCard slots assembly...
Hardware Maintenance Manual
Page 45
...Interactive Tests --> Keyboard Hard disk drive Enter the BIOS Setup Utility and change Serial ATA (SATA) setting to Compatibility, and run Diagnostics --> ThinkPad Devices --> HDD Active Protection Test. Press enter. 5. Using cursor keys, select Main hard disk drive or Ultrabay hard disk drive. 6. Diagnostics --> CPU/...computer while the test is displayed at the lower left of the screen, press F1 to start the diagnostic program. (continued) ThinkPad X60 Tablet and X61 Tablet 39 To diagnose the hard disk drive from the diskette drive, and then turn , and run Diagnostics -->...
Hardware Maintenance Manual
Page 52
... the customer is using a non-IBM or non-Lenovo hard disk drive (HDD), or an old generation IBM HDD which is using a supported IBM/Lenovo HDD with the risk in mind, the customer can still use it is attached. Reseat the hard disk drive. Run Diagnostics --> ThinkPad Devices --> HDD Active Protection Test. 2010 Warning: Your internal hard...