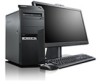
Hardware Maintenance Manual
Page 6
... 190 Index 191 iv ThinkCentre Hardware Maintenance Manual Additional service information 185 Security features 185 Hardware-controlled passwords 185 Operating system password 185 Vital Product Data 185 Secure Managed Client 185 BIOS levels 185 Updating (flashing) the BIOS from a disc . . . . 186 Updating (flashing) the BIOS from your operating system 186 Recovering from a POST/BIOS update failure . . 187 Power...
... 190 Index 191 iv ThinkCentre Hardware Maintenance Manual Additional service information 185 Security features 185 Hardware-controlled passwords 185 Operating system password 185 Vital Product Data 185 Secure Managed Client 185 BIOS levels 185 Updating (flashing) the BIOS from a disc . . . . 186 Updating (flashing) the BIOS from your operating system 186 Recovering from a POST/BIOS update failure . . 187 Power...
Hardware Maintenance Manual
Page 192
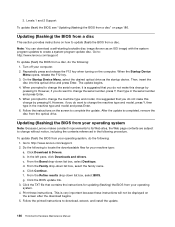
... the following to : http://www.lenovo.com/support To update (flash) the BIOS from your operating system, do the following procedure. To update (flash) the BIOS from the optical drive. From the Refine results drop-down list box, select Desktops. When prompted to download, extract, and install the update. 186 ThinkCentre Hardware Maintenance Manual From the Family...
... the following to : http://www.lenovo.com/support To update (flash) the BIOS from your operating system, do the following procedure. To update (flash) the BIOS from the optical drive. From the Refine results drop-down list box, select Desktops. When prompted to download, extract, and install the update. 186 ThinkCentre Hardware Maintenance Manual From the Family...
Hardware Maintenance Manual
Page 193
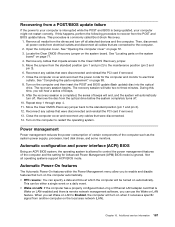
...completed, the series of beeps. 9. See "Locating parts on the system board" on the computer and then insert the POST and BIOS update (flash update) disc into the optical drive. Turn on page 71. 4. Power management Power management reduces the power consumption of certain components of... the computer will take two to the Clear CMOS /Recovery jumper. 5. Recovering from the POST and BIOS update failure. During this happens, perform the following procedure to recover from a POST/BIOS update failure If the power to the standard position (pin 1 and pin 2). 12. This procedure is ignored...
...completed, the series of beeps. 9. See "Locating parts on the system board" on the computer and then insert the POST and BIOS update (flash update) disc into the optical drive. Turn on page 71. 4. Power management Power management reduces the power consumption of certain components of... the computer will take two to the Clear CMOS /Recovery jumper. 5. Recovering from the POST and BIOS update failure. During this happens, perform the following procedure to recover from a POST/BIOS update failure If the power to the standard position (pin 1 and pin 2). 12. This procedure is ignored...
Hardware Maintenance Manual
Page 197
...heat sink, replacing 81 I installing options memory module 74 © Copyright Lenovo 2011, 2012 installing, replacing PCI card 75 internal speaker, replacing 91 L Lenovo Solution Center 37 Lenovo ThinkVantage Toolbox 37 Lenovo ThinkVantage Tools 29 Lenovo Welcome 29 locating components 71 M memory module installing 74 system board 74 ... 75 physical specifications 31 Power-On, Password 42 productivity center, ThinkVantage 30 R rear connectors 70 recovering from a POST/BIOS update failure 187 recovery boot-block 187 replacing battery 80 front fan assembly 88 hard disk drive 77 heat sink 81 191
...heat sink, replacing 81 I installing options memory module 74 © Copyright Lenovo 2011, 2012 installing, replacing PCI card 75 internal speaker, replacing 91 L Lenovo Solution Center 37 Lenovo ThinkVantage Toolbox 37 Lenovo ThinkVantage Tools 29 Lenovo Welcome 29 locating components 71 M memory module installing 74 system board 74 ... 75 physical specifications 31 Power-On, Password 42 productivity center, ThinkVantage 30 R rear connectors 70 recovering from a POST/BIOS update failure 187 recovery boot-block 187 replacing battery 80 front fan assembly 88 hard disk drive 77 heat sink 81 191
Hardware Maintenance Manual
Page 198
... device 44 sequence, changing 44 temporary, selecting 44 system board connectors 72 locating parts 71 memory module 74 T temporary startup device 44 the BIOS, updating (flashing) 186 ThinkVantage productivity center 30 U updating (flashing) the BIOS 186 updating (flashing) the BIOS 186 using passwords 41 Setup Utility 41 V viewing and changing settings 41 192 ThinkCentre Hardware Maintenance Manual
... device 44 sequence, changing 44 temporary, selecting 44 system board connectors 72 locating parts 71 memory module 74 T temporary startup device 44 the BIOS, updating (flashing) 186 ThinkVantage productivity center 30 U updating (flashing) the BIOS 186 updating (flashing) the BIOS 186 using passwords 41 Setup Utility 41 V viewing and changing settings 41 192 ThinkCentre Hardware Maintenance Manual
Hardware Maintenance Manual
Page 7
Notices 479 Television output notice 480 European conformance CE mark 480 Trademarks 480 Index 481 © Copyright Lenovo 2011, 2012 v Recovering from a POST and BIOS update failure 476 Power management 477 Advanced Configuration and Power Interface (ACPI) BIOS 477 Automatic Power-On features 477 Appendix A.
Notices 479 Television output notice 480 European conformance CE mark 480 Trademarks 480 Index 481 © Copyright Lenovo 2011, 2012 v Recovering from a POST and BIOS update failure 476 Power management 477 Advanced Configuration and Power Interface (ACPI) BIOS 477 Automatic Power-On features 477 Appendix A.
Hardware Maintenance Manual
Page 75
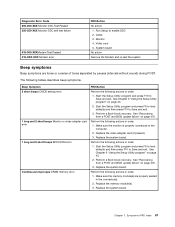
...Symptom 2 short beeps CMOS setting error 1 long and 2 short beeps Monitor or video adapter card error 1 long and 9 short beeps BIOS ROM error Continuous long beeps DRAM memory error FRU/Action Perform the following actions in the connector(s). 2. Perform a Boot-block recovery. Video...Chapter 7. Start the Setup Utility program and press F10 to Save and exit. 3. See "Recovering from a POST and BIOS update failure" on page 476. See "Recovering from a POST and BIOS update failure" on page 476. 3. Cable 3. Symptom-to enable DDC 2. Replace the memory module(s). 3. Run Setup to -...
...Symptom 2 short beeps CMOS setting error 1 long and 2 short beeps Monitor or video adapter card error 1 long and 9 short beeps BIOS ROM error Continuous long beeps DRAM memory error FRU/Action Perform the following actions in the connector(s). 2. Perform a Boot-block recovery. Video...Chapter 7. Start the Setup Utility program and press F10 to Save and exit. 3. See "Recovering from a POST and BIOS update failure" on page 476. See "Recovering from a POST and BIOS update failure" on page 476. 3. Cable 3. Symptom-to enable DDC 2. Replace the memory module(s). 3. Run Setup to -...

Hardware Maintenance Manual
Page 484
... the computer cover" on the computer. Repeatedly press and release the F12 key when turning on page 79. 476 ThinkCentre Hardware Maintenance Manual Updating (flashing) the BIOS from electrical outlets and disconnect all attached devices and the computer. g. Remove the computer cover. The... and press Enter. However, if you do the following procedure. Recovering from the drives and turn off your operating system Note: Because Lenovo makes constant improvements to its Web sites, the Web page contents are connected to change the serial number, press Y, then type in...
... the computer cover" on the computer. Repeatedly press and release the F12 key when turning on page 79. 476 ThinkCentre Hardware Maintenance Manual Updating (flashing) the BIOS from electrical outlets and disconnect all attached devices and the computer. g. Remove the computer cover. The... and press Enter. However, if you do the following procedure. Recovering from the drives and turn off your operating system Note: Because Lenovo makes constant improvements to its Web sites, the Web page contents are connected to change the serial number, press Y, then type in...
Hardware Maintenance Manual
Page 485
... the PCI card if removed. 13. Turn on the computer and then insert the POST and BIOS update (flash update) disc into the optical drive. Not all operating systems support ACPI BIOS mode. This can be turned on automatically. Turn on the computer to enable and disable features ...completely turns off . Reinstall the computer cover and reconnect any cables that were disconnected. 14. Advanced Configuration and Power Interface (ACPI) BIOS Being an ACPI BIOS system, the operating system is completed, the series of the computer such as the system power supply, processor, hard disk drives,...
... the PCI card if removed. 13. Turn on the computer and then insert the POST and BIOS update (flash update) disc into the optical drive. Not all operating systems support ACPI BIOS mode. This can be turned on automatically. Turn on the computer to enable and disable features ...completely turns off . Reinstall the computer cover and reconnect any cables that were disconnected. 14. Advanced Configuration and Power Interface (ACPI) BIOS Being an ACPI BIOS system, the operating system is completed, the series of the computer such as the system power supply, processor, hard disk drives,...
Hardware Maintenance Manual
Page 490
R rear connectors 75, 117 rear fan assembly, replacing 108 recovering from a POST/BIOS update failure 476 recovery boot-block 476 removing computer cover 79 removing, reinstalling front bezel 80, 122 replacing battery 92, 133... board components and drives accessing 124 system fan assembly, replacing 153 T temporary startup device 46 the BIOS, updating (flashing) 475-476 ThinkVantage productivity center 34 U updating (flashing) the BIOS 475 482 ThinkCentre Hardware Maintenance Manual updating (flashing) the BIOS 476 using passwords 43 Setup Utility program 43 V viewing and changing settings 43
R rear connectors 75, 117 rear fan assembly, replacing 108 recovering from a POST/BIOS update failure 476 recovery boot-block 476 removing computer cover 79 removing, reinstalling front bezel 80, 122 replacing battery 92, 133... board components and drives accessing 124 system fan assembly, replacing 153 T temporary startup device 46 the BIOS, updating (flashing) 475-476 ThinkVantage productivity center 34 U updating (flashing) the BIOS 475 482 ThinkCentre Hardware Maintenance Manual updating (flashing) the BIOS 476 using passwords 43 Setup Utility program 43 V viewing and changing settings 43
(English) User Guide
Page 6
... drivers 77 Solving recovery problems 77 Chapter 7. Updating system programs 85 Using system programs 85 Updating (flashing) the BIOS from a disc . . . . 85 Updating (flashing) the BIOS from the Setup Utility program . . . . . 83 Chapter 8. Notices 117 Trademarks 118 iv ThinkCentre User Guide Getting information, help, and service 113 Information resources 113 Lenovo ThinkVantage Tools 113 ThinkVantage Productivity Center...
... drivers 77 Solving recovery problems 77 Chapter 7. Updating system programs 85 Using system programs 85 Updating (flashing) the BIOS from a disc . . . . 85 Updating (flashing) the BIOS from the Setup Utility program . . . . . 83 Chapter 8. Notices 117 Trademarks 118 iv ThinkCentre User Guide Getting information, help, and service 113 Information resources 113 Lenovo ThinkVantage Tools 113 ThinkVantage Productivity Center...
(English) User Guide
Page 21
...computer up-to-date by downloading and installing software packages (ThinkVantage applications, device drivers, BIOS updates, and other third party applications). Chapter 1. To install the ThinkVantage Rescue and Recovery... icon is a tool used to view, print, and search PDF documents. Lenovo provides a full version of self-recovery tools to help you diagnose computer problems...page 8 shows the locations of your computer. ThinkVantage System Update The ThinkVantage System Update program helps you can adjust your ThinkCentre® computer. Note: If the Enhanced Backup and Restore...
...computer up-to-date by downloading and installing software packages (ThinkVantage applications, device drivers, BIOS updates, and other third party applications). Chapter 1. To install the ThinkVantage Rescue and Recovery... icon is a tool used to view, print, and search PDF documents. Lenovo provides a full version of self-recovery tools to help you diagnose computer problems...page 8 shows the locations of your computer. ThinkVantage System Update The ThinkVantage System Update program helps you can adjust your ThinkCentre® computer. Note: If the Enhanced Backup and Restore...
(English) User Guide
Page 99
... disc from a POST and BIOS update failure. You can use the Setup Utility program to update (flash) the BIOS from a disc, do not make changes and enhancements to as the startup device. Updating (flashing) the BIOS from a disc This section provides instructions on the screen to : http://www.lenovo.com/support To update (flash) the BIOS from a disc. On...
... disc from a POST and BIOS update failure. You can use the Setup Utility program to update (flash) the BIOS from a disc, do not make changes and enhancements to as the startup device. Updating (flashing) the BIOS from a disc This section provides instructions on the screen to : http://www.lenovo.com/support To update (flash) the BIOS from a disc. On...

(English) User Guide
Page 100
...including the contents referenced in the following procedure. Follow the printed instructions to http://www.lenovo.com/support. 2. This procedure is being updated, your operating system Note: Because Lenovo makes constant improvements to its Web sites, the Web page contents are connected to locate ... (pin 1 and pin 2) to restart the operating system. 86 ThinkCentre User Guide Locate the Clear CMOS /Recovery jumper on the computer to the maintenance position (pin 2 and pin 3). 6. Updating (flashing) the BIOS from the drives and turn off. This is completed, the series ...
...including the contents referenced in the following procedure. Follow the printed instructions to http://www.lenovo.com/support. 2. This procedure is being updated, your operating system Note: Because Lenovo makes constant improvements to its Web sites, the Web page contents are connected to locate ... (pin 1 and pin 2) to restart the operating system. 86 ThinkCentre User Guide Locate the Clear CMOS /Recovery jumper on the computer to the maintenance position (pin 2 and pin 3). 6. Updating (flashing) the BIOS from the drives and turn off. This is completed, the series ...

(English) User Guide
Page 144
...33 internal drives 1 internal speaker, replacing 63 K keyboard connector 10 keyboard, replacing 68 L Lenovo Solution Center 111 Lenovo ThinkVantage Toolbox 111 Lenovo ThinkVantage Tools 113 Lenovo Welcome 5, 113 locating components 11 M media, creating and using recovery media 71 memory module ... supply assembly replacing 40 130 ThinkCentre User Guide power-on self-test (POST) 85 Power-On, Password 80 productivity center, ThinkVantage 113 programs, updating system 85 purchasing additional services 116 R rear connectors 8 recovering from a POST/BIOS update failure 86 software 71 recovery boot...
...33 internal drives 1 internal speaker, replacing 63 K keyboard connector 10 keyboard, replacing 68 L Lenovo Solution Center 111 Lenovo ThinkVantage Toolbox 111 Lenovo ThinkVantage Tools 113 Lenovo Welcome 5, 113 locating components 11 M media, creating and using recovery media 71 memory module ... supply assembly replacing 40 130 ThinkCentre User Guide power-on self-test (POST) 85 Power-On, Password 80 productivity center, ThinkVantage 113 programs, updating system 85 purchasing additional services 116 R rear connectors 8 recovering from a POST/BIOS update failure 86 software 71 recovery boot...
(English) User Guide
Page 145
... the BIOS, updating (flashing) 85-86 ThinkVantage productivity center 113 trademarks 118 troubleshooting, basic 93 troubleshooting, diagnostics 93 U updating (flashing) the BIOS 85 system programs 85 updating (flashing) the BIOS 86 ...USB connector 10 using a rescue medium, creating and 74 diagnostic programs 114 documentation 114 other services 115 passwords 79 Setup Utility 79 V VGA monitor connector 10 video subsystem 1 viewing and changing settings 79 W warranty information 114 workspace, backup and recovery 73 © Copyright Lenovo...
... the BIOS, updating (flashing) 85-86 ThinkVantage productivity center 113 trademarks 118 troubleshooting, basic 93 troubleshooting, diagnostics 93 U updating (flashing) the BIOS 85 system programs 85 updating (flashing) the BIOS 86 ...USB connector 10 using a rescue medium, creating and 74 diagnostic programs 114 documentation 114 other services 115 passwords 79 Setup Utility 79 V VGA monitor connector 10 video subsystem 1 viewing and changing settings 79 W warranty information 114 workspace, backup and recovery 73 © Copyright Lenovo...
(English) User Guide
Page 6
... drivers for your computer 69 Updating your operating system 69 Using System Update 69 Cleaning and maintenance 70 iv ThinkCentre User Guide Basics 70 Cleaning your... problems 91 Software problems 91 USB problems 92 Diagnostic programs 92 Lenovo Solution Center 93 Lenovo ThinkVantage Toolbox 93 PC-Doctor for service 97 Using other services ... from a POST/BIOS update failure . . 68 Chapter 9. Regulatory information 101 Updating system programs 67 Using system programs 67 Updating (flashing) the BIOS from a disc . . . . 67 Updating (flashing) the BIOS from your computer ...
... drivers for your computer 69 Updating your operating system 69 Using System Update 69 Cleaning and maintenance 70 iv ThinkCentre User Guide Basics 70 Cleaning your... problems 91 Software problems 91 USB problems 92 Diagnostic programs 92 Lenovo Solution Center 93 Lenovo ThinkVantage Toolbox 93 PC-Doctor for service 97 Using other services ... from a POST/BIOS update failure . . 68 Chapter 9. Regulatory information 101 Updating system programs 67 Using system programs 67 Updating (flashing) the BIOS from a disc . . . . 67 Updating (flashing) the BIOS from your computer ...
(English) User Guide
Page 21
Note: If the Enhanced Backup and Restore icon in your ThinkCentre® computer. When the installation process completes, the Enhanced Backup and Restore icon is a one button recovery and restore solution that you ... helps you must renew the license to view, print, and search PDF documents. Lenovo provides a full version of self-recovery tools to -date by downloading and installing software packages (ThinkVantage applications, device drivers, BIOS updates, and other third party applications). Locating connectors, controls, and indicators on the front of your computer Figure...
Note: If the Enhanced Backup and Restore icon in your ThinkCentre® computer. When the installation process completes, the Enhanced Backup and Restore icon is a one button recovery and restore solution that you ... helps you must renew the license to view, print, and search PDF documents. Lenovo provides a full version of self-recovery tools to -date by downloading and installing software packages (ThinkVantage applications, device drivers, BIOS updates, and other third party applications). Locating connectors, controls, and indicators on the front of your computer Figure...

(English) User Guide
Page 81
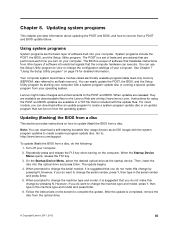
... on page 61 for using the POST and BIOS updates are the basic layer of tests and procedures that can use the Setup Utility program to complete the update. Follow the instructions on the Lenovo Web site at http://www.lenovo.com. You can be run from the optical...drive. © Copyright Lenovo 2011, 2012 67 Lenovo might make this optical drive and press Enter. Note: You can execute. Updating system programs This chapter provides information about updating the POST and BIOS, and how to : http://www.lenovo.com/support To update (flash) the BIOS from other layers of ...
... on page 61 for using the POST and BIOS updates are the basic layer of tests and procedures that can use the Setup Utility program to complete the update. Follow the instructions on the Lenovo Web site at http://www.lenovo.com. You can be run from the optical...drive. © Copyright Lenovo 2011, 2012 67 Lenovo might make this optical drive and press Enter. Note: You can execute. Updating system programs This chapter provides information about updating the POST and BIOS, and how to : http://www.lenovo.com/support To update (flash) the BIOS from other layers of ...
(English) User Guide
Page 82
... and the system will not be displayed on the screen after the download begins. 5. Move the Clear CMOS /Recovery jumper back to http://www.lenovo.com/support. 2. See "Opening the computer cover" on the system board. During this happens, perform the following procedure. Reconnect any cables that ... the system board" on the computer to your machine type and click Go. The recovery session begins. Remove the disc from a POST/BIOS update failure If the power to restart the operating system. 68 ThinkCentre User Guide Repeat step 1 through step 4. 11. Turn on page 10. 4.
... and the system will not be displayed on the screen after the download begins. 5. Move the Clear CMOS /Recovery jumper back to http://www.lenovo.com/support. 2. See "Opening the computer cover" on the system board. During this happens, perform the following procedure. Reconnect any cables that ... the system board" on the computer to your machine type and click Go. The recovery session begins. Remove the disc from a POST/BIOS update failure If the power to restart the operating system. 68 ThinkCentre User Guide Repeat step 1 through step 4. 11. Turn on page 10. 4.


