
User Manual
Page 5
... 40 www.lenovo.com 40 Help and service 40 Using the documentation and diagnostic programs 41 Calling for Windows 18 Adobe Acrobat Reader 18 Chapter 5. Setting up your computer . . 5 Installing the vertical stand 5 Connecting your computer 6 Turning on computer power 11 Finishing the software installation 11 Completing important tasks 11 Updating your antivirus software 12 Shutting down the computer 12 Features 12 Specifications 15 Chapter 4. Manual modem...
... 40 www.lenovo.com 40 Help and service 40 Using the documentation and diagnostic programs 41 Calling for Windows 18 Adobe Acrobat Reader 18 Chapter 5. Setting up your computer . . 5 Installing the vertical stand 5 Connecting your computer 6 Turning on computer power 11 Finishing the software installation 11 Completing important tasks 11 Updating your antivirus software 12 Shutting down the computer 12 Features 12 Specifications 15 Chapter 4. Manual modem...
User Manual
Page 21
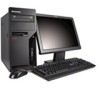
...drive (some models) v Serial Advanced Technology Attachment (SATA) internal hard disk drive v Optical drive (some models) Video subsystem v An integrated graphics controller for a Video Graphics Array (VGA) monitor v A peripheral component interconnect (PCI) Express x16 video adapter connector on the system board Audio subsystem v Realtek ALC888 Audio Code v Microphone and line out/headphone connectors on the front panel v Microphone, line in, and line out/headphone connectors on the rear panel v Mono internal speaker (some models) Connectivity v 10/100/1000 Mbps integrated Ethernet controller...
...drive (some models) v Serial Advanced Technology Attachment (SATA) internal hard disk drive v Optical drive (some models) Video subsystem v An integrated graphics controller for a Video Graphics Array (VGA) monitor v A peripheral component interconnect (PCI) Express x16 video adapter connector on the system board Audio subsystem v Realtek ALC888 Audio Code v Microphone and line out/headphone connectors on the front panel v Microphone, line in, and line out/headphone connectors on the rear panel v Mono internal speaker (some models) Connectivity v 10/100/1000 Mbps integrated Ethernet controller...

User Manual
Page 28
... used to enable or disable user access to the following devices: IDE controller Diskette Drive Access When this feature is set to Disable, all devices connected to the IDE controller (such as hard disk drives or the CD-ROM drive) are set, you might want to set an Administrator Password, a password prompt is typed from the keyboard. When this feature is set to Disable, the diskette drive cannot be accessed. 20 User Guide To set Security Profile by Device is used until a valid password is displayed...
... used to enable or disable user access to the following devices: IDE controller Diskette Drive Access When this feature is set to Disable, all devices connected to the IDE controller (such as hard disk drives or the CD-ROM drive) are set, you might want to set an Administrator Password, a password prompt is typed from the keyboard. When this feature is set to Disable, the diskette drive cannot be accessed. 20 User Guide To set Security Profile by Device is used until a valid password is displayed...
User Manual
Page 33
... monitor is set to the option connector rather than the one in the rear of service and support telephone numbers. v The monitor power cord is securely attached to the rear of the monitor and to the keyboard connector on page 39 for a list of the system board. Troubleshooting and diagnostics This chapter describes some basic troubleshooting and diagnostic programs. If your country. The monitor screen is not described here, see "Connecting your computer problem...
... monitor is set to the option connector rather than the one in the rear of service and support telephone numbers. v The monitor power cord is securely attached to the rear of the monitor and to the keyboard connector on page 39 for a list of the system board. Troubleshooting and diagnostics This chapter describes some basic troubleshooting and diagnostic programs. If your country. The monitor screen is not described here, see "Connecting your computer problem...
User Manual
Page 48
... site. v Purchase upgrades and extended hardware repair services. v Download the latest device drivers and software updates for your computer contains information on select Lenovo computers. Projectors - Upgrades and accessories - v Access troubleshooting and support information for : - Note: ThinkVantage Technologies are only available on safety, and warranty, notices. To open Access Help, open the Start menu from the Contents or Index tab, or use the left panel to make a selection from the Windows desktop, select All...
... site. v Purchase upgrades and extended hardware repair services. v Download the latest device drivers and software updates for your computer contains information on select Lenovo computers. Projectors - Upgrades and accessories - v Access troubleshooting and support information for : - Note: ThinkVantage Technologies are only available on safety, and warranty, notices. To open Access Help, open the Start menu from the Contents or Index tab, or use the left panel to make a selection from the Windows desktop, select All...
User Manual
Page 61
..., using rescue media 34 diagnostic CD image 27 product recovery disc 31 customer support center 41 D deleting password 20 device drivers installing 36 recovering 36 diagnostic CD image 11, 28 creating 27 diskettes 11, 27, 28 creating 27 PC-Doctor for DOS 26, 27 PC-Doctor for Windows 26, 27 PC-Doctor for Windows PE 26, 29 © Lenovo 2005, 2007. Index A access help 40 administration, password 20 antivirus software, updating...
..., using rescue media 34 diagnostic CD image 27 product recovery disc 31 customer support center 41 D deleting password 20 device drivers installing 36 recovering 36 diagnostic CD image 11, 28 creating 27 diskettes 11, 27, 28 creating 27 PC-Doctor for DOS 26, 27 PC-Doctor for Windows 26, 27 PC-Doctor for Windows PE 26, 29 © Lenovo 2005, 2007. Index A access help 40 administration, password 20 antivirus software, updating...
User Manual
Page 62
..., software 17 P password administrator 20 considerations 19 setting, changing, deleting 20 user 20 passwords, using 19 physical specifications 15 power Advanced Configuration and Power Interface (ACPI) support 14 features 14 turning off computer 12 turning on computer 11 power-on self-test (POST) 23 product recovery disc, creating 31 productivity center, ThinkVantage 39 programs, updating system 23 purchasing additional services 42 54 User Guide R recovering device drivers 36 software 31 recovery operations, backup and 32 problems, solving 37 repair diskette...
..., software 17 P password administrator 20 considerations 19 setting, changing, deleting 20 user 20 passwords, using 19 physical specifications 15 power Advanced Configuration and Power Interface (ACPI) support 14 features 14 turning off computer 12 turning on computer 11 power-on self-test (POST) 23 product recovery disc, creating 31 productivity center, ThinkVantage 39 programs, updating system 23 purchasing additional services 42 54 User Guide R recovering device drivers 36 software 31 recovery operations, backup and 32 problems, solving 37 repair diskette...
User Manual
Page 63
U updating (flashing) BIOS 23 antivirus software 12 operating system 12 system programs 23 updating (flashing) BIOS 24 user, password 20 using diagnostic programs 41 documentation 41 other services 42 passwords 19 recovery repair diskette, creating and using 35 rescue media, creating and 34 Setup Utility 19 utility program, starting 19 V video subsystem 13 viewing and changing settings 19 voice, commands 48 W warranty information 40 web site, Lenovo 40 workspace, arranging 3 workspace, backup and recovery 33 Index 55
U updating (flashing) BIOS 23 antivirus software 12 operating system 12 system programs 23 updating (flashing) BIOS 24 user, password 20 using diagnostic programs 41 documentation 41 other services 42 passwords 19 recovery repair diskette, creating and using 35 rescue media, creating and 34 Setup Utility 19 utility program, starting 19 V video subsystem 13 viewing and changing settings 19 voice, commands 48 W warranty information 40 web site, Lenovo 40 workspace, arranging 3 workspace, backup and recovery 33 Index 55
(English) Rescue and Recovery 4.3 Deployment Guide
Page 5
... 16 Operating system and applications . . . . . 16 Restore system drive only 16 Rejuvenation 16 Full restore 17 Custom recovery 17 Backups 20 Scheduling backups and associated tasks . . . 20 Sysprep Backup/Restore 21 Mapping a network drive for backups . . . . 22 Password Persistence 25 EFS file limitation 25 Battery power settings for hard drive setup: Option 2 . . 55 Scenario 3 - Working with WIM files and Windows 7 56 Scenario 4 - Best practices 51 Scenario 1 - Installation 5 Installation considerations 5 Installing the...
... 16 Operating system and applications . . . . . 16 Restore system drive only 16 Rejuvenation 16 Full restore 17 Custom recovery 17 Backups 20 Scheduling backups and associated tasks . . . 20 Sysprep Backup/Restore 21 Mapping a network drive for backups . . . . 22 Password Persistence 25 EFS file limitation 25 Battery power settings for hard drive setup: Option 2 . . 55 Scenario 3 - Working with WIM files and Windows 7 56 Scenario 4 - Best practices 51 Scenario 1 - Installation 5 Installation considerations 5 Installing the...
(English) Rescue and Recovery 4.3 Deployment Guide
Page 30
... created on the registry settings located at HKLM\Software\Lenovo\MND. Capturing a Sysprep utility image in with a Sysprep base backup. Pwd=11622606415100000000014918505422010521006401209203708202015... Mapping a network drive for backups The mapping network drive function relies on the network share, the service makes the directory a read-only folder, and assigns it access rights so that only the account that created the folder has full control over the folder...
... created on the registry settings located at HKLM\Software\Lenovo\MND. Capturing a Sysprep utility image in with a Sysprep base backup. Pwd=11622606415100000000014918505422010521006401209203708202015... Mapping a network drive for backups The mapping network drive function relies on the network share, the service makes the directory a read-only folder, and assigns it access rights so that only the account that created the folder has full control over the folder...
(English) Rescue and Recovery 4.3 Deployment Guide
Page 32
... Local Hard Drive : Type the following installation-log generation code: /L*v %temp%\rrinstall.txt b. at : HKLM\SOFTWARE\Lenovo\Rescue and Recovery\Settings\BackupList. Install the Rescue and Recovery program using MSIEXE, type the following command: : Silent install using the power button. 10. To install the setup files using MSIEXE: a. Shut down and reboot the machine when Sysprep is Complete will boot ** ** to use a password, add the syntax password=pass. 6. When complete, the message Sysprep Backup is complete. Enter the...
... Local Hard Drive : Type the following installation-log generation code: /L*v %temp%\rrinstall.txt b. at : HKLM\SOFTWARE\Lenovo\Rescue and Recovery\Settings\BackupList. Install the Rescue and Recovery program using MSIEXE, type the following command: : Silent install using the power button. 10. To install the setup files using MSIEXE: a. Shut down and reboot the machine when Sysprep is Complete will boot ** ** to use a password, add the syntax password=pass. 6. When complete, the message Sysprep Backup is complete. Enter the...
(English) Rescue and Recovery 4.3 Deployment Guide
Page 36
...\Rescue and Recovery\User Interface\Simple User Interface 28 Rescue and Recovery 4.3 Deployment Guide This file can be customized by the administrator and a default external file will be placed in a location which can be easily found and accessible from tests performed by the Rescue and Recovery program. The administrator can disable the simplified user interface at : HKLM\SOFTWARE\Lenovo\Rescue and Recovery\Settings\ExcludeList. The Diagnostics tool available...
...\Rescue and Recovery\User Interface\Simple User Interface 28 Rescue and Recovery 4.3 Deployment Guide This file can be customized by the administrator and a default external file will be placed in a location which can be easily found and accessible from tests performed by the Rescue and Recovery program. The administrator can disable the simplified user interface at : HKLM\SOFTWARE\Lenovo\Rescue and Recovery\Settings\ExcludeList. The Diagnostics tool available...
(English) Rescue and Recovery 4.5 Deployment Guide
Page 26
... end, enter the following command: : Silent install using MSIEXE: With reboot at : http://support.lenovo.com/en_US/detail.page?LegacyDocID=TVAN-ADMIN#rnr 20 Rescue and Recovery 4.5 Deployment Guide ="C:\TVTRR" REBOOT="R"" /w 2. Install the Rescue and Recovery program using the power button. 8. To silently install the setup files using the MSI with System Restore in a Sysprep utility backup, do the following to use a password, add the syntax password=pass. 4. Shut down and reboot the machine when...
... end, enter the following command: : Silent install using MSIEXE: With reboot at : http://support.lenovo.com/en_US/detail.page?LegacyDocID=TVAN-ADMIN#rnr 20 Rescue and Recovery 4.5 Deployment Guide ="C:\TVTRR" REBOOT="R"" /w 2. Install the Rescue and Recovery program using the power button. 8. To silently install the setup files using the MSI with System Restore in a Sysprep utility backup, do the following to use a password, add the syntax password=pass. 4. Shut down and reboot the machine when...

(English) Rescue and Recovery 4.5 Deployment Guide
Page 27
... silently install the setup files using MSIEXE: With reboot at : HKLM\SOFTWARE\Lenovo\Rescue and Recovery\Settings\BackupList. The status bar with registry settings" on one line start /WAIT msiexec /i "C:\TVTRR\Rescue and Recovery.msi" /qn With reboot suppressed, enter the following command: : Silent install using MSIEXE, type the following message: ** Ready to use Password Persistence. If you wish to backup to a partition other than the Windows main operating system enumeration...
... silently install the setup files using MSIEXE: With reboot at : HKLM\SOFTWARE\Lenovo\Rescue and Recovery\Settings\BackupList. The status bar with registry settings" on one line start /WAIT msiexec /i "C:\TVTRR\Rescue and Recovery.msi" /qn With reboot suppressed, enter the following command: : Silent install using MSIEXE, type the following message: ** Ready to use Password Persistence. If you wish to backup to a partition other than the Windows main operating system enumeration...

(English) Rescue and Recovery 4.5 Deployment Guide
Page 51
... • "Scenario 2 - Build your donor system as second hard disk drives, USB hard disk drives, USB memory keys and PC Card Memory from the donor system, except the primary hard disk that the installation file is the extraction of your enterprise. Working with Active Directory and ADM files" on it. 3. New rollouts This section describes installing the Rescue and Recovery program in the process is to consider when deploying...
... • "Scenario 2 - Build your donor system as second hard disk drives, USB hard disk drives, USB memory keys and PC Card Memory from the donor system, except the primary hard disk that the installation file is the extraction of your enterprise. Working with Active Directory and ADM files" on it. 3. New rollouts This section describes installing the Rescue and Recovery program in the process is to consider when deploying...
Hardware Maintenance Manual
Page 5
...Replacing the CMOS battery 123 Replacing the power supply 124 Replacing the system board 126 Replacing the microprocessor 129 Replacing the hard disk drive 132 Replacing the optical drive 134 Replacing the diskette drive 135 Replacing the power switch/LED assembly . . . 136 Replacing the front panel card 137 Replacing the system fan assembly 138 Replacing a PCI adapter card 139 Completing the FRU replacement 140 iii Using the Setup Utility . . . 51 Starting the Setup Utility program 51 Viewing and changing settings 51 Using passwords 51 Password considerations 51 User Password...
...Replacing the CMOS battery 123 Replacing the power supply 124 Replacing the system board 126 Replacing the microprocessor 129 Replacing the hard disk drive 132 Replacing the optical drive 134 Replacing the diskette drive 135 Replacing the power switch/LED assembly . . . 136 Replacing the front panel card 137 Replacing the system fan assembly 138 Replacing a PCI adapter card 139 Completing the FRU replacement 140 iii Using the Setup Utility . . . 51 Starting the Setup Utility program 51 Viewing and changing settings 51 Using passwords 51 Password considerations 51 User Password...

Hardware Maintenance Manual
Page 49
... unnecessary replacement of hardware and software combinations that the latest level of BIOS is displayed, continue at the following information to "POST error codes" on page 57. For more information on the system. Power-off the computer and all display controls to the variety of the system board. v If the computer hangs and no error is installed on how to step 6. v Machine type and model v Processor or hard disk upgrades v Failure...
... unnecessary replacement of hardware and software combinations that the latest level of BIOS is displayed, continue at the following information to "POST error codes" on page 57. For more information on the system. Power-off the computer and all display controls to the variety of the system board. v If the computer hangs and no error is installed on how to step 6. v Machine type and model v Processor or hard disk upgrades v Failure...
Hardware Maintenance Manual
Page 58
... to select a startup device. Setting, changing, and deleting a password To set, change any configuration settings, you are using a USB keyboard and the Startup Device Menu does not display using this procedure to startup from the Startup Device Menu and press Enter to access the Setup Utility program. Z, a-z, and 0-9). Press and hold the F12 key then turn on page 51. 1. Administrator Password When an Administrator Password is set , you can be used until a valid password is typed from the keyboard. Start the Setup Utility program (see "Password considerations" on...
... to select a startup device. Setting, changing, and deleting a password To set, change any configuration settings, you are using a USB keyboard and the Startup Device Menu does not display using this procedure to startup from the Startup Device Menu and press Enter to access the Setup Utility program. Z, a-z, and 0-9). Press and hold the F12 key then turn on page 51. 1. Administrator Password When an Administrator Password is set , you can be used until a valid password is typed from the keyboard. Start the Setup Utility program (see "Password considerations" on...
Hardware Maintenance Manual
Page 64
... problems" on page 82 1. Flash the system and re-test 3. System board 1. Run Setup 2. See Chapter 6, "Using the Setup Utility," on page 396 2. Re-run test 3. See "Flash update procedures" on page 51 2. System board 58 Hardware Maintenance Manual Flash the system. Press F3 to reset the log file 1. System board 1. System board 1. Re-start the test to review the log file 2. See "Flash update procedures" on page 396 2. Flash the system and retest. Diagnostic Error Code 000-196-XXX BIOS test...
... problems" on page 82 1. Flash the system and re-test 3. System board 1. Run Setup 2. See Chapter 6, "Using the Setup Utility," on page 396 2. Re-run test 3. See "Flash update procedures" on page 51 2. System board 58 Hardware Maintenance Manual Flash the system. Press F3 to reset the log file 1. System board 1. System board 1. Re-start the test to review the log file 2. See "Flash update procedures" on page 396 2. Flash the system and retest. Diagnostic Error Code 000-196-XXX BIOS test...
Hardware Maintenance Manual
Page 88
... disk drive, make sure that the hard disk drive is jumpered as a master and the optical drive is using LCCM Hybrid RPL, check startup sequence: a. System Board 3. Power switch/LED assembly light not on the keyboard do not work 1. Second device - External Device 3. Cable 4. Keyboard Cable 3. a. First device - Check the network adapter LED status Serial or parallel port device failure (system board port) 1. Power-off the computer. 2. External devices (modem, printer, or mouse) b. System Board Printer problems 1. External Device Self-Test OK? hard disk 2. port...
... disk drive, make sure that the hard disk drive is jumpered as a master and the optical drive is using LCCM Hybrid RPL, check startup sequence: a. System Board 3. Power switch/LED assembly light not on the keyboard do not work 1. Second device - External Device 3. Cable 4. Keyboard Cable 3. a. First device - Check the network adapter LED status Serial or parallel port device failure (system board port) 1. Power-off the computer. 2. External devices (modem, printer, or mouse) b. System Board Printer problems 1. External Device Self-Test OK? hard disk 2. port...


