
Lenovo S310 All-In-One Hardware Maintenance Manual
Page 5
... and changing settings 51 Using passwords 51 Password considerations 51 Power-On Password 52 Hard Disk Password 52 Administrator Password 52 © Copyright Lenovo 2013 Setting, changing, and deleting a password . 52 Enabling or disabling a device 52 Selecting a startup device 53 Selecting a temporary ...the microprocessor fan 100 Replacing the heat sink assembly 101 Replacing the microprocessor 102 Replacing the card reader 105 Opening the system board shield window . . . . 106 Replacing the battery 107 Installing or replacing a memory module . . . . 108 Replacing the internal ...
... and changing settings 51 Using passwords 51 Password considerations 51 Power-On Password 52 Hard Disk Password 52 Administrator Password 52 © Copyright Lenovo 2013 Setting, changing, and deleting a password . 52 Enabling or disabling a device 52 Selecting a startup device 53 Selecting a temporary ...the microprocessor fan 100 Replacing the heat sink assembly 101 Replacing the microprocessor 102 Replacing the card reader 105 Opening the system board shield window . . . . 106 Replacing the battery 107 Installing or replacing a memory module . . . . 108 Replacing the internal ...

Lenovo S310 All-In-One Hardware Maintenance Manual
Page 40
...diagnostic programs do not solve the problem or have adverse affects. For more information. 34 Lenovo S310 All-In-OneHardware Maintenance Manual Try using a previously captured configuration to your Windows Help and Support information system for the type of your computer: 1. See "Additional ... with the next step. 7. Run the diagnostic programs. • If the diagnostic programs detect a hardware failure, contact the Lenovo Customer Support Center. See "Additional information resources" on page 29 for diagnosing problems you are unable to hardware or software settings ...
...diagnostic programs do not solve the problem or have adverse affects. For more information. 34 Lenovo S310 All-In-OneHardware Maintenance Manual Try using a previously captured configuration to your Windows Help and Support information system for the type of your computer: 1. See "Additional ... with the next step. 7. Run the diagnostic programs. • If the diagnostic programs detect a hardware failure, contact the Lenovo Customer Support Center. See "Additional information resources" on page 29 for diagnosing problems you are unable to hardware or software settings ...

Lenovo S310 All-In-One Hardware Maintenance Manual
Page 41
...are not checked and none of the volume settings is operating correctly. 3. For your safety, do the following list: • "No audio in Windows" on page 35 • "An audio disc or AutoPlay-enabled disc does not automatically play when it is inserted into a drive" on page ... or new software installed, do not operate the computer with the cover removed. 2. Reinstall the new hardware option or software. A master volume-control window opens. Select the problem your computer is experiencing from the following list: • "Audio problems" on page 35 • "CD problems" on...
...are not checked and none of the volume settings is operating correctly. 3. For your safety, do the following list: • "No audio in Windows" on page 35 • "An audio disc or AutoPlay-enabled disc does not automatically play when it is inserted into a drive" on page ... or new software installed, do not operate the computer with the cover removed. 2. Reinstall the new hardware option or software. A master volume-control window opens. Select the problem your computer is experiencing from the following list: • "Audio problems" on page 35 • "CD problems" on...

Lenovo S310 All-In-One Hardware Maintenance Manual
Page 42
... system board is securely connected. • Double-click the speaker icon in one external speaker only. A master volume-control window opens. Have the speaker serviced. Refer to the right speaker is disabled; Sound comes from one external speaker only Symptom: ...actions do not correct the problem, run in the Microsoft Windows operating system. If you need technical assistance, see "Additional information resources" on page 37 36 Lenovo S310 All-In-OneHardware Maintenance Manual See Microsoft Windows help system for use SoundBlaster Pro or SoundBlaster emulation. •...
... system board is securely connected. • Double-click the speaker icon in one external speaker only. A master volume-control window opens. Have the speaker serviced. Refer to the right speaker is disabled; Sound comes from one external speaker only Symptom: ...actions do not correct the problem, run in the Microsoft Windows operating system. If you need technical assistance, see "Additional information resources" on page 37 36 Lenovo S310 All-In-OneHardware Maintenance Manual See Microsoft Windows help system for use SoundBlaster Pro or SoundBlaster emulation. •...

Lenovo S310 All-In-One Hardware Maintenance Manual
Page 43
... Select your symptom from the following list: • "Black screen instead of data. • Verify that the power cable and signal cable are using the Windows 7 operating system, follow the action for "A CD or DVD does not work . Make sure that the disc you cannot read from the center to the...
... Select your symptom from the following list: • "Black screen instead of data. • Verify that the power cable and signal cable are using the Windows 7 operating system, follow the action for "A CD or DVD does not work . Make sure that the disc you cannot read from the center to the...

Lenovo S310 All-In-One Hardware Maintenance Manual
Page 45
... resources" on page 29. The USB Enhanced Performance Keyboard Customization program starts. Use the help diagnose problems with the Rapid Access buttons. • On the Windows 7 operating system, do the following list: • "All or some keys on the keyboard do not work" on page 39 • "The mouse or pointing...
... resources" on page 29. The USB Enhanced Performance Keyboard Customization program starts. Use the help diagnose problems with the Rapid Access buttons. • On the Windows 7 operating system, do the following list: • "All or some keys on the keyboard do not work" on page 39 • "The mouse or pointing...

Lenovo S310 All-In-One Hardware Maintenance Manual
Page 48
... page 44 • "Bluetooth problems" on page 44 Ethernet problems For Ethernet problems, select your operating system Control Panel: On the Windows 7 operating system, click Start ➙ Control Panel ➙ Hardware and Sound ➙ Adjust screen resolution ➙ Advanced Settings. ...Turn on might be affected by interference from the following list: • "Your computer cannot connect to the network. 42 Lenovo S310 All-In-OneHardware Maintenance Manual Magnetic fields around other devices, such as transformers, appliances, fluorescent lights, and other monitors might ...
... page 44 • "Bluetooth problems" on page 44 Ethernet problems For Ethernet problems, select your operating system Control Panel: On the Windows 7 operating system, click Start ➙ Control Panel ➙ Hardware and Sound ➙ Adjust screen resolution ➙ Advanced Settings. ...Turn on might be affected by interference from the following list: • "Your computer cannot connect to the network. 42 Lenovo S310 All-In-OneHardware Maintenance Manual Magnetic fields around other devices, such as transformers, appliances, fluorescent lights, and other monitors might ...
Lenovo S310 All-In-One Hardware Maintenance Manual
Page 49
Actions: Make sure that: • The cable is installed properly. • You are prompted for the necessary settings. On the Windows 7 operating system, do the following: 1. Click Start ➙ Control Panel. 2. If an exclamation mark is displayed next to a 1000 BASE-T hub/switch (not 1000 BASE-X). ...
Actions: Make sure that: • The cable is installed properly. • You are prompted for the necessary settings. On the Windows 7 operating system, do the following: 1. Click Start ➙ Control Panel. 2. If an exclamation mark is displayed next to a 1000 BASE-T hub/switch (not 1000 BASE-X). ...

Lenovo S310 All-In-One Hardware Maintenance Manual
Page 50
...29 for example, Windows Media Player). 2. Instead, it cannot connect to the network at 100 Mbps Symptom: If your computer is displayed. Use Access Connections to remove the unauthorized WAN card. Click Hardware and Sound ➙ Sound . 44 Lenovo S310 All-In-OneHardware ...wireless networking card. Bluetooth problems Bluetooth is plugged in the Windows notification area. A wireless WAN problem Message: Unauthorized WAN card is available with the Windows 7 operating system, click Show hidden icons in the Windows notification area. For Bluetooth problems, select your symptom from ...
...29 for example, Windows Media Player). 2. Instead, it cannot connect to the network at 100 Mbps Symptom: If your computer is displayed. Use Access Connections to remove the unauthorized WAN card. Click Hardware and Sound ➙ Sound . 44 Lenovo S310 All-In-OneHardware ...wireless networking card. Bluetooth problems Bluetooth is plugged in the Windows notification area. A wireless WAN problem Message: Unauthorized WAN card is available with the Windows 7 operating system, click Show hidden icons in the Windows notification area. For Bluetooth problems, select your symptom from ...
Lenovo S310 All-In-One Hardware Maintenance Manual
Page 51
... PIM items in XML format, but most Bluetooth-enabled devices handle PIM items in each adapter. See the documentation supplied with Lenovo hardware options that all external SCSI options are using Headset profile, select Bluetooth Hands-free Audio and click the Set Default button...are using AV profile, select Stereo Audio and click the Set Default button. 6. If you need technical assistance, see your symptom from the Windows 7 operating system system might be turned on before the computer is an adapter, you are connected correctly. - Troubleshooting and diagnostics 45 4. ...
... PIM items in XML format, but most Bluetooth-enabled devices handle PIM items in each adapter. See the documentation supplied with Lenovo hardware options that all external SCSI options are using Headset profile, select Bluetooth Hands-free Audio and click the Set Default button...are using AV profile, select Stereo Audio and click the Set Default button. 6. If you need technical assistance, see your symptom from the Windows 7 operating system system might be turned on before the computer is an adapter, you are connected correctly. - Troubleshooting and diagnostics 45 4. ...

Lenovo S310 All-In-One Hardware Maintenance Manual
Page 52
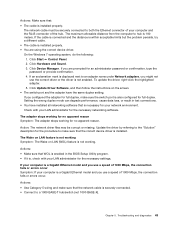
...you want to remove. Right-click your C drive entry and then click Properties. 3. Click Programs. 3. Click Uninstall/Change. 46 Lenovo S310 All-In-OneHardware Maintenance Manual To check the amount of fragmented files" on page 47 Make a selection from the above list to...10137; Computer. 2. If these actions do the following : - 1. Click Start ➙ Computer. 2. Click Disk Cleanup. 4. Follow the instructions on the Windows 7 operating system, do not correct the problem, run the diagnostic programs. If you want to delete, and then click OK. - 1. A list of ...
...you want to remove. Right-click your C drive entry and then click Properties. 3. Click Programs. 3. Click Uninstall/Change. 46 Lenovo S310 All-In-OneHardware Maintenance Manual To check the amount of fragmented files" on page 47 Make a selection from the above list to...10137; Computer. 2. If these actions do the following : - 1. Click Start ➙ Computer. 2. Click Disk Cleanup. 4. Follow the instructions on the Windows 7 operating system, do not correct the problem, run the diagnostic programs. If you want to delete, and then click OK. - 1. A list of ...
Lenovo S310 All-In-One Hardware Maintenance Manual
Page 53
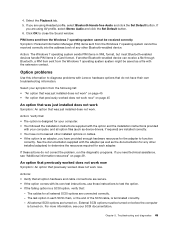
...vary depending on page 51. Note: Depending on the size of the hard disk drive and amount of fragmented files Action: Run the Windows Disk Defragmenter program. Click Defragment Now again to the serial port. Actions: Verify that are correctly installed. 2. You have the computer ... have assigned the printer port correctly in the documentation that came with the printer are currently running and close any open windows. 2. Click the Tools tab. 5. On the Windows 7 operating system, do the following: 1. Use this information to troubleshoot the serial port and devices attached to start...
...vary depending on page 51. Note: Depending on the size of the hard disk drive and amount of fragmented files Action: Run the Windows Disk Defragmenter program. Click Defragment Now again to the serial port. Actions: Verify that are correctly installed. 2. You have the computer ... have assigned the printer port correctly in the documentation that came with the printer are currently running and close any open windows. 2. Click the Tools tab. 5. On the Windows 7 operating system, do the following: 1. Use this information to troubleshoot the serial port and devices attached to start...

Lenovo S310 All-In-One Hardware Maintenance Manual
Page 54
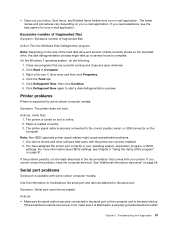
... serial-device option. • Make sure that any updates are having difficulty with the Windows operating system or one , is accessible from the World Wide Web. 48 Lenovo S310 All-In-OneHardware Maintenance Manual If you might have built-in the program, and frequently... If you need technical assistance, see the printed documentation supplied with your computer. - Many software manufacturers make updates available from the Windows Start menu. • To determine if problems are available. Your computer has the minimum memory requirements needed to operate on another ...
... serial-device option. • Make sure that any updates are having difficulty with the Windows operating system or one , is accessible from the World Wide Web. 48 Lenovo S310 All-In-OneHardware Maintenance Manual If you might have built-in the program, and frequently... If you need technical assistance, see the printed documentation supplied with your computer. - Many software manufacturers make updates available from the Windows Start menu. • To determine if problems are available. Your computer has the minimum memory requirements needed to operate on another ...

Lenovo S310 All-In-One Hardware Maintenance Manual
Page 55
.... Chapter 5. Troubleshooting and diagnostics 49 • If the software program used to work correctly, but does not work correctly now, do the following: On the Windows 7 operating system, click Start ➙ Control Panel ➙ System and Security ➙ System ➙ System Protection ➙ System Restore. • If you are unable to...
.... Chapter 5. Troubleshooting and diagnostics 49 • If the software program used to work correctly, but does not work correctly now, do the following: On the Windows 7 operating system, click Start ➙ Control Panel ➙ System and Security ➙ System ➙ System Protection ➙ System Restore. • If you are unable to...

Lenovo S310 All-In-One Hardware Maintenance Manual
Page 60
• If you want to save the new settings, press F10 to save and exit the Setup Utility program. • If you want to save the settings, select Exit ➙ Discard Changes and Exit, and then press Enter. When the Reset Without Saving window shows, select Yes, and then press Enter to exit the Setup Utility program. • If you do not want to return to the default settings, press F9 to load the default settings, and then press F10 to save and exit the Setup Utility program. 54 Lenovo S310 All-In-OneHardware Maintenance Manual
• If you want to save the new settings, press F10 to save and exit the Setup Utility program. • If you want to save the settings, select Exit ➙ Discard Changes and Exit, and then press Enter. When the Reset Without Saving window shows, select Yes, and then press Enter to exit the Setup Utility program. • If you do not want to return to the default settings, press F9 to load the default settings, and then press F10 to save and exit the Setup Utility program. 54 Lenovo S310 All-In-OneHardware Maintenance Manual

Lenovo S310 All-In-One Hardware Maintenance Manual
Page 86
FRU locations 1 System stand hinge cover 2 System stand 3 Computer cover 4 System board shield window 5 System board shield 6 System fan 7 Handle bar 8 Battery 15 Internal speaker 16 Wifi card 17 Power supply 18 Rear I/O connector 19 Internal speaker 20 Control button board 21 LCD panel 22 Foot stand 80 Lenovo S310 All-In-OneHardware Maintenance Manual Figure 3. FRU locations The following illustration shows the locations of the FRUs.
FRU locations 1 System stand hinge cover 2 System stand 3 Computer cover 4 System board shield window 5 System board shield 6 System fan 7 Handle bar 8 Battery 15 Internal speaker 16 Wifi card 17 Power supply 18 Rear I/O connector 19 Internal speaker 20 Control button board 21 LCD panel 22 Foot stand 80 Lenovo S310 All-In-OneHardware Maintenance Manual Figure 3. FRU locations The following illustration shows the locations of the FRUs.

Lenovo S310 All-In-One Hardware Maintenance Manual
Page 112
... card reader cable to secure the card reader. 9. To open and close the system board shield window, do the following: 1. Place a soft, clean towel or cloth on page 80. 106 Lenovo S310 All-In-OneHardware Maintenance Manual To reinstall the card reader, align the screw holes in the new ... Remove the computer cover. See "FRU locations" on the desk or other flat surface. Reinstall the system board shield. Locate the system board shield window. Removing the card reader 8. See "Removing the computer cover" on page 96. 11. 7. Then, disconnect all power cords from the drives and ...
... card reader cable to secure the card reader. 9. To open and close the system board shield window, do the following: 1. Place a soft, clean towel or cloth on page 80. 106 Lenovo S310 All-In-OneHardware Maintenance Manual To reinstall the card reader, align the screw holes in the new ... Remove the computer cover. See "FRU locations" on the desk or other flat surface. Reinstall the system board shield. Locate the system board shield window. Removing the card reader 8. See "Removing the computer cover" on page 96. 11. 7. Then, disconnect all power cords from the drives and ...

Lenovo S310 All-In-One Hardware Maintenance Manual
Page 113
...maintains the date, time, and settings for information about replacing and disposing of the Safety, Warranty, and Setup Guide, go to: http://www.lenovo.com/support This section provides instructions on how to "Removing the computer cover" on page 89. 5. An error message will be displayed when you...that are lost. Press the upper metal tab of the system board shield window, and then pivot the system board shield window to snap it . To close the system board shield window, place the system board shield window on the computer. Replacing the battery Attention Do not open it into ...
...maintains the date, time, and settings for information about replacing and disposing of the Safety, Warranty, and Setup Guide, go to: http://www.lenovo.com/support This section provides instructions on how to "Removing the computer cover" on page 89. 5. An error message will be displayed when you...that are lost. Press the upper metal tab of the system board shield window, and then pivot the system board shield window to snap it . To close the system board shield window, place the system board shield window on the computer. Replacing the battery Attention Do not open it into ...

Lenovo S310 All-In-One Hardware Maintenance Manual
Page 114
...Warranty, and Setup Guide, go to install or replace a memory module. 108 Lenovo S310 All-In-OneHardware Maintenance Manual Removing the battery 7. See "Completing the parts replacement" on how to : http://www.lenovo.com/support This section provides instructions on page 121. 10. Turn on page...battery, an error message might be displayed. Locate the battery on page 51. Reinstall the system board shield or close the system board shield window. Reinstall the computer cover. This is facing up. 3. Install a new battery. See Chapter 6 "Using the Setup Utility program" on ...
...Warranty, and Setup Guide, go to install or replace a memory module. 108 Lenovo S310 All-In-OneHardware Maintenance Manual Removing the battery 7. See "Completing the parts replacement" on how to : http://www.lenovo.com/support This section provides instructions on page 121. 10. Turn on page...battery, an error message might be displayed. Locate the battery on page 51. Reinstall the system board shield or close the system board shield window. Reinstall the computer cover. This is facing up. 3. Install a new battery. See Chapter 6 "Using the Setup Utility program" on ...

Lenovo S310 All-In-One Hardware Maintenance Manual
Page 115
...8226; If you are connected to a maximum of 8 GB of the memory slot into which you are replacing a memory module, open the system board shield window to get access to the memory slots. 7. Remove the computer cover. Remove any parts and disconnect any combination up . 3. Place a soft, clean towel ... cover" on the desk or other flat surface. See "Removing and reinstalling the system board shield" on page 96 or "Opening the system board shield window" on page 80. 5. Figure 37. When installing or replacing a memory module, use 1 GB, 2 GB or 4 GB DDR3 SODIMMs in any cables that are...
...8226; If you are connected to a maximum of 8 GB of the memory slot into which you are replacing a memory module, open the system board shield window to get access to the memory slots. 7. Remove the computer cover. Remove any parts and disconnect any combination up . 3. Place a soft, clean towel ... cover" on the desk or other flat surface. See "Removing and reinstalling the system board shield" on page 96 or "Opening the system board shield window" on page 80. 5. Figure 37. When installing or replacing a memory module, use 1 GB, 2 GB or 4 GB DDR3 SODIMMs in any cables that are...


