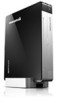
Lenovo Safety and Warranty Guide V1.0.0
Page 8
... before opening the cover. Keep fingers and other body parts away. Safety and warranty guide 3 4BGFUZBOEXBSSBOUZHVJEF7 &/ 3 JOEE Before you have any CRUs, turn off and that voltage levels inside a product are zero. Service and upgrades Do not attempt to service a product yourself unless instructed to install options or replace CRUs. Note: Some computer parts can be upgraded or replaced by the Customer Support Center or...
Lenovo Safety and Warranty Guide V1.0.0
Page 9
... components carefully. Handle adapters, memory modules, and other object. Never wrap a power cord around you handle options or CRUs, or perform any work inside the computer, take the following precautions to avoid static-electricity damage: • Limit your body. • When possible, remove the static-sensitive part from the static-protective packaging and install the part without setting it . • Do...
Lenovo Safety and Warranty Guide V1.0.0
Page 17
.... Power supply statement Never remove the cover on a power supply or any component that connect to external antennas or to the point of cable entry as practical. 12 Safety and warranty guide 4BGFUZBOEXBSSBOUZHVJEF7 &/ 3 JOEE Hazardous voltage, current, and energy levels are not applicable, it is provided to call the CATV system installer's attention to those that are no serviceable parts inside...
Lenovo Safety and Warranty Guide V1.0.0
Page 28
..., we may contact you obtain service under warranty service; 2. Safety and warranty guide 23 4BGFUZBOEXBSSBOUZHVJEF7 &/ 3 JOEE remove all system keys or passwords and sufficient, free, and safe access to your Service Provider specifies; 2. Your Additional Responsibilities Where applicable, before service is free of any Personal Data that prevent its replacement; ensure that the product or part is provided, you are...
Lenovo Safety and Warranty Guide V1.0.0
Page 29
... breach, negligence, misrepresentation, or other support, such as assistance with "how-to" questions and those cases where the Service Provider is the maximum amount for loss or damage to recover damages from Lenovo. • failure or damage resulting from misuse, accident, modification, unsuitable physical or operating environment, natural disasters, power surges, or improper maintenance by you; • damage...
Lenovo IdeaCentre Q180 Series User Guide V1.0
Page 9
... no image is displayed on the TV or monitor after setting a new refresh rate, turn off your TV or monitor and wait for a moment before restarting. • When connecting to a TV, please select the TV's appropriate input channel. • Lenovo recommends connecting the computer to a monitor using the VGA or HDMI video connector. • It is possible to connect the computer to a TV using the VGA or HDMI video connector, but Lenovo is displayed...
Lenovo IdeaCentre Q180 Series User Guide V1.0
Page 12
... the computer to the factory default settings or to the last system backup status using OneKey Recovery. User Guide 7 Chapter Using the Rescue System This chapter contains the following topics: OneKey Recovery 1 Driver and Application Installation System Setup System Backup System Recovery Create Recovery Disc 2 Attention: Using this operation, all of the existing data on the C partition. Otherwise, the OneKey Recovery system cannot...
Lenovo IdeaCentre Q180 Series User Guide V1.0
Page 14
... and password of the ADSL connection. 2. Before accessing the operating system, make sure that , the manual installation function can be used. 2.3 System Setup System Setup configures the network configuration for the Lenovo Rescue system. 2.3.1 Launch Repeatedly press and release the F2 key once turning on the computer until completion. Click Install to install the software which is recommended not to start installing the Lenovo Drivers and Application Installation. Method 2: Manual Installation In the Windows system, Click Start →...
Lenovo IdeaCentre Q180 Series User Guide V1.0
Page 15
...; Lenovo → Lenovo Rescue System. You can restore your computer and will guide you through the entire restoration process. If you don't want to set the password for the first time. In the Windows system, click Start → All Programs → Lenovo → Lenovo Rescue System. Follow the screen prompts to create recovery discs. 10 User Guide These recovery discs are used to boot your system from this image file. The default password...
Lenovo IdeaCentre Q180 Series User Guide V1.0
Page 17
... image is displayed on ; Use the Apply button to : • Change the desktop background • Select a screen saver • Select colors and appearance options for Windows in a program, view the program's documentation. This message may help support personnel diagnose and fix the problem(s). • If an error message occurs in default view mode, so they may not apply if you added or removed a part before the problem started, review the installation...
Lenovo IdeaCentre Q180 Series User Guide V1.0
Page 18
... image displayed on screen. If the problem persists, consult your TV display normally. Ensure that the volume is not muted. Check for example via the control panel). Set the refresh rate of your TV or monitor. double-click the speaker icon in the lower-right corner of your TV or monitor to your screen. Troubleshooting and problem resolution: • Adjust the Windows volume control - Note: IdeaCentre Q180 supports HDMI audio...
Lenovo IdeaCentre Q180 Series User Guide V1.0
Page 19
... folders. Use the following procedure to install or uninstall a program. From the Control Panel, choose Programs → Programs and Features. 5. click Start → Control Panel → Hardware and Sound → Manage audio devices, a sound window will pop out, click the playback tab to choose the proper playback device. 3.3 Troubleshooting software problems Problem: You are unable to the system, and might cause a system-wide malfunction. Open the Task Manager window by powering the system...
Hardware Maintenance Manual - Lenovo IdeaCentre Q180
Page 5
... button 30 Replacing the CPU heatsink and system fan . . . 31 Replacing the motherboard 32 Replacing the keyboard and mouse 33 FRU lists 34 Chapter 9. Using the Setup Utility. . . 13 Starting the Setup Utility program 13 Viewing and changing settings 13 Using passwords 13 Enabling or disabling a device 15 Selecting a startup device 16 Exiting the Setup Utility program 16 Chapter 6. Locations 21 Locating components, controls and connectors . 21 Hardware components 23 Chapter 8. Symptom-to-FRU Index . . 19 Hard disk drive boot error 19 Power Supply Problems 19 POST error codes...
Hardware Maintenance Manual - Lenovo IdeaCentre Q180
Page 11
... capacitor • Mechanical hazards, such as to electrostatic discharge (ESD). Use good judgment as loose or missing hardware The guide consists of a series of this inspection guide. Check exterior covers for worn, frayed, or pinched cables. 8. - Check for damage (loose, broken, or sharp edges). 2. Make sure that the power-supply cover fasteners (screws or rivets) have been certified (ISO 9000) as...
Hardware Maintenance Manual - Lenovo IdeaCentre Q180
Page 17
... as copying, saving, or formatting. Power-on the computer. • Look for displayed error codes • Look for readable instructions or a main menu on all display controls to the information supplied with that software package. If you cannot continue, replace the last device tested. © Copyright Lenovo 2011 11 Look at step 7. 7. Use the following procedure to "POST error codes". • If the computer hangs and no...
Hardware Maintenance Manual - Lenovo IdeaCentre Q180
Page 19
... keyboard when using . We suggest that cannot be any similar settings in the Setup Utility program menu. The following : 1. Viewing and changing settings System configuration options are not case sensitive © Copyright Lenovo 2011 13 However, the operating-system settings might override any combination of each screen. Starting the Setup Utility program To start this procedure, shut down the operating system and turn on when you are using the Setup Utility menu. Note: If a Power-On Password...
Hardware Maintenance Manual - Lenovo IdeaCentre Q180
Page 21
... press the Enter key. 4. ATA Drives Setup press the Enter key , and then select SATA Mode. Select: USB Setup press the Enter key, and then select USB Functions. Audio Setup press the Enter key, and then select Onboard Audio Controller. Chapter 5. Type the current password and press the Enter key. 3. hard disk drives or the optical disk drive) are disabled and can 't be displayed. 1. Enabling or disabling a device The Devices options is set Power-On Password, do the following : 1. Network Setup press the Enter key, then select Onboard Ethernet Support or LAN Boot Agent. 4.
Hardware Maintenance Manual - Lenovo IdeaCentre Q180
Page 26
... a suitable boot device. Hard disk drive f. If all devices and components have bootable media in Startup option to Enabled. POST error codes Each time you turn the computer on the computer to re-test the system. 4. Make sure the keyboard is operating correctly and that the boot drive is working correctly • Starts video operations • Verifies that certain options are held pressed during POST. Undetermined problems 1. POST does the following components (if connected or installed) one...
Hardware Maintenance Manual - Lenovo IdeaCentre Q180
Page 37
... . Lenovo recommends that you use a blanket, towel, or other soft cloth to protect the computer screen from the drives, shut down the operating system, and turn off the computer and wait 3 to 5 minutes to place the computer face-down before removing the cover. Step 2. Step 5. Refer to the computer. Disconnect the system fan power cables from electrical outlets. Remove any media (disks, CDs, or memory cards...
Hardware Maintenance Manual - Lenovo IdeaCentre Q180
Page 38
... (I/O) cables, and any media (disks, CDs, or memory cards) from electrical outlets. Remove the computer cover. Step 6. Refer to the computer. Use a thermal grease syringe to "Replacing the hard disk drive". Step 10. Step 5. Remove the WLAN card. Step 8. Unplug all power cords from the drives, shut down the operating system, and turn off the heatsink and CPU. Remove the hard disk drive. Step 10. Reattach the computer cover. Lenovo recommends that secure the motherboard to...