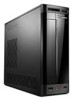
Lenovo H3 Series Hardware Maintenance Manual V2.0
Page 2
... sink 41 Replacing the CPU 42 Replacing the graphic card 45 Replacing the audio & USB connectors 46 Replacing the card reader module 46 Replacing the motherboard 47 Replacing the Power supply 48 Replacing the keyboard 50 Replacing the mouse 51 Chapter 9. Additional Service Information 52 Power management 52 Appendix. Statement 53...
Lenovo H3 Series Hardware Maintenance Manual V2.0
Page 27
Chapter 7. Locations Computer cover Power supply Motherboard Chassis Optical disk drive bay Optical disk drive Vent Heatsink Fan Hard disk drive Hard disk drive bay Front bezel Card reader (Selected models) Audio & USB connectors Front view The following illustrations show the location of connectors on the front of the computer. 1 2 3 4 5 6 25
Lenovo H3 Series Hardware Maintenance Manual V2.0
Page 30
... x 1 adapter connector 28 It provides basic computer functions and supports a variety of parts on the system board The system board (sometimes called the planar or motherboard) is the main circuit board in your computer. The following illustrations show the locations of devices that are factory-installed or that you can install...
Lenovo H3 Series Hardware Maintenance Manual V2.0
Page 42
... cover. Remove the optical disk drive. Screw back the optical disk drive bay to "Removing the computer cover". 2. Remove the front bezel. Refer to the motherboard, align and then screw back the new system fan. 8. Connect the new fan power cable to "Removing the front bezel". 3. Remove the 2 screws that secure...
Lenovo H3 Series Hardware Maintenance Manual V2.0
Page 43
Refer to the motherboard. 6. Remove the 4 screws that was included with your computer or in the new heatsink. 8. Remove the computer cover. Remove the optical disk drive. Screw back ... bezel and computer cover. 41 Replacing the heat sink Attention Chapter 8. Refer to the chassis. 10. Refer to the Support Web site at http://consumersupport.lenovo.com To replace the heatsink: 1. To obtain copies of the Safety and Warranty Guide or HMM, go to "Replacing the optical disk drive". 4. Lift up...
Lenovo H3 Series Hardware Maintenance Manual V2.0
Page 47
... the top of the microprocessor. Remove the screw that secures the graphic card to "Removing the computer cover". 2. Use the thermal grease syringe to the motherboard. 16. Replacing the graphic card To replace the graphic card: 1. Refer to the chassis. 3. Lift up then slide the graphic card out of grease on...
Lenovo H3 Series Hardware Maintenance Manual V2.0
Page 48
Remove the computer cover. Refer to "Removing the computer cover". 2. Remove the data cables from the motherboard. 6. Install the front bezel and computer cover. Refer to "Removing the front bezel". 3. Remove the front bezel. Reconnect the data cables to .... Remove the screw that secures the audio & USB connectors to "Removing the computer cover". 2. Remove the screw that secures the card reader module to the motherboard. 9. Refer to the chassis. 5. Remove the graphic card. Slide the audio & USB connectors out of chassis. 7. Refer to "Replacing the graphic card". 4....
Lenovo H3 Series Hardware Maintenance Manual V2.0
Page 49
Replacing hardware 4. Install the front bezel and computer cover. Refer to the motherboard. 8. Chapter 8. Reconnect the data cable to "Replacing the optical disk drive". 4. Remove the computer cover. Refer to "Removing the front bezel". 3. Remove the front bezel. ... cover". 2. Refer to "Replacing a memory module". 5. Remove the optical disk drive. Refer to "Replacing the hard disk drive". 47 Remove the data cable from the motherboard. 5. Replacing the motherboard To replace the motherboard: 1. Replacing the hard disk drive.
Lenovo H3 Series Hardware Maintenance Manual V2.0
Page 50
.... Remove the computer cover. Refer to "Replacing the CPU". 10. Refer to "Replacing the system fan". 7. Slide then lift the motherboard out of chassis. 13. Refer to "Replacing the hard disk drive". 48 Remove the heatsink. Refer to "Replacing the optical disk drive". 4. Refer... the graphic card". 9. Remove the hard disk drive. Remove the 6 screws that secure the motherboard to "Removing the front bezel". 3. Install the front bezel and side cover. Align then insert the new motherboard and screw it in. 14. Remove all the relative parts back. 16. Remove the optical disk...
Lenovo H3 Series Hardware Maintenance Manual V2.0
Page 51
Refer to "Replacing the heatsink". 7. Refer to "Replacing the system fan". 6. Remove the memory module. Refer to "Replacing the CPU". 10. Chapter 8. Remove the CPU. Refer to "Replacing the motherboard". 11. Remove the 5 screws that secure the Power supply to "Replacing the graphic card". 9. Replacing hardware 5. Refer to the chassis. 49 Remove the motherboard. Remove the graphic card. Remove the system fan. Remove the heatsink. Refer to "Replacing a memory module". 8.
Lenovo H3 Series Hardware Replacement Guide
Page 9
Computer cover Power supply Motherboard Chassis Optical disk drive bay Optical disk drive Vent Heatsink Fan Hard disk drive Hard disk drive bay Front bezel Card reader (Selected models) Audio & USB connectors Front view The following illustrations show the location of connectors on the front of the computer. 1 2 3 4 Power switch Card reader modules (Selected models) Optical drive 6 Hardware Replacement Guide 5 6 Headphone connector Microphone connector USB ports (2)
Lenovo H3 Series Hardware Replacement Guide
Page 12
It provides basic computer functions and supports a variety of parts on the system board The system board (sometimes called the planar or motherboard) is the main circuit board in your computer. Audio line-in connector PCI Express x1 adapter connector PCI Express x16 graphics adpter connector Identifying parts ...