User Guide
Page 3
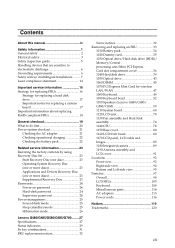
... ...5 Right-side view...7 Front view ...9 Bottom view ...10 Chapter 2. CRU instructions 35 Replacing the battery 35 Replacing the hard disk drive 37 Replacing memory ...44 Replacing the wireless LAN card 48 Removing the optical drive 50 Trademarks 52 Index...53 i Getting to the Internet 31 Wired connection ...31 Wireless connection 32 Chapter 4. Connecting...
... ...5 Right-side view...7 Front view ...9 Bottom view ...10 Chapter 2. CRU instructions 35 Replacing the battery 35 Replacing the hard disk drive 37 Replacing memory ...44 Replacing the wireless LAN card 48 Removing the optical drive 50 Trademarks 52 Index...53 i Getting to the Internet 31 Wired connection ...31 Wireless connection 32 Chapter 4. Connecting...
User Guide
Page 19
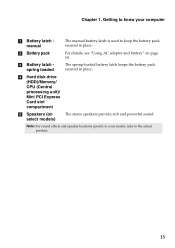
Note: For sound effects and speaker locations specific to your computer a Battery latch manual The manual battery latch is used to the actual product. 15 d Hard disk drive (HDD)/Memory/ CPU (Central processing unit)/ Mini PCI Express Card slot compartment e Speakers (on page 18. Chapter 1. b Battery pack c Battery latch spring loaded For details...
Note: For sound effects and speaker locations specific to your computer a Battery latch manual The manual battery latch is used to the actual product. 15 d Hard disk drive (HDD)/Memory/ CPU (Central processing unit)/ Mini PCI Express Card slot compartment e Speakers (on page 18. Chapter 1. b Battery pack c Battery latch spring loaded For details...
User Guide
Page 22
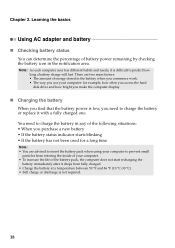
... battery • If the battery status indicator starts blinking • If the battery has not been used for example, how often you access the hard disk drive and how bright you make the computer display. „ Charging the battery When you find that the battery power is not required. 18 Note: As...
... battery • If the battery status indicator starts blinking • If the battery has not been used for example, how often you access the hard disk drive and how bright you make the computer display. „ Charging the battery When you find that the battery power is not required. 18 Note: As...

User Guide
Page 32
Chapter 2. Learning the basics a Caps lock indicator b Num lock indicator c Power status indicator d Battery status indicator e Wireless communication indicator f Hard disk drive indicator 28
Chapter 2. Learning the basics a Caps lock indicator b Num lock indicator c Power status indicator d Battery status indicator e Wireless communication indicator f Hard disk drive indicator 28
User Guide
Page 37
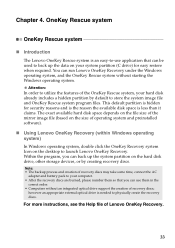
... see the Help file of operating system and preinstalled software). „ Using Lenovo OneKey Recovery (within Windows operating system) In Windows operating system, double click the OneKey Recovery system Icon on the hard disk drive, other storage devices, or by default to physically create the recovery discs. ...system image file and OneKey Rescue system program files. Attention: In order to launch Lenovo OneKey Recovery. however an appropriate external optical drive is less than it claims. The exact available hard disk space depends on the file size of the mirror image file (based on ...
... see the Help file of operating system and preinstalled software). „ Using Lenovo OneKey Recovery (within Windows operating system) In Windows operating system, double click the OneKey Recovery system Icon on the hard disk drive, other storage devices, or by default to physically create the recovery discs. ...system image file and OneKey Rescue system program files. Attention: In order to launch Lenovo OneKey Recovery. however an appropriate external optical drive is less than it claims. The exact available hard disk space depends on the file size of the mirror image file (based on ...
User Guide
Page 41
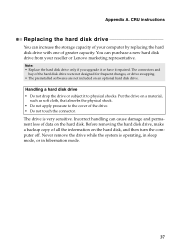
... damage and permanent loss of your reseller or Lenovo marketing representative. Put the drive on the hard disk. The drive is operating, in sleep mode, or in hibernation mode. 37 Handling a hard disk drive • Do not drop the drive or subject it repaired. Note: • Replace the hard disk drive only if you upgrade it or have it...
... damage and permanent loss of your reseller or Lenovo marketing representative. Put the drive on the hard disk. The drive is operating, in sleep mode, or in hibernation mode. 37 Handling a hard disk drive • Do not drop the drive or subject it repaired. Note: • Replace the hard disk drive only if you upgrade it or have it...
User Guide
Page 42
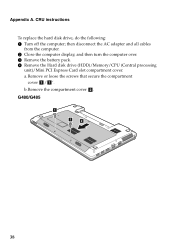
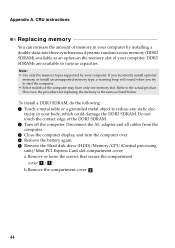
then disconnect the AC adapter and all cables from the computer. 2 Close the computer display, and then turn the computer over. 3 Remove the battery pack. 4 Remove the Hard disk drive (HDD)/Memory/CPU (Central processing unit)/Mini PCI Express Card slot compartment cover. G480/G485 1 1 2 38 b.Remove the compartment cover b. a.Remove or loose the screws that secure the compartment cover a/ a '. Appendix A. CRU instructions To replace the hard disk drive, do the following: 1 Turn off the computer;
then disconnect the AC adapter and all cables from the computer. 2 Close the computer display, and then turn the computer over. 3 Remove the battery pack. 4 Remove the Hard disk drive (HDD)/Memory/CPU (Central processing unit)/Mini PCI Express Card slot compartment cover. G480/G485 1 1 2 38 b.Remove the compartment cover b. a.Remove or loose the screws that secure the compartment cover a/ a '. Appendix A. CRU instructions To replace the hard disk drive, do the following: 1 Turn off the computer;
User Guide
Page 46
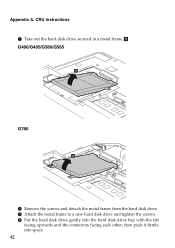
CRU instructions 7 Take out the hard disk drive secured in a metal frame e. G480/G485/G580/G585 5 G780 5 8 Remove the screws and detach the metal frame from the hard disk drive. 9 Attach the metal frame to a new hard disk drive and tighten the screws. 0 Put the hard disk drive gently into space. 42 Appendix A. then push it firmly into the hard disk drive bay with the tab facing upwards and the connectors facing each other;
CRU instructions 7 Take out the hard disk drive secured in a metal frame e. G480/G485/G580/G585 5 G780 5 8 Remove the screws and detach the metal frame from the hard disk drive. 9 Attach the metal frame to a new hard disk drive and tighten the screws. 0 Put the hard disk drive gently into space. 42 Appendix A. then push it firmly into the hard disk drive bay with the tab facing upwards and the connectors facing each other;
User Guide
Page 48
... the AC adapter and all cables from the computer. 3 Close the computer display, and turn the computer over. 4 Remove the battery again. 5 Remove the Hard disk drive (HDD)/Memory/CPU (Central processing unit)/Mini PCI Express Card slot compartment cover. Do not touch the contact edge of the computer may have only...
... the AC adapter and all cables from the computer. 3 Close the computer display, and turn the computer over. 4 Remove the battery again. 5 Remove the Hard disk drive (HDD)/Memory/CPU (Central processing unit)/Mini PCI Express Card slot compartment cover. Do not touch the contact edge of the computer may have only...
User Guide
Page 52
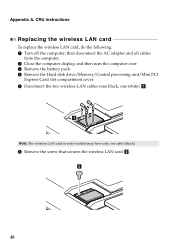
... the AC adapter and all cables from the computer. 2 Close the computer display, and then turn the computer over. 3 Remove the battery pack. 4 Remove the Hard disk drive/Memory/Central processing unit/Mini PCI Express Card slot compartment cover. 5 Disconnect the two wireless LAN cables (one black, one white) a . 1 Note: The wireless...
... the AC adapter and all cables from the computer. 2 Close the computer display, and then turn the computer over. 3 Remove the battery pack. 4 Remove the Hard disk drive/Memory/Central processing unit/Mini PCI Express Card slot compartment cover. 5 Disconnect the two wireless LAN cables (one black, one white) a . 1 Note: The wireless...

User Guide
Page 54
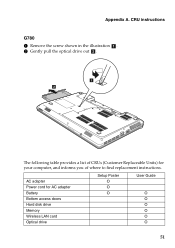
Appendix A. CRU instructions Removing the optical drive To remove the optical drive, do the following: G480/G485/G580/G585 1 Remove the Hard disk drive/Memory/Central processing unit/Mini PCI Express Card slot compartment cover. 2 Remove the screw shown in the illustration a . 3 Gently pull the optical drive out b . 1 2 50
Appendix A. CRU instructions Removing the optical drive To remove the optical drive, do the following: G480/G485/G580/G585 1 Remove the Hard disk drive/Memory/Central processing unit/Mini PCI Express Card slot compartment cover. 2 Remove the screw shown in the illustration a . 3 Gently pull the optical drive out b . 1 2 50
User Guide
Page 55
AC adapter Power cord for your computer, and informs you of where to find replacement instructions. CRU instructions G780 1 Remove the screw shown in the illustration a . 2 Gently pull the optical drive out b . 1 2 The following table provides a list of CRUs (Customer Replaceable Units) for AC adapter Battery Bottom access doors Hard disk drive Memory Wireless LAN card Optical drive Setup Poster O O O User Guide O O O O O O 51 Appendix A.
AC adapter Power cord for your computer, and informs you of where to find replacement instructions. CRU instructions G780 1 Remove the screw shown in the illustration a . 2 Gently pull the optical drive out b . 1 2 The following table provides a list of CRUs (Customer Replaceable Units) for AC adapter Battery Bottom access doors Hard disk drive Memory Wireless LAN card Optical drive Setup Poster O O O User Guide O O O O O O 51 Appendix A.
Hardware Maintenance Manual
Page 3
...mode 25 Hibernation mode 26 Lenovo G480/G485/G580/G585/G780 ........27 Specifications 27 Status indicators 29 Fn key combinations 31 FRU replacement notices 32 Screw notices 32 Removing and replacing an FRU 33 1010 Battery pack 34 1020 Dummy card 35 1030 Optical drive/Hard disk drive (HDD)/ Memory/Central .../Mini PCI Express Card slot compartment cover 36 1040 Hard disk drive 39 1050 Optical drive 43 1060 DIMM 45 1070 PCI Express Mini Card for wireless LAN/WAN 47 1080 Keyboard 49 1090 Keyboard bezel 52 1100 Speakers (Lenovo G480/G485/ G580/G585 59 1110 System board 60...
...mode 25 Hibernation mode 26 Lenovo G480/G485/G580/G585/G780 ........27 Specifications 27 Status indicators 29 Fn key combinations 31 FRU replacement notices 32 Screw notices 32 Removing and replacing an FRU 33 1010 Battery pack 34 1020 Dummy card 35 1030 Optical drive/Hard disk drive (HDD)/ Memory/Central .../Mini PCI Express Card slot compartment cover 36 1040 Hard disk drive 39 1050 Optical drive 43 1060 DIMM 45 1070 PCI Express Mini Card for wireless LAN/WAN 47 1080 Keyboard 49 1090 Keyboard bezel 52 1100 Speakers (Lenovo G480/G485/ G580/G585 59 1110 System board 60...
Hardware Maintenance Manual
Page 20
... site: http://consumersupport.lenovo.com/. After a system board is loaded to http://consumersupport.lenovo.com/. 2. Select the BIOS/Driver/Applications and download. 4. "Important notice for replacing a hard disk drive" on page 17 ...- To download software fixes, drivers, and BIOS, follow the steps below: 1. "Strategy for replacing a system board" on page 17 • "Important information about replacing RoHS compliant FRUs" on page 16 - Enter the serial number or select a product or use Lenovo smart downloading. 3. Lenovo G480/G485/G580/G585/G780...
... site: http://consumersupport.lenovo.com/. After a system board is loaded to http://consumersupport.lenovo.com/. 2. Select the BIOS/Driver/Applications and download. 4. "Important notice for replacing a hard disk drive" on page 17 ...- To download software fixes, drivers, and BIOS, follow the steps below: 1. "Strategy for replacing a system board" on page 17 • "Important information about replacing RoHS compliant FRUs" on page 16 - Enter the serial number or select a product or use Lenovo smart downloading. 3. Lenovo G480/G485/G580/G585/G780...
Hardware Maintenance Manual
Page 21
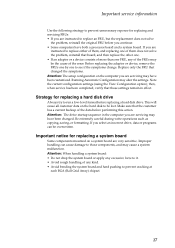
...the error. Note the current configuration settings (using the View Configuration option); Make sure that changed . Strategy for replacing a hard disk drive Always try to those settings remain in the computer you are instructed to it. • Avoid rough handling of the data ...lost. If you are servicing may have been changed the symptoms. Attention: The setup configuration on the hard disk to see if the symptoms change. Attention: The drive startup sequence in effect. Running Automatic Configuration may cause a system malfunction. Be extremely careful during write ...
...the error. Note the current configuration settings (using the View Configuration option); Make sure that changed . Strategy for replacing a hard disk drive Always try to those settings remain in the computer you are instructed to it. • Avoid rough handling of the data ...lost. If you are servicing may have been changed the symptoms. Attention: The setup configuration on the hard disk to see if the symptoms change. Attention: The drive startup sequence in effect. Running Automatic Configuration may cause a system malfunction. Be extremely careful during write ...

Hardware Maintenance Manual
Page 24
...period, the customer may be a symptom of unauthorized service or modification. • If the spindle of a hard disk drive becomes noisy, it : 1. Lenovo G480/G485/G580/G585/G780 Hardware Maintenance Manual What to do first When you do return an FRU, you must include the following information in...service 3. Date of servicer 2. Date of an incompatible card • Improper disk insertion or use . Procedure index and page number in the drive, or the insertion of a diskette with multiple labels • Damaged or bent diskette eject button • Fuses blown by attachment of a nonsupported...
...period, the customer may be a symptom of unauthorized service or modification. • If the spindle of a hard disk drive becomes noisy, it : 1. Lenovo G480/G485/G580/G585/G780 Hardware Maintenance Manual What to do first When you do return an FRU, you must include the following information in...service 3. Date of servicer 2. Date of an incompatible card • Improper disk insertion or use . Procedure index and page number in the drive, or the insertion of a diskette with multiple labels • Damaged or bent diskette eject button • Fuses blown by attachment of a nonsupported...
Hardware Maintenance Manual
Page 27
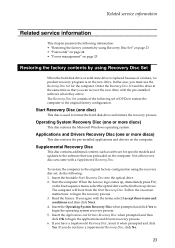
...click No. 23 If you do the following: 1. Not all recovery disc sets come with the pre-installed software when they arrive. When the Lenovo logo comes up device. In this case, you agree with the terms, select I accept these terms and conditions and then click Next. 4.... the operating system recovery process. 5. Follow the on-screen instructions to the original factory configuration using Recovery Disc Set When the hard disk drive or solid state drive is replaced because of a failure, no product recovery program is used to begin the recovery process. 3. If you can recover...
...click No. 23 If you do the following: 1. Not all recovery disc sets come with the pre-installed software when they arrive. When the Lenovo logo comes up device. In this case, you agree with the terms, select I accept these terms and conditions and then click Next. 4.... the operating system recovery process. 5. Follow the on-screen instructions to the original factory configuration using Recovery Disc Set When the hard disk drive or solid state drive is replaced because of a failure, no product recovery program is used to begin the recovery process. 3. If you can recover...
Hardware Maintenance Manual
Page 28
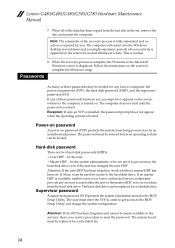
...for any Lenovo computer: the power-on the screen for the user + Master HDP - The computer does not start until the password is normal. 8. Hard-disk password There are two hard-disk passwords (HDPs): + User HDP - If it has, it can be needed for access to the hard disk drive. Supervisor ...drive even if the user has changed the user HDP Attention: If the user HDP has been forgotten, check whether a master HDP has been set , remove the disc and restart the computer. Follow the instructions on . The password must enter the SVP in the BIOS Setup Utility. Lenovo G480/G485/G580/G585/G780...
...for any Lenovo computer: the power-on the screen for the user + Master HDP - The computer does not start until the password is normal. 8. Hard-disk password There are two hard-disk passwords (HDPs): + User HDP - If it has, it can be needed for access to the hard disk drive. Supervisor ...drive even if the user has changed the user HDP Attention: If the user HDP has been forgotten, check whether a master HDP has been set , remove the disc and restart the computer. Follow the instructions on . The password must enter the SVP in the BIOS Setup Utility. Lenovo G480/G485/G580/G585/G780...

Hardware Maintenance Manual
Page 29
... the computer has three power management modes: screen blank, sleep (standby), and hibernation. You can also turn off . • The hard disk drive is low. (Alternatively, if Hibernate when battery becomes low has been selected in the following event, the computer automatically returns from sleep (...Note: The computer does not accept any key. Wait a few seconds before taking any operation with the keyboard, the hard disk, the parallel connector, or the diskette drive within that time. • If the battery indicator is amber, indicating that the battery power is powered off . ...
... the computer has three power management modes: screen blank, sleep (standby), and hibernation. You can also turn off . • The hard disk drive is low. (Alternatively, if Hibernate when battery becomes low has been selected in the following event, the computer automatically returns from sleep (...Note: The computer does not accept any key. Wait a few seconds before taking any operation with the keyboard, the hard disk, the parallel connector, or the diskette drive within that time. • If the battery indicator is amber, indicating that the battery power is powered off . ...
Hardware Maintenance Manual
Page 30
... setup data are satisfied in the boot record on , the computer returns from the hard disk drive. 26 The hibernation file in suspend mode. Also, the computer goes into hibernation mode, perform that action: - Lenovo G480/G485/G580/G585/G780 Hardware Maintenance Manual Hibernation mode In hibernation mode, the following conditions: • If a "hibernation...
... setup data are satisfied in the boot record on , the computer returns from the hard disk drive. 26 The hibernation file in suspend mode. Also, the computer goes into hibernation mode, perform that action: - Lenovo G480/G485/G580/G585/G780 Hardware Maintenance Manual Hibernation mode In hibernation mode, the following conditions: • If a "hibernation...


