User Guide
Page 5
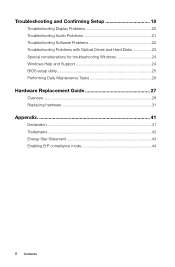
Troubleshooting and Confirming Setup 19 Troubleshooting Display Problems 20 Troubleshooting Audio Problems 21 Troubleshooting Software Problems 22 Troubleshooting Problems with Optical Drives and Hard Disks 23 Special considerations for troubleshooting Windows 24 Windows Help and Support 24 BIOS setup utility 25 Performing Daily Maintenance Tasks 26 Hardware Replacement Guide 27 Overview 28 Replacing hardware 31 Appendix 41 Declaration 41 Trademarks 42 Energy Star Statement 43 Enabling ErP compliance mode 44 ii Contents
Troubleshooting and Confirming Setup 19 Troubleshooting Display Problems 20 Troubleshooting Audio Problems 21 Troubleshooting Software Problems 22 Troubleshooting Problems with Optical Drives and Hard Disks 23 Special considerations for troubleshooting Windows 24 Windows Help and Support 24 BIOS setup utility 25 Performing Daily Maintenance Tasks 26 Hardware Replacement Guide 27 Overview 28 Replacing hardware 31 Appendix 41 Declaration 41 Trademarks 42 Energy Star Statement 43 Enabling ErP compliance mode 44 ii Contents

User Guide
Page 28
...drive is 1024M). Troubleshooting and problem resolution: 1. Confirm that was shipped with the computer. 5. Otherwise, continue with a known good CD/DVD such as 1000 bytes. The capacity of the hard disk shown in Windows can be read , replace...hard disk capacity deficit. Troubleshooting and problem resolution: For computers equipped with Optical Drives and Hard Disks Problem: The Optical drive is unable to determine if there is an optical drive... Technical Explanation: The nominal capacity of the hard disk shown in the drive. If the Service partition of 3G - 3 x 1000 ...
...drive is 1024M). Troubleshooting and problem resolution: 1. Confirm that was shipped with the computer. 5. Otherwise, continue with a known good CD/DVD such as 1000 bytes. The capacity of the hard disk shown in Windows can be read , replace...hard disk capacity deficit. Troubleshooting and problem resolution: For computers equipped with Optical Drives and Hard Disks Problem: The Optical drive is unable to determine if there is an optical drive... Technical Explanation: The nominal capacity of the hard disk shown in the drive. If the Service partition of 3G - 3 x 1000 ...
User Guide
Page 32
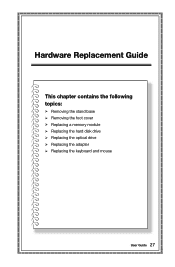
Hardware Replacement Guide This chapter contains the following topics: Ø Removing the stand base Ø Removing the foot cover Ø Replacing a memory module Ø Replacing the hard disk drive Ø Replacing the optical drive Ø Replacing the adapter Ø Replacing the keyboard and mouse User Guide 27
Hardware Replacement Guide This chapter contains the following topics: Ø Removing the stand base Ø Removing the foot cover Ø Replacing a memory module Ø Replacing the hard disk drive Ø Replacing the optical drive Ø Replacing the adapter Ø Replacing the keyboard and mouse User Guide 27
User Guide
Page 33
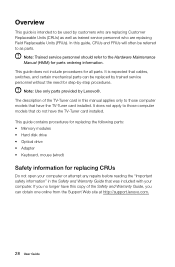
...guide contains procedures for replacing the following parts: • Memory modules • Hard disk drive • Optical drive • Adapter • Keyboard, mouse (wired) Safety information for all parts. Note: Trained service personnel should refer to as trained service personnel who are replacing Field Replaceable Units (FRUs). ...CRUs) as well as parts. The description of the Safety and Warranty Guide, you can be replaced by trained service personnel without the need for step-by Lenovo®. Note: Use only parts provided by -step procedures. If you no longer have the ...
...guide contains procedures for replacing the following parts: • Memory modules • Hard disk drive • Optical drive • Adapter • Keyboard, mouse (wired) Safety information for all parts. Note: Trained service personnel should refer to as trained service personnel who are replacing Field Replaceable Units (FRUs). ...CRUs) as well as parts. The description of the Safety and Warranty Guide, you can be replaced by trained service personnel without the need for step-by Lenovo®. Note: Use only parts provided by -step procedures. If you no longer have the ...
User Guide
Page 39
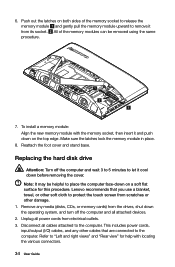
... User Guide Lenovo recommends that are connected to protect the touch screen from its socket. All of the memory socket to release the memory module and gently pull the memory module upward to the computer. Make sure the latches lock the memory module in place. 8. Replacing the hard disk drive Attention: Turn... on both sides of the memory modules can be helpful to let it cool down before removing the cover. Disconnect all power cords from the drives, shut down the operating system, and turn off the computer and wait 3 to 5 minutes to place the computer face-down on the top edge...
... User Guide Lenovo recommends that are connected to protect the touch screen from its socket. All of the memory socket to release the memory module and gently pull the memory module upward to the computer. Make sure the latches lock the memory module in place. 8. Replacing the hard disk drive Attention: Turn... on both sides of the memory modules can be helpful to let it cool down before removing the cover. Disconnect all power cords from the drives, shut down the operating system, and turn off the computer and wait 3 to 5 minutes to place the computer face-down on the top edge...


