
Lenovo C2 Series User Guide
Page 5
Using the Rescue System 23 OneKey Recovery 24 Driver and Application Installation 25 Using the Software 27 Lenovo Support 28 Troubleshooting and Confirming Setup 29 Troubleshooting Display Problems 30 Troubleshooting Touch screen 31 Troubleshooting Audio Problems 31 Troubleshooting Software Problems 32 Troubleshooting Problems with Optical Drives and Hard Disks 33 Special ... Trademarks 38 Energy Star Statement 38 Enabling ErP compliance mode 39 Electronic emissions notices 40 Mexico regulatory notice 41 ii Contents 31506537 C260 UG V1.0 (Win8.1)(EN)(R).indb 2 2013-12-6 11:54:02
Using the Rescue System 23 OneKey Recovery 24 Driver and Application Installation 25 Using the Software 27 Lenovo Support 28 Troubleshooting and Confirming Setup 29 Troubleshooting Display Problems 30 Troubleshooting Touch screen 31 Troubleshooting Audio Problems 31 Troubleshooting Software Problems 32 Troubleshooting Problems with Optical Drives and Hard Disks 33 Special ... Trademarks 38 Energy Star Statement 38 Enabling ErP compliance mode 39 Electronic emissions notices 40 Mexico regulatory notice 41 ii Contents 31506537 C260 UG V1.0 (Win8.1)(EN)(R).indb 2 2013-12-6 11:54:02
Lenovo C2 Series User Guide
Page 28
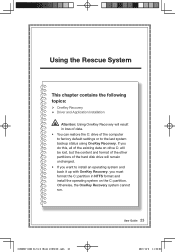
Otherwise, the OneKey Recovery system cannot run. 31506537 C260 UG V1.0 (Win8.1)(EN)(R).indb 23 User Guide 23 2013-12-6 11:54:09 Using the Rescue System This chapter contains the following topics: OneKey Recovery Driver and Application Installation Attention: Using OneKey Recovery will remain unchanged. • If you want to...
Otherwise, the OneKey Recovery system cannot run. 31506537 C260 UG V1.0 (Win8.1)(EN)(R).indb 23 User Guide 23 2013-12-6 11:54:09 Using the Rescue System This chapter contains the following topics: OneKey Recovery Driver and Application Installation Attention: Using OneKey Recovery will remain unchanged. • If you want to...
Lenovo C2 Series User Guide
Page 30
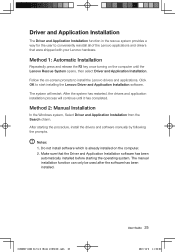
... 2: Manual Installation In the Windows system, Select Driver and Application Installation from the Search charm. Make sure that were shipped with your Lenovo hardware. After starting the operating system. The manual installation function can only be used after the software has been installed. 31506537 C260 UG V1.0 (Win8.1)(EN)(R).indb 25 User Guide...
... 2: Manual Installation In the Windows system, Select Driver and Application Installation from the Search charm. Make sure that were shipped with your Lenovo hardware. After starting the operating system. The manual installation function can only be used after the software has been installed. 31506537 C260 UG V1.0 (Win8.1)(EN)(R).indb 25 User Guide...
Lenovo C2 Series User Guide
Page 36
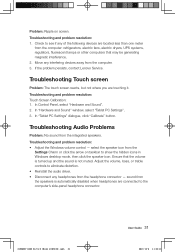
... icons in Windows desktop mode, then click the speaker icon. If the problem persists, contact Lenovo Service. In "Hardware and Sound" window, select "Tablet PC Settings". 3. sound from the...sound is automatically disabled when headphones are touching it. Problem: Ripple on taskbar to eliminate distortion. • Reinstall the audio driver. • Disconnect any of the following...problem resolution: 1. Troubleshooting Touch screen Problem: The touch screen reacts, but not where you are connected to the computer's side-panel headphone connector. 31506537 C260 UG V1.0 (Win8.1)(...
... icons in Windows desktop mode, then click the speaker icon. If the problem persists, contact Lenovo Service. In "Hardware and Sound" window, select "Tablet PC Settings". 3. sound from the...sound is automatically disabled when headphones are touching it. Problem: Ripple on taskbar to eliminate distortion. • Reinstall the audio driver. • Disconnect any of the following...problem resolution: 1. Troubleshooting Touch screen Problem: The touch screen reacts, but not where you are connected to the computer's side-panel headphone connector. 31506537 C260 UG V1.0 (Win8.1)(...

Lenovo C2 Series User Guide
Page 39
... Legacy support on the computer to explore. Repeatedly press and release the F1 key once turning on the boot menu. 34 User Guide 31506537 C260 UG V1.0 (Win8.1)(EN)(R).indb 34 2013-12-6 11:54:10 To change the boot mode? The BIOS setup utility is the BIOS ...under More to start the BIOS setup utility: 1. The capacity of the hard disk as it may be useful later when troubleshooting system problems: The drivers for this computer model only support the Windows 8.1 system. Special considerations for setting boot devices, security, hardware mode, and other preferences. There are...
... Legacy support on the computer to explore. Repeatedly press and release the F1 key once turning on the boot menu. 34 User Guide 31506537 C260 UG V1.0 (Win8.1)(EN)(R).indb 34 2013-12-6 11:54:10 To change the boot mode? The BIOS setup utility is the BIOS ...under More to start the BIOS setup utility: 1. The capacity of the hard disk as it may be useful later when troubleshooting system problems: The drivers for this computer model only support the Windows 8.1 system. Special considerations for setting boot devices, security, hardware mode, and other preferences. There are...
Lenovo C260 All-In-One PC Hardware Maintenance Manual
Page 22
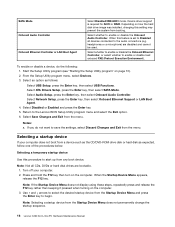
.... 1. Select Save Changes and Exit from the Startup Device Menu does not permanently change the startup sequence. 16 Lenovo C260 All-In-One PC Hardware Maintenance Manual Select ATA Drivers Setup, press the Enter key, then select SATA Mode. When the Startup Device Menu appears, release the F12 ...then select Onboard Audio Controller. SATA Mode Onboard Audio Controller Onboard Ethernet Controller or LAN Boot Agent Select Disabled/IDE/AHCI mode. Device driver support is set to save the settings, select Discard Changes and Exit from a device such as the CD/DVD-ROM drive disk...
.... 1. Select Save Changes and Exit from the Startup Device Menu does not permanently change the startup sequence. 16 Lenovo C260 All-In-One PC Hardware Maintenance Manual Select ATA Drivers Setup, press the Enter key, then select SATA Mode. When the Startup Device Menu appears, release the F12 ...then select Onboard Audio Controller. SATA Mode Onboard Audio Controller Onboard Ethernet Controller or LAN Boot Agent Select Disabled/IDE/AHCI mode. Device driver support is set to save the settings, select Discard Changes and Exit from a device such as the CD/DVD-ROM drive disk...
Lenovo C260 All-In-One PC Hardware Maintenance Manual
Page 30
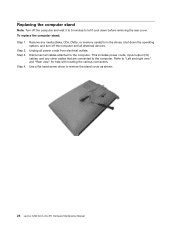
... computer. Use a flat head screw driver to the computer. Step 3. Step 4. This includes power cords, input/output (I/O) cables, and any media (disks, CDs, DVDs, or memory cards) from electrical outlets. Remove any other cables that are connected to remove the stand cover as shown. 24 Lenovo C260 All-In-One PC Hardware Maintenance...
... computer. Use a flat head screw driver to the computer. Step 3. Step 4. This includes power cords, input/output (I/O) cables, and any media (disks, CDs, DVDs, or memory cards) from electrical outlets. Remove any other cables that are connected to remove the stand cover as shown. 24 Lenovo C260 All-In-One PC Hardware Maintenance...

