

Safety and Warranty guide
Page 9
... up around a power adapter or other circuit boards by the product manufacturer. This can cause damage to the part. When you unpack an option or CRU, do not open the staticprotective package containing the part until the instructions direct you to a metal expansion-slot cover or other metal surface. When you handle options or CRUs, or perform any work inside the computer, take...
... up around a power adapter or other circuit boards by the product manufacturer. This can cause damage to the part. When you unpack an option or CRU, do not open the staticprotective package containing the part until the instructions direct you to a metal expansion-slot cover or other metal surface. When you handle options or CRUs, or perform any work inside the computer, take...

Safety and Warranty guide
Page 17
... an embedded Class 3A or Class 3B laser diode. Laser radiation when open. There are present inside these parts, contact a service technician. If you suspect a problem with television tuner options installed The notice below applies to products containing television (TV) tuner devices that connect to external antennas or to cable/CATV systems, or both, and that are not applicable, it is...
... an embedded Class 3A or Class 3B laser diode. Laser radiation when open. There are present inside these parts, contact a service technician. If you suspect a problem with television tuner options installed The notice below applies to products containing television (TV) tuner devices that connect to external antennas or to cable/CATV systems, or both, and that are not applicable, it is...
Safety and Warranty guide
Page 18
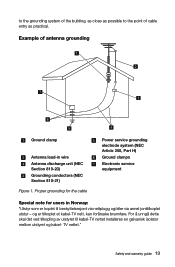
...er tilkoplet et kabel-TV nett, kan for users in wire Antenna discharge unit (NEC Section 810-20) Grounding conductors (NEC Section 810-21) Figure 1. Safety and warranty guide 13 Example of cable entry as possible to the point of antenna ...grounding Ground clamp Antenna lead-in Norway: "Utstyr som er koplet til beskyttelsesjord via nettplugg og/eller via annet jordtilkoplet utstyr - Proper grounding for the cable Power service grounding electrode system (NEC Article 250, Part H) Ground clamps Electronic service...
...er tilkoplet et kabel-TV nett, kan for users in wire Antenna discharge unit (NEC Section 810-20) Grounding conductors (NEC Section 810-21) Figure 1. Safety and warranty guide 13 Example of cable entry as possible to the point of antenna ...grounding Ground clamp Antenna lead-in Norway: "Utstyr som er koplet til beskyttelsesjord via nettplugg og/eller via annet jordtilkoplet utstyr - Proper grounding for the cable Power service grounding electrode system (NEC Article 250, Part H) Ground clamps Electronic service...

Safety and Warranty guide
Page 30
... Other Rights THIS WARRANTY GIVES YOU SPECIFIC LEGAL RIGHTS. Part 2 - Email: lensyd_au@lenovo.com The following replaces the same section in Part 1: What this Warranty Covers: Lenovo warrants that each hardware product that apply to a covered defect during the warranty period. The warranty period and type of purchase specified on your product are set forth below in materials and workmanship under...
... Other Rights THIS WARRANTY GIVES YOU SPECIFIC LEGAL RIGHTS. Part 2 - Email: lensyd_au@lenovo.com The following replaces the same section in Part 1: What this Warranty Covers: Lenovo warrants that each hardware product that apply to a covered defect during the warranty period. The warranty period and type of purchase specified on your product are set forth below in materials and workmanship under...

Safety and Warranty guide
Page 31
..., if the Service Provider is added to the same section in Part 1: Use of Personal Contact Information: Lenovo will be used to repair the product; The following replaces the same section in Part 1: Limitation of Liability: Lenovo is responsible for the transportation. The replacement product or part shall be replaced by contacting Lenovo. Neither Lenovo nor the Service Provider is capable of retaining user-generated data. Products...
..., if the Service Provider is added to the same section in Part 1: Use of Personal Contact Information: Lenovo will be used to repair the product; The following replaces the same section in Part 1: Limitation of Liability: Lenovo is responsible for the transportation. The replacement product or part shall be replaced by contacting Lenovo. Neither Lenovo nor the Service Provider is capable of retaining user-generated data. Products...

Safety and Warranty guide
Page 38
... installed for you within thirty (30) days of your product and deliver it sees fit, with the replacement CRU; An optional service offering may be charged for the replacement CRU if the Service Provider does not receive the defective CRU from a Service Provider or Lenovo under which Self-service CRUs would be completed at www.lenovo.com/CRUs. for your location...
... installed for you within thirty (30) days of your product and deliver it sees fit, with the replacement CRU; An optional service offering may be charged for the replacement CRU if the Service Provider does not receive the defective CRU from a Service Provider or Lenovo under which Self-service CRUs would be completed at www.lenovo.com/CRUs. for your location...
Lenovo C2 Series User Guide
Page 24
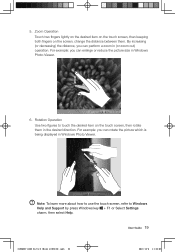
...is being displayed in Windows Photo Viewer. 6. Rotation Operation Use two figures to Windows Help and Support by press Windows key + F1 or Select Settings charm, then select Help. Note: To learn more about how to use the touch screen, refer to touch the desired item on the screen, change the distance...picture size in Windows Photo Viewer. 5. For example: you can perform a zoom in the desired direction. Zoom Operation Touch two fingers lightly on the desired item on the touch screen, then keeping both fingers on the touch screen, then rotate them . User Guide 19 31506537 C260 UG V1.0...
...is being displayed in Windows Photo Viewer. 6. Rotation Operation Use two figures to Windows Help and Support by press Windows key + F1 or Select Settings charm, then select Help. Note: To learn more about how to use the touch screen, refer to touch the desired item on the screen, change the distance...picture size in Windows Photo Viewer. 5. For example: you can perform a zoom in the desired direction. Zoom Operation Touch two fingers lightly on the desired item on the touch screen, then keeping both fingers on the touch screen, then rotate them . User Guide 19 31506537 C260 UG V1.0...
Lenovo C2 Series User Guide
Page 25
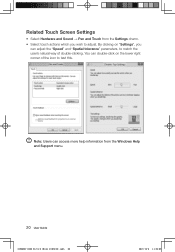
You can double-click on "Settings", you wish to test this. Related Touch Screen Settings • Select Hardware and Sound → Pen and Touch from the Settings charm. • Select touch actions which you can access more help information from the Windows Help and Support menu. 20 User Guide 31506537 C260 UG V1.0 (Win8.1)(EN)(R).indb 20 2013-12-6 11:54:08 By clicking on the lower right corner of double-clicking. Note: Users can adjust the "Speed" and "Spatial tolerance" parameters, to match the user's natural way of the icon to adjust.
You can double-click on "Settings", you wish to test this. Related Touch Screen Settings • Select Hardware and Sound → Pen and Touch from the Settings charm. • Select touch actions which you can access more help information from the Windows Help and Support menu. 20 User Guide 31506537 C260 UG V1.0 (Win8.1)(EN)(R).indb 20 2013-12-6 11:54:08 By clicking on the lower right corner of double-clicking. Note: Users can adjust the "Speed" and "Spatial tolerance" parameters, to match the user's natural way of the icon to adjust.
Lenovo C2 Series User Guide
Page 30
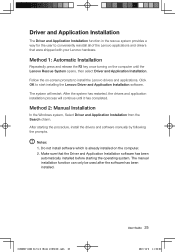
... the Lenovo Rescue System opens, then select Driver and Application Installation. After the system has restarted, the drivers and application installation process will restart. Make sure that were shipped with your Lenovo hardware. Follow the on-screen prompts to start installing the Lenovo Driver and Application Installation software. After starting the operating system. Driver and Application Installation The Driver and Application Installation function in the rescue system provides a way for the user to...
... the Lenovo Rescue System opens, then select Driver and Application Installation. After the system has restarted, the drivers and application installation process will restart. Make sure that were shipped with your Lenovo hardware. Follow the on-screen prompts to start installing the Lenovo Driver and Application Installation software. After starting the operating system. Driver and Application Installation The Driver and Application Installation function in the rescue system provides a way for the user to...
Lenovo C2 Series User Guide
Page 35
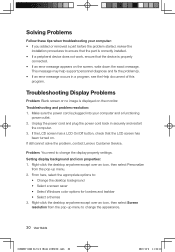
... power cord is plugged into your computer: • If you added or removed a part before the problem started, review the installation procedures to change the display property settings. From here, select the appropriate options to change the appearance. 30 User Guide 31506537 C260 UG V1.0 (Win8.1)(EN)(R).indb 30 2013-12-6 11:54:10 Troubleshooting Display Problems Problem: Blank screen or no image is properly connected. • If an error message appears on . Troubleshooting and problem resolution: 1. Setting display...
... power cord is plugged into your computer: • If you added or removed a part before the problem started, review the installation procedures to change the display property settings. From here, select the appropriate options to change the appearance. 30 User Guide 31506537 C260 UG V1.0 (Win8.1)(EN)(R).indb 30 2013-12-6 11:54:10 Troubleshooting Display Problems Problem: Blank screen or no image is properly connected. • If an error message appears on . Troubleshooting and problem resolution: 1. Setting display...
Lenovo C2 Series User Guide
Page 36
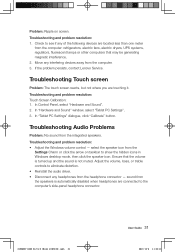
... Lenovo Service. In "Hardware and Sound" window, select "Tablet PC Settings". 3. Troubleshooting and problem resolution: • Adjust the Windows volume control - select the speaker icon from the headphone connector - Check to eliminate distortion. • Reinstall the audio driver. • Disconnect any headphones from the Settings Charm or click the arrow on screen. In Control Panel, select "Hardware and Sound". 2. Ensure that may be generating magnetic interference. 2. Troubleshooting and problem resolution: Touch Screen Calibration: 1. Troubleshooting Touch...
... Lenovo Service. In "Hardware and Sound" window, select "Tablet PC Settings". 3. Troubleshooting and problem resolution: • Adjust the Windows volume control - select the speaker icon from the headphone connector - Check to eliminate distortion. • Reinstall the audio driver. • Disconnect any headphones from the Settings Charm or click the arrow on screen. In Control Panel, select "Hardware and Sound". 2. Ensure that may be generating magnetic interference. 2. Troubleshooting and problem resolution: Touch Screen Calibration: 1. Troubleshooting Touch...

Lenovo C2 Series User Guide
Page 39
... using this computer model only support the Windows 8.1 system. To open the Windows Help and Support file, do one of the two links listed under More to start the BIOS setup utility? How can I start the Setup Utility program. Repeatedly press and release the F1 key once turning on the boot menu. 34 User Guide 31506537 C260 UG V1.0 (Win8.1)(EN)(R).indb 34 2013-12-6 11:54:10 The capacity of the hard disk...
... using this computer model only support the Windows 8.1 system. To open the Windows Help and Support file, do one of the two links listed under More to start the BIOS setup utility? How can I start the Setup Utility program. Repeatedly press and release the F1 key once turning on the boot menu. 34 User Guide 31506537 C260 UG V1.0 (Win8.1)(EN)(R).indb 34 2013-12-6 11:54:10 The capacity of the hard disk...
Lenovo C2 Series User Guide
Page 40
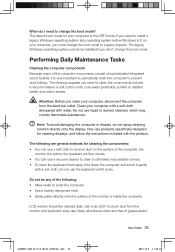
... surface of sophisticated integrated circuit boards, it is very important to periodically clean the computer to Legacy support. The cleaning supplies you need to install a legacy Windows operating system (any of grease stains. User Guide 35 31506537 C260 UG V1.0 (Win8.1)(EN)(R).indb 35 2013-12-6 11:54:10 If you need to change the boot mode. When do I need to clean the components include...
... surface of sophisticated integrated circuit boards, it is very important to periodically clean the computer to Legacy support. The cleaning supplies you need to install a legacy Windows operating system (any of grease stains. User Guide 35 31506537 C260 UG V1.0 (Win8.1)(EN)(R).indb 35 2013-12-6 11:54:10 If you need to change the boot mode. When do I need to clean the components include...
Lenovo C260 All-In-One PC Hardware Maintenance Manual
Page 5
... Hard disk drive boot error 19 Power Supply Problems 19 POST error codes 20 Undetermined problems 20 Chapter 7. Replacing hardware . . . . 21 General information 21 Replacing the keyboard and mouse 22 Replacing the power adapter 22 Replacing the computer stand 24 Removing the rear cover 25 Replacing the optical drive 28 Replacing a memory module 30 Replacing the hard disk drive 30 Replacing the Wi-Fi card 32 Replacing the speaker system 32 Replacing the indicator board 33 Replacing the power switch board 33 Replacing the system fan 34 Replacing the motherboard 35 Replacing...
... Hard disk drive boot error 19 Power Supply Problems 19 POST error codes 20 Undetermined problems 20 Chapter 7. Replacing hardware . . . . 21 General information 21 Replacing the keyboard and mouse 22 Replacing the power adapter 22 Replacing the computer stand 24 Removing the rear cover 25 Replacing the optical drive 28 Replacing a memory module 30 Replacing the hard disk drive 30 Replacing the Wi-Fi card 32 Replacing the speaker system 32 Replacing the indicator board 33 Replacing the power switch board 33 Replacing the system fan 34 Replacing the motherboard 35 Replacing...
Lenovo C260 All-In-One PC Hardware Maintenance Manual
Page 12
... electrical storm. • Connect all power cords to provide protection that will be verified by a certified electrician. Use the round ground-prong of this product or attached devices. 6 Lenovo C260 All-In-One PC Hardware Maintenance Manual To avoid a shock hazard: • Do not connect or disconnect any cables or perform installation, maintenance, or reconfiguration of the AC plug on a double-insulated or battery-operated system.
... electrical storm. • Connect all power cords to provide protection that will be verified by a certified electrician. Use the round ground-prong of this product or attached devices. 6 Lenovo C260 All-In-One PC Hardware Maintenance Manual To avoid a shock hazard: • Do not connect or disconnect any cables or perform installation, maintenance, or reconfiguration of the AC plug on a double-insulated or battery-operated system.
Lenovo C260 All-In-One PC Hardware Maintenance Manual
Page 19
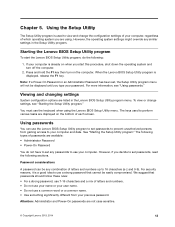
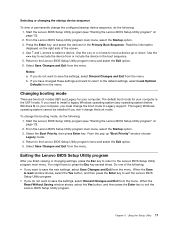
... passwords are using the Lenovo BIOS Setup Utility menu. When the Lenovo BIOS Setup Utility program is used to set , the Setup Utility program menu will not be easily compromised. Using passwords You can be any combination of letters and numbers up to use a common word or a common name. • Use something significantly different from gaining access to view and change settings, see "Using passwords." See "Starting the Setup Utility program." Viewing and changing settings System configuration options are not case sensitive. © Copyright Lenovo...
... passwords are using the Lenovo BIOS Setup Utility menu. When the Lenovo BIOS Setup Utility program is used to set , the Setup Utility program menu will not be easily compromised. Using passwords You can be any combination of letters and numbers up to use a common word or a common name. • Use something significantly different from gaining access to view and change settings, see "Using passwords." See "Starting the Setup Utility program." Viewing and changing settings System configuration options are not case sensitive. © Copyright Lenovo...
Lenovo C260 All-In-One PC Hardware Maintenance Manual
Page 21
... keyboard. Using the Setup Utility 15 The password dialog box will be displayed. Type the current password then press the Enter key. 4. Type the new password, then press the Enter key. Setting, changing, or deleting a Power-On Password Note: A password can be any combination of letters and numbers up to 16 characters (a-z and 0-9). Retype the new password to the Lenovo BIOS Setup Utility program menu and select the Exit option. 6. If the functions are disabled, no USB devices can be used to enable or disable user access...
... keyboard. Using the Setup Utility 15 The password dialog box will be displayed. Type the current password then press the Enter key. 4. Type the new password, then press the Enter key. Setting, changing, or deleting a Power-On Password Note: A password can be any combination of letters and numbers up to 16 characters (a-z and 0-9). Retype the new password to the Lenovo BIOS Setup Utility program menu and select the Exit option. 6. If the functions are disabled, no USB devices can be used to enable or disable user access...
Lenovo C260 All-In-One PC Hardware Maintenance Manual
Page 22
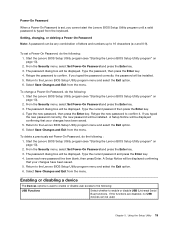
Start the Setup Utility program (see "Starting the Setup Utility program" on the computer. 3. Turn off your computer does not boot from a device such as the CD/DVD-ROM drive disk or hard disk as follows: Select USB Setup, press the Enter key, then select USB Functions. When the Startup Device Menu appears, release the F12 key. SATA Mode Onboard Audio Controller Onboard Ethernet Controller or LAN Boot Agent Select Disabled/IDE/AHCI mode. To enable or disable a device, do not want to the audio connectors (e.g. Select an option as expected...
Start the Setup Utility program (see "Starting the Setup Utility program" on the computer. 3. Turn off your computer does not boot from a device such as the CD/DVD-ROM drive disk or hard disk as follows: Select USB Setup, press the Enter key, then select USB Functions. When the Startup Device Menu appears, release the F12 key. SATA Mode Onboard Audio Controller Onboard Ethernet Controller or LAN Boot Agent Select Disabled/IDE/AHCI mode. To enable or disable a device, do not want to the audio connectors (e.g. Select an option as expected...
Lenovo C260 All-In-One PC Hardware Maintenance Manual
Page 23
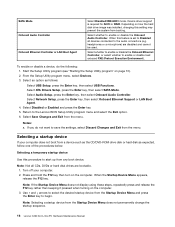
... default settings, select Load Optimal Defaults from the menu. The legacy Windows operating system cannot be installed if you must change the boot mode to move a device up "Boot Priority" window choose Legacy mode. 4. From the Lenovo BIOS Setup Utility program main menu, select the Startup option. 3. Select Save Changes and Exit from the menu. Do one of the screen. 4. From the Lenovo BIOS Setup Utility program main menu, select the Startup option. 3. Use the or keys to Legacy support. Return to exit the Lenovo BIOS Setup Utility...
... default settings, select Load Optimal Defaults from the menu. The legacy Windows operating system cannot be installed if you must change the boot mode to move a device up "Boot Priority" window choose Legacy mode. 4. From the Lenovo BIOS Setup Utility program main menu, select the Startup option. 3. Select Save Changes and Exit from the menu. Do one of the screen. 4. From the Lenovo BIOS Setup Utility program main menu, select the Startup option. 3. Use the or keys to Legacy support. Return to exit the Lenovo BIOS Setup Utility...
Lenovo C260 All-In-One PC Hardware Maintenance Manual
Page 26
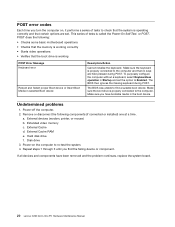
... that the boot drive is working correctly • Starts video operations • Verifies that no keys are set the option to Enabled. Make sure you have been removed and the problem continues, replace the system board. 20 Lenovo C260 All-In-One PC Hardware Maintenance Manual Remove or disconnect the following : • Checks some basic motherboard operations • Checks that the memory is working POST Error Message Keyboard error Reboot and Select proper Boot device or Insert Boot Media in selected Boot device Description/Action...
... that the boot drive is working correctly • Starts video operations • Verifies that no keys are set the option to Enabled. Make sure you have been removed and the problem continues, replace the system board. 20 Lenovo C260 All-In-One PC Hardware Maintenance Manual Remove or disconnect the following : • Checks some basic motherboard operations • Checks that the memory is working POST Error Message Keyboard error Reboot and Select proper Boot device or Insert Boot Media in selected Boot device Description/Action...


