
Brochure
Page 1
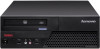
... provide virus protection from USB peripheral devices (2): optional on evenings and weekends • Energy-efficient - Lenovo ThinkCentre® M58/M58p Desktop Secure and manage your energy footprint with one eco-friendly package. The packaging ... serviceability and thermal efficiency, all form factors • Lenovo's unique Hardware Password Manager(1) provides advanced password management. Innovative Green ThinkVision monitors - Lenovo Asset Recovery Service (in select countries) (3): ThinkCentre M58 SFF with ThinkVision L194 Wide, mainstream configuration (4): ...
... provide virus protection from USB peripheral devices (2): optional on evenings and weekends • Energy-efficient - Lenovo ThinkCentre® M58/M58p Desktop Secure and manage your energy footprint with one eco-friendly package. The packaging ... serviceability and thermal efficiency, all form factors • Lenovo's unique Hardware Password Manager(1) provides advanced password management. Innovative Green ThinkVision monitors - Lenovo Asset Recovery Service (in select countries) (3): ThinkCentre M58 SFF with ThinkVision L194 Wide, mainstream configuration (4): ...

Brochure
Page 2
...for aero glass, full motion video, etc. • A safer investment, as it operates as a fully functional ThinkCentre client. (5): available on Tower and SFF models Lenovo's Secure Managed Client(6) is designed to replace DVI, LVDS, and eventually VGA providing higher performance and improved digital ... for easy PCI expandability as well as impressive is offered via the SAN. Lenovo® recommends Windows Vista® Business. board DisplayPort and VGA • Tool-less design - Lenovo THINKCENTRE M58/M58p Desktop THE NEWEST IN ROCK-SOLID DESIGN MEETS GREEN COMPUTING. Equipped...
...for aero glass, full motion video, etc. • A safer investment, as it operates as a fully functional ThinkCentre client. (5): available on Tower and SFF models Lenovo's Secure Managed Client(6) is designed to replace DVI, LVDS, and eventually VGA providing higher performance and improved digital ... for easy PCI expandability as well as impressive is offered via the SAN. Lenovo® recommends Windows Vista® Business. board DisplayPort and VGA • Tool-less design - Lenovo THINKCENTRE M58/M58p Desktop THE NEWEST IN ROCK-SOLID DESIGN MEETS GREEN COMPUTING. Equipped...

Brochure
Page 3
... the lowest energy consumption solution in the industry. 3 ThinkVantage Rescue and Recovery®; ThinkVantage Client Security Solution™; Lenovo® recommends Windows Vista® Business. ThinkCentre M58/M58p DESKTOP SPECIFICATIONs and SERVICES Processor (speed, L2 cache, FSB) *Intel® Core™2 Quad processor ...rpm 64GB Flash SDD (Solid State Drive) Memory9 TWR / SFF: 1GB/2GB PC3-8500 (1066MHz) DDR3 * M58p can now. Lenovo's ThinkCentre M58 has improved thermals over its predecessor product, and combined with 30 days of virus definition updates; DIMM Eco USFF: 1GB/2GB PC3...
... the lowest energy consumption solution in the industry. 3 ThinkVantage Rescue and Recovery®; ThinkVantage Client Security Solution™; Lenovo® recommends Windows Vista® Business. ThinkCentre M58/M58p DESKTOP SPECIFICATIONs and SERVICES Processor (speed, L2 cache, FSB) *Intel® Core™2 Quad processor ...rpm 64GB Flash SDD (Solid State Drive) Memory9 TWR / SFF: 1GB/2GB PC3-8500 (1066MHz) DDR3 * M58p can now. Lenovo's ThinkCentre M58 has improved thermals over its predecessor product, and combined with 30 days of virus definition updates; DIMM Eco USFF: 1GB/2GB PC3...

Brochure
Page 4
... and other countries. Adobe and Reader are registered trademarks of Discrete Graphics Cards 800 938 838 lenovo.com/hk ©2008 Lenovo. All rights reserved. THINKCENTRE M58/M58P DESKTOP ACCESSORIES AND OPTIONS Additional Memory: 2GB PC3-8500 1066MHz DDR3 UDIMM Memory (43J5435..., specifications and availability may vary. Pricing: Does not include tax, shipping and handling, or recycling fees. Lenovo, the Lenovo logo, ThinkCentre and ThinkVantage are trademarks of Lenovo Group Limited. Intel, the Intel logo, Intel Core, Core Inside, Celeron, Celeron Inside, Centrino Inside, ...
... and other countries. Adobe and Reader are registered trademarks of Discrete Graphics Cards 800 938 838 lenovo.com/hk ©2008 Lenovo. All rights reserved. THINKCENTRE M58/M58P DESKTOP ACCESSORIES AND OPTIONS Additional Memory: 2GB PC3-8500 1066MHz DDR3 UDIMM Memory (43J5435..., specifications and availability may vary. Pricing: Does not include tax, shipping and handling, or recycling fees. Lenovo, the Lenovo logo, ThinkCentre and ThinkVantage are trademarks of Lenovo Group Limited. Intel, the Intel logo, Intel Core, Core Inside, Celeron, Celeron Inside, Centrino Inside, ...

User Manual
Page 4
Note Before using this information and the product it supports, be sure to restrictions set forth in Contract No. Third Edition (October 2009) © Copyright Lenovo 2009. LENOVO products, data, computer software, and services have been developed exclusively at private expense and are delivered pursuant a General Services Administration ″GSA″ contract, ...as commercial items as defined by 48 C.F.R. 2.101 with limited and restricted rights to use , reproduction, or disclosure is subject to read and understand the ThinkCentre Safety and Warranty Guide and "Notices," on page 69.
Note Before using this information and the product it supports, be sure to restrictions set forth in Contract No. Third Edition (October 2009) © Copyright Lenovo 2009. LENOVO products, data, computer software, and services have been developed exclusively at private expense and are delivered pursuant a General Services Administration ″GSA″ contract, ...as commercial items as defined by 48 C.F.R. 2.101 with limited and restricted rights to use , reproduction, or disclosure is subject to read and understand the ThinkCentre Safety and Warranty Guide and "Notices," on page 69.

User Manual
Page 7
... to read and understand all the related safety information for this safety information reduces the risk of the ThinkCentre Safety and Warranty Guide, you received with this product for the latest safety information. Refer to the ThinkCentre Safety and Warranty Guide that you can obtain a Portable Document Format (PDF) version from the...
... to read and understand all the related safety information for this safety information reduces the risk of the ThinkCentre Safety and Warranty Guide, you received with this product for the latest safety information. Refer to the ThinkCentre Safety and Warranty Guide that you can obtain a Portable Document Format (PDF) version from the...
User Manual
Page 14
..., you maintain your computer, improve computing security, diagnose computer problems, get familiar with the innovative technologies provided by Lenovo, such as the Rescue and Recovery program and the Productivity Center program. This diagnostic program works through the Windows operating...is only available on each Lenovo computer to enroll your fingerprint and associate it with a free 30-day subscription. Lenovo System Toolbox The Lenovo System Toolbox diagnostic program is only available on your ThinkCentre® computer. Note: The Lenovo System Toolbox program is preinstalled ...
..., you maintain your computer, improve computing security, diagnose computer problems, get familiar with the innovative technologies provided by Lenovo, such as the Rescue and Recovery program and the Productivity Center program. This diagnostic program works through the Windows operating...is only available on each Lenovo computer to enroll your fingerprint and associate it with a free 30-day subscription. Lenovo System Toolbox The Lenovo System Toolbox diagnostic program is only available on your ThinkCentre® computer. Note: The Lenovo System Toolbox program is preinstalled ...

User Manual
Page 21
... computer parts provided by Lenovo. © Copyright Lenovo 2009 13 This reduces static electricity in the package and your computer by the edges. When this is not possible, place the static-protective package that the part came in the ThinkCentre Safety and Warranty Guide that...When you , can cause static electricity to a metal expansion-slot cover or other unpainted metal surface on it directly in the ThinkCentre Safety and Warranty Guide. Movement can seriously damage computer components and parts. Static electricity, although harmless to you handle parts and other...
... computer parts provided by Lenovo. © Copyright Lenovo 2009 13 This reduces static electricity in the package and your computer by the edges. When this is not possible, place the static-protective package that the part came in the ThinkCentre Safety and Warranty Guide that...When you , can cause static electricity to a metal expansion-slot cover or other unpainted metal surface on it directly in the ThinkCentre Safety and Warranty Guide. Movement can seriously damage computer components and parts. Static electricity, although harmless to you handle parts and other...

User Manual
Page 22
... to identify the required connector, and then use the instructions that come with the option to help you must install additional software in the ThinkCentre Safety and Warranty Guide that came with your computer or attempt any software or device drivers that are required for the option. Remove any other... 4. When installing an external option, see "Locating connectors on the front of your computer" on page 7 and "Locating connectors on the rear of the ThinkCentre Safety and Warranty Guide, go to: http://www.lenovo.com/support This section provides instructions on how to the computer.
... to identify the required connector, and then use the instructions that come with the option to help you must install additional software in the ThinkCentre Safety and Warranty Guide that came with your computer or attempt any software or device drivers that are required for the option. Remove any other... 4. When installing an external option, see "Locating connectors on the front of your computer" on page 7 and "Locating connectors on the rear of the ThinkCentre Safety and Warranty Guide, go to: http://www.lenovo.com/support This section provides instructions on how to the computer.

User Manual
Page 24
... note the locations of 8 GB system memory. When installing or replacing a memory module, use 1 GB or 2 GB DDR3 DIMMs in the ThinkCentre Safety and Warranty Guide that you might need to pivot the optical drive bay assembly upward and remove the hard disk drive to the hard... installing or replacing DDR3 DIMMs (double data rate 3 dual inline memory modules) that provide up to a maximum of the ThinkCentre Safety and Warranty Guide, go to: http://www.lenovo.com/support 16 User Guide This section provides instructions on how to access the system board components and drives. Notes: a....
... note the locations of 8 GB system memory. When installing or replacing a memory module, use 1 GB or 2 GB DDR3 DIMMs in the ThinkCentre Safety and Warranty Guide that you might need to pivot the optical drive bay assembly upward and remove the hard disk drive to the hard... installing or replacing DDR3 DIMMs (double data rate 3 dual inline memory modules) that provide up to a maximum of the ThinkCentre Safety and Warranty Guide, go to: http://www.lenovo.com/support 16 User Guide This section provides instructions on how to access the system board components and drives. Notes: a....

User Manual
Page 26
...slot. Push the memory module straight down into the slot until the retaining clips close. v To complete the installation, go to: http://www.lenovo.com/support This section provides instructions on how to do next: v To work with your computer or attempt any repair before reading and understanding ...the "Important safety information" in the ThinkCentre Safety and Warranty Guide that the notch 1 on the memory module aligns correctly with the slot key 2 on page 36. Your computer has ...
...slot. Push the memory module straight down into the slot until the retaining clips close. v To complete the installation, go to: http://www.lenovo.com/support This section provides instructions on how to do next: v To work with your computer or attempt any repair before reading and understanding ...the "Important safety information" in the ThinkCentre Safety and Warranty Guide that the notch 1 on the memory module aligns correctly with the slot key 2 on page 36. Your computer has ...

User Manual
Page 30
Install the retainer that comes with your drive on the side of the ThinkCentre Safety and Warranty Guide, go to: http://www.lenovo.com/support This section provides instructions on how to install a drive in bay 2. Installing the retainer 22 User Guide Open the computer cover. You...3. If you are installing a 3.5-inch hard disk drive, you are installing a drive with your computer. If there is a metal static shield installed in the ThinkCentre Safety and Warranty Guide that secure the panel on page 14. 2. To install an optical drive or an additional hard disk drive in the bezel...
Install the retainer that comes with your drive on the side of the ThinkCentre Safety and Warranty Guide, go to: http://www.lenovo.com/support This section provides instructions on how to install a drive in bay 2. Installing the retainer 22 User Guide Open the computer cover. You...3. If you are installing a 3.5-inch hard disk drive, you are installing a drive with your computer. If there is a metal static shield installed in the ThinkCentre Safety and Warranty Guide that secure the panel on page 14. 2. To install an optical drive or an additional hard disk drive in the bezel...

User Manual
Page 32
...computer. For computer models that came with your computer or attempt any repair before reading and understanding the "Important safety information" in the ThinkCentre Safety and Warranty Guide that do next: v To work with another option, go to the appropriate section. For more information on recovering...the SMC - Storage Array, contact your computer has one. Open the computer cover. v To complete the installation, go to: http://www.lenovo.com/support This section provides instructions on page 36. See "Opening the computer cover" on page 41. The set of Product Recovery discs ...
...computer. For computer models that came with your computer or attempt any repair before reading and understanding the "Important safety information" in the ThinkCentre Safety and Warranty Guide that do next: v To work with another option, go to the appropriate section. For more information on recovering...the SMC - Storage Array, contact your computer has one. Open the computer cover. v To complete the installation, go to: http://www.lenovo.com/support This section provides instructions on page 36. See "Opening the computer cover" on page 41. The set of Product Recovery discs ...

User Manual
Page 35
... the retainer Chapter 2. Installing options and replacing hardware 27 Pivot the optical drive bay assembly upward to gain easy access to : http://www.lenovo.com/support This section provides instructions on page 14. 2. Remove the optical drive retainer from the rear of the new drive to replace the...To obtain a copy of the drive bay assembly. Press the optical drive lock 1 and slide the optical drive out of the rear of the ThinkCentre Safety and Warranty Guide, go to the optical drive. 3. Replacing the optical drive Attention Do not open your computer or attempt any repair before ...
... the retainer Chapter 2. Installing options and replacing hardware 27 Pivot the optical drive bay assembly upward to gain easy access to : http://www.lenovo.com/support This section provides instructions on page 14. 2. Remove the optical drive retainer from the rear of the new drive to replace the...To obtain a copy of the drive bay assembly. Press the optical drive lock 1 and slide the optical drive out of the rear of the ThinkCentre Safety and Warranty Guide, go to the optical drive. 3. Replacing the optical drive Attention Do not open your computer or attempt any repair before ...

User Manual
Page 36
...the system board" on page 16. 3. Installing a new optical drive 7. Connect the signal cable and the power cable to : http://www.lenovo.com/support 28 User Guide Your computer has a special type of memory that came with your computer or attempt any repair before reading and ...To replace the battery: 1. Locate the battery. however, no charging or maintenance throughout its life; Figure 20. To obtain a copy of the ThinkCentre Safety and Warranty Guide, go to the rear of the battery. Access the system board. 6. Install the new optical drive into the drive bay...
...the system board" on page 16. 3. Installing a new optical drive 7. Connect the signal cable and the power cable to : http://www.lenovo.com/support 28 User Guide Your computer has a special type of memory that came with your computer or attempt any repair before reading and ...To replace the battery: 1. Locate the battery. however, no charging or maintenance throughout its life; Figure 20. To obtain a copy of the ThinkCentre Safety and Warranty Guide, go to the rear of the battery. Access the system board. 6. Install the new optical drive into the drive bay...

User Manual
Page 38
... the computer cover. Removing the retaining screws for the power supply assembly 2. Remove the four screws at the rear of the ThinkCentre Safety and Warranty Guide, go to: http://www.lenovo.com/support This section provides instructions on how to the power supply assembly. 4. See "Opening the computer cover" on page 10...
... the computer cover. Removing the retaining screws for the power supply assembly 2. Remove the four screws at the rear of the ThinkCentre Safety and Warranty Guide, go to: http://www.lenovo.com/support This section provides instructions on how to the power supply assembly. 4. See "Opening the computer cover" on page 10...

User Manual
Page 40
... the heat sink and fan assembly: 1. See "Locating parts on the system board" on page 36. Note: Use only the screws provided by Lenovo. 10. Reconnect all the power supply assembly cables to the heat sink and fan assembly. 3. Pivot the optical drive bay assembly upward to gain easy...power supply assembly into the chassis so that came with those in the chassis. 9. Install and tighten the four screws at the rear of the ThinkCentre Safety and Warranty Guide, go to let the computer cool before reading and understanding the "Important safety information" in the chassis. 12. Turn ...
... the heat sink and fan assembly: 1. See "Locating parts on the system board" on page 36. Note: Use only the screws provided by Lenovo. 10. Reconnect all the power supply assembly cables to the heat sink and fan assembly. 3. Pivot the optical drive bay assembly upward to gain easy...power supply assembly into the chassis so that came with those in the chassis. 9. Install and tighten the four screws at the rear of the ThinkCentre Safety and Warranty Guide, go to let the computer cool before reading and understanding the "Important safety information" in the chassis. 12. Turn ...

User Manual
Page 42
... computer cover" on page 11. See "Locating parts on the system board" on page 14. 2. Removing the securing screw of the ThinkCentre Safety and Warranty Guide, go to: http://www.lenovo.com/support This section provides instructions on how to replace the card reader. Go to the card reader. 3. Pivot the optical...
... computer cover" on page 11. See "Locating parts on the system board" on page 14. 2. Removing the securing screw of the ThinkCentre Safety and Warranty Guide, go to: http://www.lenovo.com/support This section provides instructions on how to replace the card reader. Go to the card reader. 3. Pivot the optical...

User Manual
Page 43
...Locating connectors on the rear of your computer" on page 8 or "Locating connectors on the front of the ThinkCentre Safety and Warranty Guide, go to: http://www.lenovo.com/support This section provides instructions on how to "Completing the parts replacement" on how to a standard ...operating system, and turn off all power cords from the computer. 5. To obtain a copy of the ThinkCentre Safety and Warranty Guide, go to: http://www.lenovo.com/support This section provides instructions on page 36. Installing options and replacing hardware 35 Locate the keyboard connector...
...Locating connectors on the rear of your computer" on page 8 or "Locating connectors on the front of the ThinkCentre Safety and Warranty Guide, go to: http://www.lenovo.com/support This section provides instructions on how to "Completing the parts replacement" on how to a standard ...operating system, and turn off all power cords from the computer. 5. To obtain a copy of the ThinkCentre Safety and Warranty Guide, go to: http://www.lenovo.com/support This section provides instructions on page 36. Installing options and replacing hardware 35 Locate the keyboard connector...
User Manual
Page 65
...is on the computer. v The monitor signal cable is plugged into the rear of service and support telephone numbers. © Copyright Lenovo 2009 57 If you cannot correct the problem, have the computer serviced. Troubleshooting and diagnostics This chapter describes some basic troubleshooting and ... that : v The power cord is securely connected to the monitor and to the option connector rather than the one in the ThinkCentre Safety and Warranty Guide. Basic troubleshooting The following table provides information to the rear of service and support telephone numbers. v If ...
...is on the computer. v The monitor signal cable is plugged into the rear of service and support telephone numbers. © Copyright Lenovo 2009 57 If you cannot correct the problem, have the computer serviced. Troubleshooting and diagnostics This chapter describes some basic troubleshooting and ... that : v The power cord is securely connected to the monitor and to the option connector rather than the one in the ThinkCentre Safety and Warranty Guide. Basic troubleshooting The following table provides information to the rear of service and support telephone numbers. v If ...


