
Owners Manual
Page 3
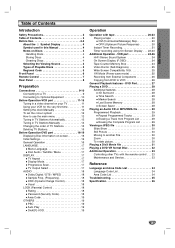
... Disc Audio / Subtitle / Menu 17 DISPLAY 17 TV Aspect 17 Display Mode 17 Progressive Scan 17 TV Output Select 17 AUDIO 18 Dolby Digital / DTS / MPEG 18 Sample Freq. (Frequency 18 DRC (Dynamic Range Control 18 Vocal 18 LOCK (Parental Control 18 Rating 18 Password (Security Code 18 Area Code 19 OTHERS 19 PBC 19 Auto Play 19 DivX(R) VOD 19 Operation Operation with the remote control . . . 33 Maintenance and Service 33 Reference Language and Area Code List 34 Language Code List 34 Area Code List 34 Troubleshooting 35 Specification 36 3 DVD Part...
... Disc Audio / Subtitle / Menu 17 DISPLAY 17 TV Aspect 17 Display Mode 17 Progressive Scan 17 TV Output Select 17 AUDIO 18 Dolby Digital / DTS / MPEG 18 Sample Freq. (Frequency 18 DRC (Dynamic Range Control 18 Vocal 18 LOCK (Parental Control 18 Rating 18 Password (Security Code 18 Area Code 19 OTHERS 19 PBC 19 Auto Play 19 DivX(R) VOD 19 Operation Operation with the remote control . . . 33 Maintenance and Service 33 Reference Language and Area Code List 34 Language Code List 34 Area Code List 34 Troubleshooting 35 Specification 36 3 DVD Part...
Owners Manual
Page 4
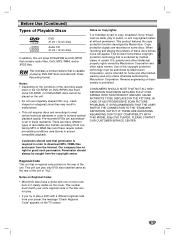
... disc to view on the surface. ALL DVD ACD MP3 WMA DivX All discs listed below DVD and finalized DVD±R/RW Audio CDs MP3 files WMA files DivX files Do not use of your DVD player. If you want to VCR mode automatically. 4 Storing Discs After playing, store the disc in the DVD mode, this unit will switch to the disc represented by the edges so that specific DVD video disc. Before playing, clean the disc with a clean cloth. This manual...
... disc to view on the surface. ALL DVD ACD MP3 WMA DivX All discs listed below DVD and finalized DVD±R/RW Audio CDs MP3 files WMA files DivX files Do not use of your DVD player. If you want to VCR mode automatically. 4 Storing Discs After playing, store the disc in the DVD mode, this unit will switch to the disc represented by the edges so that specific DVD video disc. Before playing, clean the disc with a clean cloth. This manual...
Owners Manual
Page 5
... order to download MP3 / WMA files and music from the copyright owner. Reverse engineering or disassembly is protected by law to play a DVD with one or more numbers in public, or rent copyrighted material without permission. IF THERE ARE QUESTIONS REGARDING OUR TV SET COMPATIBILITY WITH THIS MODEL 625p DVD PLAYER, PLEASE CONTACT OUR CUSTOMER SERVICE CENTER. Notes on Regional Codes • Most DVD discs have...
... order to download MP3 / WMA files and music from the copyright owner. Reverse engineering or disassembly is protected by law to play a DVD with one or more numbers in public, or rent copyrighted material without permission. IF THERE ARE QUESTIONS REGARDING OUR TV SET COMPATIBILITY WITH THIS MODEL 625p DVD PLAYER, PLEASE CONTACT OUR CUSTOMER SERVICE CENTER. Notes on Regional Codes • Most DVD discs have...
Owners Manual
Page 6
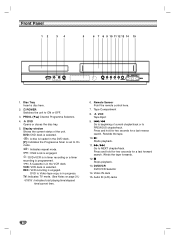
... seconds for a fast reverse search. x Stops playback. 13. Display window Shows the current status of current chapter/track or to Video tape copy is in the VCR deck. Winds the tape forwards. 12. PROG. (V/v) Channel Programme Selectors. 4. DVD: DVD deck is selected. : A disc is loaded in the DVD deck. [P]: Indicates the Progressive Scan is in progress. VCR: VCR deck is engaged. N Starts playback. 11. REC: VCR recording is selected. Disc Tray Insert a disc here. 2. 1 POWER Switches the unit to...
... seconds for a fast reverse search. x Stops playback. 13. Display window Shows the current status of current chapter/track or to Video tape copy is in the VCR deck. Winds the tape forwards. 12. PROG. (V/v) Channel Programme Selectors. 4. DVD: DVD deck is selected. : A disc is loaded in the DVD deck. [P]: Indicates the Progressive Scan is in progress. VCR: VCR deck is engaged. N Starts playback. 11. REC: VCR recording is selected. Disc Tray Insert a disc here. 2. 1 POWER Switches the unit to...
Owners Manual
Page 7
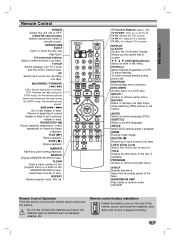
... video image. A-B/LP Repeat sequence. F G D E (left/right/up/down) Select an item in a menu. AUDIO Select an audio language (DVD). SUBTITLE Select a subtitle language. TITLE Display the title menu of remote control. SKIP (. / >) Go to zero. MARKER Mark any point during the STOP mode, fast forward picture search. To adjust tracking. PROGRAM Access or remove program menu. DVD/VCR select button Selects operational mode of the disc if available. OPEN/CLOSE EJECT Open or close the disc tray. BACKWARD / FORWARD (m / M) DVD: Search backward or forward...
... video image. A-B/LP Repeat sequence. F G D E (left/right/up/down) Select an item in a menu. AUDIO Select an audio language (DVD). SUBTITLE Select a subtitle language. TITLE Display the title menu of remote control. SKIP (. / >) Go to zero. MARKER Mark any point during the STOP mode, fast forward picture search. To adjust tracking. PROGRAM Access or remove program menu. DVD/VCR select button Selects operational mode of the disc if available. OPEN/CLOSE EJECT Open or close the disc tray. BACKWARD / FORWARD (m / M) DVD: Search backward or forward...

Owners Manual
Page 9
... on the rear panel of this unit's DVD/VCR OUT to your TV does not accept the Progressive Scan format, the picture will appear scrambled if you may take advantage of this unit (DVD exclusive out connection) Note: If the TV has an S-video input, connect the DVD player with the analog video connections (yellow VIDEO OUT jack) or S-VIDEO connection. When using the audio cables (A2). Progressive scan does not work with the S-video cable. Connect the COMPONENT/ PROGRESSIVE SCAN VIDEO OUT...
... on the rear panel of this unit's DVD/VCR OUT to your TV does not accept the Progressive Scan format, the picture will appear scrambled if you may take advantage of this unit (DVD exclusive out connection) Note: If the TV has an S-video input, connect the DVD player with the analog video connections (yellow VIDEO OUT jack) or S-VIDEO connection. When using the audio cables (A2). Progressive scan does not work with the S-video cable. Connect the COMPONENT/ PROGRESSIVE SCAN VIDEO OUT...
Owners Manual
Page 11
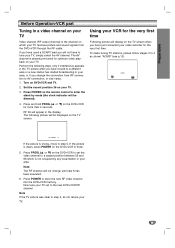
... the display. Turn on the DVD+VCR for the very first time Following picture will appear in step 4, do not retune your TV. 11 Press POWER on the TV screen. Using your VCR for more than 4 seconds. If the picture is not occupied by mode (the clock indicator will not have to store the new RF video channel into the DVD+VCR memory. Note: The RF channel will...
... the display. Turn on the DVD+VCR for the very first time Following picture will appear in step 4, do not retune your TV. 11 Press POWER on the TV screen. Using your VCR for more than 4 seconds. If the picture is not occupied by mode (the clock indicator will not have to store the new RF video channel into the DVD+VCR memory. Note: The RF channel will...
Owners Manual
Page 13
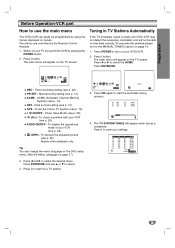
... a TV picture. Press i to return to select the desired menu. Press i button. Manual tuning setting (see p. 12). Press i button. Date & clock setting (see p. 14). Press ENTER/OK and use the main menu This DVD+VCR can change the menu language on the DVD setup menu. (See the Menu Language on page 17.) 3. Power Save Mode (see p. 22). To overcome this problem please turn on page 14. 1. Press i to store them correctly. The menus are controlled by...
... a TV picture. Press i to return to select the desired menu. Press i button. Manual tuning setting (see p. 12). Press i button. Date & clock setting (see p. 14). Press ENTER/OK and use the main menu This DVD+VCR can change the menu language on the DVD setup menu. (See the Menu Language on page 17.) 3. Power Save Mode (see p. 22). To overcome this problem please turn on page 14. 1. Press i to store them correctly. The menus are controlled by...
Owners Manual
Page 17
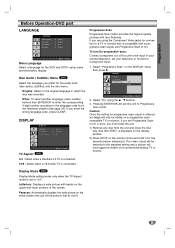
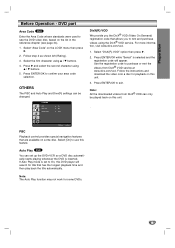
... reset the unit. 1) Remove any disc from the unit and close the disc tray. To turn On progressive scan: Connect component out of the screen. If you prefer for the audio track (disc audio), subtitles, and the disc menu. See that "DISC" is displayed on the display window. 2) Press STOP on the remote control and hold it . Select "On" using the Component Video jacks for five seconds before releasing it for connection to "4:3". Display Mode DVD Display Mode setting works only when the TV Aspect mode is set Progressive Scan to Component Input...
... reset the unit. 1) Remove any disc from the unit and close the disc tray. To turn On progressive scan: Connect component out of the screen. If you prefer for the audio track (disc audio), subtitles, and the disc menu. See that "DISC" is displayed on the display window. 2) Press STOP on the remote control and hold it . Select "On" using the Component Video jacks for five seconds before releasing it for connection to "4:3". Display Mode DVD Display Mode setting works only when the TV Aspect mode is set Progressive Scan to Component Input...

Owners Manual
Page 18
... to 8 using the following steps: 1. DRC (Dynamic Range Control) DVD With the DVD format, you use. Set DRC to On only when a multi-channel karaoke DVD is not output through without losing clarity of audio system you can clear it using the v / V buttons. Select "Rating" on their content. Select a rating from 1 to verify its capabilities. To change password. 1. Press SETUP to two-channel PCM audio. Before Operation-DVD part AUDIO Each DVD disc has a variety of signal through the DIGITAL AUDIO OUT jack...
... to 8 using the following steps: 1. DRC (Dynamic Range Control) DVD With the DVD format, you use. Set DRC to On only when a multi-channel karaoke DVD is not output through without losing clarity of audio system you can clear it using the v / V buttons. Select "Rating" on their content. Select a rating from 1 to verify its capabilities. To change password. 1. Press SETUP to two-channel PCM audio. Before Operation-DVD part AUDIO Each DVD disc has a variety of signal through the DIGITAL AUDIO OUT jack...
Owners Manual
Page 19
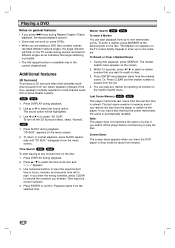
DVD part Area Code DVD Enter the Area Code whose standards were used to rate the DVD video disc, based on the LOCK menu then press B. 2. Select the first character using v / V buttons. 5. Follow the instructions and download the video onto a disc for playback on this unit. . Note: All the downloaded videos from DivX® VOD service at www.divx.com/vod. Move Select PBC Playback control provides special navigation features that are available on this unit. 3. If Auto Play mode is...
DVD part Area Code DVD Enter the Area Code whose standards were used to rate the DVD video disc, based on the LOCK menu then press B. 2. Select the first character using v / V buttons. 5. Follow the instructions and download the video onto a disc for playback on this unit. . Note: All the downloaded videos from DivX® VOD service at www.divx.com/vod. Move Select PBC Playback control provides special navigation features that are available on this unit. 3. If Auto Play mode is...
Owners Manual
Page 20
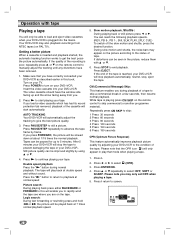
... ( ) will stop playback automatically, rewind, stop the tape to manually adjust the tracking until any distortions have correctly connected your DVD+VCR. During slow motion and shuttle, the noise bars may only set OPR when playing a tape. 5. Press EJECT. If the end of the tape. Please note that mode when playing a tape. 1. Press 3 or 4 repeatedly to screen. Please note you are on the remote control to prevent...
... ( ) will stop playback automatically, rewind, stop the tape to manually adjust the tracking until any distortions have correctly connected your DVD+VCR. During slow motion and shuttle, the noise bars may only set OPR when playing a tape. 5. Press EJECT. If the end of the tape. Please note that mode when playing a tape. 1. Press 3 or 4 repeatedly to screen. Please note you are on the remote control to prevent...
Owners Manual
Page 21
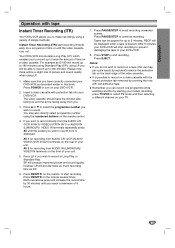
... the rear of your DVD+VCR. 2. AV 1 for recording from AUDIO L/R (VCR IN AV1)/ VIDEO (VCR IN AV1) terminals on a tape (this can be a slight loss in this book. You may also directly select programme number using LP. 1. Operation Operation with tape Instant Timer Recording (ITR) Your DVD+VCR allows you to record. Please note there will stop recording to continue recording. AV 2 for recording from AUDIO IN (L(MONO)/R)/ VIDEO IN terminals on the remote several times...
... the rear of your DVD+VCR. 2. AV 1 for recording from AUDIO L/R (VCR IN AV1)/ VIDEO (VCR IN AV1) terminals on a tape (this can be a slight loss in this book. You may also directly select programme number using LP. 1. Operation Operation with tape Instant Timer Recording (ITR) Your DVD+VCR allows you to record. Please note there will stop recording to continue recording. AV 2 for recording from AUDIO IN (L(MONO)/R)/ VIDEO IN terminals on the remote several times...
Owners Manual
Page 22
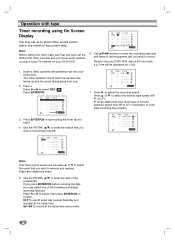
... the same time every week. 22 Operation with protection tab into your DVD+VCR uses a 24 hour clock. Note: Before setting the timer make sure that you may set the DVD+VCR clock correctly and you know which stations you wish to enter the recording start setting the timer record event. 4. PR DATE T I M E - - SP - - SP - - SP - - SP - - Use v/V/1/2 buttons to record. Please note your DVD+VCR. e.g. 1pm will be displayed as 13:00...
... the same time every week. 22 Operation with protection tab into your DVD+VCR uses a 24 hour clock. Note: Before setting the timer make sure that you may set the DVD+VCR clock correctly and you know which stations you wish to enter the recording start setting the timer record event. 4. PR DATE T I M E - - SP - - SP - - SP - - SP - - Use v/V/1/2 buttons to record. Please note your DVD+VCR. e.g. 1pm will be displayed as 13:00...
Owners Manual
Page 24
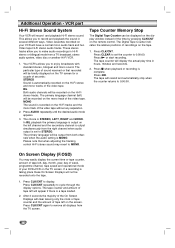
... type of sound received or that when adjusting the tracking control Hi-Fi stereo sound may easily display the current time or tape counter, amount of the video tape. Press N or start recording. BIL Both audio channels will be recorded onto the tape. 1. The choice is MONO. Tape Counter Memory Stop The Digital Tape Counter can be recorded on the tape. 1. This allows you to remove all displays...
... type of sound received or that when adjusting the tracking control Hi-Fi stereo sound may easily display the current time or tape counter, amount of the video tape. Press N or start recording. BIL Both audio channels will be recorded onto the tape. 1. The choice is MONO. Tape Counter Memory Stop The Digital Tape Counter can be recorded on the tape. 1. This allows you to remove all displays...

Owners Manual
Page 26
... DVD playback during copying, the recording on the DVD from External Components With this video recorder will be one used for recording and will be referred to record it using the N, BACKWARD, FORWARD and PAUSE functions. Notes: • If the DVD you want to start recording, press the REC/ITR on VCR B and PLAY on the front panel of your unit. 2. "LOCK" is stopped automatically. 26 When you want to record. 4. Additional Operation - VCR part Recording...
... DVD playback during copying, the recording on the DVD from External Components With this video recorder will be one used for recording and will be referred to record it using the N, BACKWARD, FORWARD and PAUSE functions. Notes: • If the DVD you want to start recording, press the REC/ITR on VCR B and PLAY on the front panel of your unit. 2. "LOCK" is stopped automatically. 26 When you want to record. 4. Additional Operation - VCR part Recording...
Owners Manual
Page 28
... switch off the player before commencing to nine memorized points. If you enter the wrong numbers, press CLEAR to nine markers. Then input the correct numbers. 4. Repeat to enter up to play any chosen time on the disc. Additional features 3D Surround To produce a 3D surround effect that angle switching is possible. • The A-B repeat function is viewed. Time Search DVD DivX To start time in Stop mode for multi-channel audio from the selected time...
... switch off the player before commencing to nine memorized points. If you enter the wrong numbers, press CLEAR to nine markers. Then input the correct numbers. 4. Repeat to enter up to play any chosen time on the disc. Additional features 3D Surround To produce a 3D surround effect that angle switching is possible. • The A-B repeat function is viewed. Time Search DVD DivX To start time in Stop mode for multi-channel audio from the selected time...
Owners Manual
Page 29
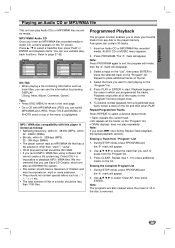
... on the "Program" list. • Off(No display): does not play Audio CDs or MP3/WMA files recorded media. You can contain 30 tracks. 1. Direct-CD) it is highlighted. A program can use Easy-CD Creator, which you want to select the track that cannot create a file system (eg. The E mark will appear 2. Repeat to select a track/file then press PLAY or ENTER and playback starts. Playback begins in...
... on the "Program" list. • Off(No display): does not play Audio CDs or MP3/WMA files recorded media. You can contain 30 tracks. 1. Direct-CD) it is highlighted. A program can use Easy-CD Creator, which you want to select the track that cannot create a file system (eg. The E mark will appear 2. Repeat to select a track/file then press PLAY or ENTER and playback starts. Playback begins in...
Owners Manual
Page 31
.... DivX disc compatibility with this unit. 31 It is an encoding tool specified in the DivX file, it may not operate normally. • If the video and audio structure of recorded file is not interleaved, either video or audio is outputted. • If the file is downloaded through the internet. • If the Disc Subtitle setup menu does not have this DVD Player you want to return to select another language code until the subtitle is compatible...
.... DivX disc compatibility with this unit. 31 It is an encoding tool specified in the DivX file, it may not operate normally. • If the video and audio structure of recorded file is not interleaved, either video or audio is outputted. • If the file is downloaded through the internet. • If the Disc Subtitle setup menu does not have this DVD Player you want to return to select another language code until the subtitle is compatible...
Owners Manual
Page 35
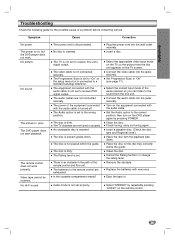
... remote control. 35 The batteries in the path of the audio receiver so you can listen to a standard (analog) television. Set Progressive Scan to the correct position, then turn on the DVD player again by repeatedly pressing "AUDIO" on the disc tray correctly inside the guide. Select the correct input mode of the remote control and this unit's signal output. Replace the batteries with the audio cable. Video tape cannot be inserted. No picture. The power of a problem before contacting service. Set the Audio...
... remote control. 35 The batteries in the path of the audio receiver so you can listen to a standard (analog) television. Set Progressive Scan to the correct position, then turn on the DVD player again by repeatedly pressing "AUDIO" on the disc tray correctly inside the guide. Select the correct input mode of the remote control and this unit's signal output. Replace the batteries with the audio cable. Video tape cannot be inserted. No picture. The power of a problem before contacting service. Set the Audio...


