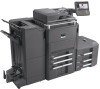
PRESCRIBE Commands Technical Reference Manual - Rev. 4.7
Page 105
... sent every 5 seconds during the 0 printing system is not sent. Interface-independent Parameters (Sheet 1 of page 0 1: Fuser sensor activated 2: Fuser sensor deactivated 3: Page ejection 4: Same as 0; non-engine-dependent Host buffer size H0 0 to 99 in units of 10MB (0 to 990MB) 0 Serial interface baud H1 rate 3: 300 bps (not valid for some models...
6500i/8000i Operation Guide Rev-1 2011.4
Page 475
... tray Bridge Unit Document finisher (Option) Cassette 5 (Option) Cassette 6,7 (Option) Reference Page 12-22 12-23 12-24 12-27 12-28 12-30 12-33 12-34 12-35 12-36 12-37 12-44 12-46 12 12-21 Remove the paper from the multi purpose tray. 3. Open fuser cover... (A1) and remove the paper. 4. Clearing instructions will be displayed. Paper jam. JAM Status Hold 02/04 1. Open fuser cover (A1) and remove the paper. 4. Open main unit right cover 1 and remove the paper.
6500i/8000i Operation Guide Rev-1 2011.4
Page 487
Take sufficient care when working in the fixing unit. 1 Pull up right cover 1 lever and open the right cover 1. 2 Remove the jammed paper. 3 Open the fuser cover. 12 CAUTION: The fixing unit is a danger of getting burned. 4 Remove the jammed paper. Troubleshooting Fixing unit Follow the steps below to clear paper jams in this area, as there is extremely hot. If the paper tears, remove every loose scrap from inside the machine. 12-33