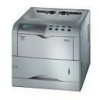

Operation Guide
Page 5
... Setting the Paper Type ...1-30 Setting the Paper Type in Paper Cassette 1-30 Setting the Paper Type in MP Tray 1-31 Custom Paper Type ...1-32 Resetting the Custom Paper Type 1-36 MP Tray Mode...1-37 Selecting the Paper Feed Source ...1-38 Output Stack ...1-39 Overriding A4 and Letter Size Difference 1-40...
... Setting the Paper Type ...1-30 Setting the Paper Type in Paper Cassette 1-30 Setting the Paper Type in MP Tray 1-31 Custom Paper Type ...1-32 Resetting the Custom Paper Type 1-36 MP Tray Mode...1-37 Selecting the Paper Feed Source ...1-38 Output Stack ...1-39 Overriding A4 and Letter Size Difference 1-40...
Operation Guide
Page 7
... ...1-92 Carriage-Return (CR) Action ...1-93 Wide A4 Pitch...1-94 Print Density...1-95 Total Printed Pages...1-96 Toner Counter Resetting ...1-96 Message Language...1-97 Automatic Form Feed Timeout...1-99 Sleep Timer Setting ...1-100 Printer Resetting ...1-102 Resource Protection ...1-103 Alarm (Buzzer) Setting...1-104 Auto Continue Setting ...1-105 Chapter 2 Paper Selection 2-1 General Guidelines ...2-2 Paper...
... ...1-92 Carriage-Return (CR) Action ...1-93 Wide A4 Pitch...1-94 Print Density...1-95 Total Printed Pages...1-96 Toner Counter Resetting ...1-96 Message Language...1-97 Automatic Form Feed Timeout...1-99 Sleep Timer Setting ...1-100 Printer Resetting ...1-102 Resource Protection ...1-103 Alarm (Buzzer) Setting...1-104 Auto Continue Setting ...1-105 Chapter 2 Paper Selection 2-1 General Guidelines ...2-2 Paper...

Operation Guide
Page 19
.... • Cancels a printing job. Cancelling data appears in the mode selection function. • Displays online help is printed. • Resets numeric values, or cancels a setting procedure. • Used to stop . Used to read an CompactFlash card, and more. Note Function • ... is installed) Press the CANCEL key again if you wish to stop the cancellation of printing. 4 Select the interface to configure the printer. Note the certain keys have the secondary function. Finalizes numeric values and other selections. 1-5 to access a desired item or enter numeric...
.... • Cancels a printing job. Cancelling data appears in the mode selection function. • Displays online help is printed. • Resets numeric values, or cancels a setting procedure. • Used to stop . Used to read an CompactFlash card, and more. Note Function • ... is installed) Press the CANCEL key again if you wish to stop the cancellation of printing. 4 Select the interface to configure the printer. Note the certain keys have the secondary function. Finalizes numeric values and other selections. 1-5 to access a desired item or enter numeric...

Operation Guide
Page 24
... Plain >Feed Select Cassette >Duplex Mode None >Stack Select Face-down tray >Sorter Mode Sorter >Override A4/LT >OOfvferride A4/LT On >Type Adjust > Custom 1 >Reset Type Adjust Life Counters > >Total Print 0123456 >New Toner Installed >>Unit mm inch >>X Dimension >>Y Dimension >>Paper weight Normal Heavy (Thick) Light (Thin) >>Duplex Path Enable...
... Plain >Feed Select Cassette >Duplex Mode None >Stack Select Face-down tray >Sorter Mode Sorter >Override A4/LT >OOfvferride A4/LT On >Type Adjust > Custom 1 >Reset Type Adjust Life Counters > >Total Print 0123456 >New Toner Installed >>Unit mm inch >>X Dimension >>Y Dimension >>Paper weight Normal Heavy (Thick) Light (Thin) >>Duplex Path Enable...

Operation Guide
Page 25
Understanding the Operator Panel Continued from previous page Others > >MSG Language English >Form Feed Time Out 030sec. >Sleep Timer > 030 min. >Print HEX-DUMP >Printer Reset >Resource Prot. Off Permanent Perm / Temp >Buzzer On Off >Auto Continue Mode On Mode Off >Service > >>Sleep Mode On Off >>Auto Continue Timer 030sec. >>Print Status Page >>Developer * >>Drum * * Since this menu is provided for service, normally you need not use it. 1-11
Understanding the Operator Panel Continued from previous page Others > >MSG Language English >Form Feed Time Out 030sec. >Sleep Timer > 030 min. >Print HEX-DUMP >Printer Reset >Resource Prot. Off Permanent Perm / Temp >Buzzer On Off >Auto Continue Mode On Mode Off >Service > >>Sleep Mode On Off >>Auto Continue Timer 030sec. >>Print Status Page >>Developer * >>Drum * * Since this menu is provided for service, normally you need not use it. 1-11

Operation Guide
Page 46
... 6 Press the or key to Ready. For how to reset the customized settings, see Resetting the Custom Paper Type on page 1-35) after selecting the paper type to set , any of these may be called up when setting the paper type for the printer. Plain Transparency Preprinted Labels Bond Recycled Vellum Rough Letterhead...
... 6 Press the or key to Ready. For how to reset the customized settings, see Resetting the Custom Paper Type on page 1-35) after selecting the paper type to set , any of these may be called up when setting the paper type for the printer. Plain Transparency Preprinted Labels Bond Recycled Vellum Rough Letterhead...

Operation Guide
Page 50
The message display returns to the default. All the customized paper weight and duplex path settings will be reset to Ready. 1-36 Paper Handling Resetting the Custom Paper Type Resets the settings of Custom 1 to 8 that are set in Custom Paper Type on page 1-32. 1 Press the MENU key. 2 Press the or key repeatedly until >Reset Type Adjust appears. >Reset Type Adjust 5 Press the ENTER key. A question mark (?) appears. >Reset Type Adjust ? 6 Press the ENTER key. Paper Handling > 3 Press the > key. 4 Press the or key repeatedly until Paper handling > appears.
The message display returns to the default. All the customized paper weight and duplex path settings will be reset to Ready. 1-36 Paper Handling Resetting the Custom Paper Type Resets the settings of Custom 1 to 8 that are set in Custom Paper Type on page 1-32. 1 Press the MENU key. 2 Press the or key repeatedly until >Reset Type Adjust appears. >Reset Type Adjust 5 Press the ENTER key. A question mark (?) appears. >Reset Type Adjust ? 6 Press the ENTER key. Paper Handling > 3 Press the > key. 4 Press the or key repeatedly until Paper handling > appears.
Operation Guide
Page 88
...kit is installed) Option (when a network interface card is equipped with both a parallel and USB interface. If you want to reset the printer or turn the power off at least once. The message display changes to apply the changes in the procedure described below. Interface ...of the interface names shown below does not select which interface data will be received from. A blinking question mark (?) appears. Normally, this printer supports a bi-directional/highspeed mode. Before select the interface to the communication mode menu. 1-74 For details, see Appendix C. Interface ?...
...kit is installed) Option (when a network interface card is equipped with both a parallel and USB interface. If you want to reset the printer or turn the power off at least once. The message display changes to apply the changes in the procedure described below. Interface ...of the interface names shown below does not select which interface data will be received from. A blinking question mark (?) appears. Normally, this printer supports a bi-directional/highspeed mode. Before select the interface to the communication mode menu. 1-74 For details, see Appendix C. Interface ?...

Operation Guide
Page 95
...job reducing the total amount of the RAM disk in your printer is not activated (Off). Once the RAM disk size is equipped with a slot for electronic sorting. The printer is set 135 MB of a CompactFlash card. You can be reset. To confirm the RAM disk size or activate the RAM ...disk, proceed as follows: Maximum RAM size = Total printer memory - 9 MB For example, if the total memory installed in...
...job reducing the total amount of the RAM disk in your printer is not activated (Off). Once the RAM disk size is equipped with a slot for electronic sorting. The printer is set 135 MB of a CompactFlash card. You can be reset. To confirm the RAM disk size or activate the RAM ...disk, proceed as follows: Maximum RAM size = Total printer memory - 9 MB For example, if the total memory installed in...

Operation Guide
Page 105
...; Carriage-Return (CR) Action • Wide A4 Pitch • Print Density • Total Printed Pages • Toner Counter Resetting • Message Language • Automatic Form Feed Timeout • Sleep Timer Setting • Printer Resetting • Resource Protection • Alarm (Buzzer) Setting • Auto Continue Setting Page Protect Mode The Page Protect Menu does...
...; Carriage-Return (CR) Action • Wide A4 Pitch • Print Density • Total Printed Pages • Toner Counter Resetting • Message Language • Automatic Form Feed Timeout • Sleep Timer Setting • Printer Resetting • Resource Protection • Alarm (Buzzer) Setting • Auto Continue Setting Page Protect Mode The Page Protect Menu does...

Operation Guide
Page 110
... appears, the total number of printed pages. 1 Press the MENU key. 2 Press the or key repeatedly until >New Toner Installed. Toner Counter Resetting When the toner container is replaced, reset the toner counter as follows so that if this operation is performed when the toner container is indicated on the status page...
... appears, the total number of printed pages. 1 Press the MENU key. 2 Press the or key repeatedly until >New Toner Installed. Toner Counter Resetting When the toner container is replaced, reset the toner counter as follows so that if this operation is performed when the toner container is indicated on the status page...

Operation Guide
Page 111
... counter is English. >MSG Language English 5 To change the language, press the ENTER key. The message display returns to Ready. The default message language is reset. Others > 3 Press the > key. 4 Press the or key repeatedly until Others > appears. A blinking question mark (?) appears. >MSG Language ? A question mark (?) appears... select the language of the messages on the message display by following the procedure given below. Contact your Kyocera Mita dealer for information. 1 Press the MENU key. 2 Press the or key repeatedly until >MSG Language appears. English 1-97
... counter is English. >MSG Language English 5 To change the language, press the ENTER key. The message display returns to Ready. The default message language is reset. Others > 3 Press the > key. 4 Press the or key repeatedly until Others > appears. A blinking question mark (?) appears. >MSG Language ? A question mark (?) appears... select the language of the messages on the message display by following the procedure given below. Contact your Kyocera Mita dealer for information. 1 Press the MENU key. 2 Press the or key repeatedly until >MSG Language appears. English 1-97

Operation Guide
Page 116
... the current unit of measurement, page orientation, font, character code set, margins, etc., set by Ready. Self test Please wait Ready 1-102 A question mark (?) appears. >Printer Reset ? 6 Press the ENTER key again. Others > 3 Press the > key. 4 Press the or key repeatedly until Others > appears. Self test appears while the...
... the current unit of measurement, page orientation, font, character code set, margins, etc., set by Ready. Self test Please wait Ready 1-102 A question mark (?) appears. >Printer Reset ? 6 Press the ENTER key again. Others > 3 Press the > key. 4 Press the or key repeatedly until Others > appears. Self test appears while the...

Operation Guide
Page 139
See Cleaning on page 1-96). 3-8 The printer parts must be locked when it is replaced, reset the toner counter (see Toner Counter Resetting on page 3-9. 8 When the toner container is correctly inserted and close the left cover. Waste Toner Box Replacement 6 Insert the new waste toner box as shown in the figure below. The box will be cleaned when replacing the toner container. New Waste Toner Box 7 Ensure that it fits into place.
See Cleaning on page 1-96). 3-8 The printer parts must be locked when it is replaced, reset the toner counter (see Toner Counter Resetting on page 3-9. 8 When the toner container is correctly inserted and close the left cover. Waste Toner Box Replacement 6 Insert the new waste toner box as shown in the figure below. The box will be cleaned when replacing the toner container. New Waste Toner Box 7 Ensure that it fits into place.

Operation Guide
Page 164
... using the procedure given below. key ? 1 Examples of online help message appears. -- Press ? Open and close the top cover (the paper jam error will be reset). Open and close top cover to release paper jam error. - remove the paper jam. Correcting a Paper Jam Jam at the MP Tray Paper jam MP...
... using the procedure given below. key ? 1 Examples of online help message appears. -- Press ? Open and close the top cover (the paper jam error will be reset). Open and close top cover to release paper jam error. - remove the paper jam. Correcting a Paper Jam Jam at the MP Tray Paper jam MP...

Operation Guide
Page 211
... place. 4 Plug the other end of the cable into the computer's RS-232C interface connector. 5 Switch on the other end. Connecting the Printer to the following values: Baud rate=9600 bps, data bits (character length)=8 bits, stop bits=1, parity=none The two RS-232C protocols are ... parameter settings, you can be a null modem cable; On many computers this can reset them simultaneously, using positive logic for DTR. Another method is wired correctly. The printer performs both the printer and the computer is turned on page 1-76. 7 Set the computer to the values listed above. You ...
... place. 4 Plug the other end of the cable into the computer's RS-232C interface connector. 5 Switch on the other end. Connecting the Printer to the following values: Baud rate=9600 bps, data bits (character length)=8 bits, stop bits=1, parity=none The two RS-232C protocols are ... parameter settings, you can be a null modem cable; On many computers this can reset them simultaneously, using positive logic for DTR. Another method is wired correctly. The printer performs both the printer and the computer is turned on page 1-76. 7 Set the computer to the values listed above. You ...


