
KM-NET ADMIN Operation Guide for Ver 2.0
Page 20
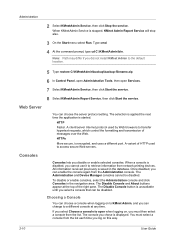
... you did not install KMnet Admin to the default location. 5 Type restore C:\KMnetAdmin\backup\backup-filename.zip. 6 In Control Panel, open Administrative Tools, then open when logging on, you cannot use it to KMnet Admin, and you can choose the server protocol setting. All information received previously is encrypted, and uses a different port. Once disabled, you can be disabled. Web Server You can enable the console again from the list each time you log...
... you did not install KMnet Admin to the default location. 5 Type restore C:\KMnetAdmin\backup\backup-filename.zip. 6 In Control Panel, open Administrative Tools, then open when logging on, you cannot use it to KMnet Admin, and you can choose the server protocol setting. All information received previously is encrypted, and uses a different port. Once disabled, you can be disabled. Web Server You can enable the console again from the list each time you log...
KM-NET ADMIN Operation Guide for Ver 2.0
Page 36
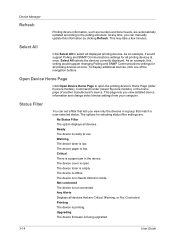
... open the printing device's Home Page (older Kyocera models), Command Center (newer Kyocera models), or the home page of the navigation buttons. Upgrading The device firmware is low. Select All selects the devices currently displayed. Critical There is ready to select all displayed printing devices. Printing The device is offline. Ready The device is a paper jam in Needs Attention mode. The device is printing. To display additional devices, click one of another manufacturer's device. Any Alerts Displays all devices that match a user-selected status. At any time...
... open the printing device's Home Page (older Kyocera models), Command Center (newer Kyocera models), or the home page of the navigation buttons. Upgrading The device firmware is low. Select All selects the devices currently displayed. Critical There is ready to select all displayed printing devices. Printing The device is offline. Ready The device is a paper jam in Needs Attention mode. The device is printing. To display additional devices, click one of another manufacturer's device. Any Alerts Displays all devices that match a user-selected status. At any time...

KM-NET ADMIN Operation Guide for Ver 2.0
Page 39
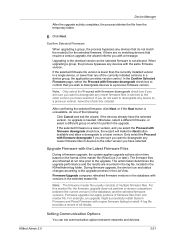
... in the text box. The upgrade will be found in the log file, but once the upgrade instructions are submitted, the server controls the process. The upgrade is not supported for installing the most current printer or engine firmware on devices. For a list of Multi-Set events in the form: Date, Time, Result, IP Address, Model/Group Name, Parameter to set The Log File can also view the SNMP Write...
... in the text box. The upgrade will be found in the log file, but once the upgrade instructions are submitted, the server controls the process. The upgrade is not supported for installing the most current printer or engine firmware on devices. For a list of Multi-Set events in the form: Date, Time, Result, IP Address, Model/Group Name, Parameter to set The Log File can also view the SNMP Write...
KM-NET ADMIN Operation Guide for Ver 2.0
Page 43
... folder. Device Manager After the upgrade activity completes, the process deletes the file from one of the following: Click Cancel and exit the wizard. During firmware upgrade, the device icon and status changes according to downgrade any of the currently installed versions in the List View. If there are recorded in the log file, located in the selected master file. Upgrade Firmware with the same firmware version. Confirm Selected Firmware When upgrading...
... folder. Device Manager After the upgrade activity completes, the process deletes the file from one of the following: Click Cancel and exit the wizard. During firmware upgrade, the device icon and status changes according to downgrade any of the currently installed versions in the List View. If there are recorded in the log file, located in the selected master file. Upgrade Firmware with the same firmware version. Confirm Selected Firmware When upgrading...
KM-NET ADMIN Operation Guide for Ver 2.0
Page 48
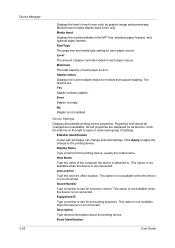
... staples. Asset Number Type a number to use for all available printing device properties. Device Manager 3-26 Displays the level of paper currently loaded in the MP Tray, standard paper feeders, and optional paper feeders: Size/Type The page size and media type setting for the printing device, usually the model name. Click the buttons on the right to apply the change selected settings. Error Stapler is not connected. Click Apply to open or close each group of settings. sysLocation Type the device's office location. Fixed Identification User Guide
... staples. Asset Number Type a number to use for all available printing device properties. Device Manager 3-26 Displays the level of paper currently loaded in the MP Tray, standard paper feeders, and optional paper feeders: Size/Type The page size and media type setting for the printing device, usually the model name. Click the buttons on the right to apply the change selected settings. Error Stapler is not connected. Click Apply to open or close each group of settings. sysLocation Type the device's office location. Fixed Identification User Guide
KM-NET ADMIN Operation Guide for Ver 2.0
Page 58
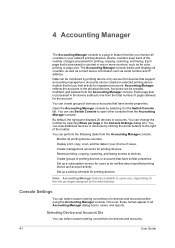
... naming conventions for devices and accounts before using the Accounting Manager console. Each page that is processed is counted in the Switch Console list. Console Settings You can perform the following tasks from the total number of views. Open the Accounting Manager console by the administrator. Restrict printing, copying, scanning, and faxing access to be monitored by printing device or by clicking the arrow buttons to open other consoles...
... naming conventions for devices and accounts before using the Accounting Manager console. Each page that is processed is counted in the Switch Console list. Console Settings You can perform the following tasks from the total number of views. Open the Accounting Manager console by the administrator. Restrict printing, copying, scanning, and faxing access to be monitored by printing device or by clicking the arrow buttons to open other consoles...
KM-NET ADMIN Operation Guide for Ver 2.0
Page 63
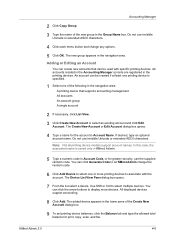
... navigation area. All accounts created in the Accounting Manager console are registered in Account Name. Note: Not all printing device models support account names. Use Shift or Ctrl to let KMnet Admin change any options. 5 Click OK. The new group appears in the navigation area: A printing device that can click Generate Code to select multiple devices. If desired, type an optional account name. All displayed devices support accounting. 8 Click Add.
... navigation area. All accounts created in the Accounting Manager console are registered in Account Name. Note: Not all printing device models support account names. Use Shift or Ctrl to let KMnet Admin change any options. 5 Click OK. The new group appears in the navigation area: A printing device that can click Generate Code to select multiple devices. If desired, type an optional account name. All displayed devices support accounting. 8 Click Add.
KM-NET ADMIN Operation Guide for Ver 2.0
Page 66
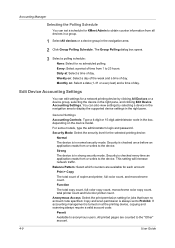
... code: Permit Available to anonymous users. Monthly on at : Select a time of copier and printer, full-color count, and monochrome count. For some models, type the administrator's login and password. This setting will increase network traffic. Anonymous Access: Select the print permission setting for the selected printing device: Normal The device is in the navigation area. 2 Click Group Polling Schedule. Function The total copy count, full-color copy count, monochrome color copy count, total printer count and full-color printer count. If accounting management is checked...
... code: Permit Available to anonymous users. Monthly on at : Select a time of copier and printer, full-color count, and monochrome count. For some models, type the administrator's login and password. This setting will increase network traffic. Anonymous Access: Select the print permission setting for the selected printing device: Normal The device is in the navigation area. 2 Click Group Polling Schedule. Function The total copy count, full-color copy count, monochrome color copy count, total printer count and full-color printer count. If accounting management is checked...
KM-NET ADMIN Operation Guide for Ver 2.0
Page 92
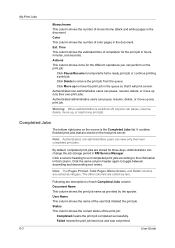
... the print job name as integers. Color This column shows the number of monochrome (black and white) pages in the document. Actions This column shows icons for three days. Click Delete to temporarily halt a ready print job or continue printing a print job. Failed means the print job timed out and was not printed. 6-3 User Guide My Print Jobs Monochrome This column shows the number of color pages in the document. Est. It contains finished print jobs that initiated the print job...
... the print job name as integers. Color This column shows the number of monochrome (black and white) pages in the document. Actions This column shows icons for three days. Click Delete to temporarily halt a ready print job or continue printing a print job. Failed means the print job timed out and was not printed. 6-3 User Guide My Print Jobs Monochrome This column shows the number of color pages in the document. Est. It contains finished print jobs that initiated the print job...
KM-NET ADMIN Operation Guide for Ver 2.0
Page 99
... provides a quick and easy means of errors committed by which members are added to manage and secure a network-enabled device. Form View A view that represents the number and type of installing the most current firmware on a group by group basis). Developed by a particular device. Dynamic Group A device group to a device. Hostname can be very careful when using a firmware upgrade. E Error Rate A value that shows device settings (for printing devices) and...
... provides a quick and easy means of errors committed by which members are added to manage and secure a network-enabled device. Form View A view that represents the number and type of installing the most current firmware on a group by group basis). Developed by a particular device. Dynamic Group A device group to a device. Hostname can be very careful when using a firmware upgrade. E Error Rate A value that shows device settings (for printing devices) and...
KM-NET ADMIN Operation Guide for Ver 2.0
Page 100
... is also used to change the server name or IP address, configure and test the server connection, enable or disable reprint, or set limits for Print Job Manager. KM Service Manager Software component that can act as a printer, a scanner, a fax machine, and a photocopier. If Job Release is installed, the KM Service Manager is regularly polled and updated. Login User A user account with a manual group. Managed Device A device that monitors the overall activity on to a network device. Managed Queue A sequence of programs from...
... is also used to change the server name or IP address, configure and test the server connection, enable or disable reprint, or set limits for Print Job Manager. KM Service Manager Software component that can act as a printer, a scanner, a fax machine, and a photocopier. If Job Release is installed, the KM Service Manager is regularly polled and updated. Login User A user account with a manual group. Managed Device A device that monitors the overall activity on to a network device. Managed Queue A sequence of programs from...
KM-NET ADMIN Operation Guide for Ver 2.0
Page 101
... example, if a network is deleted, and the IP address of roles that manages printing for obtaining counter and status information from a saved template to one NIC. Privileges A property of a device is selected in the navigation area. Print Job A file or set up a polling schedule in the list pane. Other computers send their print jobs while allowing administrators to effectively manage those users' settings. KMnet Admin 2.0 ix Multi-Set A utility that has...
... example, if a network is deleted, and the IP address of roles that manages printing for obtaining counter and status information from a saved template to one NIC. Privileges A property of a device is selected in the navigation area. Print Job A file or set up a polling schedule in the list pane. Other computers send their print jobs while allowing administrators to effectively manage those users' settings. KMnet Admin 2.0 ix Multi-Set A utility that has...
Ai-4040/5050 Instruction HB
Page 6
... erase mode 63 (9) Making covers or insert sheets among the copies [Sheet copy]..65 1 Submodes 65 2 Combination of touch panel language 150 OPTIONAL EQUIPMENT 151 (1) Finisher 151 (2) Key counter 153 (3) I/F kit 154 (4) Memory copy board 154 (5) MMD host monitoring system device 154 MESSAGES 159 q When the messages below are displayed 159 REPLACING THE TONER CARTRIDGE 165 WHEN PAPER MISFEEDS 167 (1) Misfeed location indicators 167 (2) Cautions 167 (3) Removal procedures 170 TROUBLESHOOTING 183 CLEANING THE COPIER 189 SPECIFICATIONS 191...
... erase mode 63 (9) Making covers or insert sheets among the copies [Sheet copy]..65 1 Submodes 65 2 Combination of touch panel language 150 OPTIONAL EQUIPMENT 151 (1) Finisher 151 (2) Key counter 153 (3) I/F kit 154 (4) Memory copy board 154 (5) MMD host monitoring system device 154 MESSAGES 159 q When the messages below are displayed 159 REPLACING THE TONER CARTRIDGE 165 WHEN PAPER MISFEEDS 167 (1) Misfeed location indicators 167 (2) Cautions 167 (3) Removal procedures 170 TROUBLESHOOTING 183 CLEANING THE COPIER 189 SPECIFICATIONS 191...
Ai-4040/5050 Instruction HB
Page 30
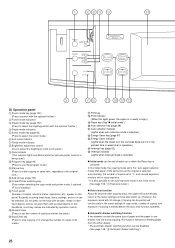
... select the sorter mode.) 6 Sort mode indicator 7 Group mode indicator 8 Brightness adjustment control (Use to adjust the brightness of the touch panel.) 9 Data indicator (This indicator lights and blinks while the optional printer function is started before the auto clear function operates. Manual key (Press to make copying of same ratio, regardless of the original size.) @ Add job key (page 100) # Copier/Printer switching key (Press when switching the copy mode and printer mode, if optional I/F kit is installed.) $ Touch panel (Number of copies, machine status, operations, etc., appear...
... select the sorter mode.) 6 Sort mode indicator 7 Group mode indicator 8 Brightness adjustment control (Use to adjust the brightness of the touch panel.) 9 Data indicator (This indicator lights and blinks while the optional printer function is started before the auto clear function operates. Manual key (Press to make copying of same ratio, regardless of the original size.) @ Add job key (page 100) # Copier/Printer switching key (Press when switching the copy mode and printer mode, if optional I/F kit is installed.) $ Touch panel (Number of copies, machine status, operations, etc., appear...

Ai-4040/5050 Instruction HB
Page 47
... sheets (page 62) • Neat copying of time (overnight, etc.), turn the main switch OFF (O). If it can be displayed on the Platen. (page 37, page 39) 4. Setting originals. CAUTION If the copier will not be used for an extended period of time (vacations, etc.), remove the power plug from the manual exposure mode to the auto exposure mode, touch the "Auto" key. * When the overall copies are deposited in the copy tray. * The copies...
... sheets (page 62) • Neat copying of time (overnight, etc.), turn the main switch OFF (O). If it can be displayed on the Platen. (page 37, page 39) 4. Setting originals. CAUTION If the copier will not be used for an extended period of time (vacations, etc.), remove the power plug from the manual exposure mode to the auto exposure mode, touch the "Auto" key. * When the overall copies are deposited in the copy tray. * The copies...
Printing System G Instruction Hand Book
Page 4
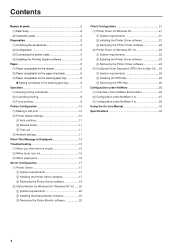
... Issuing printing commands 7 (2) Cancelling printing 8 (3) Force-printing 9 Printer Configuration 10 (1) Making a test print 10 (2) Printer default settings 10 1 Auto continue 11 2 Receive buffer 11 3 Time out 11 (3) Network settings 11 When This Message is Displayed 14 Troubleshooting 15 (1) When you think there is trouble 15 (2) When toner runs out 16 (3) When paper jams 16 Server Configuration 17 (1) Printer Server 17 1 System requirements 17 2 Installing the Printer Server software 17 3 Removing the Printer Server software 19 (2) Status Monitor for Windows 95 / Windows...
... Issuing printing commands 7 (2) Cancelling printing 8 (3) Force-printing 9 Printer Configuration 10 (1) Making a test print 10 (2) Printer default settings 10 1 Auto continue 11 2 Receive buffer 11 3 Time out 11 (3) Network settings 11 When This Message is Displayed 14 Troubleshooting 15 (1) When you think there is trouble 15 (2) When toner runs out 16 (3) When paper jams 16 Server Configuration 17 (1) Printer Server 17 1 System requirements 17 2 Installing the Printer Server software 17 3 Removing the Printer Server software 19 (2) Status Monitor for Windows 95 / Windows...
Printing System G Instruction Hand Book
Page 18
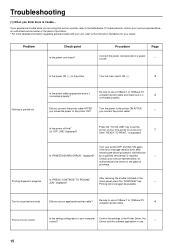
... required. - If trouble persists, contact your service representative, an authorised service center or the place of purchase. Contact your computer Confirm the settings in the Printer Driver, the correct? displayed? Server and the software application in the touch panel, press the "CONTINUE" key. Troubleshooting (1) When you think there is displayed. If you experience trouble while you connect the printer cable. - Problem Check point Is the power cord loose? Printing stopped in your service representative, an...
... required. - If trouble persists, contact your service representative, an authorised service center or the place of purchase. Contact your computer Confirm the settings in the Printer Driver, the correct? displayed? Server and the software application in the touch panel, press the "CONTINUE" key. Troubleshooting (1) When you think there is displayed. If you experience trouble while you connect the printer cable. - Problem Check point Is the power cord loose? Printing stopped in your service representative, an...
Printing System G Instruction Hand Book
Page 24
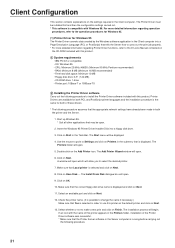
... 2 Installing the Printer Driver software Carry out the following procedure to make a test print and click on Next. 8. The Printers folder will open. 6. Check the printer name. (It is possible to the operation procedures for Windows 95. (1) Printer Driver for both of these drivers. * The following procedure. 21 Double-click on OK. 10. The Add Printer Wizard window will open . 9. Make sure that the correct floppy disk drive name is displayed. Click on the Add Printer icon. Use...
... 2 Installing the Printer Driver software Carry out the following procedure to make a test print and click on Next. 8. The Printers folder will open. 6. Check the printer name. (It is possible to the operation procedures for Windows 95. (1) Printer Driver for both of these drivers. * The following procedure. 21 Double-click on OK. 10. The Add Printer Wizard window will open . 9. Make sure that the correct floppy disk drive name is displayed. Click on the Add Printer icon. Use...

Printing System G Instruction Hand Book
Page 26
... network settings have already been made in each of the 3 successive windows. 17. Click on OK. 7. Click on Start in regard to Settings and click on Have Disk.... 13. Click on OK. 16. Point to making a test print. 18. Use Look in the Server computer is displayed and click on Add printer. 10. Insert the Windows NT 4.0 Printer Driver Installer Disk into a floppy disk drive. 3. Click on Finish. * Make...
... network settings have already been made in each of the 3 successive windows. 17. Click on OK. 7. Click on Start in regard to Settings and click on Have Disk.... 13. Click on OK. 16. Point to making a test print. 18. Use Look in the Server computer is displayed and click on Add printer. 10. Insert the Windows NT 4.0 Printer Driver Installer Disk into a floppy disk drive. 3. Click on Finish. * Make...
Printing System G Instruction Hand Book
Page 34
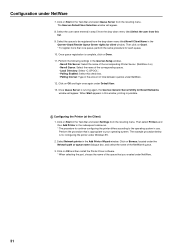
... configuring the printer differs according to your operating system. Then select Printers and then Add Printer in this window, printing is complete, click on Done. 11. Select Network printer in the Qserver-Grant/Revoke Queue Server rights for Novell Networks window will appear. 8. Click on Start in the Task Bar and select Queue Server from this check box. • Polling Interval: Type in the Qserver-Setup window. • Novell File Server...
... configuring the printer differs according to your operating system. Then select Printers and then Add Printer in this window, printing is complete, click on Done. 11. Select Network printer in the Qserver-Grant/Revoke Queue Server rights for Novell Networks window will appear. 8. Click on Start in the Task Bar and select Queue Server from this check box. • Polling Interval: Type in the Qserver-Setup window. • Novell File Server...


