bizhub 652 Finisher - Konica Minolta
bizhub 652 Finisher

View Results Below
Free Konica Minolta bizhub 652 manuals!
Problems with Konica Minolta bizhub 652?
Ask a Question
Free Konica Minolta bizhub 652 manuals!
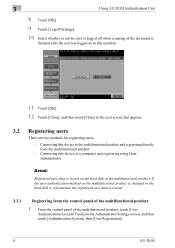
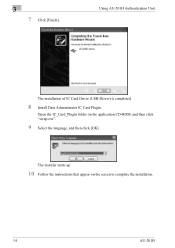
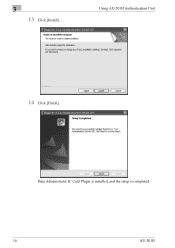
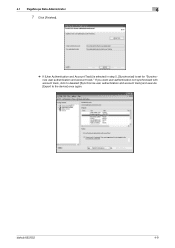
Problems with Konica Minolta bizhub 652?
Ask a Question
Related Manual Pages


Similar Questions

Minolta Biz Hub C364e, Remove Paper From Finisher Tray
i have a minolta biz hub C364e, I've just replaced the waste boxnow i have an error message that say...
i have a minolta biz hub C364e, I've just replaced the waste boxnow i have an error message that say...
(Posted by ahmadalkaff 8 years ago)

My Bizhub652 Is Not Recognizing Finisher
(Posted by Anonymous-132721 10 years ago)
How Can A Turn Off The Beep When A Job Is Finished Konica C284
How can a turn off the beep when a job is finished Konica C284
How can a turn off the beep when a job is finished Konica C284
(Posted by gjdevreede 11 years ago)
I Cannot Find Hole Punch Function On Screen.i Attached Fs 610 Finisher
I attached FS 610 finisher with hole punch unit to Bizhub 751 copier. I don't see hole punch screen ...
I attached FS 610 finisher with hole punch unit to Bizhub 751 copier. I don't see hole punch screen ...
(Posted by daeseonhong 11 years ago)