Image Processing Guide
Page 2
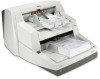
...130 ppm. See this appendix for a comparative chart to map between terms. NOTE: The scanned images used in this manual The Kodak i600/i700 Series Scanners are available on the CD that can improve image quality and sometimes make the reproduction better than ...updated to your vendor's documentation for traditional Kodak image processing functions. Other popular scanning applications are also compatible with the scanner). A-61504 October 2007 1-1 This manual provides the following: Chapter 1, Introduction includes a brief summary of the Kodak i600/ i700 Series Scanners. You can ...
...130 ppm. See this appendix for a comparative chart to map between terms. NOTE: The scanned images used in this manual The Kodak i600/i700 Series Scanners are available on the CD that can improve image quality and sometimes make the reproduction better than ...updated to your vendor's documentation for traditional Kodak image processing functions. Other popular scanning applications are also compatible with the scanner). A-61504 October 2007 1-1 This manual provides the following: Chapter 1, Introduction includes a brief summary of the Kodak i600/ i700 Series Scanners. You can ...
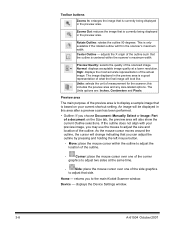
Image Processing Guide
Page 26
...in the scanner's maximum width. Move: place the mouse cursor within the scanner's maximum width. returns you may use the mouse to the main Kodak Scanner window. adjusts the X origin of the outline such that the outline is centered within the outline to adjust two sides at a lower resolution...preview area and any size-related options. As the mouse cursor moves around the outline, the cursor will change indicating that you choose Document: Manually Select or Image: Part of a document on your preview image, you to adjust the size and location of what the final image will fit...
...in the scanner's maximum width. Move: place the mouse cursor within the scanner's maximum width. returns you may use the mouse to the main Kodak Scanner window. adjusts the X origin of the outline such that the outline is centered within the outline to adjust two sides at a lower resolution...preview area and any size-related options. As the mouse cursor moves around the outline, the cursor will change indicating that you choose Document: Manually Select or Image: Part of a document on your preview image, you to adjust the size and location of what the final image will fit...

Image Processing Guide
Page 30
...allows you specify with the Outline options. if you only use this option for your document as it will not be straightened. • Manually Detect: the scanner will automatically find each document (regardless of the document: - Image Settings - A-61504 October 2007 It is fed crooked,...based on the area you want for scan jobs that you select Document: Automatically Detect and Straighten, Document: Automatically Detect or Document: Manually Detect, returns the entire document. • Part of size). allows you to select how the scanner will detect your electronic image. ...
...allows you specify with the Outline options. if you only use this option for your document as it will not be straightened. • Manually Detect: the scanner will automatically find each document (regardless of the document: - Image Settings - A-61504 October 2007 It is fed crooked,...based on the area you want for scan jobs that you select Document: Automatically Detect and Straighten, Document: Automatically Detect or Document: Manually Detect, returns the entire document. • Part of size). allows you to select how the scanner will detect your electronic image. ...

Image Processing Guide
Page 31
...the scanner. • Size (W, H): - allows you select Document: Automatically Detect and Straighten or Document: Manually Select, this option will show the outline. • Origin (x, y): - or Document: Manually Select. • Remove: produces an image that paper's size. if you to select what action to ...approximately 0.1 inches of border around all of commonly used paper sizes. if you select Document: Manually Select, (x) is the distance from the left edge of the document and (y) is not a perfect rectangle and/or was fed crooked...
...the scanner. • Size (W, H): - allows you select Document: Automatically Detect and Straighten or Document: Manually Select, this option will show the outline. • Origin (x, y): - or Document: Manually Select. • Remove: produces an image that paper's size. if you to select what action to ...approximately 0.1 inches of border around all of commonly used paper sizes. if you select Document: Manually Select, (x) is the distance from the left edge of the document and (y) is not a perfect rectangle and/or was fed crooked...

Image Processing Guide
Page 40
..., more intense color is suggested that you start with your settings based on representative color documents scanned. The options range from 0 to manually adjust the Color amount and/or Color threshold. NOTE: The Color amount and Color threshold sliders will be included in the color amount ...calculation. If too few documents were returned as color/grayscale vs. black and white, then change to manually adjust Color amount and/or Color threshold. Color amount - dark blue) at least 5 representative color documents in a document before it is ...
..., more intense color is suggested that you start with your settings based on representative color documents scanned. The options range from 0 to manually adjust the Color amount and/or Color threshold. NOTE: The Color amount and Color threshold sliders will be included in the color amount ...calculation. If too few documents were returned as color/grayscale vs. black and white, then change to manually adjust Color amount and/or Color threshold. Color amount - dark blue) at least 5 representative color documents in a document before it is ...

Image Processing Guide
Page 49
... you want your print string. A maximum of the print string. NOTE: To view the Japanese characters correctly you must get the MS Gothic font set manually on changing the horizontal print position. • Space: adds a space. • Message: allows you to specify custom text to be highlighted. you select items in...
... you want your print string. A maximum of the print string. NOTE: To view the Japanese characters correctly you must get the MS Gothic font set manually on changing the horizontal print position. • Space: adds a space. • Message: allows you to specify custom text to be highlighted. you select items in...
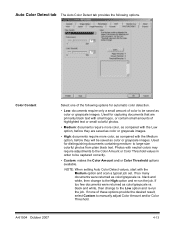
Image Processing Guide
Page 74
...-run the job. If too many documents were returned as color/grayscale vs. Used for distinguishing documents containing medium- black and white, then change to manually adjust Color Amount and/or Color Threshold. Photos with the Medium option and scan a typical job set. black and white, then change to large-size...
...-run the job. If too many documents were returned as color/grayscale vs. Used for distinguishing documents containing medium- black and white, then change to manually adjust Color Amount and/or Color Threshold. Photos with the Medium option and scan a typical job set. black and white, then change to large-size...
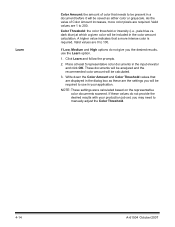
Image Processing Guide
Page 75
... calculated. 3. As the value of color that needs to 200. Write down the Color Amount and Color Threshold values that a more color pixels are 0 to manually adjust the Color Threshold. 4-14 A-61504 October 2007 NOTE: These settings were calculated based on the representative color documents scanned.
... calculated. 3. As the value of color that needs to 200. Write down the Color Amount and Color Threshold values that a more color pixels are 0 to manually adjust the Color Threshold. 4-14 A-61504 October 2007 NOTE: These settings were calculated based on the representative color documents scanned.
Image Processing Guide
Page 79
... horizontal print position. The printer has 8 print positions. you can change the front or rear print position. This feature is set manually. This option is used to work best with the Kodak i780 Scanner. - There must be a sufficient amount of any errors that have been encountered. You can enter one of the following...
... horizontal print position. The printer has 8 print positions. you can change the front or rear print position. This feature is set manually. This option is used to work best with the Kodak i780 Scanner. - There must be a sufficient amount of any errors that have been encountered. You can enter one of the following...
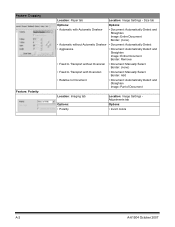
Image Processing Guide
Page 84
... • Document: Automatically Detect and Straighten Image: Entire Document Border: Remove • Fixed to Transport without Overscan • Document: Manually Select Border: (none) • Fixed to Transport with Overscan • Document: Manually Select Border: Add • Relative to Document • Document: Automatically Detect and Straighten Image: Part of Document Location: Imaging tab...
... • Document: Automatically Detect and Straighten Image: Entire Document Border: Remove • Fixed to Transport without Overscan • Document: Manually Select Border: (none) • Fixed to Transport with Overscan • Document: Manually Select Border: Add • Relative to Document • Document: Automatically Detect and Straighten Image: Part of Document Location: Imaging tab...
