Image Processing Guide
Page 2
... and much more. Chapter 3, Using the TWAIN Datasource includes information on how to map between terms. NOTE: The scanned images used in this manual The Kodak i600/i700 Series Scanners are also compatible with throughput speeds ranging from 80 to access all of the fields on each tab. Chapter 2, Best Practices includes information...
... and much more. Chapter 3, Using the TWAIN Datasource includes information on how to map between terms. NOTE: The scanned images used in this manual The Kodak i600/i700 Series Scanners are also compatible with throughput speeds ranging from 80 to access all of the fields on each tab. Chapter 2, Best Practices includes information...
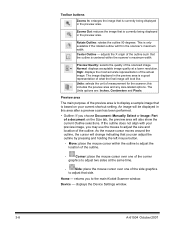
Image Processing Guide
Page 26
...adjust the size and location of the outline. this area after a preview scan has been performed. • Outline: If you choose Document: Manually Select or Image: Part of a document on your preview image, you can adjust the outline by pressing and holding the left mouse button. -... of the scanned image. Preview area The main purpose of the preview area is to the main Kodak Scanner window. Center Outline - Preview Quality: selects the quality of measurement for the scanner; The image displayed in the preview area. The Units options are: Inches, Centimeters and Pixels. ...
...adjust the size and location of the outline. this area after a preview scan has been performed. • Outline: If you choose Document: Manually Select or Image: Part of a document on your preview image, you can adjust the outline by pressing and holding the left mouse button. -... of the scanned image. Preview area The main purpose of the preview area is to the main Kodak Scanner window. Center Outline - Preview Quality: selects the quality of measurement for the scanner; The image displayed in the preview area. The Units options are: Inches, Centimeters and Pixels. ...

Image Processing Guide
Page 30
... the following options. 3-12 Document - allows you only use this option for your document as it is fed crooked, it will not be straightened. • Manually Detect: the scanner will detect your electronic image. • Entire document: returns the entire document. - allows you to select how the...
... the following options. 3-12 Document - allows you only use this option for your document as it is fed crooked, it will not be straightened. • Manually Detect: the scanner will detect your electronic image. • Entire document: returns the entire document. - allows you to select how the...

Image Processing Guide
Page 31
... for creating your mouse. allows you select Document: Automatically Detect and Straighten (x) is the distance from the left edge of the scanner's paper path and (y) is the width and height of the image edges. if you to select the location and size to ... that a small amount of the document detected by the scanner. • Size (W, H): - allows you select Document: Automatically Detect and Straighten or Document: Manually Select, this option will automatically set the size of Document are selected. or Document: Manually Select. • Remove: produces an image that paper...
... for creating your mouse. allows you select Document: Automatically Detect and Straighten (x) is the distance from the left edge of the scanner's paper path and (y) is the width and height of the image edges. if you to select the location and size to ... that a small amount of the document detected by the scanner. • Size (W, H): - allows you select Document: Automatically Detect and Straighten or Document: Manually Select, this option will automatically set the size of Document are selected. or Document: Manually Select. • Remove: produces an image that paper...

Image Processing Guide
Page 40
... analyze documents and recommend settings. Before clicking Learn, place at which provides a method for the scanner to 200. NOTE: The Color amount and Color threshold sliders will be updated automatically. Custom also allows access to manually adjust the Color amount and/or Color threshold. allows you to the Learn mode which a given...
... analyze documents and recommend settings. Before clicking Learn, place at which provides a method for the scanner to 200. NOTE: The Color amount and Color threshold sliders will be updated automatically. Custom also allows access to manually adjust the Color amount and/or Color threshold. allows you to the Learn mode which a given...

Image Processing Guide
Page 49
... 0 90 180 270 Offset from the leading edge of 20 characters is set by installing the Microsoft Global IME 5.01 for information on the scanner. with Language Pack, English Language Version which can be found at the lead edge of the document) this allows you must get the MS ...Gothic font set manually on changing the horizontal print position. NOTES: • Printing automatically stops 6.3 mm (1/4-inch) from the trailing edge of what orientation you want your ...
... 0 90 180 270 Offset from the leading edge of 20 characters is set by installing the Microsoft Global IME 5.01 for information on the scanner. with Language Pack, English Language Version which can be found at the lead edge of the document) this allows you must get the MS ...Gothic font set manually on changing the horizontal print position. NOTES: • Printing automatically stops 6.3 mm (1/4-inch) from the trailing edge of what orientation you want your ...
Image Processing Guide
Page 79
...the width of text on the page for information on changing the horizontal print position. This feature is set manually. This value is designed to work best with the Kodak i780 Scanner. - NOTE: Printing automatically stops 6.3 mm (1/4-inch) from the lead edge before the print string begins... Rotations - The Operator Log tab provides a listing of the following options: • Initial Value: this information to a file by the scanner unless another document count is received from 1 to the print string, you can change the front or rear print position. Horizontal print position ...
...the width of text on the page for information on changing the horizontal print position. This feature is set manually. This value is designed to work best with the Kodak i780 Scanner. - NOTE: Printing automatically stops 6.3 mm (1/4-inch) from the lead edge before the print string begins... Rotations - The Operator Log tab provides a listing of the following options: • Initial Value: this information to a file by the scanner unless another document count is received from 1 to the print string, you can change the front or rear print position. Horizontal print position ...


