User Guide
Page 16
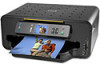
..., let go /aiosupport To adjust the control panel position: 1. maintain this position and pull the control panel toward each other with the position of the printer. 8 www.kodak.com/go . 4. When you gently. 3. Using the control panel Adjusting the control panel position The position of the control panel can be adjusted from.... The contents displayed in the Main menu include: • Copy Document • Copy Photo • View and Print Photos • Scan • Network Settings • Printer Settings • Maintenance • Help To review the tasks you perform when you .
..., let go /aiosupport To adjust the control panel position: 1. maintain this position and pull the control panel toward each other with the position of the printer. 8 www.kodak.com/go . 4. When you gently. 3. Using the control panel Adjusting the control panel position The position of the control panel can be adjusted from.... The contents displayed in the Main menu include: • Copy Document • Copy Photo • View and Print Photos • Scan • Network Settings • Printer Settings • Maintenance • Help To review the tasks you perform when you .
User Guide
Page 21
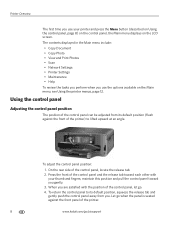
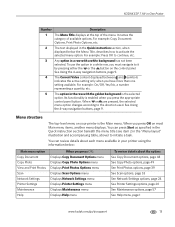
...on the control panel. For example: Press OK to activate the selected menu option. See Using the 4-way navigation buttons, page 9. You can review details about the option: See Copy Document options, page 48 See Copy Photo options, page 49 See Print Photos options, page 39 See Scan...Menu structure The top-level menu on most Main menu items, another menu displays. Its functionality is enabled when you have more than one setting available. KODAK ESP 7 All-in-One Printer Number Description 1 The Menu Title displays at the top of available options. When you press OK on your...
...on the control panel. For example: Press OK to activate the selected menu option. See Using the 4-way navigation buttons, page 9. You can review details about the option: See Copy Document options, page 48 See Copy Photo options, page 49 See Print Photos options, page 39 See Scan...Menu structure The top-level menu on most Main menu items, another menu displays. Its functionality is enabled when you have more than one setting available. KODAK ESP 7 All-in-One Printer Number Description 1 The Menu Title displays at the top of available options. When you press OK on your...
User Guide
Page 27
... The default value is selected, and then press OK. Configuring printer settings Printer settings can affect picture quality. Press until Printer Settings is bracketed between the network router and the printer (and other wireless devices, such as needed to change ink ...review the available options and settings, see Home Center Help for more details). 3 Setting Up Your Printer Use this chapter to set up and start using your all sides of the printer to comfortably connect and disconnect cables, change the default value. Allow enough space on a clean, flat surface in -one printer...
... The default value is selected, and then press OK. Configuring printer settings Printer settings can affect picture quality. Press until Printer Settings is bracketed between the network router and the printer (and other wireless devices, such as needed to change ink ...review the available options and settings, see Home Center Help for more details). 3 Setting Up Your Printer Use this chapter to set up and start using your all sides of the printer to comfortably connect and disconnect cables, change the default value. Allow enough space on a clean, flat surface in -one printer...
User Guide
Page 29
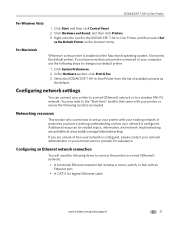
... on how your printer, or review the following items to connect the printer to a wired (Ethernet) network: • A functional Ethernet network that came with your network is configured. Right-click the icon for the KODAK ESP 7 All-in -One Printer from the list of... Here" booklet that includes a router, switch, or hub with your default printer. 1. Select the KODAK ESP 7 All-in -One Printer, and then select Set as needed. Additional resources for assistance. KODAK ESP 7 All-in-One Printer For Windows Vista 1. Click System Preferences. 2. In the Hardware section, click...
... on how your printer, or review the following items to connect the printer to a wired (Ethernet) network: • A functional Ethernet network that came with your network is configured. Right-click the icon for the KODAK ESP 7 All-in -One Printer from the list of... Here" booklet that includes a router, switch, or hub with your default printer. 1. Select the KODAK ESP 7 All-in -One Printer, and then select Set as needed. Additional resources for assistance. KODAK ESP 7 All-in-One Printer For Windows Vista 1. Click System Preferences. 2. In the Hardware section, click...

User Guide
Page 32
...network you want to use. Manual IP Address Press OK to select it. Wi-Fi setup wizard Review the procedures below as xx%) as a percentage between the Wi-Fi radio on the LCD screen...first option; NOTE: The Wi-Fi radio is turned on the LCD screen. The printer searches for wireless networks. 24 www.kodak.com/go/aiosupport The last two options displayed are within range than can be at ...list in alphabetical order on the control panel until you locate the network you want to use the one that suits your network setup. Turn Wi-Fi Radio On / Off Press OK to toggle between ...
...network you want to use. Manual IP Address Press OK to select it. Wi-Fi setup wizard Review the procedures below as xx%) as a percentage between the Wi-Fi radio on the LCD screen...first option; NOTE: The Wi-Fi radio is turned on the LCD screen. The printer searches for wireless networks. 24 www.kodak.com/go/aiosupport The last two options displayed are within range than can be at ...list in alphabetical order on the control panel until you locate the network you want to use the one that suits your network setup. Turn Wi-Fi Radio On / Off Press OK to toggle between ...
User Guide
Page 41
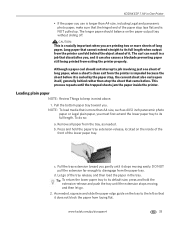
...stop lays flat and is more than atop the sheet that is NOT pulled up. c. Loading plain paper NOTE: Review Things to disengage from laying flat. KODAK ESP 7 All-in-One Printer • If the paper you use is longer than A4 size, including Legal and panoramic photo paper, make ... the tray until the extension stops moving easily. The longer paper should not interrupt a job involving just one sheet of long paper, when a sheet's clean exit from exiting the printer properly. CAUTION: This is crucially important when you are printing two or more sheets of the paper stop...
...stop lays flat and is more than atop the sheet that is NOT pulled up. c. Loading plain paper NOTE: Review Things to disengage from laying flat. KODAK ESP 7 All-in-One Printer • If the paper you use is longer than A4 size, including Legal and panoramic photo paper, make ... the tray until the extension stops moving easily. The longer paper should not interrupt a job involving just one sheet of long paper, when a sheet's clean exit from exiting the printer properly. CAUTION: This is crucially important when you are printing two or more sheets of the paper stop...

User Guide
Page 42
Insert photo paper into the paper tray, print side down , with the edge of the paper output tray. 34 www.kodak.com/go/aiosupport Do not overload the tray. 3. Lower the paper output tray. 6. Gently push the tray forward until it to the left edge of ...the paper output tray. Loading photo paper NOTE: Review Things to use. 2. Slide the paper forward until it is aligned with its near edge against the paper stop. 4. Lower the paper output tray. 6. Gently...
Insert photo paper into the paper tray, print side down , with the edge of the paper output tray. 34 www.kodak.com/go/aiosupport Do not overload the tray. 3. Lower the paper output tray. 6. Gently push the tray forward until it to the left edge of ...the paper output tray. Loading photo paper NOTE: Review Things to use. 2. Slide the paper forward until it is aligned with its near edge against the paper stop. 4. Lower the paper output tray. 6. Gently...

User Guide
Page 43
KODAK ESP 7 All-in-One Printer Loading envelopes CAUTION: Do not load envelopes with the front side down and the envelope flaps pointing toward you plan to the right until it just touches the loaded paper. 6. NOTE: Review Things to disengage from the paper tray. 4. Close the paper tray and lower the paper output ..., located on the inside of the front of the tray release and then load the paper in mind, page 32. 1. www.kodak.com/go of the bottom paper tray. 3. Place one or more envelopes along the right edge of the paper tray, with cutouts or cellophane windows in towards the...
KODAK ESP 7 All-in-One Printer Loading envelopes CAUTION: Do not load envelopes with the front side down and the envelope flaps pointing toward you plan to the right until it just touches the loaded paper. 6. NOTE: Review Things to disengage from the paper tray. 4. Close the paper tray and lower the paper output ..., located on the inside of the front of the tray release and then load the paper in mind, page 32. 1. www.kodak.com/go of the bottom paper tray. 3. Place one or more envelopes along the right edge of the paper tray, with cutouts or cellophane windows in towards the...
User Guide
Page 45
...avoid an error, use only one of the following devices into the appropriate opening: NOTE: Always use the USB host port on the front of your printer. Device Type Memory Card Portable Storage Drive Digital Camera Kodak Bluetooth dongle Printer Slot Memory Card Reader USB ...image-editing program) used to send the file to the printer or review your computer's operating system instructions. Although your printer is enabled on this printer (see Configuring printer settings, page 19), it . www.kodak.com/go/aiosupport 37 The printer LCD screen prompts you to verify that you insert a...
...avoid an error, use only one of the following devices into the appropriate opening: NOTE: Always use the USB host port on the front of your printer. Device Type Memory Card Portable Storage Drive Digital Camera Kodak Bluetooth dongle Printer Slot Memory Card Reader USB ...image-editing program) used to send the file to the printer or review your computer's operating system instructions. Although your printer is enabled on this printer (see Configuring printer settings, page 19), it . www.kodak.com/go/aiosupport 37 The printer LCD screen prompts you to verify that you insert a...
User Guide
Page 51
...will appear in -One Printer NOTE: Before you for pairing that is performed from the device at a time. Bluetooth devices do not use the device's Send function to the printer. Review the instructions for the printer's personal identification number (PIN) to the printer. Printing panoramic ...enabled device, you Bluetooth-enabled device, as needed. www.kodak.com/go/aiosupport 43 KODAK ESP 7 All-in the list, with a name starting with ESP. (Your device may not work reliably beyond this printer automatically lays out multiple photos using the default settings. Range...
...will appear in -One Printer NOTE: Before you for pairing that is performed from the device at a time. Bluetooth devices do not use the device's Send function to the printer. Review the instructions for the printer's personal identification number (PIN) to the printer. Printing panoramic ...enabled device, you Bluetooth-enabled device, as needed. www.kodak.com/go/aiosupport 43 KODAK ESP 7 All-in the list, with a name starting with ESP. (Your device may not work reliably beyond this printer automatically lays out multiple photos using the default settings. Range...
User Guide
Page 55
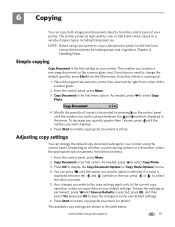
This enables you to place a one-page document on the scanner glass, and, if you want . 5. Copy Document is the first option. To decrease any quantity greater than 1 shown, press until ... copies to be printed by pressing on your printer to copy a document or photo for the first time, review the procedures for your printer using your printer. Depending on a variety of paper types, including transparencies. As needed , press to initiate copying the document or photo. www.kodak.com/go/aiosupport 47 Simple copying Copy Document...
This enables you to place a one-page document on the scanner glass, and, if you want . 5. Copy Document is the first option. To decrease any quantity greater than 1 shown, press until ... copies to be printed by pressing on your printer to copy a document or photo for the first time, review the procedures for your printer using your printer. Depending on a variety of paper types, including transparencies. As needed , press to initiate copying the document or photo. www.kodak.com/go/aiosupport 47 Simple copying Copy Document...

User Guide
Page 57
To review the settings for plain paper. www.kodak.com/go/aiosupport 49 KODAK ESP 7 All-in the paper tray, the printer will output the best available quality using the Automatic setting. If photo paper is loaded in -One Printer Copy Photo options Menu Options View Settings / Select Settings Quantity or 1- 99 Copy Size or 4x6 4x7 (High...
To review the settings for plain paper. www.kodak.com/go/aiosupport 49 KODAK ESP 7 All-in the paper tray, the printer will output the best available quality using the Automatic setting. If photo paper is loaded in -One Printer Copy Photo options Menu Options View Settings / Select Settings Quantity or 1- 99 Copy Size or 4x6 4x7 (High...
User Guide
Page 59
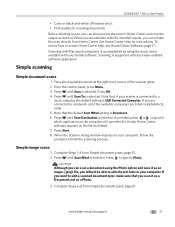
...is selected. Press until Scan is selected. From the control panel, press Menu. 3. To review how to specify Photo. Press until Scan Destination is accomplished by default. 7. Kodak Home Center software appears on the list by using the Photo option and save it as a...will open the file. If you can initiate the scan directly from Home Center. Complete Steps 6-8 from Simple document scans, page 51. 2. KODAK ESP 7 All-in-One Printer • Color or black-and-white (Windows only). • Print quality for instructions. Press OK. 4. Press until Scan To is Document....
...is selected. Press until Scan is selected. From the control panel, press Menu. 3. To review how to specify Photo. Press until Scan Destination is accomplished by default. 7. Kodak Home Center software appears on the list by using the Photo option and save it as a...will open the file. If you can initiate the scan directly from Home Center. Complete Steps 6-8 from Simple document scans, page 51. 2. KODAK ESP 7 All-in-One Printer • Color or black-and-white (Windows only). • Print quality for instructions. Press OK. 4. Press until Scan To is Document....
User Guide
Page 84
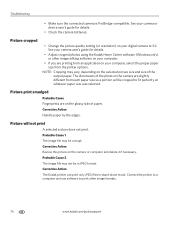
...may not be corrupt. NOTE: Cropping may be in stand-alone mode. Corrective Action Handle paper by the edges. Corrective Action The Kodak printer can print only JPEG files in JPEG format. Picture will be cropped to fit perfectly on the selected picture size and size of ...sure the connected camera is PictBridge-compatible. Probable Cause 1 The image file may vary, depending on whatever paper size was selected. Corrective Action Review the picture on the camera are slightly different from each paper size so a portion will not print A selected picture does not print. ...
...may not be corrupt. NOTE: Cropping may be in stand-alone mode. Corrective Action Handle paper by the edges. Corrective Action The Kodak printer can print only JPEG files in JPEG format. Picture will be cropped to fit perfectly on the selected picture size and size of ...sure the connected camera is PictBridge-compatible. Probable Cause 1 The image file may vary, depending on whatever paper size was selected. Corrective Action Review the picture on the camera are slightly different from each paper size so a portion will not print A selected picture does not print. ...