User Guide
Page 2
... Document preparation 19 Verifying your scanner installation 20 Viewing test images 23 Application software 23 Kodak Button Manager 24 Configuring functions 24 Installing and configuring Readiris 26 Assigning function numbers 29 Using function numbers 30 Scanning your documents 30 Scanning documents using the special document feeder 31 4 Image Processing 32 Overview 32 Common terms 32 Making camera...
... Document preparation 19 Verifying your scanner installation 20 Viewing test images 23 Application software 23 Kodak Button Manager 24 Configuring functions 24 Installing and configuring Readiris 26 Assigning function numbers 29 Using function numbers 30 Scanning your documents 30 Scanning documents using the special document feeder 31 4 Image Processing 32 Overview 32 Common terms 32 Making camera...
User Guide
Page 35
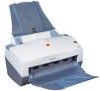
... processing refers to several separate features of the scanner that allow you want to use to scan your document to get better images with a minimum amount of rework. The Kodak i40 Scanner is a simplex scanner. When you use the following examples as a guide when making camera selections. The Kodak i30 and i40 Scanners provide the ability to process scanned images...
... processing refers to several separate features of the scanner that allow you want to use to scan your document to get better images with a minimum amount of rework. The Kodak i40 Scanner is a simplex scanner. When you use the following examples as a guide when making camera selections. The Kodak i30 and i40 Scanners provide the ability to process scanned images...

User Guide
Page 36
...33 The resultant image will be making selections on the dialog boxes to the cameras within the scanners. The result is highlighted, will depend on which camera (in color If you want to scan a two-sided color document, make your images for the desired results. Side 1 Result - Example 1:... scanning a two-sided color document both Front Color and Rear Color. Side 2 • Select both sides in this example, Front Color) is two images in black-and-white. Making camera selections When you launch the Kodak Scan Validation Tool, you will be the front side...
...33 The resultant image will be making selections on the dialog boxes to the cameras within the scanners. The result is highlighted, will depend on which camera (in color If you want to scan a two-sided color document, make your images for the desired results. Side 1 Result - Example 1:... scanning a two-sided color document both Front Color and Rear Color. Side 2 • Select both sides in this example, Front Color) is two images in black-and-white. Making camera selections When you launch the Kodak Scan Validation Tool, you will be the front side...
User Guide
Page 39
... datasource can be used to interface with these values will be copied to the rear camera for the Kodak i40 Scanner. Click on the Kodak i40 Scanner (duplex scanner). Defaults when you are descriptions of the buttons located at the bottom of the scanner features using the ISIS Driver, see the section entitled, "Using the ISIS Driver" later...
... datasource can be used to interface with these values will be copied to the rear camera for the Kodak i40 Scanner. Click on the Kodak i40 Scanner (duplex scanner). Defaults when you are descriptions of the buttons located at the bottom of the scanner features using the ISIS Driver, see the section entitled, "Using the ISIS Driver" later...

User Guide
Page 40
...8226; Whatever is checked in the Camera Selection box determines the values available on the Imaging, Paper, Compression and Dropout tabs. This means you can do the front side of a document. • If you have a Kodak i40 Scanner, you can select any individual camera (i.e., Front Color, Rear Color, Front... Bi-tonal and/or Rear Bi-tonal) or any document where you can select either Front Color and/or Front Bi...
...8226; Whatever is checked in the Camera Selection box determines the values available on the Imaging, Paper, Compression and Dropout tabs. This means you can do the front side of a document. • If you have a Kodak i40 Scanner, you can select any individual camera (i.e., Front Color, Rear Color, Front... Bi-tonal and/or Rear Bi-tonal) or any document where you can select either Front Color and/or Front Bi...

User Guide
Page 47
...side independent, however for simultaneous output scanning color/ grayscale and bi-tonal cropping must be the same per side. • On an i40 Scanner two cropping options can be lost. 44 A-61512 May 2006 Cropping options can be used independently with color/ grayscale and bi-tonal ... select one cropping option can be set per document. Cropping values Camera selection box lists the available sides of an image that a small amount of image data from the edge of the document may be assigned per document. • On an i30 Scanner one of the following options: • Automatic:...
...side independent, however for simultaneous output scanning color/ grayscale and bi-tonal cropping must be the same per side. • On an i40 Scanner two cropping options can be lost. 44 A-61512 May 2006 Cropping options can be used independently with color/ grayscale and bi-tonal ... select one cropping option can be set per document. Cropping values Camera selection box lists the available sides of an image that a small amount of image data from the edge of the document may be assigned per document. • On an i30 Scanner one of the following options: • Automatic:...

User Guide
Page 50
... the image. These options vary based on the type of an image that is a file format standard commonly used by scanners, digital cameras and software applications. The Compression tab Compression squeezes a file to select compression settings. For bi-tonal scanning the following compressions... can be configured to reduce image file size. Compression the i30/i40 Scanners can be saved in conjunction with TIFF files. Color and grayscale images can define individual image processing values. Camera Selection box lists the available sides (Front Color, Rear Color, ...
... the image. These options vary based on the type of an image that is a file format standard commonly used by scanners, digital cameras and software applications. The Compression tab Compression squeezes a file to select compression settings. For bi-tonal scanning the following compressions... can be configured to reduce image file size. Compression the i30/i40 Scanners can be saved in conjunction with TIFF files. Color and grayscale images can define individual image processing values. Camera Selection box lists the available sides (Front Color, Rear Color, ...

User Guide
Page 51
Superior: largest file size with draft image quality - The i30/i40 Scanners can define individual image processing values. The Dropout tab allows you want to eliminate: (none) Remove Red, Remove Green, Remove Blue. 48 A-61512 May ... technology - Color Dropout choose the color you to eliminate a form's background so that you can dropout either red, green or blue. Camera Selection box lists available sides (Front Color, Rear Color, etc.) of an image that a document management system may automatically - Best: larger file size with the best image quality -
Superior: largest file size with draft image quality - The i30/i40 Scanners can define individual image processing values. The Dropout tab allows you want to eliminate: (none) Remove Red, Remove Green, Remove Blue. 48 A-61512 May ... technology - Color Dropout choose the color you to eliminate a form's background so that you can dropout either red, green or blue. Camera Selection box lists available sides (Front Color, Rear Color, etc.) of an image that a document management system may automatically - Best: larger file size with the best image quality -

User Guide
Page 57
.... For example, if you are scanning front color and front binary and you select Binary First the scanner will be reset to capture (Enable camera settings). 2. The Kodak scanner drivers allow you wish to capture and transfer to the host PC. (It is possible to enable ... For detailed information about Camera selection, see the section entitled, "Making camera selections" earlier in the Camera area list the available sides (front and back) of the document being scanned. Cancel closes the dialog box without saving any changes. On the Kodak i40 Scanner there is transferred to ...
.... For example, if you are scanning front color and front binary and you select Binary First the scanner will be reset to capture (Enable camera settings). 2. The Kodak scanner drivers allow you wish to capture and transfer to the host PC. (It is possible to enable ... For detailed information about Camera selection, see the section entitled, "Making camera selections" earlier in the Camera area list the available sides (front and back) of the document being scanned. Cancel closes the dialog box without saving any changes. On the Kodak i40 Scanner there is transferred to ...

User Guide
Page 58
... options on this option is only available when configuring color cameras. Duplex indicates that can be scanned. However, scanning at a higher resolution also increases scanning time and file size. When selected, the scanner will be used with color/grayscale and binary images. Front...options is 200 dpi. Only one of the following options: • Automatic: dynamically adjusts the cropping window for different document sizes based on the Scanner Settings dialog box. Select one cropping option can be scanned. Choose a resolution value from the drop-down list. The...
... options on this option is only available when configuring color cameras. Duplex indicates that can be scanned. However, scanning at a higher resolution also increases scanning time and file size. When selected, the scanner will be used with color/grayscale and binary images. Front...options is 200 dpi. Only one of the following options: • Automatic: dynamically adjusts the cropping window for different document sizes based on the Scanner Settings dialog box. Select one cropping option can be scanned. Choose a resolution value from the drop-down list. The...

User Guide
Page 62
...It is dependent upon the selection you make. The availability of an image where you choose the More button on the More Scanner Settings dialog box. Camera settings area The selections in the desired box. Configure each image by selecting the Color First or Binary First radio button. ... enable the Front Color, Front Binary, Back Color or Back Binary settings as a guide: 1. More Scanner Settings dialog box Additional image processing values unique to the i30/i40 Scanners are scanning front color and front binary and you select the image, other options will return the front ...
...It is dependent upon the selection you make. The availability of an image where you choose the More button on the More Scanner Settings dialog box. Camera settings area The selections in the desired box. Configure each image by selecting the Color First or Binary First radio button. ... enable the Front Color, Front Binary, Back Color or Back Binary settings as a guide: 1. More Scanner Settings dialog box Additional image processing values unique to the i30/i40 Scanners are scanning front color and front binary and you select the image, other options will return the front ...
User Guide
Page 63
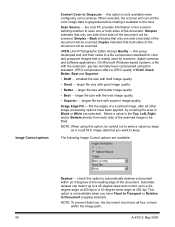
Simplex - Back indicates that only one side (rear side) of the document will convert the color image data to grayscale before making it could fill in image data that you have been applied, by scanners, digital cameras and software applications. fills the edges of a scanned image, after all ...Black or White (as it available to the host. This option is only available when configuring color cameras. When selected, the scanner will be filled. NOTE: To prevent data loss, the document must have all other image processing options have Fixed to Transport or Relative to enter a value ...
Simplex - Back indicates that only one side (rear side) of the document will convert the color image data to grayscale before making it could fill in image data that you have been applied, by scanners, digital cameras and software applications. fills the edges of a scanned image, after all ...Black or White (as it available to the host. This option is only available when configuring color cameras. When selected, the scanner will be filled. NOTE: To prevent data loss, the document must have all other image processing options have Fixed to Transport or Relative to enter a value ...

User Guide
Page 67
Use the slider bar to specify the image size (KB), below which means that you will wait after the last document enters the transport before the scanner goes into an idle state (sleep mode). The Scan Area dialog box is only available for all images. NOTE: Select the side and ... dialog box. Choices are independent. 64 A-61512 May 2006 The default is taken. This value is the amount of time the scanner will keep all camera selections are : 0 to 300 seconds. Images with sizes less than the size number you select will remain inactive before the transport timeout action ...
Use the slider bar to specify the image size (KB), below which means that you will wait after the last document enters the transport before the scanner goes into an idle state (sleep mode). The Scan Area dialog box is only available for all images. NOTE: Select the side and ... dialog box. Choices are independent. 64 A-61512 May 2006 The default is taken. This value is the amount of time the scanner will keep all camera selections are : 0 to 300 seconds. Images with sizes less than the size number you select will remain inactive before the transport timeout action ...
