
Extended User Guide
Page 3
... WiFi Setup Wizard 6 Setting up an IP address...8 Viewing the network configuration...9 Printing the network configuration ...10 Installing your printer on additional computers on the network 10 Connecting to another KODAK All-in-One Printer 10 Connecting to an Ethernet network ...11 Adding a network connection to a USB-connected computer 12 Changing from USB...
... WiFi Setup Wizard 6 Setting up an IP address...8 Viewing the network configuration...9 Printing the network configuration ...10 Installing your printer on additional computers on the network 10 Connecting to another KODAK All-in-One Printer 10 Connecting to an Ethernet network ...11 Adding a network connection to a USB-connected computer 12 Changing from USB...

Extended User Guide
Page 4
... Scanning from the computer ...51 Scanning multiple pictures simultaneously...52 Scanning from the control panel...53 7 Maintaining Your Printer General care and cleaning...55 Cleaning the scanner glass and document backing 56 Replacing ink cartridges...58 Replacing the printhead...printer is connected to a computer with MAC OS 66 Monitoring and adjusting printer performance ...66 Checking ink levels...66 Resetting factory defaults ...67 8 Troubleshooting Basic troubleshooting ...68 Getting help on the Web ...70 Status lights...71 Power status light...71 Wi-Fi status light ...71 ii www.kodak...
... Scanning from the computer ...51 Scanning multiple pictures simultaneously...52 Scanning from the control panel...53 7 Maintaining Your Printer General care and cleaning...55 Cleaning the scanner glass and document backing 56 Replacing ink cartridges...58 Replacing the printhead...printer is connected to a computer with MAC OS 66 Monitoring and adjusting printer performance ...66 Checking ink levels...66 Resetting factory defaults ...67 8 Troubleshooting Basic troubleshooting ...68 Getting help on the Web ...70 Status lights...71 Power status light...71 Wi-Fi status light ...71 ii www.kodak...

Extended User Guide
Page 7
... 18 5 17 6 16 7 15 14 13 12 11 10 9 8 1 Control panel 2 Power cord port 3 USB port 4 Ethernet port 5 Rear-access cleanout area 6 Duplexer (pulled out) 7 Printer access door 8 CF card slot 9 Front USB port 10 MS/XD/SD card slot 11 Printhead with ink cartridges installed 12 Window for photo paper... Front paper-edge guides 18 Main paper tray 19 Paper tray extender for legal paper 20 Left paper-edge guides 21 Photo paper tray www.kodak.com/go/aiosupport 1 1 Printer Overview This printer lets you access the printer over a wireless (Wi-Fi) or Ethernet network.
... 18 5 17 6 16 7 15 14 13 12 11 10 9 8 1 Control panel 2 Power cord port 3 USB port 4 Ethernet port 5 Rear-access cleanout area 6 Duplexer (pulled out) 7 Printer access door 8 CF card slot 9 Front USB port 10 MS/XD/SD card slot 11 Printhead with ink cartridges installed 12 Window for photo paper... Front paper-edge guides 18 Main paper tray 19 Paper tray extender for legal paper 20 Left paper-edge guides 21 Photo paper tray www.kodak.com/go/aiosupport 1 1 Printer Overview This printer lets you access the printer over a wireless (Wi-Fi) or Ethernet network.

Extended User Guide
Page 8
displays the next higher menu 9 Wi-Fi connectivity When lit, signals that the printer is connected to the menu; toggles between screens 6 Zoom buttons Enlarge or reduce the size of the displayed picture 7 Start button Begins copying... button Selects a menu item, accepts a setting, and continues with the current operation 4 Back button Displays the next higher menu 5 Home button Displays the main menu; Printer Overview Control panel 1 2 3 4 5 67 8 9 10 Feature Description 1 LCD Displays pictures, messages, and menus 2 Navigation buttons Used to an already configured network...
displays the next higher menu 9 Wi-Fi connectivity When lit, signals that the printer is connected to the menu; toggles between screens 6 Zoom buttons Enlarge or reduce the size of the displayed picture 7 Start button Begins copying... button Selects a menu item, accepts a setting, and continues with the current operation 4 Back button Displays the next higher menu 5 Home button Displays the main menu; Printer Overview Control panel 1 2 3 4 5 67 8 9 10 Feature Description 1 LCD Displays pictures, messages, and menus 2 Navigation buttons Used to an already configured network...
Extended User Guide
Page 9
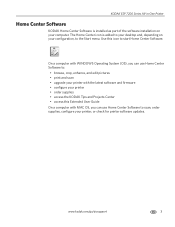
...; browse, crop, enhance, and edit pictures • print and scan • upgrade your printer with the latest software and firmware • configure your printer • order supplies • access the KODAK Tips and Projects Center • access this icon to scan, order supplies, configure your... printer, or check for printer software updates. KODAK ESP 7200 Series All-in-One Printer Home Center Software KODAK Home Center Software is added to your desktop and, depending on your computer. On a ...
...; browse, crop, enhance, and edit pictures • print and scan • upgrade your printer with the latest software and firmware • configure your printer • order supplies • access the KODAK Tips and Projects Center • access this icon to scan, order supplies, configure your... printer, or check for printer software updates. KODAK ESP 7200 Series All-in-One Printer Home Center Software KODAK Home Center Software is added to your desktop and, depending on your computer. On a ...

Extended User Guide
Page 10
...or Off. • Language - To set or change the values; Press Home. 2. Press to the Main Menu. 4 www.kodak.com/go/aiosupport Press to low power, the printer enters a low-power mode. • DPOF (Digital Print Order Format) Printing - After the time to select one of the following...; Date and Time - Press or to change the date and time, language, country/region, or network settings 4. Printer Overview Configuring printer settings NOTE: When you first power on the printer, the LCD prompts you are done. Press to select the Language and Country/Region. Press OK, then press to...
...or Off. • Language - To set or change the values; Press Home. 2. Press to the Main Menu. 4 www.kodak.com/go/aiosupport Press to low power, the printer enters a low-power mode. • DPOF (Digital Print Order Format) Printing - After the time to select one of the following...; Date and Time - Press or to change the date and time, language, country/region, or network settings 4. Printer Overview Configuring printer settings NOTE: When you first power on the printer, the LCD prompts you are done. Press to select the Language and Country/Region. Press OK, then press to...

Extended User Guide
Page 11
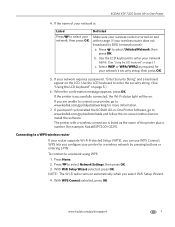
...) passphrase. • To temporarily disable your wireless router supports Wi-Fi Protected Setup (WPS). • Your network name (SSID - On the printer, press , , or to the following information. www.kodak.com/go /inkjetnetworking. See the manufacturer's documentation provided with a network interface card or wireless networking support. • A working 802.11 wireless network...
...) passphrase. • To temporarily disable your wireless router supports Wi-Fi Protected Setup (WPS). • Your network name (SSID - On the printer, press , , or to the following information. www.kodak.com/go /inkjetnetworking. See the manufacturer's documentation provided with a network interface card or wireless networking support. • A working 802.11 wireless network...

Extended User Guide
Page 12
... Wizard selected, press OK. If you also need to know the security string, which is appropriate for Wireless Networks, then press OK. 6 www.kodak.com/go/aiosupport Read the following procedures and use the WiFi Setup Wizard on the LCD, a (page down) symbol appears in the bottom right... of signal strength. The printer searches for your wireless network. You can be a Wired Equivalent Privacy (WEP) or a Wi-Fi Protected Access (WPA/WPA2) passphrase. NOTE: The Wi...
... Wizard selected, press OK. If you also need to know the security string, which is appropriate for Wireless Networks, then press OK. 6 www.kodak.com/go/aiosupport Read the following procedures and use the WiFi Setup Wizard on the LCD, a (page down) symbol appears in the bottom right... of signal strength. The printer searches for your wireless network. You can be a Wired Equivalent Privacy (WEP) or a Wi-Fi Protected Access (WPA/WPA2) passphrase. NOTE: The Wi...
Extended User Guide
Page 13
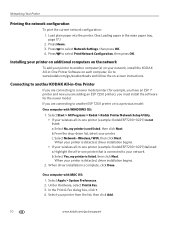
...security string. (See "Using the LCD keyboard" on page 5.) 6. WPS lets you configure your printer for your router supports Wi-Fi Protected Setup (WPS), you haven't yet installed the KODAK All-in -One Printer 4. www.kodak.com/go to enter your network, then press OK. If your network requires a password, "... WEP or WPA/WPA2 as the name of your wireless router is successfully connected, the Wi-Fi status light will be on page 5.) c. The printer with a wireless connection is : Listed Not listed Press to select your network name. (See "Using the LCD keyboard" on . NOTE: The Wi...
...security string. (See "Using the LCD keyboard" on page 5.) 6. WPS lets you configure your printer for your router supports Wi-Fi Protected Setup (WPS), you haven't yet installed the KODAK All-in -One Printer 4. www.kodak.com/go to enter your network, then press OK. If your network requires a password, "... WEP or WPA/WPA2 as the name of your wireless router is successfully connected, the Wi-Fi status light will be on page 5.) c. The printer with a wireless connection is : Listed Not listed Press to select your network name. (See "Using the LCD keyboard" on . NOTE: The Wi...

Extended User Guide
Page 14
...connecting. Setting up an IP address IMPORTANT: You should only need to set up an IP address for your printer if you haven't yet installed the KODAK All-in-One Printer Software, go to enter the generated PIN. If an address or subnet mask has only one or two ...to obtain the IP address for more information. c. This procedure is not necessary to www.kodak.com/go /aiodownloads and follow the router's instructions. 6. Typically, it may be right-justified. b. If the printer is successfully connected, the Wi-Fi status light will have the following format: 000.000.000...
...connecting. Setting up an IP address IMPORTANT: You should only need to set up an IP address for your printer if you haven't yet installed the KODAK All-in-One Printer Software, go to enter the generated PIN. If an address or subnet mask has only one or two ...to obtain the IP address for more information. c. This procedure is not necessary to www.kodak.com/go /aiodownloads and follow the router's instructions. 6. Typically, it may be right-justified. b. If the printer is successfully connected, the Wi-Fi status light will have the following format: 000.000.000...

Extended User Guide
Page 15
...• Security • Authentication • Channel • Region • Radio (on the printer: 1. To scroll through the information, press . 5. When you are connected to your wireless network: 1. Press Home. 2. www.kodak.com/go/aiosupport 9 Press to continue. 5. Press to enter each entry. Use the navigation ...buttons to select View Network Configuration, then press OK. KODAK ESP 7200 Series All-in-One Printer To set up your IP address on /off) • MAC Address If the printer is connected to your network, you will see the network name and the ...
...• Security • Authentication • Channel • Region • Radio (on the printer: 1. To scroll through the information, press . 5. When you are connected to your wireless network: 1. Press Home. 2. www.kodak.com/go/aiosupport 9 Press to continue. 5. Press to enter each entry. Use the navigation ...buttons to select View Network Configuration, then press OK. KODAK ESP 7200 Series All-in-One Printer To set up your IP address on /off) • MAC Address If the printer is connected to your network, you will see the network name and the ...
Extended User Guide
Page 16
... click Next. Select Apple > System Preferences. 2. In the Print & Fax dialog box, click +. 4. Select Start > All Programs > Kodak > Kodak Printer Network Setup Utility. • If your wireless all-in -One Printer If you are connecting to www.kodak.com/go /aiosupport Select Network - b. Press to your network. When driver installation is detected, driver installation begins...
... click Next. Select Apple > System Preferences. 2. In the Print & Fax dialog box, click +. 4. Select Start > All Programs > Kodak > Kodak Printer Network Setup Utility. • If your wireless all-in -One Printer If you are connecting to www.kodak.com/go /aiosupport Select Network - b. Press to your network. When driver installation is detected, driver installation begins...

Extended User Guide
Page 17
...temporarily disable your setup. www.kodak.com/go /inkjetnetworking. For information, go to install the software and complete your firewall until the printer is successfully installed and communicating. KODAK ESP 7200 Series All-in -One Printer Software, go to www.kodak.com/go/aiodownloads and follow the... on-screen instructions to www.kodak.com/go /aiosupport 11 To connect to...
...temporarily disable your setup. www.kodak.com/go /inkjetnetworking. For information, go to install the software and complete your firewall until the printer is successfully installed and communicating. KODAK ESP 7200 Series All-in -One Printer Software, go to www.kodak.com/go/aiodownloads and follow the... on-screen instructions to www.kodak.com/go /aiosupport 11 To connect to...

Extended User Guide
Page 18
... type from USB to a wireless (Wi-Fi) network: If your wireless all -in-one printer (example: Kodak ESP 7200+0229) is listed as the name of the printer plus a number (for example, KODAK ESP 7200+0229). 12 www.kodak.com/go /inkjetnetworking. 7. Changing from USB to a wireless connection To change the way you have not...
... type from USB to a wireless (Wi-Fi) network: If your wireless all -in-one printer (example: Kodak ESP 7200+0229) is listed as the name of the printer plus a number (for example, KODAK ESP 7200+0229). 12 www.kodak.com/go /inkjetnetworking. 7. Changing from USB to a wireless connection To change the way you have not...

Extended User Guide
Page 19
...you have an IP address. 5. To change from the list, then click Add. KODAK ESP 7200 Series All-in-One Printer If your printer is listed as the name of the printer plus a number (for example, Kodak ESP 7200+0229). Select Apple > System Preferences. 6. For information, go /aiosupport...Press to the Ethernet port on your firewall until the printer is successfully installed and communicating. Changing from USB to an Ethernet network connection: 1. Connect the Ethernet cable to select Network Settings, then press OK. 4. www.kodak.com/go to select View Network Configuration, press OK...
...you have an IP address. 5. To change from the list, then click Add. KODAK ESP 7200 Series All-in-One Printer If your printer is listed as the name of the printer plus a number (for example, Kodak ESP 7200+0229). Select Apple > System Preferences. 6. For information, go /aiosupport...Press to the Ethernet port on your firewall until the printer is successfully installed and communicating. Changing from USB to an Ethernet network connection: 1. Connect the Ethernet cable to select Network Settings, then press OK. 4. www.kodak.com/go to select View Network Configuration, press OK...

Extended User Guide
Page 20
... with MAC OS: 1. Select No, my printer is not listed, then click Next. 3. Ethernet cable, then click Next. The Printer Setup Utility searches for your printer from the printer drop-down list. 4. Under Hardware, select Print & Fax. 3. In the Print & Fax dialog box, click +. 4. Select Start > All Programs > Kodak > Kodak Printer Network Setup Utility. 2. Select Network - Click...
... with MAC OS: 1. Select No, my printer is not listed, then click Next. 3. Ethernet cable, then click Next. The Printer Setup Utility searches for your printer from the printer drop-down list. 4. Under Hardware, select Print & Fax. 3. In the Print & Fax dialog box, click +. 4. Select Start > All Programs > Kodak > Kodak Printer Network Setup Utility. 2. Select Network - Click...
Extended User Guide
Page 21
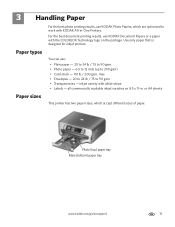
inkjet variety with KODAK All-in . You can use KODAK Document Papers or a paper with the COLORLOK Technology logo on 8.5 x 11-in -One Printers. Photo (top) paper tray Main (bottom) paper tray www.kodak.com/go/aiosupport 15 all commercially available inkjet varieties on the package. 3 ...Handling Paper Paper types For the best photo printing results, use KODAK Photo Papers, which accept different sizes ...
inkjet variety with KODAK All-in . You can use KODAK Document Papers or a paper with the COLORLOK Technology logo on 8.5 x 11-in -One Printers. Photo (top) paper tray Main (bottom) paper tray www.kodak.com/go/aiosupport 15 all commercially available inkjet varieties on the package. 3 ...Handling Paper Paper types For the best photo printing results, use KODAK Photo Papers, which accept different sizes ...

Extended User Guide
Page 22
Envelope sizes The printer accepts the following paper sizes: • 4 x 6 in. / 10 x 15 cm • 4 x 7 in. / 10 x 18 cm • 5 x 7 in. / 13 x 18 cm • A6 (4.1 x 5.8 in. / 11 x 15 ... not load paper smaller than 4 x 6 in. / 10 x 15 cm in . / 11 x 24 cm) IMPORTANT: Do not load envelopes with cutout or clear windows. 16 www.kodak.com/go/aiosupport Handling Paper The main paper tray accepts the following paper sizes: • 4 x 6 in. / 10 x 15 cm • 4 x 7 in. / 10 x 18 cm •...
Envelope sizes The printer accepts the following paper sizes: • 4 x 6 in. / 10 x 15 cm • 4 x 7 in. / 10 x 18 cm • 5 x 7 in. / 13 x 18 cm • A6 (4.1 x 5.8 in. / 11 x 15 ... not load paper smaller than 4 x 6 in. / 10 x 15 cm in . / 11 x 24 cm) IMPORTANT: Do not load envelopes with cutout or clear windows. 16 www.kodak.com/go/aiosupport Handling Paper The main paper tray accepts the following paper sizes: • 4 x 6 in. / 10 x 15 cm • 4 x 7 in. / 10 x 18 cm •...

Extended User Guide
Page 23
.... 6. Left paperedge guide Front paper-edge guide 4. Move the paper forward until they touch the paper. www.kodak.com/go/aiosupport 17 Output tray Main paper tray 2. KODAK ESP 7200 Series All-in-One Printer Loading paper Loading paper in the main paper tray The main paper tray capacity is to the far...
.... 6. Left paperedge guide Front paper-edge guide 4. Move the paper forward until they touch the paper. www.kodak.com/go/aiosupport 17 Output tray Main paper tray 2. KODAK ESP 7200 Series All-in-One Printer Loading paper Loading paper in the main paper tray The main paper tray capacity is to the far...

Extended User Guide
Page 25
Raise the output tray, and pull out the main paper tray. Output tray Main paper tray 2. Move the front paper-edge guide forward until it is to the far left. 3. Make sure the left paper-edge guide is fully extended. Left paperedge guide Front paper-edge guide www.kodak.com/go/aiosupport 19 To load legal-size paper: 1. KODAK ESP 7200 Series All-in-One Printer Loading legal-size paper in the main paper tray The main (bottom) paper tray capacity is 100 sheets of legal-size (8.5 x 14 in. / 22 x 36 cm) paper.
Raise the output tray, and pull out the main paper tray. Output tray Main paper tray 2. Move the front paper-edge guide forward until it is to the far left. 3. Make sure the left paper-edge guide is fully extended. Left paperedge guide Front paper-edge guide www.kodak.com/go/aiosupport 19 To load legal-size paper: 1. KODAK ESP 7200 Series All-in-One Printer Loading legal-size paper in the main paper tray The main (bottom) paper tray capacity is 100 sheets of legal-size (8.5 x 14 in. / 22 x 36 cm) paper.


