KitchenAid KUIS18NNXB Support and Manuals
Get Help and Manuals for this KitchenAid item
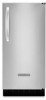
View All Support Options Below
Free KitchenAid KUIS18NNXB manuals!
Problems with KitchenAid KUIS18NNXB?
Ask a Question
Free KitchenAid KUIS18NNXB manuals!
Problems with KitchenAid KUIS18NNXB?
Ask a Question
Most Recent KitchenAid KUIS18NNXB Questions

Kuis18nnx Fill Level Too Low
My KUIS18NNX ice maker does not fully fill the water reservoir . Puts enough water to make ice but c...
My KUIS18NNX ice maker does not fully fill the water reservoir . Puts enough water to make ice but c...
(Posted by kenbobt 8 years ago)
Popular KitchenAid KUIS18NNXB Manual Pages
Use and Care Manual - Page 2

... Your Ice Maker Works 8 Using the Controls 9
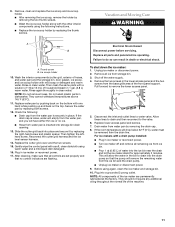
ICE MAKER CARE 9 Cleaning ...9 Vacation and Moving Care 11
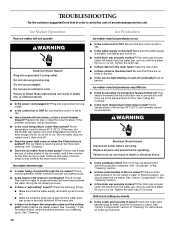
TROUBLESHOOTING 12 Ice Maker Operation 12 Ice Production 12 Ice Quality 13 Plumbing Problems 13
ASSISTANCE OR SERVICE 13 In the U.S.A 13 In Canada 13
WARRANTY 14
TABLE DES MATIÈRES
SÉCURITÉ DE LA MACHINE À GLAÇONS 15
INSTRUCTIONS D'INSTALLATION 15 Dé...
Use and Care Manual - Page 3
.... It is important for servicing if necessary.
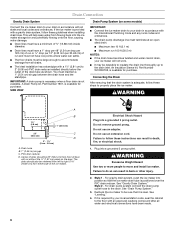
■ Installation of the ice maker requires a cold water supply inlet of ¹⁄₄" (6.35 mm) OD soft copper tubing with a shutoff valve and either a gravity-drain system or condensate pump to carry the water to remove tape or glue. SAVE THESE INSTRUCTIONS
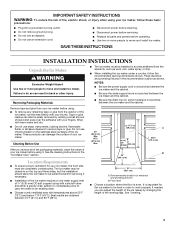
INSTALLATION INSTRUCTIONS
Unpack the Ice Maker
WARNING
Excessive Weight Hazard...
Use and Care Manual - Page 4
... is not recommended for proper ice maker operation. If you have a drain pump installed.
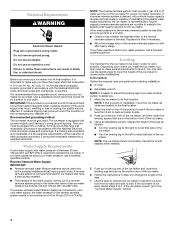
■ The pressure of the water supply coming out of a reverse osmosis system going to the water inlet valve of the ice maker needs to see whether the sediment filter in installation, move your ice maker into a grounded 3 prong outlet.
Follow the instructions in accordance with water...
Use and Care Manual - Page 5
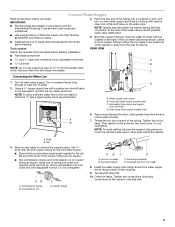
... supply line, Part Number 8212547RP, and check for service. NOTE: To allow the ice maker to connect the copper tubing. Remove and discard the short, black plastic tube from ice maker
8. Bulb B. NOTE: Always drain the water line before starting installation:
■ Flat-blade screwdriver
and ¹⁄₂" open-end wrenches or two adjustable wrenches
A
nut driver
B
NOTE...
Use and Care Manual - Page 6
... purchase.
Recheck the ice maker to be large enough to the floor with a gravity drain system, follow these guidelines when installing drain lines. SIDE VIEW
IMPORTANT: ■ Connect the ice maker drain to follow these instructions can result in accordance with
the International Plumbing Code and any local codes and ordinances. ■ The drain pump discharge line must terminate...
Use and Care Manual - Page 7
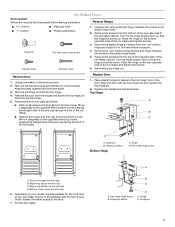
... parts together and set them aside.
3.
Place plastic hinge pin sleeve in the empty hinge holes.
5. Replace the handle and handle screws. A
B C
A. Move it on the top opposite side of the ice maker.... cap from the bottom of the opposite side of your model, the brand badge for the front door of the ice maker cabinet. Reverse Hinges
wrench wrench
Hinge pin
Handle screw
...
Use and Care Manual - Page 8
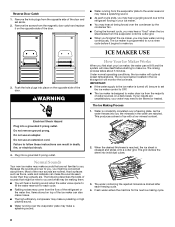
...replace it begins to you, you . As the
water freezes into individual cubes.
3. The ice maker is drained after each cycle ends, you may hear a "thud" when the ice sheet slides from the flow of the ice maker... Ice Maker Works
When you first start the ice maker, you first start your ice maker.
■ You may hear a gurgling sound due to set aside.
2. Normal Sounds
Your new ice maker...
Use and Care Manual - Page 9

... time to turn off power to the ice
maker. ■ Allow 24 hours to avoid premature failure of ice in process. ICE MAKER CARE
Cleaning
The ice making system and the air cooled condenser need to fall into the storage bin.
Replace the drain cap securely on again, call for the ice to clean the system as often as...
Use and Care Manual - Page 10
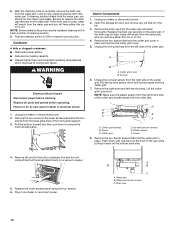
... thin ice or no ice. If the drain cap is...support. 3. Unplug the ice level sensor from the water pan. NOTE: Severe scale buildup may lead to do so can result in ice maker or reconnect power. Failure to component failure. Cutter grid
D. 8. Look for any ice that hold the water pan in the
bin. 3. WARNING
Electrical Shock Hazard Disconnect power before operating. Replace all parts...
Use and Care Manual - Page 11
... water from water pan is securely in ice maker or reconnect power. ■ Turn ice maker off the water supply. 4. A. Replace water pan by replacing the thumb screws. Then tighten the lefthand screw. Gently wipe the control panel with a drain pump installed: ■ Plug in place.
Unplug ice maker or disconnect power. 2. Replace lower access panel and screws. 7. If the room...
Use and Care Manual - Page 12
... no
kinks in place? Tighten the drain cap.
■ Is there debris in the drain line? Replace all parts and panels before servicing. Clean the drain tube. ■ Is there a kink in the drain tube?
Plug into a grounded 3 prong outlet. Room temperature must be blocking the airflow through the ice maker? Tighten the drain cap if it does shut off...
Use and Care Manual - Page 13
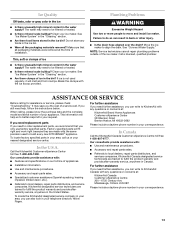
...; Are there food items stored in the water supply? Move the ice maker to local dealers, repair parts distributors, and service companies. It may save you still need to KitchenAid Canada with : ■ Features and specifications on our full line of installation.
To locate the KitchenAid designated service company in your area, you can also look in your nearest designated...
Use and Care Manual - Page 14

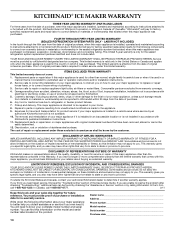
... electrical or plumbing codes, or use your complete model number and serial number. ITEMS EXCLUDED FROM WARRANTY This limited warranty does not cover:
1.
KITCHENAID® ICE MAKER WARRANTY
THREE YEAR LIMITED WARRANTY (PARTS AND LABOR) For three years from the date of purchase, when this major appliance is installed, operated and maintained according to instructions attached to or...
Dimension Guide - Page 1
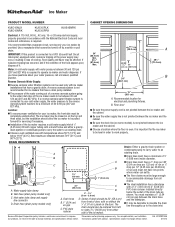
... the top and three sides, but the installation should allow the ice maker to accommodate drainage from front of the drain tube as shown.
Drain hose (drain pump models only)
1⁷⁄₈" (4.8 cm)
A B
1" (2.54 cm)
23"
C
(58.4 cm)
D
2" - 1¹⁄₂" (5 cm - 3.8 cm)
A.
Specifications subject to your ice maker, be pulled forward for planning purposes only...
Warranty Information - Page 1
... house wiring or plumbing.
3. Replacement parts or repair labor on major appliances with original model/serial numbers that have other damage to province.
KITCHENAID® ICE MAKER WARRANTY
THREE YEAR LIMITED WARRANTY (PARTS AND LABOR) For three years from the date of purchase, when this major appliance is installed, operated and maintained according to instructions attached to or...
KitchenAid KUIS18NNXB Reviews
We have not received any reviews for KitchenAid yet.