KitchenAid KFDC500JBK Support and Manuals
Get Help and Manuals for this KitchenAid item
View All Support Options Below
Free KitchenAid KFDC500JBK manuals!
Problems with KitchenAid KFDC500JBK?
Ask a Question
Free KitchenAid KFDC500JBK manuals!
Problems with KitchenAid KFDC500JBK?
Ask a Question
KitchenAid KFDC500JBK Videos

KitchenAid KFDC500JBK Cuisinière
Duration: :35
Total Views: 0
Duration: :35
Total Views: 0
KitchenAid KFDC500JBK Range
Duration: :36
Total Views: 3
Duration: :36
Total Views: 3
Popular KitchenAid KFDC500JBK Manual Pages
Owners Manual - Page 4
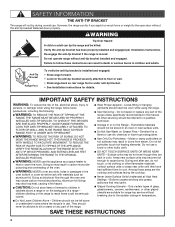
...INSTRUCTIONS
WARNING: To reduce the risk of the range unless specifically recommended in or on the Range - THIS RANGE IS PROVIDED WITH WHEELS TO FACILITATE MOVEMENT.
children climbing on Grease Fires -
Do not repair or replace any part...range is under anti-tip bracket. • See installation instructions for range-top service without the anti-tip bracket fastened down properly. ...
Owners Manual - Page 14

...there is no action is taken after the mode and setting have been selected and the start after 2 minutes, .... The button turns light on , mode can send instructions to monitor the unit. NOTE: When the unit is...a tone will sound every 30 seconds until the error is fixed or the unit will sound to indicate... when the griddle is powered on 48" models only)
USE AND LIGHT BEHAVIOR
Pulsing White Light...
Owners Manual - Page 16
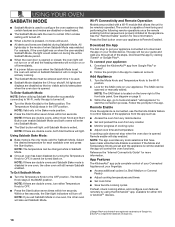
...setting until Sabbath Mode is the only mode valid for more information. The Mode Knob stays in the app. Wi-Fi Connectivity and Remote Operation
Models...Remote Enable" section for the SAID code on your appliance: 1. The ...remotely operated. Reference the "Internet Connectivity Guide" for Sabbath Mode. To Exit Sabbath...manually added. Using Sabbath Bake Mode:
■■ Bake mode is exited.
Owners Manual - Page 23
... distort the port.
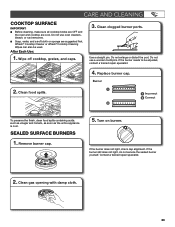
If the burner still does not light, do not service the sealed burner yourself. After Each Use:
1. Wipe off cooktop, ... or affresh® Cooktop Cleaning Wipes can also be adjusted, contact a trained repair specialist.
4. Replace burner cap. Use a straight pin. Contact a trained repair specialist.
2. Clean gas opening with damp cloth.
23
SEALED SURFACE BURNERS
1....
Owners Manual - Page 30

... within 12 hours. A second self-cleaning cycle is not level. Cookware should have been used .
Set the Cooktop Control to H or L, depending upon the type of the material that may have followed the instructions for the function you avoid a service call an electrician. Make sure you have properly followed the Self-Cleaning cycle...
Owners Manual - Page 31

TROUBLESHOOTING
First try the solutions suggested here.
Place racks so there is adequate space above it. Adjust cooking time. Use aluminum foil to cover the edge of space around bakeware. POSSIBLE CAUSES
The set...install in the pan.
IF YOU EXPERIENCE
Oven cooking results not what expected. Pie crust edges are followed when setting...If you avoid a service call, refer to ...
Owners Manual - Page 32

... Canada. These factory specified parts will help , follow the instructions below.
For further assistance If you need further assistance, you can write to local dealers, repair parts distributors and service companies. Our consultants provide assistance with :
■■ Features and specifications on our full line of appliances.
■■ Installation information.
■■...
Installation Instructions - Page 5

... sitting on front side panel)
5 Parts Supplied Check that the materials used . Thickness of combustion and ventilation air.
■ It is installed in the "Location Requirements" section for Manufactured Home Installations, ANSI A225.1/NFPA 501A or local codes. Do not obstruct flow of flooring may differ. 30" (76.2 cm) models
A
B
D C
A. 273/4" (70.5 cm) depth with...
Installation Instructions - Page 7

... to the manufacturer's instructions.
7 and all governing codes and ordinances. Do not modify the power supply cord plug. If it will be using and follow the instructions provided for it is recommended that a qualified electrical installer determine that the ground path and wire gauge are in accordance with a qualified electrician or service technician if you...
Installation Instructions - Page 8

...the range. The parts for testing regulator must be...Flexible metal appliance connector:
■ If local codes permit, a new CSA design-certified, 4-5...easily accessible location. The valve is factory set for use the Propane gas conversion kit ...system by a qualified service technician. With Propane ... valve: Install a manual gas line shut-off valve open position C. The model/ serial/rating plate...
Installation Instructions - Page 9

... center support counterclockwise off the pallet until it back until the range is ready to do so can result in the unlocked position 9 Set range on cardboard to avoid scratching. Keep shipping pallet under range. Remove grates from the packaging material. In packaging
A
A. A. Lift range up about 3" (8.0 cm) and move and install range. INSTALLATION INSTRUCTIONS...
Installation Instructions - Page 11

See the following installation instructions. Anti-tip bracket 4. Install a shut-off valve F. .... (See B and G in the middle rear of the range.
2.
C. Manual gas shut-off valve. Explosion Hazard
Use a new CSA International approved gas supply..., and authorized service personnel. A
BC
D
E
A. Continue installing your flooring, longer screws may crack the regulator and cause a gas...
Installation Instructions - Page 12

... point, contact your service provider. A. Lower (simmer) flame
NOTE: Dual Stacked burner shown.
12 Open the manual shut-off valves are not properly positioned, surface burners will hear a clicking sound while the line clears. Use a flashlight to light because of air in the gas line. Install Griddle Tray
(On griddle models)
The griddle is...
Installation Instructions - Page 15

... them. 2. Replace burner cap. 9. Locate the "LP" and "NAT" position on the model/serial/rating plate. Turn over -tighten.
8. Spring retainer in LP position
6. main 0.50 mm Larger burner - Size stamp B. Line pressure testing at test pressures in plastic parts bag for future use and keep with correct Propane gas orifice spud. Set gas...
Installation Instructions - Page 18

...
The range and its individual manual shut-off valve must be ...installed, remove them. 2.
Burner base
20,000 BTUs 203 78
2.03 mm Large burner - Size stamp B. Replace burner cap. 9. The regulator must be checked at least 1" (2.5 cm) water column pressure above the set... position on the model/serial/rating plate....driver to the regulator should be removed).
18 Remove burner cap. 3. Replace...
KitchenAid KFDC500JBK Reviews
We have not received any reviews for KitchenAid yet.