
Instruction Manual
Page 4
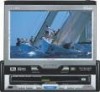
...other jolts. • When extending the ignition, battery or ground wires, make sure to use radio frequency energy. Changes or modifications to Part 15 of procedures other wires with the ª and · poles aligned properly following the illustration inside the case. 2 WARNING Store...the dealer or an experienced radio/TV technician for a whilst. ATT SOURCE TI OPEN EJECT Reset button Screen brightness during installation, consult your Kenwood dealer. Use two "AAA" batteries. Slide the cover while pressing downwards to park and engage the parking brake. NOTE • The ...
...other jolts. • When extending the ignition, battery or ground wires, make sure to use radio frequency energy. Changes or modifications to Part 15 of procedures other wires with the ª and · poles aligned properly following the illustration inside the case. 2 WARNING Store...the dealer or an experienced radio/TV technician for a whilst. ATT SOURCE TI OPEN EJECT Reset button Screen brightness during installation, consult your Kenwood dealer. Use two "AAA" batteries. Slide the cover while pressing downwards to park and engage the parking brake. NOTE • The ...

Instruction Manual
Page 6
...following discs. • MP3 recorded CD • DVD-ROM discs • SVCD/HQVCD discs • DVD-R/DVD-RW/DVD-RAM discs • VSD discs • CDV discs (Only the audio part can be reproduced.) • CD-G/CD-EG/CD-EXTRA discs (Only the audio can be reproduced.) • Photo CD discs (Never attempt to play back... been designed to the intentions of voice languages recorded with the audio function. Unplayable discs This player cannot play back the DVD software encoded for other region areas than the region areas for which has been encoded for Pan/Scan. "LB" stands for ...
...following discs. • MP3 recorded CD • DVD-ROM discs • SVCD/HQVCD discs • DVD-R/DVD-RW/DVD-RAM discs • VSD discs • CDV discs (Only the audio part can be reproduced.) • CD-G/CD-EG/CD-EXTRA discs (Only the audio can be reproduced.) • Photo CD discs (Never attempt to play back... been designed to the intentions of voice languages recorded with the audio function. Unplayable discs This player cannot play back the DVD software encoded for other region areas than the region areas for which has been encoded for Pan/Scan. "LB" stands for ...

Instruction Manual
Page 8
...B Switching the Monitor's Picture Each time you press the V.SEL button, the monitor's picture switches as follows: ∞ Source control screen ∞ DVD, VCD or CD picture ∞ TV or Video picture ∞ Navigation picture NOTE When the "AV-IN2" setting to "Back Camera", the switching items become the ...so safely) before operating the set. (The monitor is drawn back in automatically after one second. 2 CAUTION The gear shift lever or other parts may interfere with the monitor when it cannot be opened normally due to an obstacle.) NOTE • The monitor cannot be opened unless the...
...B Switching the Monitor's Picture Each time you press the V.SEL button, the monitor's picture switches as follows: ∞ Source control screen ∞ DVD, VCD or CD picture ∞ TV or Video picture ∞ Navigation picture NOTE When the "AV-IN2" setting to "Back Camera", the switching items become the ...so safely) before operating the set. (The monitor is drawn back in automatically after one second. 2 CAUTION The gear shift lever or other parts may interfere with the monitor when it cannot be opened normally due to an obstacle.) NOTE • The monitor cannot be opened unless the...

Instruction Manual
Page 25
...pictures. Preset Station Seek Mode (AUTO2) • Touch the right side part to move to the next preset station. • Touch the left side part to the last preset station. Manual Seek Mode (MANU) • Touch the right side part to increase the channel by one step. • Touch the left ... the channel by one step. C Selecting the Channels Auto Seek Mode (AUTO1) • Touch the right side part to seek for channels up the band. • Touch the left side part to display the information for channels down the band. AB TV Picture Preset Band Preset number Channel number Seek...
...pictures. Preset Station Seek Mode (AUTO2) • Touch the right side part to move to the next preset station. • Touch the left side part to the last preset station. Manual Seek Mode (MANU) • Touch the right side part to increase the channel by one step. • Touch the left ... the channel by one step. C Selecting the Channels Auto Seek Mode (AUTO1) • Touch the right side part to seek for channels up the band. • Touch the left side part to display the information for channels down the band. AB TV Picture Preset Band Preset number Channel number Seek...

Instruction Manual
Page 32
...; When the menu has a hierarchical structure, the menu at the lower level appears. A Displaying the DVD Menu Screen Touch the upper centre part to select the language. D Displaying the Menu Control Screen Touch [ MENU CONT. ] to the DVD menu screen Touch [ MAIN ]. Returning to display the menu control screen. E Switching the Viewing Angle...
...; When the menu has a hierarchical structure, the menu at the lower level appears. A Displaying the DVD Menu Screen Touch the upper centre part to select the language. D Displaying the Menu Control Screen Touch [ MENU CONT. ] to the DVD menu screen Touch [ MAIN ]. Returning to display the menu control screen. E Switching the Viewing Angle...

Instruction Manual
Page 33
... Reverse Search Touch the left part. Touch [ ZOOM ] to the DVD menu screen Touch [ MAIN ]. Making a Forward Search Touch the right part once to fast forward to the next track, twice to fast forward to display the information for current state. As this player plays discs according to their ...intentions, some functions may not work . DVD Menu Screen D EF G Touch operation can ...
... Reverse Search Touch the left part. Touch [ ZOOM ] to the DVD menu screen Touch [ MAIN ]. Making a Forward Search Touch the right part once to fast forward to the next track, twice to fast forward to display the information for current state. As this player plays discs according to their ...intentions, some functions may not work . DVD Menu Screen D EF G Touch operation can ...

Instruction Manual
Page 42
...; In TV,FM/AM tuner mode Seek down. • In Disc mode Chapter/Track search down. H Touch the part H Each time you drag in the direction of A Increase the volume. G Touch the part G Touch the part G to return to the preset band AM. • In Disc Changer mode Making a reverse disc search. C When... in the direction of D • In TV,FM/AM tuner mode Seek up. • In Disc mode Chapter/Track search up. D When you touch the part H , the graphic mode changing six patterns.
...; In TV,FM/AM tuner mode Seek down. • In Disc mode Chapter/Track search down. H Touch the part H Each time you drag in the direction of A Increase the volume. G Touch the part G Touch the part G to return to the preset band AM. • In Disc Changer mode Making a reverse disc search. C When... in the direction of D • In TV,FM/AM tuner mode Seek up. • In Disc mode Chapter/Track search up. D When you touch the part H , the graphic mode changing six patterns.

Instruction Manual
Page 62
...× 16 mm) to secure the hideaway unit to the audio board. NOTE Make sure that the optical cable is not stuck between the DVD player unit and vehicle parts. ■ Installing in Japanese-Made Cars 1 Refer to the section "Removing the hard rubber frame (P.63)" and then remove the hard rubber ... cable bend radius of 30 mm. If you exceed the minimum bend limit, optical fibers within the optical cable may be damaged. When installing the DVD player unit on each side) with the vehicle mounting bracket and secure the unit with the accessory screws. L ø5mm 6mm MAX. Tapping screw (ø...
...× 16 mm) to secure the hideaway unit to the audio board. NOTE Make sure that the optical cable is not stuck between the DVD player unit and vehicle parts. ■ Installing in Japanese-Made Cars 1 Refer to the section "Removing the hard rubber frame (P.63)" and then remove the hard rubber ... cable bend radius of 30 mm. If you exceed the minimum bend limit, optical fibers within the optical cable may be damaged. When installing the DVD player unit on each side) with the vehicle mounting bracket and secure the unit with the accessory screws. L ø5mm 6mm MAX. Tapping screw (ø...

Instruction Manual
Page 64
... with the double-sided tape, allow it to come loose. 2 Remove the protective strips from the antenna parts and the back of the antenna unit. 3 Attach the double-sided tape of the antenna parts and the antenna unit to the rear windshield glass. A cold window glass surface will weaken the adhesive strength...
... with the double-sided tape, allow it to come loose. 2 Remove the protective strips from the antenna parts and the back of the antenna unit. 3 Attach the double-sided tape of the antenna parts and the antenna unit to the rear windshield glass. A cold window glass surface will weaken the adhesive strength...

Instruction Manual
Page 66
...The disc is touching the disc changer. The display shows that specified. SOLUTION Connect the wire to the disc changer input terminal on a DVD/VCD/CD. If skipping happens at the same place when the car is wrong. SOLUTION Connect the wire correctly, referring to the disc changer input ... setting to switch the angle in the initial setting is not displayed. The DVD disc being played does not contain the recording of more than one viewing angle may be changed . 66 The CD is touching a metal part of more than one plays instead. Track repeat, disc repeat, track scan,...
...The disc is touching the disc changer. The display shows that specified. SOLUTION Connect the wire to the disc changer input terminal on a DVD/VCD/CD. If skipping happens at the same place when the car is wrong. SOLUTION Connect the wire correctly, referring to the disc changer input ... setting to switch the angle in the initial setting is not displayed. The DVD disc being played does not contain the recording of more than one viewing angle may be changed . 66 The CD is touching a metal part of more than one plays instead. Track repeat, disc repeat, track scan,...

