
Quick Start Guide
Page 8
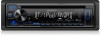
... Turn on the power Adjust the volume Select a source Change the display information On the faceplate Press BSRC. • Press and hold to turn on the unit with the antenna control wire connected. Turn the volume knob. Press BSRC repeatedly. We shall bear no responsibility for the moisture to avoid damaging the speakers by the sudden increase of the output level. Attach Detach How to STANDBY when parking at a low...
... Turn on the power Adjust the volume Select a source Change the display information On the faceplate Press BSRC. • Press and hold to turn on the unit with the antenna control wire connected. Turn the volume knob. Press BSRC repeatedly. We shall bear no responsibility for the moisture to avoid damaging the speakers by the sudden increase of the output level. Attach Detach How to STANDBY when parking at a low...

Quick Start Guide
Page 11
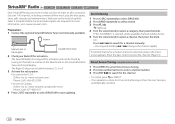
... on the model. [FUNCTION] menu items [AUDIO CONTROL] : [DISPLAY] : [TUNER SETTING] : [SIRIUS XM] : [USB] : [BT MODE] : [REMOTE APP] : [MIC GAIN]* : [NR LEVEL]* : [ECHO CANCEL]* : [SYSTEM] : [CLOCK] : [ENGLISH] : [ESPANOL] : [DEMO MODE] : Sets your preferred control for using a USB device. To return to the previous setting item, press . • Refer to [SUB-W] in standby mode before you need to set [SWITCH PREOUT] to the INSTRUCTION MANUAL on the phone. FUNCTIONS SETTINGS 1 Press the volume knob to enter [FUNCTION]. 2 Turn the volume knob to select an item...
... on the model. [FUNCTION] menu items [AUDIO CONTROL] : [DISPLAY] : [TUNER SETTING] : [SIRIUS XM] : [USB] : [BT MODE] : [REMOTE APP] : [MIC GAIN]* : [NR LEVEL]* : [ECHO CANCEL]* : [SYSTEM] : [CLOCK] : [ENGLISH] : [ESPANOL] : [DEMO MODE] : Sets your preferred control for using a USB device. To return to the previous setting item, press . • Refer to [SUB-W] in standby mode before you need to set [SWITCH PREOUT] to the INSTRUCTION MANUAL on the phone. FUNCTIONS SETTINGS 1 Press the volume knob to enter [FUNCTION]. 2 Turn the volume knob to select an item...

Instruction Manual
Page 6
... clock and date 3 Set the initial settings RADIO 6 CD/USB/iPod/ANDROID 8 AUX 10 Pandora® 11 iHeartRadio® 12 Spotify 13 SiriusXM® Radio 14 BLUETOOTH® 17 AUDIO SETTINGS 25 DISPLAY SETTINGS 28 LEARNING STEERING REMOTE CONTROL 30 REFERENCES 31 Maintenance More information TROUBLESHOOTING 35 INSTALLATION/ CONNECTION 38 SPECIFICATIONS 42 2 ENGLISH BEFORE USE IMPORTANT • To ensure proper use, please read through this manual before playing digital sources to avoid damaging...
... clock and date 3 Set the initial settings RADIO 6 CD/USB/iPod/ANDROID 8 AUX 10 Pandora® 11 iHeartRadio® 12 Spotify 13 SiriusXM® Radio 14 BLUETOOTH® 17 AUDIO SETTINGS 25 DISPLAY SETTINGS 28 LEARNING STEERING REMOTE CONTROL 30 REFERENCES 31 Maintenance More information TROUBLESHOOTING 35 INSTALLATION/ CONNECTION 38 SPECIFICATIONS 42 2 ENGLISH BEFORE USE IMPORTANT • To ensure proper use, please read through this manual before playing digital sources to avoid damaging...

Instruction Manual
Page 9
... KENWOOD Marine Remote Control unit for details. [F/W UPDATE] [UPDATE SYSTEM] [F/W UP xxxx] [YES]: Starts upgrading the firmware. ; [NO]: Cancels (upgrading is not activated). GETTING STARTED [DISPLAY] [EASY MENU] [TUNER SETTING] [PRESET TYPE] [SYSTEM] [KEY BEEP] [SOURCE SELECT] [PANDORA SRC] [IHEART SRC] [SPOTIFY SRC] [BUILT-IN AUX] [CD READ] (For / / / ) When entering [FUNCTION]... [ON]: [ZONE 1] illumination changes to the illustration on page 28 for zone identification. [NORMAL]: Memorizes one station for each preset button...
... KENWOOD Marine Remote Control unit for details. [F/W UPDATE] [UPDATE SYSTEM] [F/W UP xxxx] [YES]: Starts upgrading the firmware. ; [NO]: Cancels (upgrading is not activated). GETTING STARTED [DISPLAY] [EASY MENU] [TUNER SETTING] [PRESET TYPE] [SYSTEM] [KEY BEEP] [SOURCE SELECT] [PANDORA SRC] [IHEART SRC] [SPOTIFY SRC] [BUILT-IN AUX] [CD READ] (For / / / ) When entering [FUNCTION]... [ON]: [ZONE 1] illumination changes to the illustration on page 28 for zone identification. [NORMAL]: Memorizes one station for each preset button...
Instruction Manual
Page 18
... SiriusXM® brings you more information, visit . If a locked channel or a mature channel is selected, a pass code input screen appears. Enter the pass code to receive the channel. (Page 16) Direct Access Tuning (using the remote control) 1 Press DIRECT to enter Direct Access Tuning. 2 Press the number buttons to enter a channel number. 3 Press ENT IW to , all the available channels will be found on the rear panel SiriusXM Vehicle Tuner 2 Check your Radio ID for activation.
... SiriusXM® brings you more information, visit . If a locked channel or a mature channel is selected, a pass code input screen appears. Enter the pass code to receive the channel. (Page 16) Direct Access Tuning (using the remote control) 1 Press DIRECT to enter Direct Access Tuning. 2 Press the number buttons to enter a channel number. 3 Press ENT IW to , all the available channels will be found on the rear panel SiriusXM Vehicle Tuner 2 Check your Radio ID for activation.

Instruction Manual
Page 20
... to exit. [CHANNEL CLEAR]*1 [YES]: Clears all SiriusXM settings to default. ; [NO]: Cancels. *1 Displayed only when [LOCK SETTING] is set to [USER DEFINED]. *2 Available only if the connected SiriusXM Vehicle Tuner is 0000.) 4 Press the volume knob to confirm. 1 Turn the volume knob to select a number. 2 Press S / T to move to the entry position. 3 Repeat steps 1 and 2 to enter a new 4-digit pass code. 4 Press the volume knob to confirm...
... to exit. [CHANNEL CLEAR]*1 [YES]: Clears all SiriusXM settings to default. ; [NO]: Cancels. *1 Displayed only when [LOCK SETTING] is set to [USER DEFINED]. *2 Available only if the connected SiriusXM Vehicle Tuner is 0000.) 4 Press the volume knob to confirm. 1 Turn the volume knob to select a number. 2 Press S / T to move to the entry position. 3 Repeat steps 1 and 2 to enter a new 4-digit pass code. 4 Press the volume knob to confirm...

Instruction Manual
Page 21
... switch between these five devices. (Page 22) • Some Bluetooth devices may need to turn on the unit. 2 Search and select the name of the Bluetooth device for the first time 1 Press B SRC to enter the Personal Identification Number (PIN) code immediately after pairing. ENGLISH 17 Advanced Audio Distribution Profile (A2DP) - Advanced Audio Coding (AAC) Connect the microphone Rear panel Microphone input jack Microphone (supplied) Adjust the microphone...
... switch between these five devices. (Page 22) • Some Bluetooth devices may need to turn on the unit. 2 Search and select the name of the Bluetooth device for the first time 1 Press B SRC to enter the Personal Identification Number (PIN) code immediately after pairing. ENGLISH 17 Advanced Audio Distribution Profile (A2DP) - Advanced Audio Coding (AAC) Connect the microphone Rear panel Microphone input jack Microphone (supplied) Adjust the microphone...

Instruction Manual
Page 27
... USB input terminal. - You change from iPod BT source to any playback source connected via Bluetooth. ; [NO]: Cancels. [ANDROID LIST]* [STATUS] Selects the Android smartphone to use from the list. Listen to iPhone/iPod via Bluetooth You can operate the iPod/iPhone in an iPhone/iPod to the USB input terminal while listening to iPod BT source, the source automatically changes to iPod USB. BLUETOOTH® Settings to use KENWOOD Remote application KENWOOD Remote application is designed to control the KENWOOD car receiver...
... USB input terminal. - You change from iPod BT source to any playback source connected via Bluetooth. ; [NO]: Cancels. [ANDROID LIST]* [STATUS] Selects the Android smartphone to use from the list. Listen to iPhone/iPod via Bluetooth You can operate the iPod/iPhone in an iPhone/iPod to the USB input terminal while listening to iPod BT source, the source automatically changes to iPod USB. BLUETOOTH® Settings to use KENWOOD Remote application KENWOOD Remote application is designed to control the KENWOOD car receiver...
Instruction Manual
Page 29
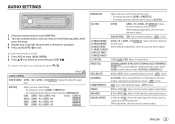
... using the remote control) 1 Press AUD to enter [AUDIO CONTROL]. 2 Press J/K a to the previous setting item, press . To return to select an item, then press ENT IW. Default: [XX] [AUDIO CONTROL] [SUB-W LEVEL] [LEVEL -50] to [LEVEL +10] ([LEVEL 0]): Adjusts the subwoofer output level. [EASY EQ] Adjusts your own sound settings. • The settings are stored to [USER] in [PRESET EQ]. • The settings made may affect the current settings of [MANUAL EQ]. [SW]: [LEVEL -50] to [LEVEL +10] (Default: [LEVEL 0] [BASS]: [LEVEL -9] to [LEVEL +9] [LEVEL 0] [MID]: [LEVEL...
... using the remote control) 1 Press AUD to enter [AUDIO CONTROL]. 2 Press J/K a to the previous setting item, press . To return to select an item, then press ENT IW. Default: [XX] [AUDIO CONTROL] [SUB-W LEVEL] [LEVEL -50] to [LEVEL +10] ([LEVEL 0]): Adjusts the subwoofer output level. [EASY EQ] Adjusts your own sound settings. • The settings are stored to [USER] in [PRESET EQ]. • The settings made may affect the current settings of [MANUAL EQ]. [SW]: [LEVEL -50] to [LEVEL +10] (Default: [LEVEL 0] [BASS]: [LEVEL -9] to [LEVEL +9] [LEVEL 0] [MID]: [LEVEL...

Instruction Manual
Page 30
... selected speakers. [-6DB]/[-12DB]/[-18DB]/[-24DB]: Adjusts the crossover slope. (Selectable only if a setting other than [THROUGH] is selected for the subwoofer (low pass filter). ; [THROUGH]: All signals are sent to [FRONT HPF] settings above.) [30HZ]/[40HZ]/[50HZ]/[60HZ]/[70HZ]/[80HZ]/ [90HZ]/[100HZ]/[120HZ]/[150HZ]/[180HZ]/ [220HZ]/[250HZ]: Adjusts the crossover frequency for [F - AUDIO SETTINGS [SOUND EFFECT] [SOUND RECNSTR] (Sound reconstruction) (Not applicable for RADIO source, AUX source and SIRIUS XM source.) [ON]: Creates realistic sound...
... selected speakers. [-6DB]/[-12DB]/[-18DB]/[-24DB]: Adjusts the crossover slope. (Selectable only if a setting other than [THROUGH] is selected for the subwoofer (low pass filter). ; [THROUGH]: All signals are sent to [FRONT HPF] settings above.) [30HZ]/[40HZ]/[50HZ]/[60HZ]/[70HZ]/[80HZ]/ [90HZ]/[100HZ]/[120HZ]/[150HZ]/[180HZ]/ [220HZ]/[250HZ]: Adjusts the crossover frequency for [F - AUDIO SETTINGS [SOUND EFFECT] [SOUND RECNSTR] (Sound reconstruction) (Not applicable for RADIO source, AUX source and SIRIUS XM source.) [ON]: Creates realistic sound...
Instruction Manual
Page 39
... USB port is not malfunction and reattach the USB device. "PROTECTING SEND SERVICE" Send the unit to forcibly eject the disc. Be careful not to another source. • "USB ERROR" appears. If this does not solve the problem, turn on the power and perform the operation again.(Page 5) (For ) "ERROR"/"FAILED" Your steering remote controller is not compatible, learning may not be displayed correctly. (For ) "SET ERROR"/"DEL ERROR" Setting...
... USB port is not malfunction and reattach the USB device. "PROTECTING SEND SERVICE" Send the unit to forcibly eject the disc. Be careful not to another source. • "USB ERROR" appears. If this does not solve the problem, turn on the power and perform the operation again.(Page 5) (For ) "ERROR"/"FAILED" Your steering remote controller is not compatible, learning may not be displayed correctly. (For ) "SET ERROR"/"DEL ERROR" Setting...

Instruction Manual
Page 42
... protect the wires. on and off by the ignition key. • Keep all cables away from the unit. (Page 21) Warning • The unit can only be controlled. TROUBLESHOOTING INSTALLATION/CONNECTION Bluetooth® Symptom The connected Bluetooth audio player cannot be used with metal parts to the car's chassis again after use of the unit. If "ERROR" appears again, check if the device supports the function...
... protect the wires. on and off by the ignition key. • Keep all cables away from the unit. (Page 21) Warning • The unit can only be controlled. TROUBLESHOOTING INSTALLATION/CONNECTION Bluetooth® Symptom The connected Bluetooth audio player cannot be used with metal parts to the car's chassis again after use of the unit. If "ERROR" appears again, check if the device supports the function...
Instruction Manual 1
Page 6
...® 17 AUDIO SETTINGS 25 DISPLAY SETTINGS 28 LEARNING STEERING REMOTE CONTROL 30 REFERENCES 31 Maintenance More information TROUBLESHOOTING 35 INSTALLATION/ CONNECTION 38 SPECIFICATIONS 42 2 ENGLISH BEFORE USE IMPORTANT • To ensure proper use, please read through this manual before playing digital sources to avoid damaging the speakers by the sudden increase of the output level. It is indicated on the faceplate of explanation. General: • Avoid using buttons on the...
...® 17 AUDIO SETTINGS 25 DISPLAY SETTINGS 28 LEARNING STEERING REMOTE CONTROL 30 REFERENCES 31 Maintenance More information TROUBLESHOOTING 35 INSTALLATION/ CONNECTION 38 SPECIFICATIONS 42 2 ENGLISH BEFORE USE IMPORTANT • To ensure proper use, please read through this manual before playing digital sources to avoid damaging the speakers by the sudden increase of the output level. It is indicated on the faceplate of explanation. General: • Avoid using buttons on the...

Instruction Manual 1
Page 18
... updating. Enter the pass code to receive the channel. (Page 16) Direct Access Tuning (using the remote control) 1 Press DIRECT to enter Direct Access Tuning. 2 Press the number buttons to enter a channel number. 3 Press ENT IW to search for the channel. • To cancel, press or DIRECT. • If no operation is done for 10 seconds after step 2, Direct Access Tuning is selected, a pass code input screen appears. Antenna Expansion port on the SiriusXM Vehicle Tuner...
... updating. Enter the pass code to receive the channel. (Page 16) Direct Access Tuning (using the remote control) 1 Press DIRECT to enter Direct Access Tuning. 2 Press the number buttons to enter a channel number. 3 Press ENT IW to search for the channel. • To cancel, press or DIRECT. • If no operation is done for 10 seconds after step 2, Direct Access Tuning is selected, a pass code input screen appears. Antenna Expansion port on the SiriusXM Vehicle Tuner...

Instruction Manual 1
Page 20
.... ; [OFF]: Cancels. [SIGNAL LEVEL] Shows the strength ([NO SIGNAL]/[WEAK]/[GOOD]/[STRONG]) of the selected band. To return to [USER DEFINED]. *2 Available only if the connected SiriusXM Vehicle Tuner is set to the previous setting item, press . [SIRIUS XM] [SEEK MODE] [CHANNEL LOCK] [CODE SET] Default: [XX] Selects the tuning method for S / T buttons when pressed. [CHANNEL]: Manually search for a channel. ; [PRESET]: Search for a preset channel of the current received signal. [BUFFER USAGE] [SXM RESET] Shows the...
.... ; [OFF]: Cancels. [SIGNAL LEVEL] Shows the strength ([NO SIGNAL]/[WEAK]/[GOOD]/[STRONG]) of the selected band. To return to [USER DEFINED]. *2 Available only if the connected SiriusXM Vehicle Tuner is set to the previous setting item, press . [SIRIUS XM] [SEEK MODE] [CHANNEL LOCK] [CODE SET] Default: [XX] Selects the tuning method for S / T buttons when pressed. [CHANNEL]: Manually search for a channel. ; [PRESET]: Search for a preset channel of the current received signal. [BUFFER USAGE] [SXM RESET] Shows the...

Instruction Manual 1
Page 21
... the unit after searching. 3 Press the volume knob to enter the Personal Identification Number (PIN) code immediately after pairing. Phonebook Access Profile (PBAP) Supported Bluetooth codecs - Advanced Audio Distribution Profile (A2DP) - Advanced Audio Coding (AAC) Connect the microphone Rear panel Microphone input jack Microphone (supplied) Adjust the microphone angle Secure using cord clamps (not supplied) if necessary. Sub Band Codec (SBC) - Audio/Video Remote Control Profile (AVRCP) - Depending on page 21. • A maximum...
... the unit after searching. 3 Press the volume knob to enter the Personal Identification Number (PIN) code immediately after pairing. Phonebook Access Profile (PBAP) Supported Bluetooth codecs - Advanced Audio Distribution Profile (A2DP) - Advanced Audio Coding (AAC) Connect the microphone Rear panel Microphone input jack Microphone (supplied) Adjust the microphone angle Secure using cord clamps (not supplied) if necessary. Sub Band Codec (SBC) - Audio/Video Remote Control Profile (AVRCP) - Depending on page 21. • A maximum...

Instruction Manual 1
Page 29
...]/[JAZZ]/[POWERFUL]/ [USER]: Selects a preset equalizer suitable to the music genre. (Select [USER] to use the settings made in [EASY EQ] or [MANUAL EQ].) [BASS BOOST] [LV1] to [LV5]: Selects your preferred bass boost level. ; [OFF]: Cancels. [LOUDNESS] [LV1]/[LV2]: Selects your preferred low or high frequencies boost to produce a well-balanced sound at low volume. ; [OFF]: Cancels. [SUBWOOFER SET] [ON]: Turns on the subwoofer output. ; [OFF]: Cancels. [FADER] [R15] to [F15] ([0]): Adjusts the front and rear speaker output balance...
...]/[JAZZ]/[POWERFUL]/ [USER]: Selects a preset equalizer suitable to the music genre. (Select [USER] to use the settings made in [EASY EQ] or [MANUAL EQ].) [BASS BOOST] [LV1] to [LV5]: Selects your preferred bass boost level. ; [OFF]: Cancels. [LOUDNESS] [LV1]/[LV2]: Selects your preferred low or high frequencies boost to produce a well-balanced sound at low volume. ; [OFF]: Cancels. [SUBWOOFER SET] [ON]: Turns on the subwoofer output. ; [OFF]: Cancels. [FADER] [R15] to [F15] ([0]): Adjusts the front and rear speaker output balance...

Instruction Manual 1
Page 30
...]: Adjusts the crossover frequency for the tweeter speaker. [-8] to [0]: Adjusts the output volume of the left tweeter. [-8] to [0]: Adjusts the output volume of the selected speaker. (Refer to [FRONT HPF] settings above.) [30HZ]/[40HZ]/[50HZ]/[60HZ]/[70HZ]/[80HZ]/ [90HZ]/[100HZ]/[120HZ]/[150HZ]/[180HZ]/ [220HZ]/[250HZ]: Adjusts the crossover frequency for the subwoofer (low pass filter). ; [THROUGH]: All signals are sent to the selected speakers. [-6DB]/[-12DB]/[-18DB]/[-24DB]: Adjusts the crossover slope. (Selectable only if a setting...
...]: Adjusts the crossover frequency for the tweeter speaker. [-8] to [0]: Adjusts the output volume of the left tweeter. [-8] to [0]: Adjusts the output volume of the selected speaker. (Refer to [FRONT HPF] settings above.) [30HZ]/[40HZ]/[50HZ]/[60HZ]/[70HZ]/[80HZ]/ [90HZ]/[100HZ]/[120HZ]/[150HZ]/[180HZ]/ [220HZ]/[250HZ]: Adjusts the crossover frequency for the subwoofer (low pass filter). ; [THROUGH]: All signals are sent to the selected speakers. [-6DB]/[-12DB]/[-18DB]/[-24DB]: Adjusts the crossover slope. (Selectable only if a setting...
Instruction Manual 1
Page 31
... and rear speaker location in order to make the adjustment for optimum performance. [DTA SETTINGS] [CAR SETTINGS] [SW LPF GAIN] [-8] to [0]: Adjusts the output volume of the selected [POSITION] to default. ; [NO]: Cancels. For settings, see "Determining the value for [DISTANCE] and [GAIN] of [DTA SETTINGS]" on the right column. • (For / / / ) The following item is selectable only if [SWITCH PREOUT] is set to [SUB-W] (page 4): - [SUB-W LEVEL] - [SUBWOOFER SET] - [SW LEVEL...
... and rear speaker location in order to make the adjustment for optimum performance. [DTA SETTINGS] [CAR SETTINGS] [SW LPF GAIN] [-8] to [0]: Adjusts the output volume of the selected [POSITION] to default. ; [NO]: Cancels. For settings, see "Determining the value for [DISTANCE] and [GAIN] of [DTA SETTINGS]" on the right column. • (For / / / ) The following item is selectable only if [SWITCH PREOUT] is set to [SUB-W] (page 4): - [SUB-W LEVEL] - [SUBWOOFER SET] - [SW LEVEL...

Instruction Manual 1
Page 42
... on the vehicle's fuse box which provides 12 V DC power supply and is installed, check whether the brake lamps, blinkers, wipers, etc. The connected phones might not support phone switching feature. Secure the wires with cable clamps and wrap vinyl tape around the wires that has the same rating. 38 ENGLISH Remedy • Check whether the connected Bluetooth audio player supports Audio/Video Remote Control Profile (AVRCP). (Refer...
... on the vehicle's fuse box which provides 12 V DC power supply and is installed, check whether the brake lamps, blinkers, wipers, etc. The connected phones might not support phone switching feature. Secure the wires with cable clamps and wrap vinyl tape around the wires that has the same rating. 38 ENGLISH Remedy • Check whether the connected Bluetooth audio player supports Audio/Video Remote Control Profile (AVRCP). (Refer...


