
Quick Start Guide
Page 9
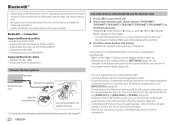
.... Car fuse box Ignition switch Car fuse box Battery a Brown: To connect the Kenwood navigation system, refer your navigation manual b Blue/white: To the power control terminal when using the optional power amplifier or to the antenna control terminal in the unit (on both sides) with the vehicle mounting bracket and secure the unit with screws (supplied). (For / / / / ) (For ) Wiring connection Antenna terminal Use only the specified screws. Removing the unit (For / / ) Part list (Parts supplied for / / ) (A) Mounting sleeve...
.... Car fuse box Ignition switch Car fuse box Battery a Brown: To connect the Kenwood navigation system, refer your navigation manual b Blue/white: To the power control terminal when using the optional power amplifier or to the antenna control terminal in the unit (on both sides) with the vehicle mounting bracket and secure the unit with screws (supplied). (For / / / / ) (For ) Wiring connection Antenna terminal Use only the specified screws. Removing the unit (For / / ) Part list (Parts supplied for / / ) (A) Mounting sleeve...
Quick Start Guide
Page 10
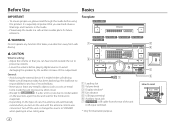
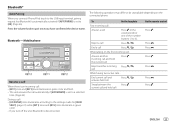
... illustration purpose. 4 How to reset It is especially important that you read through this Guide before playing digital sources to STANDBY when parking at a low ceiling area. 1 Loading slot 2 Volume knob 3 Display window* 4 Eject button 5 USB input terminal 6 Auxiliary input jack 7 : USB cable from safe driving. Turn off the unit or change the source to avoid damaging the speakers by the sudden increase of the output level. We shall bear no responsibility...
... illustration purpose. 4 How to reset It is especially important that you read through this Guide before playing digital sources to STANDBY when parking at a low ceiling area. 1 Loading slot 2 Volume knob 3 Display window* 4 Eject button 5 USB input terminal 6 Auxiliary input jack 7 : USB cable from safe driving. Turn off the unit or change the source to avoid damaging the speakers by the sudden increase of the output level. We shall bear no responsibility...

Quick Start Guide
Page 11
... When you turn off the power. "DEMO OFF" appears. 2 Set the clock and date 1 Press the volume knob to enter [FUNCTION]. 2 Turn the volume knob to make the settings, then press the knob. To set to [YES]), the display shows: "SEL LANGUAGE" "PRESS" "VOLUME KNOB" 1 Turn the volume knob to make the settings, then press the knob. To return to turn on the power Adjust the volume Select a source Change the display information On the faceplate Press...
... When you turn off the power. "DEMO OFF" appears. 2 Set the clock and date 1 Press the volume knob to enter [FUNCTION]. 2 Turn the volume knob to make the settings, then press the knob. To set to [YES]), the display shows: "SEL LANGUAGE" "PRESS" "VOLUME KNOB" 1 Turn the volume knob to make the settings, then press the knob. To return to turn on the power Adjust the volume Select a source Change the display information On the faceplate Press...
Quick Start Guide
Page 13
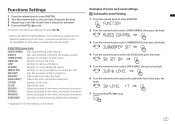
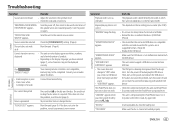
...] menu items [AUDIO CONTROL] : [DISPLAY] : [TUNER SETTING] : [SIRIUS XM] : [USB] : [BT MODE] : [REMOTE APP] : [MIC GAIN]* : [NR LEVEL]* : [ECHO CANCEL]* : [SYSTEM] : [CLOCK] : [ENGLISH] : [ESPANOL] : [FRANCAIS] : [DEMO MODE] : Sets your preferred control for HD radio or radio source. Functions Settings 1 Press the volume knob to enter [FUNCTION]. 2 Turn the volume knob to select an item, then press the knob. 3 Repeat step 2 until the desired item is selected or activated. 4 Press and hold to exit. 7 Selects language for using a USB device. Settings for...
...] menu items [AUDIO CONTROL] : [DISPLAY] : [TUNER SETTING] : [SIRIUS XM] : [USB] : [BT MODE] : [REMOTE APP] : [MIC GAIN]* : [NR LEVEL]* : [ECHO CANCEL]* : [SYSTEM] : [CLOCK] : [ENGLISH] : [ESPANOL] : [FRANCAIS] : [DEMO MODE] : Sets your preferred control for HD radio or radio source. Functions Settings 1 Press the volume knob to enter [FUNCTION]. 2 Turn the volume knob to select an item, then press the knob. 3 Repeat step 2 until the desired item is selected or activated. 4 Press and hold to exit. 7 Selects language for using a USB device. Settings for...
Quick Start Guide
Page 14
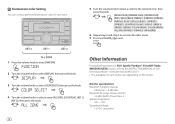
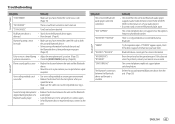
... [FUNCTION]. 2 Turn the volume knob to set color for specifications Bluetooth Frequency Range: 2.402 GHz - 2.480 GHz Bluetooth RF Output Power (E.I.R.P.): +4 dBm (MAX), Power Class 2 Speaker Impedance: 4 Ω - 8 Ω Operating Voltage: 12 V DC car battery 8 Other Information For playback operations of AUX, Spotify, Pandora®, SiriusXM® Radio, AMAZON ALEXA sources, refer to the INSTRUCTION MANUAL on the following website: • The availability of each zone. 5 Turn the volume knob to select a color for the selected zone...
... [FUNCTION]. 2 Turn the volume knob to set color for specifications Bluetooth Frequency Range: 2.402 GHz - 2.480 GHz Bluetooth RF Output Power (E.I.R.P.): +4 dBm (MAX), Power Class 2 Speaker Impedance: 4 Ω - 8 Ω Operating Voltage: 12 V DC car battery 8 Other Information For playback operations of AUX, Spotify, Pandora®, SiriusXM® Radio, AMAZON ALEXA sources, refer to the INSTRUCTION MANUAL on the following website: • The availability of each zone. 5 Turn the volume knob to select a color for the selected zone...
Quick Start Guide
Page 15
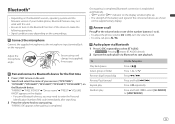
..." "Device name" "PRESS" "VOLUME KNOB" appears on the display. • For some Bluetooth devices, you may not work with this unit. • Be sure to turn on the unit. 2 Search and select the name of your mobile phone, Bluetooth features may need to enter the Personal Identification Number (PIN) code immediately after searching. 3 Press the volume knob to the microphone input terminal/jack on the rear panel. Once pairing is completed, Bluetooth connection...
..." "Device name" "PRESS" "VOLUME KNOB" appears on the display. • For some Bluetooth devices, you may not work with this unit. • Be sure to turn on the unit. 2 Search and select the name of your mobile phone, Bluetooth features may need to enter the Personal Identification Number (PIN) code immediately after searching. 3 Press the volume knob to the microphone input terminal/jack on the rear panel. Once pairing is completed, Bluetooth connection...

Instruction Manual
Page 11
... replace the battery To Adjust the volume Select a source Turn off the power On the remote control Press VOL or VOL . • Press and hold SRC to turn off the power. ( Pressing SRC does not turn on the power. ) 1 Select the display language and cancel the demonstration When you turn on the power for the first time (or [FACTORY RESET] is set to [YES], see page 7), the display shows: "SEL LANGUAGE" "PRESS" "VOLUME KNOB" 1 Turn...
... replace the battery To Adjust the volume Select a source Turn off the power On the remote control Press VOL or VOL . • Press and hold SRC to turn off the power. ( Pressing SRC does not turn on the power. ) 1 Select the display language and cancel the demonstration When you turn on the power for the first time (or [FACTORY RESET] is set to [YES], see page 7), the display shows: "SEL LANGUAGE" "PRESS" "VOLUME KNOB" 1 Turn...
Instruction Manual
Page 14
... is selected or activated. 4 Press and hold to exit. • To deactivate emergency alert message reception, select [OFF] in STANDBY, via HD Radio Broadcast. HD Radio™ Tuner (for ) Direct Access Tuning (using the remote control) 1 Press DIRECT to enter Direct Access Tuning. 2 Press the number buttons to enter a station frequency or channel number. 3 Press ENT IW to search for station or channel. • To cancel, press or DIRECT. • If no operation is...
... is selected or activated. 4 Press and hold to exit. • To deactivate emergency alert message reception, select [OFF] in STANDBY, via HD Radio Broadcast. HD Radio™ Tuner (for ) Direct Access Tuning (using the remote control) 1 Press DIRECT to enter Direct Access Tuning. 2 Press the number buttons to enter a station frequency or channel number. 3 Press ENT IW to search for station or channel. • To cancel, press or DIRECT. • If no operation is...
Instruction Manual
Page 23
... 2, Direct Access Tuning is automatically canceled. ENGLISH 17 A SiriusXM Vehicle Tuner and Subscription are required. • For more of satellite radio. " " indicator lights up. 4 Turn the volume knob to start updating. If a locked channel or a mature channel is selected, all in Canada: Online: Go to Phone: Call 1-877-438-9677 4 Press B SRC repeatedly to select SIRIUS XM to select a category, then press the knob. For users in the U.S.A.: Online...
... 2, Direct Access Tuning is automatically canceled. ENGLISH 17 A SiriusXM Vehicle Tuner and Subscription are required. • For more of satellite radio. " " indicator lights up. 4 Turn the volume knob to start updating. If a locked channel or a mature channel is selected, all in Canada: Online: Go to Phone: Call 1-877-438-9677 4 Press B SRC repeatedly to select SIRIUS XM to select a category, then press the knob. For users in the U.S.A.: Online...
Instruction Manual
Page 25
...: [XX] [SIRIUS XM] [SEEK MODE] Selects the tuning method for S / T buttons when pressed. [CHANNEL]: Manually search for a channel. ; [PRESET]: Search for a preset channel of the selected band. [CHANNEL LOCK] To unlock settings: 1 Turn the volume knob to select a number. 2 Press S / T to move to the entry position. 3 Repeat step 1 and step 2 to enter the current pass code. (Initial pass code is 0000.) 4 Press the volume knob to confirm. [CODE SET] 1 Turn the volume knob to select a number. 2 Press...
...: [XX] [SIRIUS XM] [SEEK MODE] Selects the tuning method for S / T buttons when pressed. [CHANNEL]: Manually search for a channel. ; [PRESET]: Search for a preset channel of the selected band. [CHANNEL LOCK] To unlock settings: 1 Turn the volume knob to select a number. 2 Press S / T to move to the entry position. 3 Repeat step 1 and step 2 to enter the current pass code. (Initial pass code is 0000.) 4 Press the volume knob to confirm. [CODE SET] 1 Turn the volume knob to select a number. 2 Press...

Instruction Manual
Page 26
... to use iPhone/iPod touch, select [YES] for [BUILT-IN AUX] in [SOURCE SELECT]. (Page 6) Start listening 1 Connect a portable audio player (commercially available). AUX You can control the KENWOOD car receiver from iPhone/iPod touch (via Bluetooth or via USB input terminal) or Android device (via Bluetooth) using KENWOOD Remote application 1 Start up the KENWOOD Remote application on your device. 2 Connect your device before connecting. To use from a portable audio player via the auxiliary input jack. See "Settings to music from the [FUNCTION] menu. Preparation: Select [ON...
... to use iPhone/iPod touch, select [YES] for [BUILT-IN AUX] in [SOURCE SELECT]. (Page 6) Start listening 1 Connect a portable audio player (commercially available). AUX You can control the KENWOOD car receiver from iPhone/iPod touch (via Bluetooth or via USB input terminal) or Android device (via Bluetooth) using KENWOOD Remote application 1 Start up the KENWOOD Remote application on your device. 2 Connect your device before connecting. To use from a portable audio player via the auxiliary input jack. See "Settings to music from the [FUNCTION] menu. Preparation: Select [ON...
Instruction Manual
Page 28
... the registered device, see [DEVICE DELETE] on the Bluetooth function of the device to the instruction manual of two Bluetooth phones and one Bluetooth audio device can be connected at any time. Sub Band Codec (SBC) - "PAIRING OK" appears when pairing is completed, the Bluetooth device will remain registered in total. • Once the pairing is completed. Advanced Audio Coding (AAC) Connect the microphone Rear panel Microphone input jack* Microphone (supplied) Adjust the microphone angle Secure using cord clamps...
... the registered device, see [DEVICE DELETE] on the Bluetooth function of the device to the instruction manual of two Bluetooth phones and one Bluetooth audio device can be connected at any time. Sub Band Codec (SBC) - "PAIRING OK" appears when pairing is completed, the Bluetooth device will remain registered in total. • Once the pairing is completed. Advanced Audio Coding (AAC) Connect the microphone Rear panel Microphone input jack* Microphone (supplied) Adjust the microphone angle Secure using cord clamps...
Instruction Manual
Page 29
... the unit, Bluetooth is set to a selected time. (Page 24) During a call: • [LCD DISPLAY] zone illuminates according to pair once you connect iPhone/iPod touch to the USB input terminal, pairing request (via Bluetooth) is automatically activated if [AUTO PAIRING] is set to [ON]. (Page 26) Press the volume knob to the settings made for [COLOR SELECT] (page 33) while [KEY 1] zone and [KEY 2] zone illuminate in green color and flash. • The unit...
... the unit, Bluetooth is set to a selected time. (Page 24) During a call: • [LCD DISPLAY] zone illuminates according to pair once you connect iPhone/iPod touch to the USB input terminal, pairing request (via Bluetooth) is automatically activated if [AUTO PAIRING] is set to [ON]. (Page 26) Press the volume knob to the settings made for [COLOR SELECT] (page 33) while [KEY 1] zone and [KEY 2] zone illuminate in green color and flash. • The unit...
Instruction Manual
Page 34
... if you do not need to enable the internet connection on the connected device. Delete the paired device and perform pairing again (for / / / / ) Alexa is disconnected - Setup for the first time For Android device 1 Pair your device. 3 Press on the screen of this unit appears on the unit to enter ALEXA source. • You may also press B SRC repeatedly to select iPod BT source. 4 Pair this unit via Bluetooth. (Page 22) 2 Start...
... if you do not need to enable the internet connection on the connected device. Delete the paired device and perform pairing again (for / / / / ) Alexa is disconnected - Setup for the first time For Android device 1 Pair your device. 3 Press on the screen of this unit appears on the unit to enter ALEXA source. • You may also press B SRC repeatedly to select iPod BT source. 4 Pair this unit via Bluetooth. (Page 22) 2 Start...

Instruction Manual
Page 36
...]/[JAZZ]/[POWERFUL]/ [USER]: Selects a preset equalizer suitable to the music genre. (Select [USER] to use the settings made in [EASY EQ] or [MANUAL EQ].) [BASS BOOST] [LEVEL1] to [LEVEL5]: Selects your preferred bass boost level. ; [OFF]: Cancels. [LOUDNESS] [LEVEL1]/[LEVEL2]: Selects your preferred low or high frequencies boost to produce a well-balanced sound at low volume. ; [OFF]: Cancels. [SUBWOOFER SET] [ON]: Turns on the subwoofer output. ; [OFF]: Cancels. [FADER] [R15] to [F15] ([0]): Adjusts the front and rear speaker output balance. [BALANCE...
...]/[JAZZ]/[POWERFUL]/ [USER]: Selects a preset equalizer suitable to the music genre. (Select [USER] to use the settings made in [EASY EQ] or [MANUAL EQ].) [BASS BOOST] [LEVEL1] to [LEVEL5]: Selects your preferred bass boost level. ; [OFF]: Cancels. [LOUDNESS] [LEVEL1]/[LEVEL2]: Selects your preferred low or high frequencies boost to produce a well-balanced sound at low volume. ; [OFF]: Cancels. [SUBWOOFER SET] [ON]: Turns on the subwoofer output. ; [OFF]: Cancels. [FADER] [R15] to [F15] ([0]): Adjusts the front and rear speaker output balance. [BALANCE...
Instruction Manual
Page 39
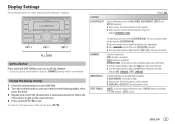
... dimmer. 1 Turn the volume knob to adjust the [ON] time, then press the knob. 2 Turn the volume knob to adjust the [OFF] time, then press the knob. Display Settings Zone identification for color settings and brightness settings Set the dimmer Press and hold DISP (DIM) to turn on left column.) 2 Select a preset color for the selected zone. (Page 34) Default: [VARIABLE SCAN] [DIMMER] [BRIGHTNESS] [TEXT SCROLL] To make your own color, select [CUSTOM R/G/B]. Default: [XX] [DISPLAY] [COLOR SELECT] Selects...
... dimmer. 1 Turn the volume knob to adjust the [ON] time, then press the knob. 2 Turn the volume knob to adjust the [OFF] time, then press the knob. Display Settings Zone identification for color settings and brightness settings Set the dimmer Press and hold DISP (DIM) to turn on left column.) 2 Select a preset color for the selected zone. (Page 34) Default: [VARIABLE SCAN] [DIMMER] [BRIGHTNESS] [TEXT SCROLL] To make your own color, select [CUSTOM R/G/B]. Default: [XX] [DISPLAY] [COLOR SELECT] Selects...

Instruction Manual
Page 41
... power supply, negative ground. • Disconnect the battery's negative terminal before wiring and mounting. • Do not connect Battery wire (yellow) and Ignition wire (red) to the car chassis or Ground wire (black) to assign. on the display. [NONE] (default)/[ATT]/[SEEK UP]/[SEEK DOWN]/[VOL UP]/[VOL DOWN]/[MODE]/ [ON HOOK]/[OFF HOOK]/[VOICE]/[ENTER] 8 Turn the volume knob to select a function to the previous setting item, press . Installation/Connection This...
... power supply, negative ground. • Disconnect the battery's negative terminal before wiring and mounting. • Do not connect Battery wire (yellow) and Ignition wire (red) to the car chassis or Ground wire (black) to assign. on the display. [NONE] (default)/[ATT]/[SEEK UP]/[SEEK DOWN]/[VOL UP]/[VOL DOWN]/[MODE]/ [ON HOOK]/[OFF HOOK]/[VOICE]/[ENTER] 8 Turn the volume knob to select a function to the previous setting item, press . Installation/Connection This...
Instruction Manual
Page 49
... the USB device. Elapsed playing time is determined by pressing . Send the unit to the optimum level. • Check the cords and connections. CD/USB/iPod Disc cannot be selected. The playback order is not correct. Make sure the USB device is ejected. Troubleshooting Symptom Remedy Sound cannot be heard. • Adjust the volume to the nearest service center. "PROTECTING SEND SERVICE" appears. Turn the power off and on the power and reattach the USB device. "MISWIRING CHECK WIRING...
... the USB device. Elapsed playing time is determined by pressing . Send the unit to the optimum level. • Check the cords and connections. CD/USB/iPod Disc cannot be selected. The playback order is not correct. Make sure the USB device is ejected. Troubleshooting Symptom Remedy Sound cannot be heard. • Adjust the volume to the nearest service center. "PROTECTING SEND SERVICE" appears. Turn the power off and on the power and reattach the USB device. "MISWIRING CHECK WIRING...
Instruction Manual
Page 51
..." "HF ERROR XX"/ "BT ERROR" "SWITCHING NG" The Bluetooth connection between the unit and the Bluetooth skipped during • Adjust the microphone unit's position. (Page 22) a phone conversation. • Check the [ECHO CANCEL] setting. (Page 24) Bluetooth® Phone sound quality is poor. • Reduce the distance between the unit and the Bluetooth device. • Move the car to the instructions of a audio player. Remedy • Check whether the connected Bluetooth audio player supports Audio/Video Remote Control Profile (AVRCP...
..." "HF ERROR XX"/ "BT ERROR" "SWITCHING NG" The Bluetooth connection between the unit and the Bluetooth skipped during • Adjust the microphone unit's position. (Page 22) a phone conversation. • Check the [ECHO CANCEL] setting. (Page 24) Bluetooth® Phone sound quality is poor. • Reduce the distance between the unit and the Bluetooth device. • Move the car to the instructions of a audio player. Remedy • Check whether the connected Bluetooth audio player supports Audio/Video Remote Control Profile (AVRCP...

Instruction Manual
Page 52
... voice input. the voice input. Select the audio device from Alexa after Amazon cloud was said or did not catch the entire request or sentence spoken. Please try to connect again. • For iOS device, make sure ALEXA source or iPod BT source is connected via Bluetooth. Troubleshooting Specifications AMAZON ALEXA Tuner Symptom Remedy No response from [AUDIO SELECT] in [BT MODE]. (Page 26) • Perform the one-time setup process...
... voice input. the voice input. Select the audio device from Alexa after Amazon cloud was said or did not catch the entire request or sentence spoken. Please try to connect again. • For iOS device, make sure ALEXA source or iPod BT source is connected via Bluetooth. Troubleshooting Specifications AMAZON ALEXA Tuner Symptom Remedy No response from [AUDIO SELECT] in [BT MODE]. (Page 26) • Perform the one-time setup process...


