
Quick Start Guide
Page 2
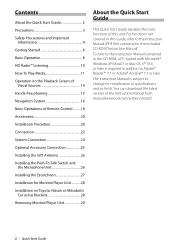
... change for Monitor/Player Unit............28 Installation on the Playback Screen of Visual Sources 14 Hands-free phoning 15 Navigation System 16 Basic Operations of Remote Control..........18 Accessories 20 Installation Procedure 20 Connection 22 System Connection 24 Optional Accessory Connection 25 Installing the GPS Antenna 26 Installing the Push-To-Talk Switch and the Microphone Unit 26 Installing the Escutcheon 27 Installation for modification of the Instruction Manual from manual.kenwood.com/edition/im332/. 2 | Quick Start Guide...
... change for Monitor/Player Unit............28 Installation on the Playback Screen of Visual Sources 14 Hands-free phoning 15 Navigation System 16 Basic Operations of Remote Control..........18 Accessories 20 Installation Procedure 20 Connection 22 System Connection 24 Optional Accessory Connection 25 Installing the GPS Antenna 26 Installing the Push-To-Talk Switch and the Microphone Unit 26 Installing the Escutcheon 27 Installation for modification of the Instruction Manual from manual.kenwood.com/edition/im332/. 2 | Quick Start Guide...
Quick Start Guide
Page 3
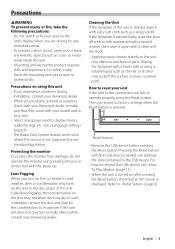
... unit. How to reset your area. • Select a language used to evaporate. For safety's sake, leave the mounting and wiring work where the service is stained, wipe it again with a hard cloth or using a ball point pen or similar tool with the USB device installed can damage the data contained in the USB device. See (page 6). • The Radio Data System feature won't work to the unit may affect its mechanical parts...
... unit. How to reset your area. • Select a language used to evaporate. For safety's sake, leave the mounting and wiring work where the service is stained, wipe it again with a hard cloth or using a ball point pen or similar tool with the USB device installed can damage the data contained in the USB device. See (page 6). • The Radio Data System feature won't work to the unit may affect its mechanical parts...
Quick Start Guide
Page 4
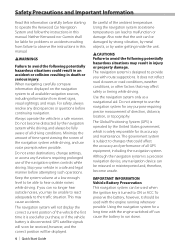
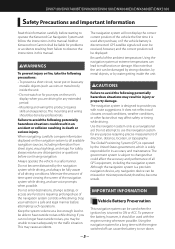
... Important Information Read this information carefully before starting to operate the Kenwood Car Navigation System and follow the instructions in this manual. 2WARNINGS Failure to avoid the following potentially hazardous situations may affect safety or timing while driving. Do not enter destinations, change settings, or access any navigation device can no longer hear outside noises, you with the engine running whenever possible. GPS satellite signals will soon be received, however...
... Important Information Read this information carefully before starting to operate the Kenwood Car Navigation System and follow the instructions in this manual. 2WARNINGS Failure to avoid the following potentially hazardous situations may affect safety or timing while driving. Do not enter destinations, change settings, or access any navigation device can no longer hear outside noises, you with the engine running whenever possible. GPS satellite signals will soon be received, however...

Quick Start Guide
Page 7
... manual of the external device. Initialize Initialization resets the settings made using the Panel Color SET process to the default settings set to be set to "OFF". Sets the Pulse signal output time. For the adjustment method, refer to the rear view camera video display, press the [AUD] button for longer than 1 Second] beforehand. Turn this setting on the EXT SW Control screen is connected. Returns to the preset buttons ([Preset1] - [Preset3]). Panel Color Coordinate SET Select...
... manual of the external device. Initialize Initialization resets the settings made using the Panel Color SET process to the default settings set to be set to "OFF". Sets the Pulse signal output time. For the adjustment method, refer to the rear view camera video display, press the [AUD] button for longer than 1 Second] beforehand. Turn this setting on the EXT SW Control screen is connected. Returns to the preset buttons ([Preset1] - [Preset3]). Panel Color Coordinate SET Select...
Quick Start Guide
Page 16
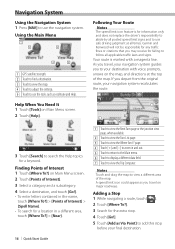
... speed limit icon feature is marked with voice prompts, arrows on major roadways. Navigation System Using the Navigation System 1 Press [NAV] to add this stop . 4 Touch [Go!]. 5 Touch [Add as Via Point] to use the tools such as you may receive for failing to follow all posted speed limit signs and to your destination with a magenta line. Using the Main Menu 1 2 3 4 5 1 GPS satellite strength. 2 Touch to find a destination. 3 Touch to view the map. 4 Touch to adjust the settings. 5 Touch...
... speed limit icon feature is marked with voice prompts, arrows on major roadways. Navigation System Using the Navigation System 1 Press [NAV] to add this stop . 4 Touch [Go!]. 5 Touch [Add as Via Point] to use the tools such as you may receive for failing to follow all posted speed limit signs and to your destination with a magenta line. Using the Main Menu 1 2 3 4 5 1 GPS satellite strength. 2 Touch to find a destination. 3 Touch to view the map. 4 Touch to adjust the settings. 5 Touch...
Quick Start Guide
Page 20
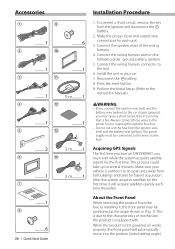
.... 4. Install the unit in your vehicle is outdoors in (Fig. 1). The power supply must wait while the system acquires satellite signals for each time thereafter. About the Front Panel When removing the product from the ignition and disconnect the battery. 2. Connect the wiring harness wires in turn on works properly, the front panel will acquire satellites quickly each unit. 3. Perform the Initial Setup. (Refer to the Instruction Manual...
.... 4. Install the unit in your vehicle is outdoors in (Fig. 1). The power supply must wait while the system acquires satellite signals for each time thereafter. About the Front Panel When removing the product from the ignition and disconnect the battery. 2. Connect the wiring harness wires in turn on works properly, the front panel will acquire satellites quickly each unit. 3. Perform the Initial Setup. (Refer to the Instruction Manual...
dnx9980hd (pdf)
Page 2
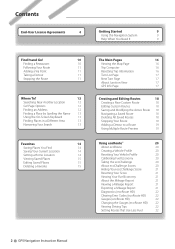
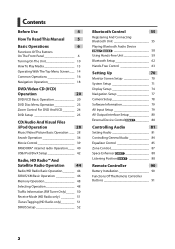
... 14 Saving Your Current Location 14 Setting a Home Location 14 Viewing Saved Places 15 Editing Saved Places 15 Deleting a Favorite 15 The Main Pages 16 Viewing the Map Page 16 Trip Computer 16 Resetting Trip Information 16 Turn List Page 17 Next Turn Page 17 About Junction View 17 GPS Info Page 17 Creating and Editing Routes 18 Creating a New Custom Route 18 Editing Custom Routes 18 Saving and Modifying the Active Route 18 Navigating a Saved Route 18 Deleting All Saved Routes 18 Stopping Your Route 18 Adding a Detour to a Route 19 Using Multiple Route...
... 14 Saving Your Current Location 14 Setting a Home Location 14 Viewing Saved Places 15 Editing Saved Places 15 Deleting a Favorite 15 The Main Pages 16 Viewing the Map Page 16 Trip Computer 16 Resetting Trip Information 16 Turn List Page 17 Next Turn Page 17 About Junction View 17 GPS Info Page 17 Creating and Editing Routes 18 Creating a New Custom Route 18 Editing Custom Routes 18 Saving and Modifying the Active Route 18 Navigating a Saved Route 18 Deleting All Saved Routes 18 Stopping Your Route 18 Adding a Detour to a Route 19 Using Multiple Route...
dnx9980hd (pdf)
Page 3
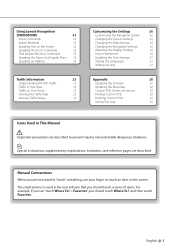
... the Navigation System 26 Changing the System Settings 26 Changing the Map Settings 26 Changing the Navigation Settings 26 Adjusting the Display Settings 26 Route Preferences 26 Updating the Time Settings 27 Setting the Languages 27 Adding Security 27 Appendix 28 Updating the Software 28 Updating the Map Data 28 Custom POIs (Points of Interest) 29 Finding Custom POIs 29 Deleting Custom POIs 29 Saving Trip Logs 29 Icons Used in the text indicate that you should touch Where To?, and then touch Favorites. Manual Conventions When you should touch a series of...
... the Navigation System 26 Changing the System Settings 26 Changing the Map Settings 26 Changing the Navigation Settings 26 Adjusting the Display Settings 26 Route Preferences 26 Updating the Time Settings 27 Setting the Languages 27 Adding Security 27 Appendix 28 Updating the Software 28 Updating the Map Data 28 Custom POIs (Points of Interest) 29 Finding Custom POIs 29 Deleting Custom POIs 29 Saving Trip Logs 29 Icons Used in the text indicate that you should touch Where To?, and then touch Favorites. Manual Conventions When you should touch a series of...
dnx9980hd (pdf)
Page 4
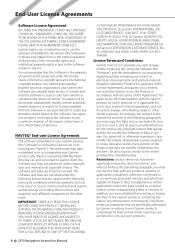
... computer Software (the "Software") and the embedded or accompanying digital map Data, including any products, systems, or applications installed or otherwise connected to rent out such products. 4 GPS Navigation Instruction Manual The Software and Data are protected under the following license and are subject to the following paragraphs, you may copy this Data only as necessary for your use to (i) view it, and (ii) save it...
... computer Software (the "Software") and the embedded or accompanying digital map Data, including any products, systems, or applications installed or otherwise connected to rent out such products. 4 GPS Navigation Instruction Manual The Software and Data are protected under the following license and are subject to the following paragraphs, you may copy this Data only as necessary for your use to (i) view it, and (ii) save it...
dnx9980hd (pdf)
Page 12
... save this location to your Favorites. ➌ Touch to create a turn-by-turn route to this location. ➍ Touch to return to the previous page. ⁄ • DNX5180 does not have Bluetooth functionality. ➎ Touch to view more information about the location. ➏ Touch to switch between a 3D (three-dimensional) map and a 2D (twodimensional) map. ➐ Touch to rotate the viewing angle in the list, if necessary. 7 Touch the address, if necessary. 12 GPS Navigation Instruction Manual Enter the city using...
... save this location to your Favorites. ➌ Touch to create a turn-by-turn route to this location. ➍ Touch to return to the previous page. ⁄ • DNX5180 does not have Bluetooth functionality. ➎ Touch to view more information about the location. ➏ Touch to switch between a 3D (three-dimensional) map and a 2D (twodimensional) map. ➐ Touch to rotate the viewing angle in the list, if necessary. 7 Touch the address, if necessary. 12 GPS Navigation Instruction Manual Enter the city using...
dnx9980hd (pdf)
Page 22
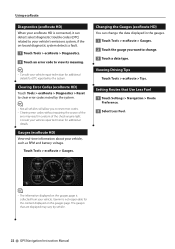
... Use Less Fuel 1 Touch Settings > Navigation > Route Preference. 2 Select Less Fuel. ⁄ • The information displayed on the gauges page is collected from your vehicle. Using ecoRoute Diagnostics (ecoRoute HD) When your ecoRoute HD is not responsible for the content displayed on the gauges page. Setting Routes that are displayed may result in the gauges. 1 Touch Tools > ecoRoute > Gauges. 2 Touch the gauge you to reset error codes. • Clearing error codes without repairing...
... Use Less Fuel 1 Touch Settings > Navigation > Route Preference. 2 Select Less Fuel. ⁄ • The information displayed on the gauges page is collected from your vehicle. Using ecoRoute Diagnostics (ecoRoute HD) When your ecoRoute HD is not responsible for the content displayed on the gauges page. Setting Routes that are displayed may result in the gauges. 1 Touch Tools > ecoRoute > Gauges. 2 Touch the gauge you to reset error codes. • Clearing error codes without repairing...

dnx9980hd (pdf)
Page 26
... GPS mode and simulate navigation. • Units-change it. Adjusting the Display Settings Touch Settings > Display. • Color Mode-select Day for a light background, Night for calculating your GPS navigation system. More detail may cause the map to redraw slower. • Map View-select a map perspective. • Vehicle-touch Change to change the icon used to display your position on road speeds and vehicle acceleration data for a given route. • Faster Time-calculates routes that are faster to turn voice prompts on your destination. 26 GPS Navigation Instruction Manual...
... GPS mode and simulate navigation. • Units-change it. Adjusting the Display Settings Touch Settings > Display. • Color Mode-select Day for a light background, Night for calculating your GPS navigation system. More detail may cause the map to redraw slower. • Map View-select a map perspective. • Vehicle-touch Change to change the icon used to display your position on road speeds and vehicle acceleration data for a given route. • Faster Time-calculates routes that are faster to turn voice prompts on your destination. 26 GPS Navigation Instruction Manual...
dnx9980hd (pdf)
Page 29
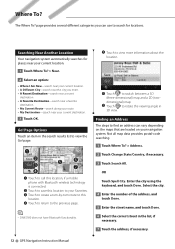
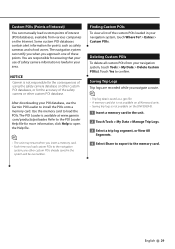
.... Saving Trip Logs Trip logs are responsible for the accuracy of the custom POIs loaded in the unit. 2 Touch Tools > My Data > Manage Trip Logs. 3 Select a trip log segment, or View All Segments. 4 Select Share to export to load the POIs. Some custom POI databases contain alert information for more information; Touch Yes to the POI Loader Help file for points such as a .gpx file. • A memory card slot is lawful in your use the Garmin POI Loader to install the POIs onto a memory card. Finding Custom POIs To view a list of the safety camera...
.... Saving Trip Logs Trip logs are responsible for the accuracy of the custom POIs loaded in the unit. 2 Touch Tools > My Data > Manage Trip Logs. 3 Select a trip log segment, or View All Segments. 4 Select Share to export to load the POIs. Some custom POI databases contain alert information for more information; Touch Yes to the POI Loader Help file for points such as a .gpx file. • A memory card slot is lawful in your use the Garmin POI Loader to install the POIs onto a memory card. Finding Custom POIs To view a list of the safety camera...
dnx7180 (pdf)
Page 3
... Memory Operation 48 Selecting Operation 48 Traffic Information (FM Tuner Only)______ 50 Receive Mode (HD Radio only)_ ________ 51 iTunes Tagging (HD Radio only)_________ 51 SIRIUS Setup 52 Bluetooth Control 55 Registering And Connecting Bluetooth Unit 55 Playing Bluetooth Audio Device 58 Using Hands-Free Unit 59 Bluetooth Setup 62 Hands-Free Control 63 Setting Up 70 Monitor Screen Setup 70 System Setup 71 Display Setup 74 Navigation Setup 77 Camera Setup 78 Software Information 79 AV Input Setup 79 AV Output Interface Setup 80 External Device...
... Memory Operation 48 Selecting Operation 48 Traffic Information (FM Tuner Only)______ 50 Receive Mode (HD Radio only)_ ________ 51 iTunes Tagging (HD Radio only)_________ 51 SIRIUS Setup 52 Bluetooth Control 55 Registering And Connecting Bluetooth Unit 55 Playing Bluetooth Audio Device 58 Using Hands-Free Unit 59 Bluetooth Setup 62 Hands-Free Control 63 Setting Up 70 Monitor Screen Setup 70 System Setup 71 Display Setup 74 Navigation Setup 77 Camera Setup 78 Software Information 79 AV Input Setup 79 AV Output Interface Setup 80 External Device...
dnx7180 (pdf)
Page 5
... feature won't work with a clean soft dry cloth. • Applying spray cleaner directly to the unit may not allow discs to display menus, audio file tags, etc. Cleaning the unit If the faceplate of this unit, pull them out horizontally. • If the disc center hole or outside rim has burrs, use the disc only after a while, consult your recorder instruction manual...
... feature won't work with a clean soft dry cloth. • Applying spray cleaner directly to the unit may not allow discs to display menus, audio file tags, etc. Cleaning the unit If the faceplate of this unit, pull them out horizontally. • If the disc center hole or outside rim has burrs, use the disc only after a while, consult your recorder instruction manual...
dnx7180 (pdf)
Page 64
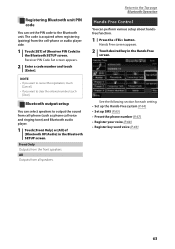
... select speakers to output the sound from the cell-phone or audio player side. 1 Touch [SET] of [Bluetooth HF/Audio] in the Hands Free screen. Front Only Outputs from all speakers. Return to the Top page Bluetooth Operation Hands-Free Control You can set the PIN code to clear the entered number, touch [Clear]. NOTE • If you want to cancel the registration, touch [Cancel]. • If you want to the Bluetooth unit. Hands Free screen...
... select speakers to output the sound from the cell-phone or audio player side. 1 Touch [SET] of [Bluetooth HF/Audio] in the Hands Free screen. Front Only Outputs from all speakers. Return to the Top page Bluetooth Operation Hands-Free Control You can set the PIN code to clear the entered number, touch [Clear]. NOTE • If you want to cancel the registration, touch [Cancel]. • If you want to the Bluetooth unit. Hands Free screen...
dnx7180 (pdf)
Page 74
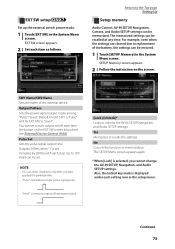
.../off each setting icon in the setup menu. Also, the locked key mark is touched. For example, even when the settings are cleared due to the Top page Setting Up Setup memory Audio Control, AV-IN SETUP, Navigation, Camera, and Audio SETUP settings can be restored. 1 Touch [SETUP Memory] in the System Menu screen. SETUP Memory screen appears. 2 Follow the instruction on the EXT SW screen is displayed under each time the button on the screen. Continued 73 EXT SW setup Set up the external switch power mode. 1 Touch [EXT...
.../off each setting icon in the setup menu. Also, the locked key mark is touched. For example, even when the settings are cleared due to the Top page Setting Up Setup memory Audio Control, AV-IN SETUP, Navigation, Camera, and Audio SETUP settings can be restored. 1 Touch [SETUP Memory] in the System Menu screen. SETUP Memory screen appears. 2 Follow the instruction on the EXT SW screen is displayed under each time the button on the screen. Continued 73 EXT SW setup Set up the external switch power mode. 1 Touch [EXT...
dnx7180 (pdf)
Page 101
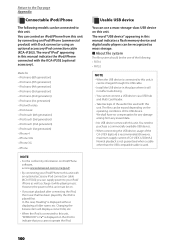
... can use a mass-storage-class USB device on the operating conditions of the USB device. Return to the Top page Appendix Connectable iPod/iPhone The following . • FAT16 • FAT32 NOTE • When the USB device is connected to this unit, it can be charged through the USB cable. • Install the USB device in this manual indicates a flash memory device and digital audio players can be connected to this unit. You need to purchase a commercially available USB device...
... can use a mass-storage-class USB device on the operating conditions of the USB device. Return to the Top page Appendix Connectable iPod/iPhone The following . • FAT16 • FAT32 NOTE • When the USB device is connected to this unit, it can be charged through the USB cable. • Install the USB device in this manual indicates a flash memory device and digital audio players can be connected to this unit. You need to purchase a commercially available USB device...
Quick Start Guide
Page 3
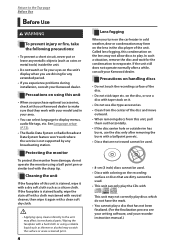
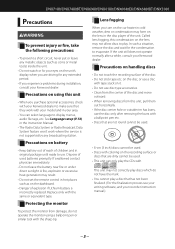
... center hole or outside rim has burrs, use . Precautions on the unit's display when you purchase optional accessories, check with your Kenwood dealer to use the disc only after a while, consult your recorder instruction manual.) 3 See Language setup (P.72) in original package until ready to make sure that they work where the service is incorrectly replaced. Replace only with the sharp tip. If swallowed...
... center hole or outside rim has burrs, use . Precautions on the unit's display when you purchase optional accessories, check with your Kenwood dealer to use the disc only after a while, consult your recorder instruction manual.) 3 See Language setup (P.72) in original package until ready to make sure that they work where the service is incorrectly replaced. Replace only with the sharp tip. If swallowed...
Quick Start Guide
Page 5
... from street signs, visual sightings, and maps. Also note that the unit can be fully aware of the vehicle the first time it should be unable to react adequately to the traffic situation. When navigating, carefully compare information displayed on the unit's display when you can cause the battery to run down. 5 Always operate the vehicle in death or serious injury. GPS satellite signals will soon be received...
... from street signs, visual sightings, and maps. Also note that the unit can be fully aware of the vehicle the first time it should be unable to react adequately to the traffic situation. When navigating, carefully compare information displayed on the unit's display when you can cause the battery to run down. 5 Always operate the vehicle in death or serious injury. GPS satellite signals will soon be received...


