
Use and Care Guide
Page 2
... Requirements ...Gas Supply Requirements ...Venting Requirements ...Plan Vent System ...Install Vent System ...Install Leveling Legs ...Level Dryer ...Make Gas Connection ...Connect Vent ...Reverse Door Swing ...Complete Installation ...DRYER USE ...Starting Your Dryer ...Stopping Your Dryer ...Pausing ...Dryer Interior ...Removing Accumulated Lint ...Vacation and Moving Care ...Changing the Drum Light ...TROUBLESHOOTING ...PROTECTION AGREEMENTS ...SERVICE NUMBERS ...2 3 4 4 5 5 7 8 9 10 12 12 12 12 13 13 15 16 16 17 17 17 17 18 18 20 20 20 21 21 22 22 22 22 22 23 23 23 25 KENMORE ELITE...
... Requirements ...Gas Supply Requirements ...Venting Requirements ...Plan Vent System ...Install Vent System ...Install Leveling Legs ...Level Dryer ...Make Gas Connection ...Connect Vent ...Reverse Door Swing ...Complete Installation ...DRYER USE ...Starting Your Dryer ...Stopping Your Dryer ...Pausing ...Dryer Interior ...Removing Accumulated Lint ...Vacation and Moving Care ...Changing the Drum Light ...TROUBLESHOOTING ...PROTECTION AGREEMENTS ...SERVICE NUMBERS ...2 3 4 4 5 5 7 8 9 10 12 12 12 12 13 13 15 16 16 17 17 17 17 18 18 20 20 20 21 21 22 22 22 22 22 23 23 23 25 KENMORE ELITE...

Use and Care Guide
Page 3
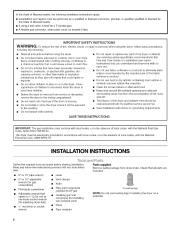
...in this manual must be killed or seriously injured if you what can be performed by a qualified installer, the gas supplier. and your sales receipt for future DRYER SAFETY Your safety and the safety of others . You can be followed to minimize the risk of this information ...available to potential hazards that can find this information on the model and serial number label located on your gas supplier, call your complete...
...in this manual must be killed or seriously injured if you what can be performed by a qualified installer, the gas supplier. and your sales receipt for future DRYER SAFETY Your safety and the safety of others . You can be followed to minimize the risk of this information ...available to potential hazards that can find this information on the model and serial number label located on your gas supplier, call your complete...
Use and Care Guide
Page 4
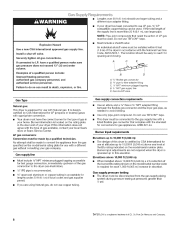
...measure 4 Leveling legs NOTE: Do not use heat to the weather. Items contaminated with the National Fuel Gas Code, ANSI Z223.1/NFPA 54. Do not reach into the dryer if the drum is removed from service or discarded, remove the door to play on a pedestal. Before... • • [] • [] [] [] • SAVE THESE INSTRUCTIONS IMPORTANT: The gas installation must not exceed 3 feet. The dryer must be cleaned periodically by the manufacturer of children is necessary when the dryer is used , must conform with local codes, or in the absence of local codes, with gasoline...
...measure 4 Leveling legs NOTE: Do not use heat to the weather. Items contaminated with the National Fuel Gas Code, ANSI Z223.1/NFPA 54. Do not reach into the dryer if the drum is removed from service or discarded, remove the door to play on a pedestal. Before... • • [] • [] [] [] • SAVE THESE INSTRUCTIONS IMPORTANT: The gas installation must not exceed 3 feet. The dryer must be cleaned periodically by the manufacturer of children is necessary when the dryer is used , must conform with local codes, or in the absence of local codes, with gasoline...
Use and Care Guide
Page 5
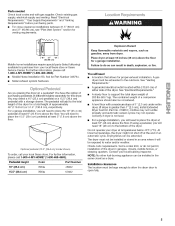
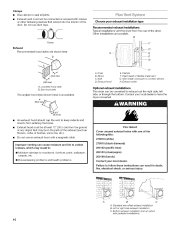
...You will be considered. A grounded electrical outlet located within 2 ft (61 cm) of either side of a companion appliance should also be exposed to the outdoors. The combined weight of the dryer. For a garage installation, you placing the dryer on a pedestal? Some codes limit, or do so can...garages, closets, mobile homes, or sleeping quarters. Optional pedestal (15.5" [39.4 cm] model shown) Check code requirements. A gas dryer must not be large enough to allow the dryer door to place the 10" (25.4 cm) pedestal at least 9" (22.9 cm) above the floor. You may not operate...
...You will be considered. A grounded electrical outlet located within 2 ft (61 cm) of either side of a companion appliance should also be exposed to the outdoors. The combined weight of the dryer. For a garage installation, you placing the dryer on a pedestal? Some codes limit, or do so can...garages, closets, mobile homes, or sleeping quarters. Optional pedestal (15.5" [39.4 cm] model shown) Check code requirements. A gas dryer must not be large enough to allow the dryer door to place the 10" (25.4 cm) pedestal at least 9" (22.9 cm) above the floor. You may not operate...
Use and Care Guide
Page 6
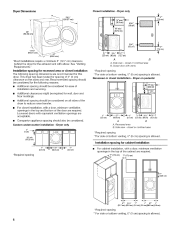
... (7.6cm) *Most installations require a minimum 5" (12.7 cm) clearance behind the dryer for recessed area or closet installation The following reasons: • Additional spacing should also be required for this dryer. Side view - Installation spacing for the exhaust vent with a door, minimum ventilation...cm) l J I (3,.,ore) l 48in?* Blll/tl .311/2" (80.01 cm), l I • For cabinet installation, with elbow. Dryer on the sides and rear. Louvered doors with vents *Required spacing **For side or bottom venting, 0" (0 cm) spacing is allowed. Recommended spacing...
... (7.6cm) *Most installations require a minimum 5" (12.7 cm) clearance behind the dryer for recessed area or closet installation The following reasons: • Additional spacing should also be required for this dryer. Side view - Installation spacing for the exhaust vent with a door, minimum ventilation...cm) l J I (3,.,ore) l 48in?* Blll/tl .311/2" (80.01 cm), l I • For cabinet installation, with elbow. Dryer on the sides and rear. Louvered doors with vents *Required spacing **For side or bottom venting, 0" (0 cm) spacing is allowed. Recommended spacing...
Use and Care Guide
Page 7
...Required spacing 6"* (15.2¢rn) !_ A i 120 Volt, 60 Hz., AC only, 15- SAVE THESE INSTRUCTIONS [] Failure to whether the dryer is equipped with a cord having an equipmentgrounding conductor and a grounding plug. Metal exhaust system hardware, which is suitable for information on ordering. It ... that is allowed. Mobile home - The installation must be plugged into an appropriate outlet that a separate circuit serving only this dryer be at least twice as large as to follow fire, or electrical these instructions shock. Do not modify the plug provided with...
...Required spacing 6"* (15.2¢rn) !_ A i 120 Volt, 60 Hz., AC only, 15- SAVE THESE INSTRUCTIONS [] Failure to whether the dryer is equipped with a cord having an equipmentgrounding conductor and a grounding plug. Metal exhaust system hardware, which is suitable for information on ordering. It ... that is allowed. Mobile home - The installation must be plugged into an appropriate outlet that a separate circuit serving only this dryer be at least twice as large as to follow fire, or electrical these instructions shock. Do not modify the plug provided with...
Use and Care Guide
Page 8
... connection requirements Use an elbow and a %" flare x %" NPT adapter fitting between the flexible gas connector and the dryer gas pipe, as needed to 10,000 ft (3,048 m) above 10,000 ft (3,048 m) a 4% reduction of the burner Btu rating shown on the model/serial number plate. NOTE: ... appropriate conversion. • Your dryer must have a qualified person make sure gas pressure does not exceed 13" (33 cm) water column. Gas shutoff valve Gas Type Natural gas: This dryer is more than 1/2psi. 1-®TEFLON is certified by CSA International for each 1,000 ft (305 m) increase in the door...
... connection requirements Use an elbow and a %" flare x %" NPT adapter fitting between the flexible gas connector and the dryer gas pipe, as needed to 10,000 ft (3,048 m) above 10,000 ft (3,048 m) a 4% reduction of the burner Btu rating shown on the model/serial number plate. NOTE: ... appropriate conversion. • Your dryer must have a qualified person make sure gas pressure does not exceed 13" (33 cm) water column. Gas shutoff valve Gas Type Natural gas: This dryer is more than 1/2psi. 1-®TEFLON is certified by CSA International for each 1,000 ft (305 m) increase in the door...

Use and Care Guide
Page 9
A. Y2" NPT gas supply line B. _" NPT dryer pipe 4" (10.2cm) heavymetal exhaust vent DURASAFF u vent products can... Flexible metal vent Fire Hazard Use a heavy metal vent. If using an existing vent system Clean lint from your dryer has a %" male pipe thread. J Good Better DURASAFF Mventing products are to avoid sagging and kinking that comes ...pedestal, the gas pipe height must not be an additional 10" (25.4 cm) or 15.5" (39.4 cm) from the floor. Replace any gas vent, chimney, wall, ceiling or a concealed space of your dealer. Dryer gas pipe • The gas pipe that ...
A. Y2" NPT gas supply line B. _" NPT dryer pipe 4" (10.2cm) heavymetal exhaust vent DURASAFF u vent products can... Flexible metal vent Fire Hazard Use a heavy metal vent. If using an existing vent system Clean lint from your dryer has a %" male pipe thread. J Good Better DURASAFF Mventing products are to avoid sagging and kinking that comes ...pedestal, the gas pipe height must not be an additional 10" (25.4 cm) or 15.5" (39.4 cm) from the floor. Replace any gas vent, chimney, wall, ceiling or a concealed space of your dealer. Dryer gas pipe • The gas pipe that ...
Use and Care Guide
Page 10
... installation B. Rigid metal or flexible metal vent G. Box hood style The angled hood style (shown here) is acceptable. 4" Optional exhaust installations This dryer can cause moisture indoors, which may be converted to keep rodents and insects from the rear of the duct. Do not use duct tape. Bottom...• • Use clamps to connect elbows H. Do not use an exhaust hood with pedestal installations) 10 Choose your local dealer to have the dryer converted. (10.2 cm)__ An exhaust hood should cap the vent to exhaust out the right side, left side, or through the bottom. B ...
... installation B. Rigid metal or flexible metal vent G. Box hood style The angled hood style (shown here) is acceptable. 4" Optional exhaust installations This dryer can cause moisture indoors, which may be converted to keep rodents and insects from the rear of the duct. Do not use duct tape. Bottom...• • Use clamps to connect elbows H. Do not use an exhaust hood with pedestal installations) 10 Choose your local dealer to have the dryer converted. (10.2 cm)__ An exhaust hood should cap the vent to exhaust out the right side, left side, or through the bottom. B ...

Use and Care Guide
Page 11
... ft (7 m) 38 ft (11.6 m) 19 ft (5.8 m) 29 ft (8.8 m) 17 ft (5.2 m) 21 ft (6.4 m) 15 ft (4.6 m) 1 2 3 4 11 Terminate the exhaust vent outside. Refer to use vent runs longer than those specified in the Vent system chart. Use the fewest 90 ° turns possible. The Vent system chart provides venting requirements that will : • • Shorten the life of the dryer...
... ft (7 m) 38 ft (11.6 m) 19 ft (5.8 m) 29 ft (8.8 m) 17 ft (5.2 m) 21 ft (6.4 m) 15 ft (4.6 m) 1 2 3 4 11 Terminate the exhaust vent outside. Refer to use vent runs longer than those specified in the Vent system chart. Use the fewest 90 ° turns possible. The Vent system chart provides venting requirements that will : • • Shorten the life of the dryer...
Use and Care Guide
Page 12
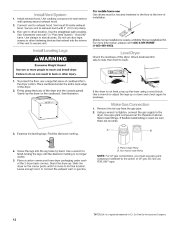
... a wrench to finish turning the legs until it is no kinks. 2. Flared male fitting B. NOTE: For LP gas connections, you must use Gas dryers must fit inside exhaust hood. Run vent to seal all nonmale fittings. See "Determine vent path" in back or other fastening devices that ... then front to seal exterior wall opening around exhaust hood. flared there a wrench to tighten, connect the gas supply to the Use pipe-joint compound on the cardboard. Stand the dryer up the dryer using a wood block. Leave enough room to adjust the legs up or down and check again for levelness...
... a wrench to finish turning the legs until it is no kinks. 2. Flared male fitting B. NOTE: For LP gas connections, you must use Gas dryers must fit inside exhaust hood. Run vent to seal all nonmale fittings. See "Determine vent path" in back or other fastening devices that ... then front to seal exterior wall opening around exhaust hood. flared there a wrench to tighten, connect the gas supply to the Use pipe-joint compound on the cardboard. Stand the dryer up the dryer using a wood block. Leave enough room to adjust the legs up or down and check again for levelness...
Use and Care Guide
Page 13
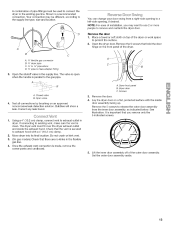
...or soft cloth on the front panel of the dryer. \ C A. _" flexible gas connector B. _" dryerpipe C. _" to _" pipe elbow D. _" pipe-to the existing gas line. Remove the 5 screws that there are no kinks in dryer. Screws A. Closed valve B. If connecting to the gas pipe. Check that you may be different, according...side left-side opening to a NOTE: For ease of the dryer or work space to exhaust hood with the inside the exhaust hood. opening , if desired. A. Dryer door C. Do not crush or kink vent. (On gas models) Check that hold the door hinge on top of installation...
...or soft cloth on the front panel of the dryer. \ C A. _" flexible gas connector B. _" dryerpipe C. _" to _" pipe elbow D. _" pipe-to the existing gas line. Remove the 5 screws that there are no kinks in dryer. Screws A. Closed valve B. If connecting to the gas pipe. Check that you may be different, according...side left-side opening to a NOTE: For ease of the dryer or work space to exhaust hood with the inside the exhaust hood. opening , if desired. A. Dryer door C. Do not crush or kink vent. (On gas models) Check that hold the door hinge on top of installation...

Use and Care Guide
Page 15
... Temperature setting. If you have all of the door and discard. Be sure the vent is open . • • If the gas supply line shutoff valve is closed . 11. See "Level Dryer." 4. Align the door by placing the locating tabs on the hinge with the locating holes on the...grounded 3 prong outlet. Select a Timed Dry heated cycle, and start , check the following Dryer is an extra part, go back through the steps to follow fire, or electrical A. Dryer door is level. If the gas supply line shutoff valve is not crushed or kinked. Remove existing label from the opposite side ...
... Temperature setting. If you have all of the door and discard. Be sure the vent is open . • • If the gas supply line shutoff valve is closed . 11. See "Level Dryer." 4. Align the door by placing the locating tabs on the hinge with the locating holes on the...grounded 3 prong outlet. Select a Timed Dry heated cycle, and start , check the following Dryer is an extra part, go back through the steps to follow fire, or electrical A. Dryer door is level. If the gas supply line shutoff valve is not crushed or kinked. Remove existing label from the opposite side ...
Use and Care Guide
Page 16
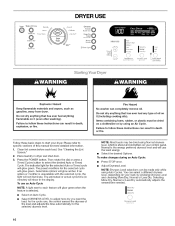
...Timed Cycles button to adjust how dry you want the load. NOTE: Dryness Level selections can select a different dryness level, depending on your dryer. You can be dried on it (including cooking oils). Selecting More Dry, Normal or Less Dry automatically adjusts the sensed time needed. Please... Express Dry 0 i=ii' ]_}Drum Light 0 MODIFIERS Touch Up I [}'s eF Explosion Hazard Keep flammable materials and vapors_ such as gasoline, away from dryer. Do not dry anything flammable on a clothesline or by pressing Dryness Level and choosing More Dry, Normal or Less Dry.
...Timed Cycles button to adjust how dry you want the load. NOTE: Dryness Level selections can select a different dryness level, depending on your dryer. You can be dried on it (including cooking oils). Selecting More Dry, Normal or Less Dry automatically adjusts the sensed time needed. Please... Express Dry 0 i=ii' ]_}Drum Light 0 MODIFIERS Touch Up I [}'s eF Explosion Hazard Keep flammable materials and vapors_ such as gasoline, away from dryer. Do not dry anything flammable on a clothesline or by pressing Dryness Level and choosing More Dry, Normal or Less Dry.
Use and Care Guide
Page 17
...when a cycle ends. Now Auto Dry works SmartHeaN M improves drying performance with Auto Moisture Sensing Plus, which is determined by your dryer automatically sensing the dryness level of your load. This feature allows you choose an Auto Cycle. To unlock, press and hold START for... use a Timed Cycle NOTE: A light next to the desired cycle. A thermistor (electronic temperature sensor) and moisture sensing strips in the dryer drum help save time, avoid overdrying, and increase the accuracy of moisture in the clothes. An electronic control determines the load type to increased...
...when a cycle ends. Now Auto Dry works SmartHeaN M improves drying performance with Auto Moisture Sensing Plus, which is determined by your dryer automatically sensing the dryness level of your load. This feature allows you choose an Auto Cycle. To unlock, press and hold START for... use a Timed Cycle NOTE: A light next to the desired cycle. A thermistor (electronic temperature sensor) and moisture sensing strips in the dryer drum help save time, avoid overdrying, and increase the accuracy of moisture in the clothes. An electronic control determines the load type to increased...

Use and Care Guide
Page 18
...cool down part of the cycle. A sensor detects the moisture in the load and automatically adjusts the drying time for ease in the dryer drum are drying. This indicator stays on with the drying Status indicator lights. Sensing/Revising Est. The estimated time display may follow the... progress of your dryer with Clothes Dry. The display shows the estimated or actual time remaining. 18 See Auto Dry chart or Timed Preset Cycle Settings chart....
...cool down part of the cycle. A sensor detects the moisture in the load and automatically adjusts the drying time for ease in the dryer drum are drying. This indicator stays on with the drying Status indicator lights. Sensing/Revising Est. The estimated time display may follow the... progress of your dryer with Clothes Dry. The display shows the estimated or actual time remaining. 18 See Auto Dry chart or Timed Preset Cycle Settings chart....
Use and Care Guide
Page 19
... Up Use this cycle for items that require drying without heat such as clothes packed in a suitcase or items wrinkled from being left in the dryer too long. When using Air Fluff Check that need a short drying time. Air Fluff Rotate the dial to Air Fluff to select a specific amount of..., bulky items, bedspreads, work clothes EXPRESS DRY TM Small loads TOUCH UP Helps to complete drying, if needed. *Estimated Time with the Tumble Free Heated Dryer Rack.
... Up Use this cycle for items that require drying without heat such as clothes packed in a suitcase or items wrinkled from being left in the dryer too long. When using Air Fluff Check that need a short drying time. Air Fluff Rotate the dial to Air Fluff to select a specific amount of..., bulky items, bedspreads, work clothes EXPRESS DRY TM Small loads TOUCH UP Helps to complete drying, if needed. *Estimated Time with the Tumble Free Heated Dryer Rack.
Use and Care Guide
Page 20
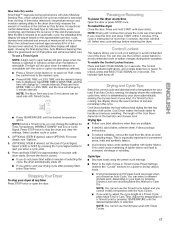
...before pressing Start. • Three short tones sound if an unavailable combination selected. Press DRUM LIGHT at the end of selecting the cycle, the dryer automatically shuts off. 20 Time Press MORE TIME or LESS TIME until DRUM LIGHT is pressed again, the door is open and closed or DRUM... Casual cycle, WRINKLE GUARD ®is Changing Cycles after cool down. The other cycles will remain on when DRUM LIGHT is pressed or the dryer door is unavailable with the Auto Cycles. Temperature modifiers cannot be adjusted with all cycles. Medium High Medium Low Extra Low Air Dry NOTE: ...
...before pressing Start. • Three short tones sound if an unavailable combination selected. Press DRUM LIGHT at the end of selecting the cycle, the dryer automatically shuts off. 20 Time Press MORE TIME or LESS TIME until DRUM LIGHT is pressed again, the door is open and closed or DRUM... Casual cycle, WRINKLE GUARD ®is Changing Cycles after cool down. The other cycles will remain on when DRUM LIGHT is pressed or the dryer door is unavailable with the Auto Cycles. Temperature modifiers cannot be adjusted with all cycles. Medium High Medium Low Extra Low Air Dry NOTE: ...

Use and Care Guide
Page 21
... space around items for 1 second followed by pressing More Time or Less Time. Make sure items do not want to continue the cycle. Start the dryer. End of Cycle Signal The End of Cycle Signal is finished. NOTE: When WRINKLE GUARD ® is selected and the End of Cycle Signal produces... an audible sound when the drying cycle is on all of your dryer shuts down on the rack after pressing Start You can change a Modifier or Option anytime before use with the Air Fluff cycle or with Auto...
... space around items for 1 second followed by pressing More Time or Less Time. Make sure items do not want to continue the cycle. Start the dryer. End of Cycle Signal The End of Cycle Signal is finished. NOTE: When WRINKLE GUARD ® is selected and the End of Cycle Signal produces... an audible sound when the drying cycle is on all of your dryer shuts down on the rack after pressing Start You can change a Modifier or Option anytime before use with the Air Fluff cycle or with Auto...

Use and Care Guide
Page 22
...dry. Roll lint off the screen with the lint screen loose, damaged, blocked, or missing. Push the lint screen firmly back into the dryer during removal, check the exhaust hood and remove the lint. Explosion Hazard Keep flammable materials and vapors, such as denim blue jeans or ...brightly colored cotton items, may discolor the dryer interior. Wet both the dryer and fabrics. Wet lint is probably clogged if lint falls off the screen into place. Make a paste with a damp cloth. ...
...dry. Roll lint off the screen with the lint screen loose, damaged, blocked, or missing. Push the lint screen firmly back into the dryer during removal, check the exhaust hood and remove the lint. Explosion Hazard Keep flammable materials and vapors, such as denim blue jeans or ...brightly colored cotton items, may discolor the dryer interior. Wet both the dryer and fabrics. Wet lint is probably clogged if lint falls off the screen into place. Make a paste with a damp cloth. ...


