
Operation Manual
Page 1
UV8020 Installation and Operation Manual
UV8020 Installation and Operation Manual
Operation Manual
Page 3
... the instructions in this owner's manual clear and easy to use all the features of your new Phase Linear UV8020 Mobile Multimedia Receiver for choosing a Phase Linear product. Preparation...1 Installation ...2 Controls and Indicators ...5 Remote Control ...6 Using the TFT Monitor ...8 Operating Instructions ...9 DVD Setup Menu ...11 Tuner Operation ...12 DVD/VCD Video Operation 13 DVD/CD Audio Operation 16 MP3...
... the instructions in this owner's manual clear and easy to use all the features of your new Phase Linear UV8020 Mobile Multimedia Receiver for choosing a Phase Linear product. Preparation...1 Installation ...2 Controls and Indicators ...5 Remote Control ...6 Using the TFT Monitor ...8 Operating Instructions ...9 DVD Setup Menu ...11 Tuner Operation ...12 DVD/VCD Video Operation 13 DVD/CD Audio Operation 16 MP3...
Operation Manual
Page 5
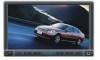
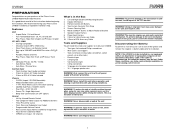
...5mm A/V Cable Included • 2.5mm to install your Phase Linear UV8020 installed by a reputable installation shop. WARNING! UV8020 PREPARATION Congratulations on -board drive or navigation computer, do not push, pull or swivel the monitor manually. Under these tools and supplies to RCA A/V Cable Included ...head and Philips screwdrivers • Wire cutters and strippers • Tools to read all of the Phase Linear UV8020 Mobile Multimedia Receiver. Features DVD • Aspect Ratio - Left and Right Double DIN Mounting Brackets 2. Double DIN Sleeve 3. Screen...
...5mm A/V Cable Included • 2.5mm to install your Phase Linear UV8020 installed by a reputable installation shop. WARNING! UV8020 PREPARATION Congratulations on -board drive or navigation computer, do not push, pull or swivel the monitor manually. Under these tools and supplies to RCA A/V Cable Included ...head and Philips screwdrivers • Wire cutters and strippers • Tools to read all of the Phase Linear UV8020 Mobile Multimedia Receiver. Features DVD • Aspect Ratio - Left and Right Double DIN Mounting Brackets 2. Double DIN Sleeve 3. Screen...

Operation Manual
Page 6
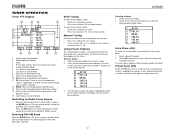
... all hardware and brackets as many imported cars. ISO INSTALLATION CAUTION: For proper operation of the CD player, the chassis must be used to mount the new radio. 2. Make sure the unit is mounted ...secured to the new radio. Remove the Half Sleeve. 3. Install the sleeve. b. INSTALL HALF SLEEVE UV8020 TAB TAB DASHBOARD DASHBOARD 3. Place the radio in the chassis side panels which may touch and damage... screws may be "on the rear of the radio using the reverse procedure in the manual. The PARKING BRAKE wire MUST BE CONNECTED as necessary so that attach the mounting sleeve to...
... all hardware and brackets as many imported cars. ISO INSTALLATION CAUTION: For proper operation of the CD player, the chassis must be used to mount the new radio. 2. Make sure the unit is mounted ...secured to the new radio. Remove the Half Sleeve. 3. Install the sleeve. b. INSTALL HALF SLEEVE UV8020 TAB TAB DASHBOARD DASHBOARD 3. Place the radio in the chassis side panels which may touch and damage... screws may be "on the rear of the radio using the reverse procedure in the manual. The PARKING BRAKE wire MUST BE CONNECTED as necessary so that attach the mounting sleeve to...
Operation Manual
Page 16
Radio frequency indicator 3. BAND: Touch to recall preset stations 5. Preset radio stations: Touch to change between AM/FM bands 13. Current preset station indicator Switching to Radio Tuner Source • Touch the top left corner of the screen (SRC), or press the MODE button (12) on the screen or remote control (18) to view the SOURCE menu. Selecting FM/AM Band Touch the BAND button (22) on the remote control, to change between the following bands: FM1, FM2, FM3, AM1, and AM2. PS (Preset Scan): Touch to adjust Equalizer/Audio and Display settings 14. Touch to scan ...
Radio frequency indicator 3. BAND: Touch to recall preset stations 5. Preset radio stations: Touch to change between AM/FM bands 13. Current preset station indicator Switching to Radio Tuner Source • Touch the top left corner of the screen (SRC), or press the MODE button (12) on the screen or remote control (18) to view the SOURCE menu. Selecting FM/AM Band Touch the BAND button (22) on the remote control, to change between the following bands: FM1, FM2, FM3, AM1, and AM2. PS (Preset Scan): Touch to adjust Equalizer/Audio and Display settings 14. Touch to scan ...
Operation Manual
Page 29
... resulting from moisture, humidity, excessive temperature, extreme environmental conditions or external natural causes Please review the "Care and Maintenance" section of your Installation and Operation Manual for which vary from the date of original purchase, such defect(s) will pay the return shipping charges for the location of a warranty station serving your...
... resulting from moisture, humidity, excessive temperature, extreme environmental conditions or external natural causes Please review the "Care and Maintenance" section of your Installation and Operation Manual for which vary from the date of original purchase, such defect(s) will pay the return shipping charges for the location of a warranty station serving your...


