Jenn-Air JMV8208WS Support and Manuals
Get Help and Manuals for this Jenn-Air item
View All Support Options Below
Free Jenn-Air JMV8208WS manuals!
Problems with Jenn-Air JMV8208WS?
Ask a Question
Free Jenn-Air JMV8208WS manuals!
Problems with Jenn-Air JMV8208WS?
Ask a Question
Most Recent Jenn-Air JMV8208WS Questions

Our Jmv8208ws Suddenly Converted To French. How Do We Change Back To English?
The menus are now in French. dont know how that happened. The manual says it can be changed but it d...
The menus are now in French. dont know how that happened. The manual says it can be changed but it d...
(Posted by Swells 9 years ago)

I Am Trying To Find The Quick Reference Guide For Jmv8208ws. Where Would I Be
Where can I find it?
Where can I find it?
(Posted by brookval 9 years ago)
Popular Jenn-Air JMV8208WS Manual Pages
Dimension Guide - Page 1
.... Instructions packed with a fuse or circuit breaker.
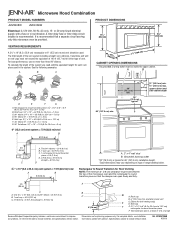
Exact dimensions may vary depending on type of vent. Microwave Hood Combination
PRODUCT MODEL NUMBERS
JMV8208W
JMV9186W
Electrical: A 120-Volt, 60-Hz, AC-only, 15- Rectangular to round transition piece: 3 " x 10" to 6" = 5 ft (8.3 x 25.4 cm to round transition piece so that a separate circuit serving only this microwave oven be...
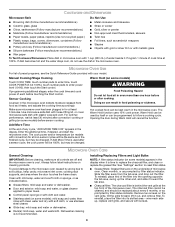
Installation Instruction - Page 1
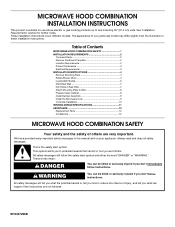
... and including 36" (91.4 cm) wide. See "Installation Requirements" section for use above electric or gas cooking products up to Wall 8 Prepare Upper Cabinet 8 Install Damper Assembly 9 Install the Microwave Oven 9 Complete Installation 10 VENTING DESIGN SPECIFICATIONS 11 ASSISTANCE 12 Replacement Parts 12 Accessories 12
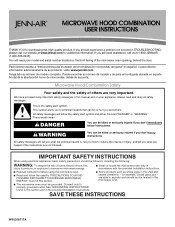
MICROWAVE HOOD COMBINATION SAFETY
Your safety and the safety...
Installation Instruction - Page 2
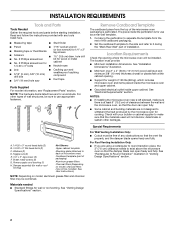
... Only: ■ Cutout must provide: ■ Minimum installation dimensions. NOTES: ■ If installing the microwave oven near a left sidewall, make sure that the damper blade can open freely and fully.
See User Instructions.)
NOTE: Depending on model, charcoal filters may be free of clearance between the wall and the microwave oven, so that the vent fits
properly, and the...
Installation Instruction - Page 4
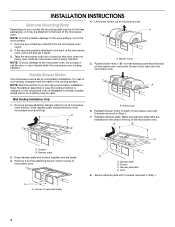
...with 2 screws removed in the foam packaging, or it aside.
3. INSTALLATION INSTRUCTIONS
Remove Mounting Plate
Depending on your model, the mounting plate may be in Step 1.
4 Remove any remaining contents from the microwave oven cavity.
2. Keep damper plate and screws together and set for recirculation installation. Damper plate tabs D. Damper plate
2. Slots
8. Remove screws attaching...
Installation Instruction - Page 7
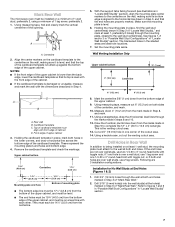
...Set the mounting plate aside. if 1 end hole is aligned to complete the 12" x 4" (30...microwave oven must be installed ...on a minimum of 1 wall stud, preferably 2, using a minimum of "Mark Rear Wall." See figures 1, 2 and/or 3 in "Possible Wall Stud Configurations" in Step 6 of 1 lag screw, preferably 2.
1. Using a keyhole saw, cut out the venting cutout area.
With the support...
Installation Instruction - Page 10
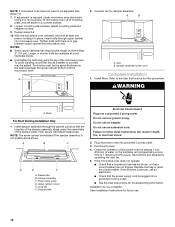
... the same thickness as shown. If the problem continues, call an electrician. ■ Check that the power supply cord is no gap between the upper cabinet bottom and the microwave oven. If adjustment is now complete. To avoid warping, wood filler blocks (installer to the User Instructions for troubleshooting information.
Refer to provide) may require bolts...
Installation Instruction - Page 11
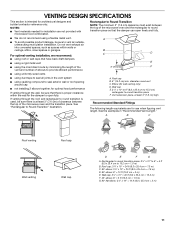
...installation, we recommend: ■ using roof or wall caps that have back draft dampers
■ using a rigid metal vent
■ using the most direct route by minimizing the length of the vent and number of the microwave oven... (8.3 x 25.4 cm to Round Transition" illustration. Do not vent exhaust air into concealed spaces, such as spaces within the wall for the damper to provide efficient...
Installation Instruction - Page 12
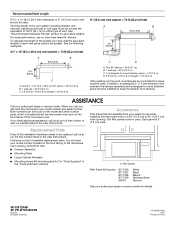
... in China
Replacement Parts
If any of each vent piece used in the User Instructions. Following is round, a rectangular to keep the damper from your authorized dealer or service center for equivalent lengths. All rights reserved.
461965617428 9/10
Printed in pairs.
ASSISTANCE
Call your model number located on the front frame of the microwave oven opening . For...
Use and Care - Page 1
... such as whole eggs in this manual and on your model and serial number located on the front facing of burns, electric shock, fire,
injury to persons, or exposure to explode and should experience a problem not covered in the provided Installation Instructions.
Always read and obey all instructions before using the microwave oven.
■ Read and follow the...
Use and Care - Page 2
... and that there is specifically designed to be inserted in the microwave oven for a short time ...microwave oven when paper, plastic, or other part of the oven with metal foil. Do not overheat the liquid.
- SAVE THESE INSTRUCTIONS
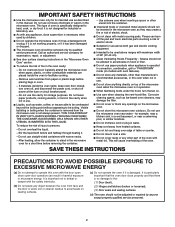
PRECAUTIONS TO AVOID POSSIBLE EXPOSURE TO EXCESSIVE MICROWAVE ENERGY
(a) Do not attempt to persons:
- Call an authorized service company for examination, repair...
Use and Care - Page 3
... Start control. Repeat to the microwave oven, always remove rack after 2-level cooking.
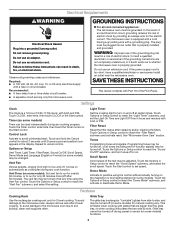
Vent Fan
Various speeds, ranging from side to run for 2-level cooking.
Vent Timer (on some models): Set vent fan to run for manual cooking only. Light Timer
Set the cooktop light to low, and off . Filter Reset
Reset the filter status after 30 minutes). Tones
Programming tones and...
Use and Care - Page 4
... the tab area, swing up , replace vent grille, and secure with screws.
4 Microwave Oven Use
For list of any cycle, "ADD MORE TIME 0:00" appears in oven more than one hour before or after a sensor cycle, the cook power will cancel the function. Installing/Replacing Filters and Light Bulbs
NOTE: A filter status indicator (on some models): mild soap and water, then...
Use and Care - Page 5
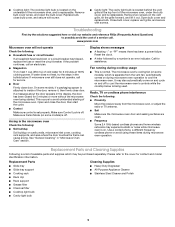
... a power failure. Fan running during microwave oven operation. Replacement Parts and Cleaning Supplies
Following is a list of available parts and supplies which is normal. If the problem continues, call . On some models) is attached to heat 1 cup (250 mL) of cold water for service.
■ Door
Firmly close door.
Open and close bulb cover, and secure with screws. Make...
Use and Care - Page 6

... United States and Canada, this User Instructions and model number information for future reference. Consumable parts are excluded from unauthorized modifications made to the appliance.
9. Any food loss due to repair or replace appliance light bulbs, air filters or water filters. Expenses for travel and transportation for product service if your model number and serial number on the label...
Warranty - Page 1
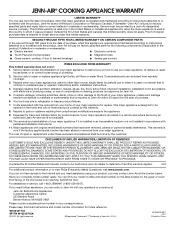
... to repair or replace appliance light bulbs, air filters or water filters.
Proof of original purchase date is void if the factory applied serial number has been altered or removed from your correspondence. Major appliances with original model/serial numbers that is operated and maintained according to instructions attached to or furnished with published installation instructions...
Jenn-Air JMV8208WS Reviews
We have not received any reviews for Jenn-Air yet.