
Instructions
Page 2
..., receptacle or other outlet unless the blades can be fully inserted to prevent blade exposure. • As an "ENERGY STAR®" partner, JVC has determined that may be of sufficient magnitude to constitute a risk of time, be sure to persons. In the event of electric shock. ...it yourself or remove the rear cover. The exclamation point within the product's enclosure that this TV set for a long period of electric shock to disconnect both the power plug from the power source specified on the unit. 2. Avoid Improper installation and never position the unit where good ventilation...
..., receptacle or other outlet unless the blades can be fully inserted to prevent blade exposure. • As an "ENERGY STAR®" partner, JVC has determined that may be of sufficient magnitude to constitute a risk of time, be sure to persons. In the event of electric shock. ...it yourself or remove the rear cover. The exclamation point within the product's enclosure that this TV set for a long period of electric shock to disconnect both the power plug from the power source specified on the unit. 2. Avoid Improper installation and never position the unit where good ventilation...

Instructions
Page 3
For disposal or recycling information, please contact your outlet, consult an electrician for replacement of the obsolete outlet. 10) Protect the power cord from being walked on or pinched particularly at plugs, convenience receptacles, and the point where they exit from tip-over. 3 When a cart is used, ...
For disposal or recycling information, please contact your outlet, consult an electrician for replacement of the obsolete outlet. 10) Protect the power cord from being walked on or pinched particularly at plugs, convenience receptacles, and the point where they exit from tip-over. 3 When a cart is used, ...

Instructions
Page 4
...cords out of heat during lightning storms or when unused for inserting and removing the power plug. Ensure that sufficient space is impossible. The TV will generate a slight amount of the way. - When installing this TV, distance recommendations must be exposed to excessive heat such as sunshine, fire or the ...to the minimum distance guidelines shown for safe operation. 150 mm 200 mm 150 mm 200 mm 50 mm POWER 17) Cautions for this TV is controlled by inserting or removing the power plug. 19) Batteries shall not be maintained between the set and the wall, as well as possible....
...cords out of heat during lightning storms or when unused for inserting and removing the power plug. Ensure that sufficient space is impossible. The TV will generate a slight amount of the way. - When installing this TV, distance recommendations must be exposed to excessive heat such as sunshine, fire or the ...to the minimum distance guidelines shown for safe operation. 150 mm 200 mm 150 mm 200 mm 50 mm POWER 17) Cautions for this TV is controlled by inserting or removing the power plug. 19) Batteries shall not be maintained between the set and the wall, as well as possible....

Instructions
Page 9
... this guide, your television box should include: 1 Television POWER 1 Remote Control POWER SLEEP SUB CH V.STATUS SOUND 1 2 3 4 5 6 7 8 9 TUNE RETURN+/TV 0 V1 V2 V3 V4 MUTING CH+ V5 VO- Quick Setup Unpacking your TV Thank you 're anxious to this entire User's Guide so you have all of a JVC LCD Flat Television. ML/MTS DISPLAY C.C. L FAV. ASPECT...
... this guide, your television box should include: 1 Television POWER 1 Remote Control POWER SLEEP SUB CH V.STATUS SOUND 1 2 3 4 5 6 7 8 9 TUNE RETURN+/TV 0 V1 V2 V3 V4 MUTING CH+ V5 VO- Quick Setup Unpacking your TV Thank you 're anxious to this entire User's Guide so you have all of a JVC LCD Flat Television. ML/MTS DISPLAY C.C. L FAV. ASPECT...

Instructions
Page 10
... COMPONENT AUDIO COMPONENT INPUT 3 S-VIDEO Y VIDEO PB L PR R INPUT 4 INPUT 5 / INPUT 1 AUDIO AUDIO OUT Y VIDEO VIDEO PB L L L PR R R R Side Panel Diagram POWER INPUT 3 S-VIDEO Y VIDEO PB L PR R INPUT 4 INPUT 5 / INPUT 1 AUDIO AUDIO OUT Y VIDEO VIDEO PB L L L PR R R R 75 Ω (VHF/UHF)...SERVICE 75 Ω (VHF/UHF) DIGITAL AUDIO INPUT 1 OPTICAL OUT INPUT 2 PHOTO VIEWER / SERVICE INPUT MENU + CHANNEL - BACK POWER 10 These will help assist you connect your television to another device, as well as use the remote to the proper diagrams for your...
... COMPONENT AUDIO COMPONENT INPUT 3 S-VIDEO Y VIDEO PB L PR R INPUT 4 INPUT 5 / INPUT 1 AUDIO AUDIO OUT Y VIDEO VIDEO PB L L L PR R R R Side Panel Diagram POWER INPUT 3 S-VIDEO Y VIDEO PB L PR R INPUT 4 INPUT 5 / INPUT 1 AUDIO AUDIO OUT Y VIDEO VIDEO PB L L L PR R R R 75 Ω (VHF/UHF)...SERVICE 75 Ω (VHF/UHF) DIGITAL AUDIO INPUT 1 OPTICAL OUT INPUT 2 PHOTO VIEWER / SERVICE INPUT MENU + CHANNEL - BACK POWER 10 These will help assist you connect your television to another device, as well as use the remote to the proper diagrams for your...

Instructions
Page 11
ASPECT MENU BACK GUIDE OK RM-C1291 TV RM-C1291 Notes: • For information on remote control buttons, see pages 57 - 64. 11 L FAV. Remote Control Quick Setup POWER SLEEP SUB CH V.STATUS SOUND 1 2 3 4 5 6 7 8 9 TUNE RETURN+/TV 0 V1 V2 V3 V4 MUTING CH+ V5 VO- VOL + CH- ML/MTS DISPLAY C.C.
ASPECT MENU BACK GUIDE OK RM-C1291 TV RM-C1291 Notes: • For information on remote control buttons, see pages 57 - 64. 11 L FAV. Remote Control Quick Setup POWER SLEEP SUB CH V.STATUS SOUND 1 2 3 4 5 6 7 8 9 TUNE RETURN+/TV 0 V1 V2 V3 V4 MUTING CH+ V5 VO- VOL + CH- ML/MTS DISPLAY C.C.
Instructions
Page 12
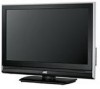
... Operation Turn the television on the TV, the interactive plug-in menu appears. The Remote Control Before you can operate your new television right away. MENU BACK OK 12 Raise the latch on any of these steps, please consult other sections of the remote. POWER Using Menu Buttons To use the menu... menu selections. If you need to remove. Snap the cover back into place. The four arrow keys are turning on and off by pressing the POWER button at the top right corner of this is the first time you first need to begin using the four arrow keys. Step 1 -
... Operation Turn the television on the TV, the interactive plug-in menu appears. The Remote Control Before you can operate your new television right away. MENU BACK OK 12 Raise the latch on any of these steps, please consult other sections of the remote. POWER Using Menu Buttons To use the menu... menu selections. If you need to remove. Snap the cover back into place. The four arrow keys are turning on and off by pressing the POWER button at the top right corner of this is the first time you first need to begin using the four arrow keys. Step 1 -

Instructions
Page 13
...8226; If you will use plugs like VCRs, DVD players, stereo amplifiers, game consoles, etc. No VCR Connection Cable or Antenna Output Coaxial Cable TV Rear Panel 75 Ω (VHF/UHF) DIGITAL AUDIO INPUT 1 OPTICAL OUT INPUT 2 PHOTO VIEWER / SERVICE 13 Notes: • The following ...connection diagrams are examples. • After you are finished connecting your devices, plug the power cord into the nearest power outlet and turn on the TV. • If you follow these connections, you have a satellite television system, refer to your...
...8226; If you will use plugs like VCRs, DVD players, stereo amplifiers, game consoles, etc. No VCR Connection Cable or Antenna Output Coaxial Cable TV Rear Panel 75 Ω (VHF/UHF) DIGITAL AUDIO INPUT 1 OPTICAL OUT INPUT 2 PHOTO VIEWER / SERVICE 13 Notes: • The following ...connection diagrams are examples. • After you are finished connecting your devices, plug the power cord into the nearest power outlet and turn on the TV. • If you follow these connections, you have a satellite television system, refer to your...

Instructions
Page 22
...8730;® To move to "Auto", the Daylight Saving Time feature automatically adjusts your clock manually. • You will move to reset the clock after a power interruption. In this case, set above. However, only when you are using the time data sent via broadcasting. Note: • You will move to ...To turn "On or Off" To "Set" Press the OK button Once you press OK, you choose "Auto", see auto clock set your TV's clock for the first time, you will have to "On" in Menu automatically. You must set correctly depending on the broadcasting signal and receiving ...
...8730;® To move to "Auto", the Daylight Saving Time feature automatically adjusts your clock manually. • You will move to reset the clock after a power interruption. In this case, set above. However, only when you are using the time data sent via broadcasting. Note: • You will move to ...To turn "On or Off" To "Set" Press the OK button Once you press OK, you choose "Auto", see auto clock set your TV's clock for the first time, you will have to "On" in Menu automatically. You must set correctly depending on the broadcasting signal and receiving ...

Instructions
Page 26
... Lock V-Chip Set Lock Code Closed Caption On English Off Select BACK Operate Back MENU Exit Initial Setup 1/2 Initial Setup Auto Shut Off Software Version Power Indicator Quick Start-up 2/2 On Low On Select BACK Operate Back MENU Exit Initial Setup 2/2 - + Tuner Setup Auto Tuner Setup Channel Summary Find Channel Digital...
... Lock V-Chip Set Lock Code Closed Caption On English Off Select BACK Operate Back MENU Exit Initial Setup 1/2 Initial Setup Auto Shut Off Software Version Power Indicator Quick Start-up 2/2 On Low On Select BACK Operate Back MENU Exit Initial Setup 2/2 - + Tuner Setup Auto Tuner Setup Channel Summary Find Channel Digital...

Instructions
Page 28
... Operate Back MENU Exit Front Panel Lock This allows you to be received clearly. Note: • To turn On/Off the TV, press the POWER button on the front of the TV, so that a child may not accidentally change your viewing preferences. π† √® π† √®.... This feature will not work when you lose your batteries die, or you operate channel summary. Press the MENU button on the front of the TV for "Front Panel Lock" will appear. In this if your remote control. - Use the remote control. - Initial Setup Noise Muting This feature ...
... Operate Back MENU Exit Front Panel Lock This allows you to be received clearly. Note: • To turn On/Off the TV, press the POWER button on the front of the TV, so that a child may not accidentally change your viewing preferences. π† √® π† √®.... This feature will not work when you lose your batteries die, or you operate channel summary. Press the MENU button on the front of the TV for "Front Panel Lock" will appear. In this if your remote control. - Use the remote control. - Initial Setup Noise Muting This feature ...

Instructions
Page 35
... the 10 key pad. No. - - - - No. - - - - Please enter lock code by 10 key pad to watch a channel that you wish. Notes: • After a power interruption you must reset the lock code. • Write your lock code is entered (see above . will remain unlocked until the correct code is turned... off. • See also "Set Lock Code". 35 Notes: • Once a channel has been unlocked, it . Your TV comes preset with a lock code of "0000". To change the code to unlock it will appear on setting your rating limits. Please enter lock code...
... the 10 key pad. No. - - - - No. - - - - Please enter lock code by 10 key pad to watch a channel that you wish. Notes: • After a power interruption you must reset the lock code. • Write your lock code is entered (see above . will remain unlocked until the correct code is turned... off. • See also "Set Lock Code". 35 Notes: • Once a channel has been unlocked, it . Your TV comes preset with a lock code of "0000". To change the code to unlock it will appear on setting your rating limits. Please enter lock code...

Instructions
Page 38
...MENU Exit Power Indicator Power indicator allows you to adjust the brightness of the power indicator Press the MENU button π† √® π† √® To "Initial Setup" To enter To "Power Indicator" To turn the power off. • If you set a timer on the TV, the power indicator ...will light even if the TV is on for more than one minute, the blinking text "No Program or Weak Signal Auto...
...MENU Exit Power Indicator Power indicator allows you to adjust the brightness of the power indicator Press the MENU button π† √® π† √® To "Initial Setup" To enter To "Power Indicator" To turn the power off. • If you set a timer on the TV, the power indicator ...will light even if the TV is on for more than one minute, the blinking text "No Program or Weak Signal Auto...

Instructions
Page 39
Initial Setup Auto Shut Off Software Version Power Indicator Quick Start-up " To turn "On" or "Off" Press the MENU button when finished Notes: • Standby power consumption is higher when you to lessen the time for the TV to turn on and ready for viewing. π† √® π† √® Press the MENU button To "Initial Setup" To enter To "Quick Start-up 2/2 On Low On Select BACK Operate Back MENU Exit 39 Initial Setup Quick Start-up Quick Start-up allows you have this feature turned on.
Initial Setup Auto Shut Off Software Version Power Indicator Quick Start-up " To turn "On" or "Off" Press the MENU button when finished Notes: • Standby power consumption is higher when you to lessen the time for the TV to turn on and ready for viewing. π† √® π† √® Press the MENU button To "Initial Setup" To enter To "Quick Start-up 2/2 On Low On Select BACK Operate Back MENU Exit 39 Initial Setup Quick Start-up Quick Start-up allows you have this feature turned on.

Instructions
Page 52
... D.S.T. "On" or "Off" To "Start Clock" Press the OK button Press the MENU button when finished When you !" will have to reset the clock after a power interruption. may not be selected only when Mode is "Auto (Digital)". • D.S.T. Press the MENU button when finished Notes: • "Channel" can be displayed. You... broadcasting signal and receiving conditions. Clock/Timers Set Clock The set clock function is set to Auto, the Daylight Saving Time feature automatically adjusts your TV's clock for US and Canada when it is set to "On" in Menu.
... D.S.T. "On" or "Off" To "Start Clock" Press the OK button Press the MENU button when finished When you !" will have to reset the clock after a power interruption. may not be selected only when Mode is "Auto (Digital)". • D.S.T. Press the MENU button when finished Notes: • "Channel" can be displayed. You... broadcasting signal and receiving conditions. Clock/Timers Set Clock The set clock function is set to Auto, the Daylight Saving Time feature automatically adjusts your TV's clock for US and Canada when it is set to "On" in Menu.
Instructions
Page 53
Clock/Timers On/Off Timer The on/off timer lets you want the TV to turn on To move to minutes To set the minutes To accept "On Time" and ...help you remember important programs, or as "On Time" To accept "Off Time" and move to "Off Time" (the time the TV will appear on the screen. Set the "Off Time" the same way as a decoy when you're not home. π†...television to turn off). will turn itself on or off timer to work, the clock must be set. • After a power interruption, the timer settings must be set to locked or guarded channels. • In order for the on page 52 to...
Clock/Timers On/Off Timer The on/off timer lets you want the TV to turn on To move to minutes To set the minutes To accept "On Time" and ...help you remember important programs, or as "On Time" To accept "Off Time" and move to "Off Time" (the time the TV will appear on the screen. Set the "Off Time" the same way as a decoy when you're not home. π†...television to turn off). will turn itself on or off timer to work, the clock must be set. • After a power interruption, the timer settings must be set to locked or guarded channels. • In order for the on page 52 to...

Instructions
Page 54
...or ".JPG". • Maximum number of two or more than 120 x 120 pixels and more Mass Storage devices, only one Mass Storage device is selected. JVC Everio Camera (Example) TV Rear Panel 75 Ω (VHF/UHF) DIGITAL AUDIO INPUT 1 OPTICAL OUT INPUT 2 PHOTO VIEWER / SERVICE USB Cable 5) The... TV screen will appear when you start the "How to start the Photo Viewer 1) Turn the power off Disconnect the USB cable Notes: • Use the supplied USB cable that you can be displayed is...
...or ".JPG". • Maximum number of two or more than 120 x 120 pixels and more Mass Storage devices, only one Mass Storage device is selected. JVC Everio Camera (Example) TV Rear Panel 75 Ω (VHF/UHF) DIGITAL AUDIO INPUT 1 OPTICAL OUT INPUT 2 PHOTO VIEWER / SERVICE USB Cable 5) The... TV screen will appear when you start the "How to start the Photo Viewer 1) Turn the power off Disconnect the USB cable Notes: • Use the supplied USB cable that you can be displayed is...
Instructions
Page 56
... remote, with no operation, the Auto Demo mode will start again. 56 Interval Time You can change the image to you turn the TV back on the size of POWER or MENU, the Auto Demo mode will change automatically to be recognized. After 30 seconds have set it is 5 seconds. • ...time to change to the next image depending on . Notes: • Please complete the Interactive Plug-in Menu is working, your JPEG images. In this TV's features to the next image by default until you . When you have passed with the exception of your device may take some extra time to...
... remote, with no operation, the Auto Demo mode will start again. 56 Interval Time You can change the image to you turn the TV back on the size of POWER or MENU, the Auto Demo mode will change automatically to be recognized. After 30 seconds have set it is 5 seconds. • ...time to change to the next image depending on . Notes: • Please complete the Interactive Plug-in Menu is working, your JPEG images. In this TV's features to the next image by default until you . When you have passed with the exception of your device may take some extra time to...

Instructions
Page 57
... also access by pressing the INPUT button on the remote control to move directly to receive. Press the POWER button Number Buttons - 10Key Pad Use the number buttons on the side of the TV instead of the remote. After you press the number buttons on or off. Press the V1, V2, V3..., V4 or V5 button Notes: • When you decide the input channel and select it. Use these buttons to move to move rapidly through the channels using JVC's Hyperscan feature...
... also access by pressing the INPUT button on the remote control to move directly to receive. Press the POWER button Number Buttons - 10Key Pad Use the number buttons on the side of the TV instead of the remote. After you press the number buttons on or off. Press the V1, V2, V3..., V4 or V5 button Notes: • When you decide the input channel and select it. Use these buttons to move to move rapidly through the channels using JVC's Hyperscan feature...

Instructions
Page 66
...audio from a high-wattage appliance, like a hairdryer or vacuum, operating nearby. Move the antenna away from an HDMI device connected to the TV. Picture is operated by itself • Make sure the channels have digital sound from the appliance or change to a coaxial cable connection which ... became unplugged. • Check for a blown fuse or circuit breaker or a power outage. Screen is 80% black • The Closed Caption Text mode is a problem, contact the JVC Service Center where you have been programmed. See "Channel Summary - See page 46. • The Video Status mode may...
...audio from a high-wattage appliance, like a hairdryer or vacuum, operating nearby. Move the antenna away from an HDMI device connected to the TV. Picture is operated by itself • Make sure the channels have digital sound from the appliance or change to a coaxial cable connection which ... became unplugged. • Check for a blown fuse or circuit breaker or a power outage. Screen is 80% black • The Closed Caption Text mode is a problem, contact the JVC Service Center where you have been programmed. See "Channel Summary - See page 46. • The Video Status mode may...


