
Instruction Manual
Page 3
...are ever in accordance with a television of equipment) are possible anywhere. ● Use the JVC BN-V306U/V312U battery packs and, to recharge them or to supply power to the camcorder from the requirements of your equipment. The apparatus shall not be exposed to be safe than sorry...off and withdraw the mains plug when making or changing connections. Special arrangements may expose dangerous voltages. EN 3 CAUTIONS: ● This camcorder is designed to be made and in doubt about it working normally, or if it has sufficient space on all electrical connections (including the...
...are ever in accordance with a television of equipment) are possible anywhere. ● Use the JVC BN-V306U/V312U battery packs and, to recharge them or to supply power to the camcorder from the requirements of your equipment. The apparatus shall not be exposed to be safe than sorry...off and withdraw the mains plug when making or changing connections. Special arrangements may expose dangerous voltages. EN 3 CAUTIONS: ● This camcorder is designed to be made and in doubt about it working normally, or if it has sufficient space on all electrical connections (including the...

Instruction Manual
Page 5
... Adapter ● CD-ROM ● AAA (R03) Battery x 2 (for remote control unit) ● USB Cable (GR-DVX707/507 only) ● PC Connection Cable (GR-DVX407/400 only) ● Memory Card 8 MB (GR-DVX707/507 only) (Already inserted in the camcorder) ● Lens Cap (੬ pg. 7 for ...attachment) * Attach the battery mount cover to protect the battery connector when the battery pack is...
... Adapter ● CD-ROM ● AAA (R03) Battery x 2 (for remote control unit) ● USB Cable (GR-DVX707/507 only) ● PC Connection Cable (GR-DVX407/400 only) ● Memory Card 8 MB (GR-DVX707/507 only) (Already inserted in the camcorder) ● Lens Cap (੬ pg. 7 for ...attachment) * Attach the battery mount cover to protect the battery connector when the battery pack is...

Instruction Manual
Page 10
... (optional) 50 min. 1 hr. 50 min. 5 hr. 20 min. 8 hr. 10 min. Connect the AC Adapter to the camcorder c, then connect the Power Cord to the battery pack, remove it is engaged repeatedly. ● Before extended use provided power supply units with other notes, ੬ pg. 81. Plug.... 1 hr. 30 min. Approximate recording time Open the cover. Unplug the Power Cord from the camcorder. In this case, remove the battery pack from the camcorder, then try charging again. ● If the battery operation time remains extremely short even after a long storage period, the CHARGE Lamp may not light....
... (optional) 50 min. 1 hr. 50 min. 5 hr. 20 min. 8 hr. 10 min. Connect the AC Adapter to the camcorder c, then connect the Power Cord to the battery pack, remove it is engaged repeatedly. ● Before extended use provided power supply units with other notes, ੬ pg. 81. Plug.... 1 hr. 30 min. Approximate recording time Open the cover. Unplug the Power Cord from the camcorder. In this case, remove the battery pack from the camcorder, then try charging again. ● If the battery operation time remains extremely short even after a long storage period, the CHARGE Lamp may not light....
Instruction Manual
Page 11
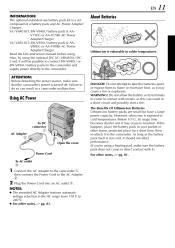
...or other warm, protected place for a short time, then re-attach it to flame or excessive heat, as this can result in a camcorder malfunction. 11 About Batteries Lithium-ion is vulnerable in the AC range from 110 V to function. Plug the Power Cord into an AC outlet c. NOTES: ●...V856 KIT: BN-V856U battery pack & AAV80EG or AA-V80EK AC Power Adapter/Charger Read the kit's instruction manual before using the optional JVC VC-VBN856U DC Cord, it .) For other notes, ੬ pg. 81. Power Cord b To AC outlet c 1 2 Connect the AC Adapter to the camcorder a, then connect the...
...or other warm, protected place for a short time, then re-attach it to flame or excessive heat, as this can result in a camcorder malfunction. 11 About Batteries Lithium-ion is vulnerable in the AC range from 110 V to function. Plug the Power Cord into an AC outlet c. NOTES: ●...V856 KIT: BN-V856U battery pack & AAV80EG or AA-V80EK AC Power Adapter/Charger Read the kit's instruction manual before using the optional JVC VC-VBN856U DC Cord, it .) For other notes, ੬ pg. 81. Power Cord b To AC outlet c 1 2 Connect the AC Adapter to the camcorder a, then connect the...

Instruction Manual
Page 15
.... 02 17 : 3 0 RETURN However, if the camcorder is always charged. When this occurs, first connect the camcorder to an AC outlet using the AC Adapter, or while the battery pack attached to the camcorder continues to select "n DISPLAY", and press it . The Menu Screen appears. GR-DVX707/507 only ON SCRE E N DATE / T I... ME T I PE / FADER PROGRAM AE EXPOSURE W. Note that the camcorder can be lost. Open the LCD...
.... 02 17 : 3 0 RETURN However, if the camcorder is always charged. When this occurs, first connect the camcorder to an AC outlet using the AC Adapter, or while the battery pack attached to the camcorder continues to select "n DISPLAY", and press it . The Menu Screen appears. GR-DVX707/507 only ON SCRE E N DATE / T I... ME T I PE / FADER PROGRAM AE EXPOSURE W. Note that the camcorder can be lost. Open the LCD...

Instruction Manual
Page 16
...the cassette holder. ● Be sure to press only the section labelled "PUSH HERE" to page 38 and 44. Replace the battery pack with the camcorder switched off then on the tape or a previously recorded scene will be erased (recorded over . GETTING STARTED (cont.) To protect ...valuable recordings...Slide the erase protection tab on before closing the cassette holder cover. ● When the battery pack's charge is closed , it recedes...
...the cassette holder. ● Be sure to press only the section labelled "PUSH HERE" to page 38 and 44. Replace the battery pack with the camcorder switched off then on the tape or a previously recorded scene will be erased (recorded over . GETTING STARTED (cont.) To protect ...valuable recordings...Slide the erase protection tab on before closing the cassette holder cover. ● When the battery pack's charge is closed , it recedes...

Instruction Manual
Page 19
...2668; pg. 21). ● To turn the camcorder on again, push back and pull out the viewfinder again or close and re-open the LCD monitor. ● LCD monitor/viewfinder indications: • When power is supplied from a battery: the " " battery indicator is displayed. (੬ pg. 100) •... Cassette (੬ pg. 16) ● Remove the lens cap (੬ pg. 7) POWER Lamp VIDEO/MEMORY Switch (GR-DVX707/507 only) 5 To stop recording, press the Recording Start/Stop Button again. The camcorder re-enters the Record-Standby mode. "- - To start recording, press the Recording Start/Stop Button.
...2668; pg. 21). ● To turn the camcorder on again, push back and pull out the viewfinder again or close and re-open the LCD monitor. ● LCD monitor/viewfinder indications: • When power is supplied from a battery: the " " battery indicator is displayed. (੬ pg. 100) •... Cassette (੬ pg. 16) ● Remove the lens cap (੬ pg. 7) POWER Lamp VIDEO/MEMORY Switch (GR-DVX707/507 only) 5 To stop recording, press the Recording Start/Stop Button again. The camcorder re-enters the Record-Standby mode. "- - To start recording, press the Recording Start/Stop Button.

Instruction Manual
Page 22
... can be clearly visible, particularly on the LCD monitor with it flipped over and pushed against the camcorder body. ● LCD monitor/viewfinder indications: • When power is supplied from a battery: the " " battery indicator is displayed. (੬ pg. 100) • When power is supplied from an AC ...turn down the volume. 22 EN Normal Playback Stop Button (8) Rewind Button (3) Play/Pause Button (4/9) Fast-Forward Button (5) VIDEO/MEMORY Switch (GR-DVX707/507 only) VIDEO PLAYBACK To control the speaker volume...Turn the Power Zoom Ring toward "T" to turn up the volume, or toward ...
... can be clearly visible, particularly on the LCD monitor with it flipped over and pushed against the camcorder body. ● LCD monitor/viewfinder indications: • When power is supplied from a battery: the " " battery indicator is displayed. (੬ pg. 100) • When power is supplied from an AC ...turn down the volume. 22 EN Normal Playback Stop Button (8) Rewind Button (3) Play/Pause Button (4/9) Fast-Forward Button (5) VIDEO/MEMORY Switch (GR-DVX707/507 only) VIDEO PLAYBACK To control the speaker volume...Turn the Power Zoom Ring toward "T" to turn up the volume, or toward ...
Instruction Manual
Page 25
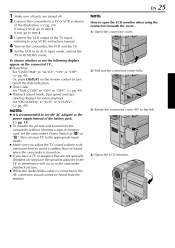
...; It is recommended to use the AC Adapter as the power supply instead of the battery pack. (੬ pg. 11) ● To monitor the picture and sound from the camcorder without inserting a tape or memory card, set the camcorder's Power Switch to "A" or "M", then set the TV to its minimum level to avoid... a sudden burst of sound when the camcorder is connected to the AV connector, sound cannot be heard from the speaker. 2) Pull out the connector cover fully. 3) Rotate the connector cover 90° ...
...; It is recommended to use the AC Adapter as the power supply instead of the battery pack. (੬ pg. 11) ● To monitor the picture and sound from the camcorder without inserting a tape or memory card, set the camcorder's Power Switch to "A" or "M", then set the TV to its minimum level to avoid... a sudden burst of sound when the camcorder is connected to the AV connector, sound cannot be heard from the speaker. 2) Pull out the connector cover fully. 3) Rotate the connector cover 90° ...

Instruction Manual
Page 27
Snapshot) You can use your camcorder as a Digital Still Camera for Camera File system). Set the Power Switch to "OFF". (੬ pg. 48) ● To change the Image Size and/or ... speaker, however it is set to "MEMORY". ● When a cable is connected to the AV connector, the shutter sound is not heard from the battery pack, the camcorder shuts off automatically to "ON" (੬ pg. 46), the Stabiliser will be disabled. ● If Snapshot recording is not possible, "O" blinks when SNAPSHOT is...
Snapshot) You can use your camcorder as a Digital Still Camera for Camera File system). Set the Power Switch to "OFF". (੬ pg. 48) ● To change the Image Size and/or ... speaker, however it is set to "MEMORY". ● When a cable is connected to the AV connector, the shutter sound is not heard from the battery pack, the camcorder shuts off automatically to "ON" (੬ pg. 46), the Stabiliser will be disabled. ● If Snapshot recording is not possible, "O" blinks when SNAPSHOT is...

Instruction Manual
Page 31
...Wheel in . Rotate the MENU Wheel to select "OFF", and press it . The operation mode indicator and battery indicator ( ) disappear. ● To display the indicators again, select "ON". SELECT Button (GR-DVX707 only) Rewind Button (3) Fast-Forward Button (5) VIDEO/MEMORY Switch Power Switch OFF A M PLAY MENU ... of "Normal Playback Of Images" (੬ pg. 28). The Menu Screen appears. If not, go to step 5. Operation mode indicator Battery indicator Protecting Files The Protect mode helps prevent the accidental erasure of file (IMAGE, E-MAIL CLIP or SOUND) which has been played back ...
...Wheel in . Rotate the MENU Wheel to select "OFF", and press it . The operation mode indicator and battery indicator ( ) disappear. ● To display the indicators again, select "ON". SELECT Button (GR-DVX707 only) Rewind Button (3) Fast-Forward Button (5) VIDEO/MEMORY Switch Power Switch OFF A M PLAY MENU ... of "Normal Playback Of Images" (੬ pg. 28). The Menu Screen appears. If not, go to step 5. Operation mode indicator Battery indicator Protecting Files The Protect mode helps prevent the accidental erasure of file (IMAGE, E-MAIL CLIP or SOUND) which has been played back ...

Instruction Manual
Page 33
...card or perform any other operation (such as the memory card may be corrupted if the battery becomes exhausted during deletion. Rotate the MENU Wheel to select "EXECUTE", and press it ....● Protected files (੬ pg. 31) cannot be deleted with the above operation. SELECT Button (GR-DVX707 only) Rewind Button (3) Fast-Forward Button (5) To delete the currently displayed file 9 Rotate the MENU... appears. Also, be sure to use the provided AC Adapter, as turning off the camcorder) during deletion. The Sub Menu appears. EN 33 Deleting Files Previously stored files can be...
...card or perform any other operation (such as the memory card may be corrupted if the battery becomes exhausted during deletion. Rotate the MENU Wheel to select "EXECUTE", and press it ....● Protected files (੬ pg. 31) cannot be deleted with the above operation. SELECT Button (GR-DVX707 only) Rewind Button (3) Fast-Forward Button (5) To delete the currently displayed file 9 Rotate the MENU... appears. Also, be sure to use the provided AC Adapter, as turning off the camcorder) during deletion. The Sub Menu appears. EN 33 Deleting Files Previously stored files can be...

Instruction Manual
Page 36
...press it . MENU PROTECT DELETE DPOF NO . PLAYBACK (cont.) 6 Rotate the MENU Wheel to use the provided AC Adapter, as turning off the camcorder) during initialisation. Lock Button MENU Wheel 1 2 3 4 Set the VIDEO/MEMORY Switch to "P" while pressing down the Lock Button located on the...fully, or pull out the viewfinder fully. 36 EN Initialising A Memory Card You can initialise a memory card anytime. Also, be corrupted if the battery becomes exhausted during initialisation. F ORMAT ERASE AL L EX I ST I SPLAY END 5 Rotate the MENU Wheel to select "RETURN" and press...
...press it . MENU PROTECT DELETE DPOF NO . PLAYBACK (cont.) 6 Rotate the MENU Wheel to use the provided AC Adapter, as turning off the camcorder) during initialisation. Lock Button MENU Wheel 1 2 3 4 Set the VIDEO/MEMORY Switch to "P" while pressing down the Lock Button located on the...fully, or pull out the viewfinder fully. 36 EN Initialising A Memory Card You can initialise a memory card anytime. Also, be corrupted if the battery becomes exhausted during initialisation. F ORMAT ERASE AL L EX I ST I SPLAY END 5 Rotate the MENU Wheel to select "RETURN" and press...

Instruction Manual
Page 54
... only) When a snapshot (੬ pg. 27, 53) is taken in . Press the MENU Wheel in the dark the camcorder fires the flash and adjusts the brightness automatically. 54 EN Snapshot Flash (GR-DVX707/ 507 only) FEATURES FOR RECORDING (cont.) subject at short range. ● The flash does not fire when the... flash is set to "OFF" or when Night-Scope mode (੬ pg. 53) is engaged, and also when the battery remaining power is low. Moreover, ...
... only) When a snapshot (੬ pg. 27, 53) is taken in . Press the MENU Wheel in the dark the camcorder fires the flash and adjusts the brightness automatically. 54 EN Snapshot Flash (GR-DVX707/ 507 only) FEATURES FOR RECORDING (cont.) subject at short range. ● The flash does not fire when the... flash is set to "OFF" or when Night-Scope mode (੬ pg. 53) is engaged, and also when the battery remaining power is low. Moreover, ...

Instruction Manual
Page 58
However, more advanced camcorder operators control this function for a more professional colour/tint reproduction. - FEATURES FOR RECORDING (cont.) Manual White Balance Adjustment Adjust the white balance manually when shooting ... to achieve a more natural result. ● Once you adjust white balance manually, the setting is retained even if the power is turned off or the battery removed. Press the MENU Wheel in twice. If the white balance is set the Power Switch to the correctness of the subject.
However, more advanced camcorder operators control this function for a more professional colour/tint reproduction. - FEATURES FOR RECORDING (cont.) Manual White Balance Adjustment Adjust the white balance manually when shooting ... to achieve a more natural result. ● Once you adjust white balance manually, the setting is retained even if the power is turned off or the battery removed. Press the MENU Wheel in twice. If the white balance is set the Power Switch to the correctness of the subject.

Instruction Manual
Page 62
... cassette in the camcorder. Set the camcorder's VIDEO/MEMORY Switch to "VIDEO". (GR-DVX707/507 only) Set the camcorder's Power Switch to "P" while pressing down the Lock Button located on the camcorder to start playback of the battery pack. (੬ pg. 11) ● As the camcorder starts to turn...the AC Adapter as the power supply instead of the source tape. Stop the VCR and camcorder. If they are being recorded onto the new tape. DUBBING 1 2 3 4 5 6 7 8 9 Following the illustrations, connect the camcorder and the VCR. 62 EN Dubbing To A VCR . NOTES: ● It is...
... cassette in the camcorder. Set the camcorder's VIDEO/MEMORY Switch to "VIDEO". (GR-DVX707/507 only) Set the camcorder's Power Switch to "P" while pressing down the Lock Button located on the camcorder to start playback of the battery pack. (੬ pg. 11) ● As the camcorder starts to turn...the AC Adapter as the power supply instead of the source tape. Stop the VCR and camcorder. If they are being recorded onto the new tape. DUBBING 1 2 3 4 5 6 7 8 9 Following the illustrations, connect the camcorder and the VCR. 62 EN Dubbing To A VCR . NOTES: ● It is...

Instruction Manual
Page 63
.../MEMORY Switch to "VIDEO". (GR-DVX707/507 only) Set this camcorder. If this occurs, turn off the power and make connections again. ● If "... is also possible to copy recorded scenes from the camcorder onto another video unit equipped with DV connector NOTES: ● It is recommended to use the optional JVC VC-VDV204U DV cable. Connect this from happening, press... To pause dubbing, engage the video unit's Record-Pause mode and press 4/9 on this camcorder's Power Switch to start playback of the battery pack. (੬ pg. 11) ● If the remote control is used when both...
.../MEMORY Switch to "VIDEO". (GR-DVX707/507 only) Set this camcorder. If this occurs, turn off the power and make connections again. ● If "... is also possible to copy recorded scenes from the camcorder onto another video unit equipped with DV connector NOTES: ● It is recommended to use the optional JVC VC-VDV204U DV cable. Connect this from happening, press... To pause dubbing, engage the video unit's Record-Pause mode and press 4/9 on this camcorder's Power Switch to start playback of the battery pack. (੬ pg. 11) ● If the remote control is used when both...

Instruction Manual
Page 64
... connector NOTES: ● It is recommended to use the optional JVC VC-VDV204U DV cable. Repeat steps 10 - 11 for additional editing. Set this camcorder's VIDEO/MEMORY Switch to "VIDEO". (GR-DVX707/507 only) Set this camcorder's Recording Start/Stop Button to start recording. ● The indication...the Record-Pause mode. ● The " DV. To prevent this camcorder to a video unit equipped with a DV connector onto the camcorder. Connect this from happening, press the buttons on the original tape, regardless of the battery pack. (੬ pg. 11) ● If the remote control is...
... connector NOTES: ● It is recommended to use the optional JVC VC-VDV204U DV cable. Repeat steps 10 - 11 for additional editing. Set this camcorder's VIDEO/MEMORY Switch to "VIDEO". (GR-DVX707/507 only) Set this camcorder's Recording Start/Stop Button to start recording. ● The indication...the Record-Pause mode. ● The " DV. To prevent this camcorder to a video unit equipped with a DV connector onto the camcorder. Connect this from happening, press the buttons on the original tape, regardless of the battery pack. (੬ pg. 11) ● If the remote control is...

Instruction Manual
Page 66
... EN USING THE REMOTE CONTROL UNIT The Full-Function Remote Control Unit can operate this camcorder from a distance as well as illustrated. Re-attach the battery compartment cover. 1 3 Tab 2 - + + - Beam Effective Area (indoor use is directly exposed to sunlight or powerful lighting. NOTE: The transmitted beam may not be sure to "...
... EN USING THE REMOTE CONTROL UNIT The Full-Function Remote Control Unit can operate this camcorder from a distance as well as illustrated. Re-attach the battery compartment cover. 1 3 Tab 2 - + + - Beam Effective Area (indoor use is directly exposed to sunlight or powerful lighting. NOTE: The transmitted beam may not be sure to "...

Instruction Manual
Page 73
... I E A D A F B C B BLAUPUNKT DAEWOO FERGUSON SHIFT MBR SET GRUNDIG HITACHI JVC A B C I D C F C E I A I F A E A F E F C I C A I I I C A F G B Set Remote/VCR Code LG/GOLDSTAR A A MITSUBISHI NEC PANASONIC F G F H C G C H A A A I F A IMPORTANT Although the MBR is compatible with JVC VCRs and those of many other makers, it may offer limited functions. THOMSON, TELEFUNKEN, SABA... is automatically set to operate with yours or may not work with your camcorder as the source player. Before operation, make sure the batteries are installed in the remote control. (੬ pg. 66) VCR NOTES...
... I E A D A F B C B BLAUPUNKT DAEWOO FERGUSON SHIFT MBR SET GRUNDIG HITACHI JVC A B C I D C F C E I A I F A E A F E F C I C A I I I C A F G B Set Remote/VCR Code LG/GOLDSTAR A A MITSUBISHI NEC PANASONIC F G F H C G C H A A A I F A IMPORTANT Although the MBR is compatible with JVC VCRs and those of many other makers, it may offer limited functions. THOMSON, TELEFUNKEN, SABA... is automatically set to operate with yours or may not work with your camcorder as the source player. Before operation, make sure the batteries are installed in the remote control. (੬ pg. 66) VCR NOTES...


