Instructions
Page 6
... A Cassette 16 Loading/Unloading A Memory Card 17 16:9 Wide Mode 17 RECORDING & PLAYBACK 18 VIDEO RECORDING 18 Basic Recording 18 Tape Remaining Time 18 Quick Review 18 Zooming 19 Journalistic Shooting 19 Interface Shooting 19 Time Code 20 Recording From The Middle Of A Tape...20 Dual Rec 20 Auto/Manual Mode...
... A Cassette 16 Loading/Unloading A Memory Card 17 16:9 Wide Mode 17 RECORDING & PLAYBACK 18 VIDEO RECORDING 18 Basic Recording 18 Tape Remaining Time 18 Quick Review 18 Zooming 19 Journalistic Shooting 19 Interface Shooting 19 Time Code 20 Recording From The Middle Of A Tape...20 Dual Rec 20 Auto/Manual Mode...

Instructions
Page 7
... the control lever: moving the lever towards up . 47 Move the control lever down. 2 ¡ LIGHT Move the control lever right. 1 1 QUICK REVIEW Move the control lever left /right, or pressing down the control lever to select SET: SET Lithium Battery CR2025* (for connections. Do not use the... equipped with one core filter, the end that is pre-installed in the Remote Control Unit at time of the camcorder, provided cables may be connected to the camcorder. ● Make sure to use any other cables. NOTES: ● In order to maintain optimum performance of shipment (...
... the control lever: moving the lever towards up . 47 Move the control lever down. 2 ¡ LIGHT Move the control lever right. 1 1 QUICK REVIEW Move the control lever left /right, or pressing down the control lever to select SET: SET Lithium Battery CR2025* (for connections. Do not use the... equipped with one core filter, the end that is pre-installed in the Remote Control Unit at time of the camcorder, provided cables may be connected to the camcorder. ● Make sure to use any other cables. NOTES: ● In order to maintain optimum performance of shipment (...
Instructions
Page 9
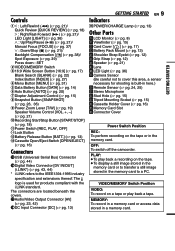
OFF: To switch off the camcorder. PLAY: ● To play back a tape. The connectors are located beneath the covers. )Audio/Video Output Connector [AV] (੬ pg. 23, 42) ~DC Input Connector [... stored in the memory card or to the IEEE1394-1995 industry specification and extensions thereof. Controls 11 : Left/Rewind (1) (੬ pg. 21)/ Quick Review [QUICK REVIEW] (੬ pg. 18) 2 : Right/Fast-Forward (¡) (੬ pg. 21)/ LED Light [LIGHT] (੬ pg. 36) 3 : Up/Play/Pause (6) (੬ pg. 21)/ Manual Focus...
OFF: To switch off the camcorder. PLAY: ● To play back a tape. The connectors are located beneath the covers. )Audio/Video Output Connector [AV] (੬ pg. 23, 42) ~DC Input Connector [... stored in the memory card or to the IEEE1394-1995 industry specification and extensions thereof. Controls 11 : Left/Rewind (1) (੬ pg. 21)/ Quick Review [QUICK REVIEW] (੬ pg. 18) 2 : Right/Fast-Forward (¡) (੬ pg. 21)/ LED Light [LIGHT] (੬ pg. 36) 3 : Up/Play/Pause (6) (੬ pg. 21)/ Manual Focus...

Instructions
Page 18
.... (੬ pg. 17) VIDEO/MEMORY Zoom Lever ● When a blank portion is left between recorded scenes on /off automatically. To turn the camcorder on the display. 18 EN VIDEO RECORDING Basic Recording NOTE: Before continuing, perform the procedures listed below: ● Power (੬ pg. 13) &#...remaining time reaches 2 minutes, the indication starts blinking. ● The time required to the type of the last recording. 1) Press QUICK REVIEW during the Recording-Standby mode. 2) Tape is rewound for about several seconds and played back automatically, then pauses in LP (Long Play) ...
.... (੬ pg. 17) VIDEO/MEMORY Zoom Lever ● When a blank portion is left between recorded scenes on /off automatically. To turn the camcorder on the display. 18 EN VIDEO RECORDING Basic Recording NOTE: Before continuing, perform the procedures listed below: ● Power (੬ pg. 13) &#...remaining time reaches 2 minutes, the indication starts blinking. ● The time required to the type of the last recording. 1) Press QUICK REVIEW during the Recording-Standby mode. 2) Tape is rewound for about several seconds and played back automatically, then pauses in LP (Long Play) ...

Instructions
Page 19
Hold the camcorder in the desired position and tilt the LCD monitor in the LCD monitor, and you zoom into a subject close to the lens, the camera may ... executed during the interface shooting, the LCD monitor will be turned off. However, the actual recorded image does not appear inverted. ● If the Quick Review (੬ pg. 18) is therefore called digital zoom. In such a case, check the playback picture in the viewfinder. ● To check the playback...
Hold the camcorder in the desired position and tilt the LCD monitor in the LCD monitor, and you zoom into a subject close to the lens, the camera may ... executed during the interface shooting, the LCD monitor will be turned off. However, the actual recorded image does not appear inverted. ● If the Quick Review (੬ pg. 18) is therefore called digital zoom. In such a case, check the playback picture in the viewfinder. ● To check the playback...
Instructions
Page 52
... Alive 41 O On Screen 34, 35 P Playback Sound 35 Playback Special Effects .. 25 Power-linked operation ... 8 Priority 34 Program AE 41 Protecting Files 28 Q Quick Review 18 EN R Rec Mode 33, 35 Recording Capacity Memory Card ......... 26 Tape 18 Recording Media Selection 33 Remote Control ....... 24, 34 Resetting The File Name... Troubleshooting ...... 46, 47 V Video/Memory Switch ..... 9 W White Balance 39 Wind Cut 33 Wipe Or Fader Effects .. 40 Z Zooming 19, 25, 32 16:9 Output 34, 35 GR-D775U © 2006 Victor Company of Japan, Limited US Printed in Malaysia 1206ASR-NF-MP
... Alive 41 O On Screen 34, 35 P Playback Sound 35 Playback Special Effects .. 25 Power-linked operation ... 8 Priority 34 Program AE 41 Protecting Files 28 Q Quick Review 18 EN R Rec Mode 33, 35 Recording Capacity Memory Card ......... 26 Tape 18 Recording Media Selection 33 Remote Control ....... 24, 34 Resetting The File Name... Troubleshooting ...... 46, 47 V Video/Memory Switch ..... 9 W White Balance 39 Wind Cut 33 Wipe Or Fader Effects .. 40 Z Zooming 19, 25, 32 16:9 Output 34, 35 GR-D775U © 2006 Victor Company of Japan, Limited US Printed in Malaysia 1206ASR-NF-MP