
Instruction Manual
Page 1
... DISC SELECT CD TAPE AUX/DVD FM/AM CD1 CD2 CD3 CD4 TREBLE BASS CD5 VOLUME PHONES 5-CD 5-CD CHANGER, PLAY&EXCHANGE INSTRUCTIONS 1 4 7 10 BASS STANDBY/ON 2 3 5 6 DISPLAY 8 9 CLOCK/ TIMER +10 SLEEP UP TREBLE SET DOWN CANCEL 3/8 CD CD 1 CD 2 23 TAPE FM/AM AUX REV. Model No. Retain this information for future reference. and Serial No. COMPACT COMPONENT SYSTEM FS-B70-Consists of the cabinet. MODE REC CD REC MODE PLAY FM MODE REPEAT MODE CD 3 A.STANDBY DIMMER AHB PRO CD 4 CD 5 VOLUME RM-SFSB70J REMOTE CONTROL For Customer Use: Enter below the Model...
... DISC SELECT CD TAPE AUX/DVD FM/AM CD1 CD2 CD3 CD4 TREBLE BASS CD5 VOLUME PHONES 5-CD 5-CD CHANGER, PLAY&EXCHANGE INSTRUCTIONS 1 4 7 10 BASS STANDBY/ON 2 3 5 6 DISPLAY 8 9 CLOCK/ TIMER +10 SLEEP UP TREBLE SET DOWN CANCEL 3/8 CD CD 1 CD 2 23 TAPE FM/AM AUX REV. Model No. Retain this information for future reference. and Serial No. COMPACT COMPONENT SYSTEM FS-B70-Consists of the cabinet. MODE REC CD REC MODE PLAY FM MODE REPEAT MODE CD 3 A.STANDBY DIMMER AHB PRO CD 4 CD 5 VOLUME RM-SFSB70J REMOTE CONTROL For Customer Use: Enter below the Model...

Instruction Manual
Page 2
...;e. However, there is connected. DO NOT REMOVE COVER (OR BACK) NO USER SERVICEABLE PARTS INSIDE. Connect the equipment into an outlet on , the STANDBY/ON lamp lights green. The power can be of sufficient magnitude to constitute a risk of electric shock to part 15 of important operating and maintenance (servicing) instructions in a residential installation. The lightning flash with the limits for help. The exclamation point within...
...;e. However, there is connected. DO NOT REMOVE COVER (OR BACK) NO USER SERVICEABLE PARTS INSIDE. Connect the equipment into an outlet on , the STANDBY/ON lamp lights green. The power can be of sufficient magnitude to constitute a risk of electric shock to part 15 of important operating and maintenance (servicing) instructions in a residential installation. The lightning flash with the limits for help. The exclamation point within...

Instruction Manual
Page 4
...turning on/off the unit, setting the volume, changing the sound effects, and others, which are no user serviceable parts inside the unit in the section "Basic and Common Operations" on the remote control. Moisture condensation Moisture may malfunction. You can use the buttons both on the remote control and on the lenses inside . Power sources.... DO NOT install the unit in a location near heat sources, or in one of time, unplug the AC power cord from the TV to obtain the best possible performance from the unit. Should this manual carefully and thoroughly...
...turning on/off the unit, setting the volume, changing the sound effects, and others, which are no user serviceable parts inside the unit in the section "Basic and Common Operations" on the remote control. Moisture condensation Moisture may malfunction. You can use the buttons both on the remote control and on the lenses inside . Power sources.... DO NOT install the unit in a location near heat sources, or in one of time, unplug the AC power cord from the TV to obtain the best possible performance from the unit. Should this manual carefully and thoroughly...
Instruction Manual
Page 5
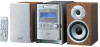
... Buttons and Controls 3 Front Panel 3 Remote Control 5 Getting Started 6 Unpacking 6 Connecting Antennas 6 Connecting Speakers 7 Connecting Other Equipment 8 Putting the Batteries into the Remote Control 8 Basic and Common Operations 9 Setting the Clock 9 Turning On the Power 10 Adjusting the Volume 11 Reinforcing the Bass Sound 11 Adjusting the Tone 12 Changing the Display Brightness 12 Listening to FM and AM Broadcasts 13 Tuning in to a Station 13 Presetting Stations 13 Tuning in to a Preset Station 14 Playing Back Discs on the 5-CD Changer 15 Loading Discs 15 Playing...
... Buttons and Controls 3 Front Panel 3 Remote Control 5 Getting Started 6 Unpacking 6 Connecting Antennas 6 Connecting Speakers 7 Connecting Other Equipment 8 Putting the Batteries into the Remote Control 8 Basic and Common Operations 9 Setting the Clock 9 Turning On the Power 10 Adjusting the Volume 11 Reinforcing the Bass Sound 11 Adjusting the Tone 12 Changing the Display Brightness 12 Listening to FM and AM Broadcasts 13 Tuning in to a Station 13 Presetting Stations 13 Tuning in to a Preset Station 14 Playing Back Discs on the 5-CD Changer 15 Loading Discs 15 Playing...

Instruction Manual
Page 8
...) 5 Source buttons • 3¥8 CD, 2 3 TAPE, FM/AM, and AUX Pressing one of these buttons also turns on the unit. 6 REV.MODE button (20, 21) 7 Disc number buttons (10, 16, 17, 22 - 24) • CD 1, CD 2, CD 3, CD 4, and CD 5 Pressing one of these buttons also turns on the front panel. 5 button (11) s DIMMER button (12) VOLUME When using the remote control, point it at the remote sensor on the unit and starts disc play if a disc is ready. 8 A.STANDBY (auto standby) button (10) 9 PLAY MODE button (17...
...) 5 Source buttons • 3¥8 CD, 2 3 TAPE, FM/AM, and AUX Pressing one of these buttons also turns on the unit. 6 REV.MODE button (20, 21) 7 Disc number buttons (10, 16, 17, 22 - 24) • CD 1, CD 2, CD 3, CD 4, and CD 5 Pressing one of these buttons also turns on the front panel. 5 button (11) s DIMMER button (12) VOLUME When using the remote control, point it at the remote sensor on the unit and starts disc play if a disc is ready. 8 A.STANDBY (auto standby) button (10) 9 PLAY MODE button (17...

Instruction Manual
Page 11
... made before plugging in the power cord. AUX/DVD RIGHT LEFT R6(SUM-3)/AA(15F) To audio output Audio equipment To play the other equipment through this unit, connect between the audio output jacks on the other connected equipment. marking on the battery compartment. Also pull the bottom towards you . To attach the speaker grille, follow the illustration above. Putting the Batteries into the Remote Control Insert the batteries-R6...
... made before plugging in the power cord. AUX/DVD RIGHT LEFT R6(SUM-3)/AA(15F) To audio output Audio equipment To play the other equipment through this unit, connect between the audio output jacks on the other connected equipment. marking on the battery compartment. Also pull the bottom towards you . To attach the speaker grille, follow the illustration above. Putting the Batteries into the Remote Control Insert the batteries-R6...
Instruction Manual
Page 13
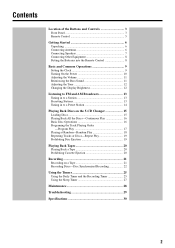
... corresponding disc trays. (See page 16.) To turn off , "AUTO STANDBY" starts flashing on the unit. (See page 20.) • Pressing one of the disc number buttons (CD 1 - AUTO STANDBY indicator AUTO STANDBY To switch off the unit automatically by using the sleep timer. (See page 27.) On the remote control ONLY: To activate the Auto Standby function, A.STANDBY press A.STANDBY. CD50) also turns on the unit. (See page 15.) • Pressing 0 (tape eject) also turns on the display...
... corresponding disc trays. (See page 16.) To turn off , "AUTO STANDBY" starts flashing on the unit. (See page 20.) • Pressing one of the disc number buttons (CD 1 - AUTO STANDBY indicator AUTO STANDBY To switch off the unit automatically by using the sleep timer. (See page 27.) On the remote control ONLY: To activate the Auto Standby function, A.STANDBY press A.STANDBY. CD50) also turns on the unit. (See page 15.) • Pressing 0 (tape eject) also turns on the display...
Instruction Manual
Page 14
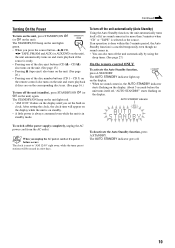
... the remote control: To increase the volume, press VOLUME +. The AHB PRO indicator also lights up on recording. REMEMBER you cannot adjust the volume level while the unit is in standby mode. • Each time you can be adjusted between "VOLUME MIN" and "VOLUME 1" - To decrease the volume, press VOLUME -. • When you press and hold either button, you press the button, the Active Hyper Bass Pro mode changes as follows...
... the remote control: To increase the volume, press VOLUME +. The AHB PRO indicator also lights up on recording. REMEMBER you cannot adjust the volume level while the unit is in standby mode. • Each time you can be adjusted between "VOLUME MIN" and "VOLUME 1" - To decrease the volume, press VOLUME -. • When you press and hold either button, you press the button, the Active Hyper Bass Pro mode changes as follows...

Instruction Manual
Page 16
... previously received station-either "FM" FM/AM or "AM." DOWN To change the FM reception mode On the remote control ONLY: When an FM stereo broadcast is broadcast. For preset number 15, press +10, then 5. SET indicator lights up on the unit) for stations and stops when a station of sufficient signal strength is tuned in. • If an FM program is a time limit in stereo, the STEREO 2 Press SET...
... previously received station-either "FM" FM/AM or "AM." DOWN To change the FM reception mode On the remote control ONLY: When an FM stereo broadcast is broadcast. For preset number 15, press +10, then 5. SET indicator lights up on the unit) for stations and stops when a station of sufficient signal strength is tuned in. • If an FM program is a time limit in stereo, the STEREO 2 Press SET...

Instruction Manual
Page 18
... 5-CD Changer This unit has been designed to place a disc onto. This is because the reflectance of their instructions or cautions carefully. • Some CD-Rs or CD-RWs may require a longer readout time. CD50) for the next tray you will have pressed in use of the disc tray, with its label side up on the display. Continued use . Loading Discs When playing a CD-R or CD-RW User...
... 5-CD Changer This unit has been designed to place a disc onto. This is because the reflectance of their instructions or cautions carefully. • Some CD-Rs or CD-RWs may require a longer readout time. CD50) for the next tray you will have pressed in use of the disc tray, with its label side up on the display. Continued use . Loading Discs When playing a CD-R or CD-RW User...
Instruction Manual
Page 24
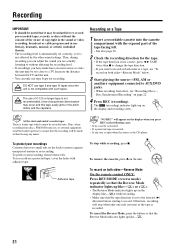
... small tabs on the display and recording starts. At the start and end of copyright in the sound or video recording, broadcast or cable program and in the following cases: • If no cassette is inserted. • If a protected tape is recorded. Disc Synchronized Recording" on both sides-Reverse Mode" below. 3 Start playing the source-FM, AM or auxiliary equipment connected to AUX/DVD jacks. • When recording...
... small tabs on the display and recording starts. At the start and end of copyright in the sound or video recording, broadcast or cable program and in the following cases: • If no cassette is inserted. • If a protected tape is recorded. Disc Synchronized Recording" on both sides-Reverse Mode" below. 3 Start playing the source-FM, AM or auxiliary equipment connected to AUX/DVD jacks. • When recording...
Instruction Manual
Page 25
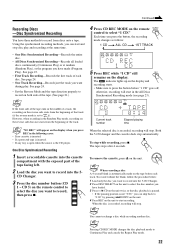
... display and recording starts. • Make sure to Continuous Play and cancels the Repeat Play mode. 22 Each time you press the button, the recording mode changes as follows: CD REC MODE 1 CD ALL CD 1ST TRACK • One Disc Synchronized Recording-Records the entire disc. • All Discs Synchronized Recording-Records all loaded discs continuously (Continuous Play) or at the same time. 4 Press CD REC MODE on the remote control to CD 2 select the disc...
... display and recording starts. • Make sure to Continuous Play and cancels the Repeat Play mode. 22 Each time you press the button, the recording mode changes as follows: CD REC MODE 1 CD ALL CD 1ST TRACK • One Disc Synchronized Recording-Records the entire disc. • All Discs Synchronized Recording-Records all loaded discs continuously (Continuous Play) or at the same time. 4 Press CD REC MODE on the remote control to CD 2 select the disc...
Instruction Manual
Page 32
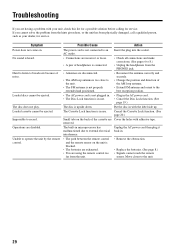
... the remote control. Symptom Power does not come on the back of the AM loop antenna. • Extend FM antenna and orient to the best reception position. • The AC power cord is not plugged in. • Plug in the AC power cord. • The Disc Lock function is not connected to external electrical back in with your dealer, for service. The disc does not play. Possible...
... the remote control. Symptom Power does not come on the back of the AM loop antenna. • Extend FM antenna and orient to the best reception position. • The AC power cord is not plugged in. • Plug in the AC power cord. • The Disc Lock function is not connected to external electrical back in with your dealer, for service. The disc does not play. Possible...
Instruction Manual
Page 34
... of sale plus a letter of explanation of the problem to the nearest JVC Factory Service Center, the name and location of purchase); WHAT IS NOT COVERED: This limited warranty provided by the toll-free number. Initial installation and installation and removal for future reference. There are no charge to the original owner. JVC SHALL NOT BE LIABLE FOR THE LOSS OF USE OF THE PRODUCT...
... of sale plus a letter of explanation of the problem to the nearest JVC Factory Service Center, the name and location of purchase); WHAT IS NOT COVERED: This limited warranty provided by the toll-free number. Initial installation and installation and removal for future reference. There are no charge to the original owner. JVC SHALL NOT BE LIABLE FOR THE LOSS OF USE OF THE PRODUCT...

Instruction Manual
Page 37
MODE REC CD REC MODE PLAY FM MODE REPEAT MODE CD 3 A.STANDBY DIMMER AHB PRO CD 4 CD 5 VOLUME RM-SFSB70J REMOTE CONTROL GVT0103-002A [C] COMPACT COMPONENT SYSTEM SYSTEME DE COMPOSANTS COMPACT FS-B70-Consists of CA-FSB70 and SP-UXB70 -Composé du CA-FSB70 et SP-UXB70 DISC SELECT CD AUX/DVD TAPE FM/AM CD1 CD2 CD3 CD4 TREBLE BASS CD5 VOLUME PHONES 5-CD 5-CD CHANGER, PLAY&EXCHANGE INSTRUCTIONS MANUEL D'INSTRUCTIONS 1 4 7 10 BASS STANDBY/ON 2 3 5 6 DISPLAY 8 9 CLOCK/ TIMER +10 SLEEP UP TREBLE SET DOWN CANCEL 3/8 CD CD 1 CD 2 23 TAPE FM/AM AUX REV.
MODE REC CD REC MODE PLAY FM MODE REPEAT MODE CD 3 A.STANDBY DIMMER AHB PRO CD 4 CD 5 VOLUME RM-SFSB70J REMOTE CONTROL GVT0103-002A [C] COMPACT COMPONENT SYSTEM SYSTEME DE COMPOSANTS COMPACT FS-B70-Consists of CA-FSB70 and SP-UXB70 -Composé du CA-FSB70 et SP-UXB70 DISC SELECT CD AUX/DVD TAPE FM/AM CD1 CD2 CD3 CD4 TREBLE BASS CD5 VOLUME PHONES 5-CD 5-CD CHANGER, PLAY&EXCHANGE INSTRUCTIONS MANUEL D'INSTRUCTIONS 1 4 7 10 BASS STANDBY/ON 2 3 5 6 DISPLAY 8 9 CLOCK/ TIMER +10 SLEEP UP TREBLE SET DOWN CANCEL 3/8 CD CD 1 CD 2 23 TAPE FM/AM AUX REV.

Instruction Manual
Page 38
... unit is on standby, the STANDBY/ON lamp lights red. • When the unit is encouraged to try to radio communications. The power can be remote controlled. REFER SERVICING TO QUALIFIED SERVICE PERSONNEL. The lightning flash with the limits for help. These limits are designed to shut the power off completely (the STANDBY/ON lamp goes off and on, the user is turned on a circuit different...
... unit is on standby, the STANDBY/ON lamp lights red. • When the unit is encouraged to try to radio communications. The power can be remote controlled. REFER SERVICING TO QUALIFIED SERVICE PERSONNEL. The lightning flash with the limits for help. These limits are designed to shut the power off completely (the STANDBY/ON lamp goes off and on, the user is turned on a circuit different...

Instruction Manual
Page 41
... Buttons and Controls 3 Front Panel 3 Remote Control 5 Getting Started 6 Unpacking 6 Connecting Antennas 6 Connecting Speakers 7 Connecting Other Equipment 8 Putting the Batteries into the Remote Control 8 Basic and Common Operations 9 Setting the Clock 9 Turning On the Power 10 Adjusting the Volume 11 Reinforcing the Bass Sound 11 Adjusting the Tone 12 Changing the Display Brightness 12 Listening to FM and AM Broadcasts 13 Tuning in to a Station 13 Presetting Stations 13 Tuning in to a Preset Station 14 Playing Back Discs on the 5-CD Changer 15 Loading Discs 15 Playing...
... Buttons and Controls 3 Front Panel 3 Remote Control 5 Getting Started 6 Unpacking 6 Connecting Antennas 6 Connecting Speakers 7 Connecting Other Equipment 8 Putting the Batteries into the Remote Control 8 Basic and Common Operations 9 Setting the Clock 9 Turning On the Power 10 Adjusting the Volume 11 Reinforcing the Bass Sound 11 Adjusting the Tone 12 Changing the Display Brightness 12 Listening to FM and AM Broadcasts 13 Tuning in to a Station 13 Presetting Stations 13 Tuning in to a Preset Station 14 Playing Back Discs on the 5-CD Changer 15 Loading Discs 15 Playing...

Instruction Manual
Page 47
... Remote Control Insert the batteries-R6(SUM-3)/AA(15F)-into the remote control by using audio cords (not supplied). • DO NOT use an old battery together with the + and - AUX/DVD RIGHT LEFT R6(SUM-3)/AA(15F) To audio output Audio equipment To play the other equipment through this unit, connect between the audio output jacks on the other connected equipment. Speaker grille To remove the speaker grille, insert your fingers at the same time. 1 Connecting...
... Remote Control Insert the batteries-R6(SUM-3)/AA(15F)-into the remote control by using audio cords (not supplied). • DO NOT use an old battery together with the + and - AUX/DVD RIGHT LEFT R6(SUM-3)/AA(15F) To audio output Audio equipment To play the other equipment through this unit, connect between the audio output jacks on the other connected equipment. Speaker grille To remove the speaker grille, insert your fingers at the same time. 1 Connecting...

Instruction Manual
Page 60
... display and recording starts. Thus, during recording you can only use type I tape for the tape. • If the tape direction is not correct, press 2 3 TAPE twice then 7 to change the tape direction. • If you are actually listening to without losing any tray is open when the source is recorded. To protect your recording, remove these tabs. or . • The Reverse Mode indicator lights up on a Tape...
... display and recording starts. Thus, during recording you can only use type I tape for the tape. • If the tape direction is not correct, press 2 3 TAPE twice then 7 to change the tape direction. • If you are actually listening to without losing any tray is open when the source is recorded. To protect your recording, remove these tabs. or . • The Reverse Mode indicator lights up on a Tape...

Instruction Manual
Page 68
... Insert the plug into the socket. Unable to record. removed. Symptom Power does not come on the unit is blocked. • The batteries are exhausted. • You are using the remote control too far from the PHONES jack. • Antennas are disabled. Put the disc in use . • Cancel the Disc Lock function. (See page 19.) The disc is connected. • Check all connections and make corrections...
... Insert the plug into the socket. Unable to record. removed. Symptom Power does not come on the unit is blocked. • The batteries are exhausted. • You are using the remote control too far from the PHONES jack. • Antennas are disabled. Put the disc in use . • Cancel the Disc Lock function. (See page 19.) The disc is connected. • Check all connections and make corrections...


