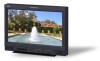
JVC DT-E17L4G Research
Related Manual Pages


Similar Questions

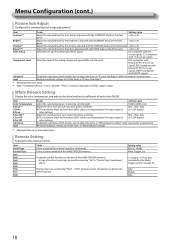
Does Dt-v24g11z Supports 3g Sdi?
Does DT-V24G11z supports 3G SDI 2.97 Gbit/sec? Then I try to connect it monitor does not lock and d...
Does DT-V24G11z supports 3G SDI 2.97 Gbit/sec? Then I try to connect it monitor does not lock and d...
(Posted by nick79409 11 years ago)

I Have Jvc Plasma Display Model 2001 It Comes On Fans Start Runs For About 2 Min
have a jvc plasma display 2001 it comes on for 1 min then it cuts off what could be wrong
have a jvc plasma display 2001 it comes on for 1 min then it cuts off what could be wrong
(Posted by bigtigger111 11 years ago)
Good Afternoon I Am Have A Jvc Plasma Display Monitor Haft Of It Is Show Black
(Posted by cummingsalexander1972 11 years ago)