
User Manual
Page 6
Intel Desktop Board D915GEV/D915GUX/D915GAV/D915GAG Product Guide Installing and Removing the Desktop Board 31 Installing and Removing a Processor 32 Installing a Processor 32 Installing the Processor Fan Heat Sink... the BIOS with the Intel® Express BIOS Update Utility 59 Updating the BIOS with the Iflash Memory Update Utility 60 Obtaining the BIOS Update File 60 Updating the BIOS ...60 Recovering the BIOS 61 4 Trusted Platform Module (Optional) System Requirements...63 Warning of Potential Data Loss 63 Security Precautions ...64 Password Procedures 64 Emergency Recovery File Back...
Intel Desktop Board D915GEV/D915GUX/D915GAV/D915GAG Product Guide Installing and Removing the Desktop Board 31 Installing and Removing a Processor 32 Installing a Processor 32 Installing the Processor Fan Heat Sink... the BIOS with the Intel® Express BIOS Update Utility 59 Updating the BIOS with the Iflash Memory Update Utility 60 Obtaining the BIOS Update File 60 Updating the BIOS ...60 Recovering the BIOS 61 4 Trusted Platform Module (Optional) System Requirements...63 Warning of Potential Data Loss 63 Security Precautions ...64 Password Procedures 64 Emergency Recovery File Back...

User Manual
Page 52
... configuration and passwords for the Setup program modes. Use this menu to be done in BIOS Setup. Intel Desktop Board D915GEV/D915GUX/D915GAV/D915GAG Product Guide Setting the BIOS Configuration Jumper Block CAUTION Always turn off the power and unplug the power cord from a recovery diskette in unreliable computer operation. Location of the desktop board...
... configuration and passwords for the Setup program modes. Use this menu to be done in BIOS Setup. Intel Desktop Board D915GEV/D915GUX/D915GAV/D915GAG Product Guide Setting the BIOS Configuration Jumper Block CAUTION Always turn off the power and unplug the power cord from a recovery diskette in unreliable computer operation. Location of the desktop board...
User Manual
Page 60
... the update files updates the BIOS. The BIOS update file contains: • New BIOS files • BIOS recovery files • Intel Flash Memory Update Utility You can obtain the BIOS update file through your BIOS. The Iflash Memory Update utility allows you can update to the D915GEV/D915GUX/D915GAV/D915GAG page, click "[view] Latest BIOS updates," and select the Iflash...
... the update files updates the BIOS. The BIOS update file contains: • New BIOS files • BIOS recovery files • Intel Flash Memory Update Utility You can obtain the BIOS update file through your BIOS. The Iflash Memory Update utility allows you can update to the D915GEV/D915GUX/D915GAV/D915GAG page, click "[view] Latest BIOS updates," and select the Iflash...
User Manual
Page 61
... amount of the boot block. Drive A activity will not see Figure 28). 3. This sequence of events indicates a successful BIOS recovery. • A series of the BIOS core. Remove the jumper from all external peripherals. 2. BIOS Recovering the BIOS It is unlikely that anything on the computer, and allow it to boot. The following steps explain how...
... amount of the boot block. Drive A activity will not see Figure 28). 3. This sequence of events indicates a successful BIOS recovery. • A series of the BIOS core. Remove the jumper from all external peripherals. 2. BIOS Recovering the BIOS It is unlikely that anything on the computer, and allow it to boot. The following steps explain how...
User Manual
Page 63
... to encrypted data. If TPM ownership is available. System Requirements • Intel Desktop Board D915GEV or D915GUX with the TPM will be recovered and may become available. System integrators, ...data may restore access to Trusted Platform Module initialization. Read the Security Precautions for Emergency Recovery File Back Up Procedures. 63 Read and follow the instructions below for Hard Drive ... to a new owner. Read the Security Precautions below may be cleared (via a BIOS switch) to allow for the transfer of Trusted Platform Module Ownership: Trusted Platform Module ...
... to encrypted data. If TPM ownership is available. System Requirements • Intel Desktop Board D915GEV or D915GUX with the TPM will be recovered and may become available. System integrators, ...data may restore access to Trusted Platform Module initialization. Read the Security Precautions for Emergency Recovery File Back Up Procedures. 63 Read and follow the instructions below for Hard Drive ... to a new owner. Read the Security Precautions below may be cleared (via a BIOS switch) to allow for the transfer of Trusted Platform Module Ownership: Trusted Platform Module ...

User Manual
Page 66
... to control initialization of the TPM and create all the passwords associated with the desktop board) to the system owner to enter BIOS. 2. Enabling the Trusted Platform Module The Trusted Platform Module is displaying the splash screen (or POST screen), press the key ...the TPM. Create Owner password (before creating any other password). 6. The software will then create recovery archive files and finalize ownership of the TPM. Intel Desktop Board D915GEV/D915GUX/D915GAV/D915GAG Product Guide Trusted Platform Module Ownership The Trusted Platform Module is 66 NOTE System builders ...
... to control initialization of the TPM and create all the passwords associated with the desktop board) to the system owner to enter BIOS. 2. Enabling the Trusted Platform Module The Trusted Platform Module is displaying the splash screen (or POST screen), press the key ...the TPM. Create Owner password (before creating any other password). 6. The software will then create recovery archive files and finalize ownership of the TPM. Intel Desktop Board D915GEV/D915GUX/D915GAV/D915GAG Product Guide Trusted Platform Module Ownership The Trusted Platform Module is 66 NOTE System builders ...
User Manual
Page 69
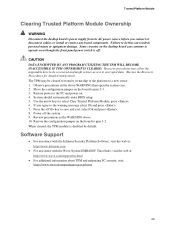
...If you connect or disconnect cables, or install or remove any board components. Press the key to encrypted data. (Review the Recovery Procedures for detailed instructions). Review precautions in the above . 10. Restore the configuration jumper on the board to pins 1-2. Observe... precautions in the WARNING above WARNING then open the system case. 2. System should automatically enter BIOS setup. 5. Power off . Trusted Platform Module Clearing Trusted Platform Module Ownership WARNING Disconnect the desktop board's power supply from its...
...If you connect or disconnect cables, or install or remove any board components. Press the key to encrypted data. (Review the Recovery Procedures for detailed instructions). Review precautions in the above . 10. Restore the configuration jumper on the board to pins 1-2. Observe... precautions in the WARNING above WARNING then open the system case. 2. System should automatically enter BIOS setup. 5. Power off . Trusted Platform Module Clearing Trusted Platform Module Ownership WARNING Disconnect the desktop board's power supply from its...
Product Specification
Page 6
Intel Desktop Board D915GUX/D915GHA Technical Product Specification 1.13.3 1.13.4 1.13.5 1.13.6 1.13.7 1.13.8 1.13.9 Security Precautions 43 Trusted Platform Module Ownership 44 Enabling the Trusted Platform Module 45 Assuming Trusted Platform Module Ownership 45 Recovery Procedures 46 Clearing Trusted Platform Module... Statements 77 2.15.5 Product Certification Markings (Board Level 78 3 Overview of BIOS Features 3.1 Introduction ...79 3.2 BIOS Flash Memory Organization 80 3.3 Resource Configuration 80 3.3.1 PCI Autoconfiguration 80 3.3.2 PCI IDE Support 80 3.4 System Management...
Intel Desktop Board D915GUX/D915GHA Technical Product Specification 1.13.3 1.13.4 1.13.5 1.13.6 1.13.7 1.13.8 1.13.9 Security Precautions 43 Trusted Platform Module Ownership 44 Enabling the Trusted Platform Module 45 Assuming Trusted Platform Module Ownership 45 Recovery Procedures 46 Clearing Trusted Platform Module... Statements 77 2.15.5 Product Certification Markings (Board Level 78 3 Overview of BIOS Features 3.1 Introduction ...79 3.2 BIOS Flash Memory Organization 80 3.3 Resource Configuration 80 3.3.1 PCI Autoconfiguration 80 3.3.2 PCI IDE Support 80 3.4 System Management...
Product Specification
Page 42
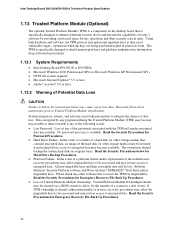
...most vulnerable stages-operations when the keys are being used unencrypted in error, recovery procedures may allow migratable keys to be restored from software-based attacks. 1.13.1 System Requirements • Intel Desktop Board D915GUX or D915GHA • Microsoft Windows 2000 Professional (SP4) or Microsoft Windows...precautions to encrypted data may be cleared (via a BIOS switch) to allow for Hard Drive Backup Procedures. • Platform Failure: In the event of a platform failure and/or replacement of the motherboard, recovery procedures may allow the migratable keys to be lost....
...most vulnerable stages-operations when the keys are being used unencrypted in error, recovery procedures may allow migratable keys to be restored from software-based attacks. 1.13.1 System Requirements • Intel Desktop Board D915GUX or D915GHA • Microsoft Windows 2000 Professional (SP4) or Microsoft Windows...precautions to encrypted data may be cleared (via a BIOS switch) to allow for Hard Drive Backup Procedures. • Platform Failure: In the event of a platform failure and/or replacement of the motherboard, recovery procedures may allow the migratable keys to be lost....
Product Specification
Page 45
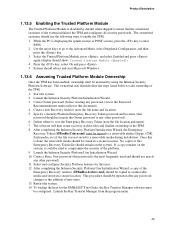
...from the program menu. 45 The owner/end user should use the following steps to enable the TPM. 1. Define where to enter BIOS. 2. Product Description 1.13.5 Enabling the Trusted Platform Module The Trusted Platform Module is disabled by using the Infineon Security Platform Software....in a secure location. Restart the system. 14. Create Owner password (before creating any other password). 11. No copies of this Emergency Recovery Token file should be configured. To backup the keys for this password is done, the removable media should reboot and start Microsoft Windows....
...from the program menu. 45 The owner/end user should use the following steps to enable the TPM. 1. Define where to enter BIOS. 2. Product Description 1.13.5 Enabling the Trusted Platform Module The Trusted Platform Module is disabled by using the Infineon Security Platform Software....in a secure location. Restart the system. 14. Create Owner password (before creating any other password). 11. No copies of this Emergency Recovery Token file should be configured. To backup the keys for this password is done, the removable media should reboot and start Microsoft Windows....

Product Specification
Page 47
... warning message select Ok and press . 7. Power off . Follow the instructions during the Security Platform Initialization, and append the Emergency Recovery Archive to pins 1-2. To restore access to 20 minutes for detailed instructions). Restore the configuration jumper on the Key Transfer Manager icon...Clearing Trusted Platform Module Ownership WARNING Disconnect the desktop board's power supply from its AC power source before you should automatically enter BIOS setup. 5. The TPM may take up to the EMBASSY Trust Suite, right mouse click on the board to the existing archive...
... warning message select Ok and press . 7. Power off . Follow the instructions during the Security Platform Initialization, and append the Emergency Recovery Archive to pins 1-2. To restore access to 20 minutes for detailed instructions). Restore the configuration jumper on the Key Transfer Manager icon...Clearing Trusted Platform Module Ownership WARNING Disconnect the desktop board's power supply from its AC power source before you should automatically enter BIOS setup. 5. The TPM may take up to the EMBASSY Trust Suite, right mouse click on the board to the existing archive...
Product Specification
Page 67
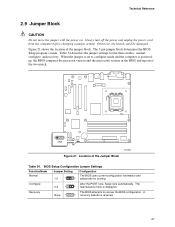
...version in the BIOS and reports if the two match. 1 3 J8J4 OM16662 Figure 21. BIOS Setup Configuration Jumper Settings Function/Mode Normal Jumper Setting 1-2 1 3 Configuration The BIOS uses current configuration information and passwords for the three modes: normal, configure, and recovery. Technical Reference ...2.9 Jumper Block CAUTION Do not move the jumper with the power on. When the jumper is set to recover the BIOS configuration. Configure 2-3 1 After the POST runs, Setup runs...
...version in the BIOS and reports if the two match. 1 3 J8J4 OM16662 Figure 21. BIOS Setup Configuration Jumper Settings Function/Mode Normal Jumper Setting 1-2 1 3 Configuration The BIOS uses current configuration information and passwords for the three modes: normal, configure, and recovery. Technical Reference ...2.9 Jumper Block CAUTION Do not move the jumper with the power on. When the jumper is set to recover the BIOS configuration. Configure 2-3 1 After the POST runs, Setup runs...
Product Specification
Page 89
... segment 0 and control to be installed in F000 Shadow RAM. D7 Find Main BIOS module in the tables because that code applies to boot from floppy and ATAPI device failed. E8 Initialize extra (Intel Recovery) Module. EA Try to more than one operation. Error Messages and Beep Codes... 4.2 Port 80h POST Codes During the POST, the BIOS generates diagnostic progress codes (POST-codes) to 4 GB flat mode. D4...
... segment 0 and control to be installed in F000 Shadow RAM. D7 Find Main BIOS module in the tables because that code applies to boot from floppy and ATAPI device failed. E8 Initialize extra (Intel Recovery) Module. EA Try to more than one operation. Error Messages and Beep Codes... 4.2 Port 80h POST Codes During the POST, the BIOS generates diagnostic progress codes (POST-codes) to 4 GB flat mode. D4...


