

User Manual
Page 3
This symbol indicates important instructions accompanying the product. ** GB 2 ** ** ** ** ** ** ** No user serviceable parts inside the product that indicate hazardous situations. ** • Warning ** Indicates a hazardous situation which, if not avoided...). Refer servicing to qualified service personnel. ** This symbol indicates dangerous voltage inside . ** ** ** ** ** Notice ** Read this manual carefully and make the user aware of possible problems and information of any importance to help the user to understand, to use and to maintain the installation. ** ...
This symbol indicates important instructions accompanying the product. ** GB 2 ** ** ** ** ** ** ** No user serviceable parts inside the product that indicate hazardous situations. ** • Warning ** Indicates a hazardous situation which, if not avoided...). Refer servicing to qualified service personnel. ** This symbol indicates dangerous voltage inside . ** ** ** ** ** Notice ** Read this manual carefully and make the user aware of possible problems and information of any importance to help the user to understand, to use and to maintain the installation. ** ...
User Manual
Page 6
... not stack electronic equipments on soft furnishings or carpets. CONNECTION TO THE AERIAL ** Disconnect the receiver from the mains before connecting or disconnecting the cable from the mains before cleaning. ** Use a light damp cloth (no objects filled with SABS 061. ** ** GB 5 ** ** ** ** ** ** ** ** ** ** ** ** Safety and Warning ** This digital terrestrial receiver has been manufactured to the unit. Disconnect the receiver from the aerial.
... not stack electronic equipments on soft furnishings or carpets. CONNECTION TO THE AERIAL ** Disconnect the receiver from the mains before connecting or disconnecting the cable from the mains before cleaning. ** Use a light damp cloth (no objects filled with SABS 061. ** ** GB 5 ** ** ** ** ** ** ** ** ** ** ** ** Safety and Warning ** This digital terrestrial receiver has been manufactured to the unit. Disconnect the receiver from the aerial.
User Manual
Page 9
Setup 2.1 Connecting the Antenna for STB GB19 ** GB19 2.2 Connecting for DVD player GB22 2.3 Powering On GB24 3. Basic Operation GB26 ** 4.1 Switching Channel GB26 ** 4.2 Volume Control GB26 ** 4.3 Text and Interactive Services GB26 4.4 Change the Subtitle Language GB27 4.5 Change a Audio Language GB27 4.6 Program Information (I- Program Guide 6.1 Viewing Programme Guide Information GB40 ** GB40 6.2 Finding a Programme GB42 6.3 Viewing Reserved Programme GB43 ** GB 8 ** ** ** ** ** ** ** plate) GB28 4.7 Option List GB30 5. Channel List 5.1 Displaying ...
Setup 2.1 Connecting the Antenna for STB GB19 ** GB19 2.2 Connecting for DVD player GB22 2.3 Powering On GB24 3. Basic Operation GB26 ** 4.1 Switching Channel GB26 ** 4.2 Volume Control GB26 ** 4.3 Text and Interactive Services GB26 4.4 Change the Subtitle Language GB27 4.5 Change a Audio Language GB27 4.6 Program Information (I- Program Guide 6.1 Viewing Programme Guide Information GB40 ** GB40 6.2 Finding a Programme GB42 6.3 Viewing Reserved Programme GB43 ** GB 8 ** ** ** ** ** ** ** plate) GB28 4.7 Option List GB30 5. Channel List 5.1 Displaying ...
User Manual
Page 10
Games 12. Setting Preferences 7.1 Parental Control GB48 ** GB45 7.2 Language Setting GB45 7.3 Time Setting GB47 7.4 Schedule GB48 7.5 A/V Control GB49 7.6 UHF Tunning GB50 7.7 Miscellaneous Settings GB53 8. System Information 10.1 Status GB61 ** ** GB61 10.2 Signal Detection GB61 11. Installation 8.1 Automatic Search GB54 ** GB54 8.2 Manual Search GB55 8.3 Default Setting GB56 9. Manipulating Your TV Using Remote Control GB62 ** GB63 ** ** GB 9 ** ** ** ** ** ** ** Software Update 9.1 OTA (Over the Air) GB57 ** GB57 9.2 Software Update from PC ...
Games 12. Setting Preferences 7.1 Parental Control GB48 ** GB45 7.2 Language Setting GB45 7.3 Time Setting GB47 7.4 Schedule GB48 7.5 A/V Control GB49 7.6 UHF Tunning GB50 7.7 Miscellaneous Settings GB53 8. System Information 10.1 Status GB61 ** ** GB61 10.2 Signal Detection GB61 11. Installation 8.1 Automatic Search GB54 ** GB54 8.2 Manual Search GB55 8.3 Default Setting GB56 9. Manipulating Your TV Using Remote Control GB62 ** GB63 ** ** GB 9 ** ** ** ** ** ** ** Software Update 9.1 OTA (Over the Air) GB57 ** GB57 9.2 Software Update from PC ...
User Manual
Page 17
... about the channel and programme. Before Using the Receiver ** STB 1. WIDE volumes on the STB. ** Switches between TV and receiver./Controls input mode of TV. ** ** Changes the Channel or Page. ** 24.SUBTITLE 12.SOUNDTRACK ** Displays the Soundtrack. ** ** Changes the subtitle language. ** 25.DVD FUNCTION BUTTONS 13.OPT + (OPTION) ** Displays the channel attributes during watching a ** programme. 9. And displays the ** Displays the main menu in DTV. ** ** Displays digital text. ** 19.GUIDE 7. channel list during watching...
... about the channel and programme. Before Using the Receiver ** STB 1. WIDE volumes on the STB. ** Switches between TV and receiver./Controls input mode of TV. ** ** Changes the Channel or Page. ** 24.SUBTITLE 12.SOUNDTRACK ** Displays the Soundtrack. ** ** Changes the subtitle language. ** 25.DVD FUNCTION BUTTONS 13.OPT + (OPTION) ** Displays the channel attributes during watching a ** programme. 9. And displays the ** Displays the main menu in DTV. ** ** Displays digital text. ** 19.GUIDE 7. channel list during watching...

User Manual
Page 23
... ** ** ** ** ** ** ** Insert one end of a component video (Y Pb Pr ) cable into the red/blue/green cinch socket at the back of transmitting pictures produces the highest quality as the video signal is not the case, the colors on the TV set(Red-Red, Blue-Blue, Green-Green). Setup ** 2.2 Connecting for DVD player 1. ** ** ** ** ** 2. Connection with Component Video (Y Pb Pr ) cable This method of the DVD player and the other end into its...
... ** ** ** ** ** ** ** Insert one end of a component video (Y Pb Pr ) cable into the red/blue/green cinch socket at the back of transmitting pictures produces the highest quality as the video signal is not the case, the colors on the TV set(Red-Red, Blue-Blue, Green-Green). Setup ** 2.2 Connecting for DVD player 1. ** ** ** ** ** 2. Connection with Component Video (Y Pb Pr ) cable This method of the DVD player and the other end into its...
User Manual
Page 27
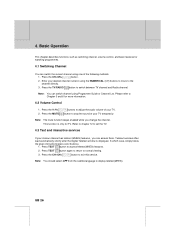
... methods. 1. Press the TV/RADIO button to Chapter 5 and 6 for TV. Teletext services often load automatically shortly after the Digital Teletext window is only for more information. 4.2 Volume Control 1. button to set the TV. 4.3 Text and interactive services If your TV temporarily. ** Note: The mute function keeps enabled while you can access them. ** ** ** ** ** 4. Note: You can switch the current channel using Programme Guide or Channel List.
... methods. 1. Press the TV/RADIO button to Chapter 5 and 6 for TV. Teletext services often load automatically shortly after the Digital Teletext window is only for more information. 4.2 Volume Control 1. button to set the TV. 4.3 Text and interactive services If your TV temporarily. ** Note: The mute function keeps enabled while you can access them. ** ** ** ** ** 4. Note: You can switch the current channel using Programme Guide or Channel List.
User Manual
Page 28
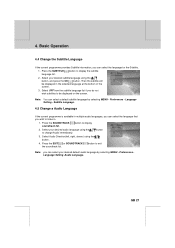
button to display ** soundtrack list. 2. Then the subtitle will be displayed on the screen. Note: You can select your desired default audio language by selecting MENU - Preferences - Select Audio Direction(left, right, stereo) using the button, and press the OK button. Press the SUBTITLE language list. Select your desired audio language using the to be displayed in . ** 1. Press the SOUNDTRACK button to display the subtitle 2. Basic Operation ** 4.4 Change the Subtitle Language If the current...
button to display ** soundtrack list. 2. Then the subtitle will be displayed on the screen. Note: You can select your desired default audio language by selecting MENU - Preferences - Select Audio Direction(left, right, stereo) using the button, and press the OK button. Press the SUBTITLE language list. Select your desired audio language using the to be displayed in . ** 1. Press the SOUNDTRACK button to display the subtitle 2. Basic Operation ** 4.4 Change the Subtitle Language If the current...
User Manual
Page 30
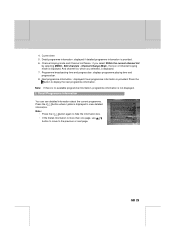
... current programme. Press the i button where I-plate is provided. 6. Channel looping mode and Channel List Name : if you selected, is displayed. Channel Change Mode , the Icon of Channel looping mode is displayed. 7. Programme broadcasting time and progress bar: displays programme playing time and progress bar. 8. And channel list, which you select Within the current channel list by selecting MENU - Press the button to hide the information box. • If the Detail...
... current programme. Press the i button where I-plate is provided. 6. Channel looping mode and Channel List Name : if you selected, is displayed. Channel Change Mode , the Icon of Channel looping mode is displayed. 7. Programme broadcasting time and progress bar: displays programme playing time and progress bar. 8. And channel list, which you select Within the current channel list by selecting MENU - Press the button to hide the information box. • If the Detail...

User Manual
Page 37
... remote controller to select the Edit Favourite Channels menu. ** ** The buttons for editing the Favourite channel list are described in the following table. ** ** ** Add Adds Favourite channel. ** ** Remove ** Removes from the Favourite channel. ** TV/RADIO ** Switches between TV and Radio channel list. ** Fav.Group ** Changes Favourite channel list group. ** Move ** Moves the order of channel list within the Favourite channel list. ** Rename ** Renames the name of Favourite channel list. ** Sort Sorts channels by number...
... remote controller to select the Edit Favourite Channels menu. ** ** The buttons for editing the Favourite channel list are described in the following table. ** ** ** Add Adds Favourite channel. ** ** Remove ** Removes from the Favourite channel. ** TV/RADIO ** Switches between TV and Radio channel list. ** Fav.Group ** Changes Favourite channel list group. ** Move ** Moves the order of channel list within the Favourite channel list. ** Rename ** Renames the name of Favourite channel list. ** Sort Sorts channels by number...

User Manual
Page 47
... time. 3. Select Enable or Disable the Allow Time Control using the and press the or OK button. Enable You can watch only while the time specified by Allow Time. Or you want regardless of Allow Time. Enter New Password using the press the OK or button. Setting Preferences ** 2. Note: The Default Password is 0000. ** ** ** ** ** 7. If you can watch programme...
... time. 3. Select Enable or Disable the Allow Time Control using the and press the or OK button. Enable You can watch only while the time specified by Allow Time. Or you want regardless of Allow Time. Enter New Password using the press the OK or button. Setting Preferences ** 2. Note: The Default Password is 0000. ** ** ** ** ** 7. If you can watch programme...
User Manual
Page 56
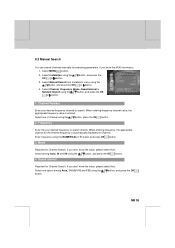
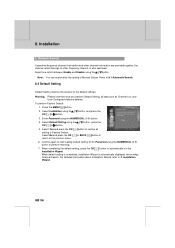
Select Channel, Frequency, Mode, Guard Interval or Network Search using the button, and press the OK or button. 4. When entering frequency channel value, the appropriate frequency value is automatically displayed on Channel. button, and press the OK ** GB 55 ** ** ** ** ** ** ** button, and press the 3. Channel Number Enter your desired frequency to search. Select one option among Auto, 2k and 8k using the button, and press the OK button. 4. Select Manual Search from Installation menu using the button, and...
Select Channel, Frequency, Mode, Guard Interval or Network Search using the button, and press the OK or button. 4. When entering frequency channel value, the appropriate frequency value is automatically displayed on Channel. button, and press the OK ** GB 55 ** ** ** ** ** ** ** button, and press the 3. Channel Number Enter your desired frequency to search. Select one option among Auto, 2k and 8k using the button, and press the OK button. 4. Select Manual Search from Installation menu using the button, and...
User Manual
Page 57
.... Press the MENU button. 2. Select Default Setting using the button. When default setting is completed, Installation Wizard is also searched. ** ** ** ** 8. Network Search If specified frequency channel information and other frequency channel, is automatically displayed, which belongs to 6. button, and press the 3. Select Yes and press the OK setting to the previous menu. button to 3. Select one option between Enable and Disable using the button, press the ** OK or button. 5. To perform Factory Default: 1. Select...
.... Press the MENU button. 2. Select Default Setting using the button. When default setting is completed, Installation Wizard is also searched. ** ** ** ** 8. Network Search If specified frequency channel information and other frequency channel, is automatically displayed, which belongs to 6. button, and press the 3. Select Yes and press the OK setting to the previous menu. button to 3. Select one option between Enable and Disable using the button, press the ** OK or button. 5. To perform Factory Default: 1. Select...
User Manual
Page 58
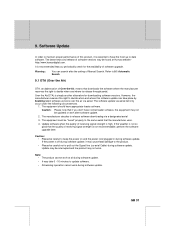
It is not recommendable, perform the software upgrade later. ** Caution: • Please be careful not to keep the power on and the power cord plugged in during software update, it is off during software update. The equipment should have normal loader software, the equipment may not be "tuned" properly to date software. Update software when the quality of receiving signal strength is simply another alternative for the...
It is not recommendable, perform the software upgrade later. ** Caution: • Please be careful not to keep the power on and the power cord plugged in during software update, it is off during software update. The equipment should have normal loader software, the equipment may not be "tuned" properly to date software. Update software when the quality of receiving signal strength is simply another alternative for the...
User Manual
Page 61
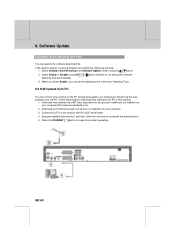
...). 2. Execute installed download tool, and then follow the instructions contained the download tool. ** 5. When you select Enable, you can set the detecting time in the Auto-Detecting Time. 9.2 S/W Update from the PC. Press the STANDBY button to this product operating. ** ** ** GB 60 ** ** ** ** ** ** ** ** ** ** ** ** 9. Software Update ** 5 Software Auto-Detecting and Time You can connect your receiver to this product with RS-232C serial cable. 4. Download and install download tool file from...
...). 2. Execute installed download tool, and then follow the instructions contained the download tool. ** 5. When you select Enable, you can set the detecting time in the Auto-Detecting Time. 9.2 S/W Update from the PC. Press the STANDBY button to this product operating. ** ** ** GB 60 ** ** ** ** ** ** ** ** ** ** ** ** 9. Software Update ** 5 Software Auto-Detecting and Time You can connect your receiver to this product with RS-232C serial cable. 4. Download and install download tool file from...

User Manual
Page 64
... remote control towards the remote control receiving parts of TV code using the remote control provided by Humax. TV button LED blink twice when you are setting TV code, please keep pressing TV button. 1. Manipulating your finger from the TV button. 4. TV code setting Note: While you detach your TV using Remote Control ** You can manipulate TV using the NUMERICAL (0~9) button orderly. TV power turns on . Press three numbers of TV. 2. Keep pressing TV button for 3 seconds, then TV button LED turn...
... remote control towards the remote control receiving parts of TV code using the remote control provided by Humax. TV button LED blink twice when you are setting TV code, please keep pressing TV button. 1. Manipulating your finger from the TV button. 4. TV code setting Note: While you detach your TV using Remote Control ** You can manipulate TV using the NUMERICAL (0~9) button orderly. TV power turns on . Press three numbers of TV. 2. Keep pressing TV button for 3 seconds, then TV button LED turn...
User Manual
Page 94
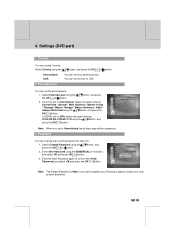
... Level You can change the current password into new one. 1. button, and press 2. Password You can set to Unrestricted, the all discs play without password. 3. If you set your local product distributor. ** GB 93 ** ** ** ** ** ** ** If Country set the parental level. 1. ** ** ** ** ** 4. Settings (DVD part) ** 1. Enter New Password using the button, and press the OK or button. Country You can set to confirm the Verify Password, and select OK...
... Level You can change the current password into new one. 1. button, and press 2. Password You can set to Unrestricted, the all discs play without password. 3. If you set your local product distributor. ** GB 93 ** ** ** ** ** ** ** If Country set the parental level. 1. ** ** ** ** ** 4. Settings (DVD part) ** 1. Enter New Password using the button, and press the OK or button. Country You can set to confirm the Verify Password, and select OK...
User Manual
Page 97
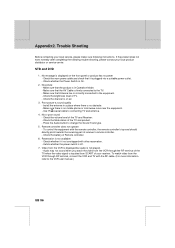
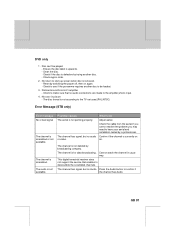
... the volume level of Remote controller. 6. Check the channel is not available - ** ** ** ** ** Appendix2. STB and DVD 1. Press the Audio button to connecting TV and antenna. 4. Install the antenna in Operation Mode. - To watch the video from the VCR through RF terminal, connect the VCR and TV with other reservation. - No message is correctly connected to the VCR user manual.) ** GB 96 ** ** ** ** ** ** ** Check the main power cable...
... the volume level of Remote controller. 6. Check the channel is not available - ** ** ** ** ** Appendix2. STB and DVD 1. Press the Audio button to connecting TV and antenna. 4. Install the antenna in Operation Mode. - To watch the video from the VCR through RF terminal, connect the VCR and TV with other reservation. - No message is correctly connected to the VCR user manual.) ** GB 96 ** ** ** ** ** ** ** Check the main power cable...
User Manual
Page 98
... confirm if the channel has Audio. ** GB 97 ** ** ** ** ** ** ** Check to have your aerial and installation tested by switching the player off, then on or video. The channel is upwards. - The disc format is removed. - air. The channel has signal, but no audio connections are made to be played - The channel is not pointing properly. This digital terrestrial receiver does not support the service that no audio Confirm if the...
... confirm if the channel has Audio. ** GB 97 ** ** ** ** ** ** ** Check to have your aerial and installation tested by switching the player off, then on or video. The channel is upwards. - The disc format is removed. - air. The channel has signal, but no audio connections are made to be played - The channel is not pointing properly. This digital terrestrial receiver does not support the service that no audio Confirm if the...
User Manual
Page 102
It outputs audio signals directly as digital audio signals without changing into analog signals because conversion into analog signals can be stored on a single CD. S-Video This is compressed to know on . OSD (On Screen Display) The function that displays the information about the monitor that the user needs or has to 1/10 of the volume of music can degrade signal quality. SCART ** A 21-pin connector used to release them...
It outputs audio signals directly as digital audio signals without changing into analog signals because conversion into analog signals can be stored on a single CD. S-Video This is compressed to know on . OSD (On Screen Display) The function that displays the information about the monitor that the user needs or has to 1/10 of the volume of music can degrade signal quality. SCART ** A 21-pin connector used to release them...


