
User Guide
Page 6
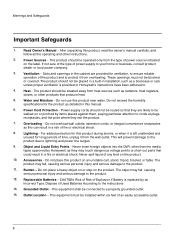
...registers, stoves, or other instructions. 2. Do not exceed the humidity specifications for long periods of fire or electrical shock. 8. Never insert foreign objects into the DVR, other than the media types approved by Honeywell, as this manual. 6. CAUTION: Risk of ...injury and serious damage to the Instructions 13. Grounded Outlet - Read Owner's Manual - These openings must be blocked or covered. Do not overload wall outlets; Warnings and Safeguards Important Safeguards 1. Ventilation - Heat - Power-supply cords should not be operated only from the wall outlet....
...registers, stoves, or other instructions. 2. Do not exceed the humidity specifications for long periods of fire or electrical shock. 8. Never insert foreign objects into the DVR, other than the media types approved by Honeywell, as this manual. 6. CAUTION: Risk of ...injury and serious damage to the Instructions 13. Grounded Outlet - Read Owner's Manual - These openings must be blocked or covered. Do not overload wall outlets; Warnings and Safeguards Important Safeguards 1. Ventilation - Heat - Power-supply cords should not be operated only from the wall outlet....

User Guide
Page 7
... used replacement parts specified by a qualified technician to restore the unit to service this indicates a need for long periods of other controls may expose the user to qualified service personnel under the following the operating instructions. The unit may result in performance - Performance Series DVR User Guide 15. Notes on a level surface. This is in proper operating condition. Do not use . When the unit exhibits a distinct change...
... used replacement parts specified by a qualified technician to restore the unit to service this indicates a need for long periods of other controls may expose the user to qualified service personnel under the following the operating instructions. The unit may result in performance - Performance Series DVR User Guide 15. Notes on a level surface. This is in proper operating condition. Do not use . When the unit exhibits a distinct change...

User Guide
Page 11
... Features ...16 USB Flash Drive Approved List 16 PTZ Compatibility List ...17 Quick Start Guide...18 Logging In for the First Time 18 4 Installation ...19 Front Panel Controls ...19 Rear Panel Connectors...20 Remote Control ...21 Connection Guide ...22 Connecting the Monitor 22 Connecting Video Inputs 22 Connecting to a Network 22 Connecting Audio ...22 Connecting a PTZ Camera 23 Connecting the External Power Supply 23 Connecting to a Sensor Input 23 Connecting to a Relay Output 24 Turning on the DVR...24 Setting the Remote Controller ID 24 5 Setup ...25 Setup Menus ...25 System...
... Features ...16 USB Flash Drive Approved List 16 PTZ Compatibility List ...17 Quick Start Guide...18 Logging In for the First Time 18 4 Installation ...19 Front Panel Controls ...19 Rear Panel Connectors...20 Remote Control ...21 Connection Guide ...22 Connecting the Monitor 22 Connecting Video Inputs 22 Connecting to a Network 22 Connecting Audio ...22 Connecting a PTZ Camera 23 Connecting the External Power Supply 23 Connecting to a Sensor Input 23 Connecting to a Relay Output 24 Turning on the DVR...24 Setting the Remote Controller ID 24 5 Setup ...25 Setup Menus ...25 System...
User Guide
Page 13
...63 Creating a DVR Connection with Remote Software 64 Default Remote Software Log in Information 64 Access Remote Connection 65 Connecting Multiple DVRs 65 Using the Remote Software 66 Setting the Time and Date 66 Live View Screen ...67 Camera View ...68 Screen Division Buttons 69 Setup Overview...70 Setup Screen Overview 70 Camera Setup ...70 Camera Setup 70 PanTilt Setup 70 Sequence Setup 70 SPOT Setup 71 Record Setup ...71 Time Setup 71 Schedule Setup 71 Audio Setup 72 Motion / Event Input 72 HDD Setup 73 Sensor Setup...73 Sensor ...73 System Setup ...74 User Management 74...
...63 Creating a DVR Connection with Remote Software 64 Default Remote Software Log in Information 64 Access Remote Connection 65 Connecting Multiple DVRs 65 Using the Remote Software 66 Setting the Time and Date 66 Live View Screen ...67 Camera View ...68 Screen Division Buttons 69 Setup Overview...70 Setup Screen Overview 70 Camera Setup ...70 Camera Setup 70 PanTilt Setup 70 Sequence Setup 70 SPOT Setup 71 Record Setup ...71 Time Setup 71 Schedule Setup 71 Audio Setup 72 Motion / Event Input 72 HDD Setup 73 Sensor Setup...73 Sensor ...73 System Setup ...74 User Management 74...
User Guide
Page 14
... Web Viewer Overview ...83 Connecting to a DVR Using Web Viewer 84 Closing the Web Viewer 84 Digital Verifier Overview ...85 Using the Digital Verifier 85 8 Appendix ...87 Screen Icon Index ...87 Recording Icons ...87 Status Icons ...88 Search Icons ...88 Button Index ...88 LED Status Indicators 88 Enter / Exit Buttons ...88 Numeric Buttons ...89 Function Buttons ...89 Directional and Playback Control Buttons 90 DVR FAQ ...91 General ...91 Live Monitoring ...91 Recording ...92 Searching and Playing Video 92 Backup ...92 Network...92 Miscellaneous ...92 Troubleshooting...
... Web Viewer Overview ...83 Connecting to a DVR Using Web Viewer 84 Closing the Web Viewer 84 Digital Verifier Overview ...85 Using the Digital Verifier 85 8 Appendix ...87 Screen Icon Index ...87 Recording Icons ...87 Status Icons ...88 Search Icons ...88 Button Index ...88 LED Status Indicators 88 Enter / Exit Buttons ...88 Numeric Buttons ...89 Function Buttons ...89 Directional and Playback Control Buttons 90 DVR FAQ ...91 General ...91 Live Monitoring ...91 Recording ...92 Searching and Playing Video 92 Backup ...92 Network...92 Miscellaneous ...92 Troubleshooting...

User Guide
Page 15
... has never been easier to view live viewing, and digital search. Document 800-02471 Rev A 15 02/09 Preconfigured for easy installation and operation. Performance Series DVR User Guide Introduction Product Description Honeywell's HRDP4F Performance Series DVR is a powerful, yet affordable, video management solution designed for continuous recording, with additional capabilities such as LANs and WANs for simultaneous live video, perform searches, and operate PTZ cameras. This powerful software enables users to maintain. The HRDP4F...
... has never been easier to view live viewing, and digital search. Document 800-02471 Rev A 15 02/09 Preconfigured for easy installation and operation. Performance Series DVR User Guide Introduction Product Description Honeywell's HRDP4F Performance Series DVR is a powerful, yet affordable, video management solution designed for continuous recording, with additional capabilities such as LANs and WANs for simultaneous live video, perform searches, and operate PTZ cameras. This powerful software enables users to maintain. The HRDP4F...
User Guide
Page 18
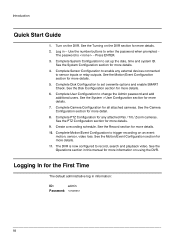
... the Turning on an event: motion, sensor, video loss. Log in information: ID: admin Password: 18 See the System Configuration section for more details. 10. See the Camera Configuration section for more details. 7. See the Operations section in this manual for more details. 4. See the System >User Configuration section for more details. 11. Introduction Quick Start Guide 1. Use the number buttons to record, search and playback video...
... the Turning on an event: motion, sensor, video loss. Log in information: ID: admin Password: 18 See the System Configuration section for more details. 10. See the Camera Configuration section for more details. 7. See the Operations section in this manual for more details. 4. See the System >User Configuration section for more details. 11. Introduction Quick Start Guide 1. Use the number buttons to record, search and playback video...
User Guide
Page 24
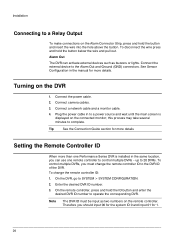
... be input as buzzers or lights. See Sensor Configuration in the manual for more than one remote controller to control multiple DVRs - Connect a network cable and a monitor cable. 4. On the DVR, go to 20 DVRs. Note The DVR ID must change the remote controller ID: 1. Connect the power cable. 2. this process may take several minutes to the DVR ID of the DVR. Installation Connecting to a Relay Output To make connections on the DVR 1. To control multiple DVRs, you should input 00...
... be input as buzzers or lights. See Sensor Configuration in the manual for more than one remote controller to control multiple DVRs - Connect a network cable and a monitor cable. 4. On the DVR, go to 20 DVRs. Note The DVR ID must change the remote controller ID: 1. Connect the power cable. 2. this process may take several minutes to the DVR ID of the DVR. Installation Connecting to a Relay Output To make connections on the DVR 1. To control multiple DVRs, you should input 00...

User Guide
Page 27
... / HIGH / ULTRA. Performance Series DVR User Guide System Configuration Continued USE DST - Highlight NTP (Network Time Protocol) and press ENTER to SYNC the DVR with resolution.] AVERAGE PICTURE QUALITY - ON/OFF [Enables / Disables Audible keypad touch confirmation]. This is a security feature.] Setup Wizard The Setup Wizard allows you to turn Daylight Saving Time ON/OFF. AVERAGE DAYS TO RECORD - [The estimated days of...
... / HIGH / ULTRA. Performance Series DVR User Guide System Configuration Continued USE DST - Highlight NTP (Network Time Protocol) and press ENTER to SYNC the DVR with resolution.] AVERAGE PICTURE QUALITY - ON/OFF [Enables / Disables Audible keypad touch confirmation]. This is a security feature.] Setup Wizard The Setup Wizard allows you to turn Daylight Saving Time ON/OFF. AVERAGE DAYS TO RECORD - [The estimated days of...

User Guide
Page 31
USER SUPERUSER ADMIN Live View PTZ User Privileges Search Replay Backup SuperUser Privileges Setup 2. Select ADD/CHANGE on -screen keyboard to input the user name. 4. Select OK. 5. Server Use the Server menu to the next level. Select the authorization level to display the names of the screen and pressing ENTER to cycle to manage users that level (ADMIN, SUPERUSER, USER) by selecting the user type at appropriate authorization levels. 7. To add a new user: 1. Select...
USER SUPERUSER ADMIN Live View PTZ User Privileges Search Replay Backup SuperUser Privileges Setup 2. Select ADD/CHANGE on -screen keyboard to input the user name. 4. Select OK. 5. Server Use the Server menu to the next level. Select the authorization level to display the names of the screen and pressing ENTER to cycle to manage users that level (ADMIN, SUPERUSER, USER) by selecting the user type at appropriate authorization levels. 7. To add a new user: 1. Select...
User Guide
Page 32
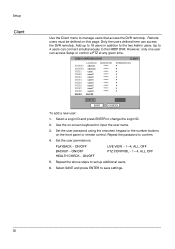
... here can connect simultaneously to the two Admin users. Set the user permissions. Repeat the above steps to set up to 18 users in addition to the HRDP DVR. However, only one user can access Setup or control a PTZ at any given time. ON/OFF LIVE VIEW - 1~4, ALL, OFF PTZ CONTROL - 1~4, ALL, OFF 5. Setup Client Use the Client menu to save settings. 32 Use the on the front panel or remote control. Remote users must be...
... here can connect simultaneously to the two Admin users. Set the user permissions. Repeat the above steps to set up to 18 users in addition to the HRDP DVR. However, only one user can access Setup or control a PTZ at any given time. ON/OFF LIVE VIEW - 1~4, ALL, OFF PTZ CONTROL - 1~4, ALL, OFF 5. Setup Client Use the Client menu to save settings. 32 Use the on the front panel or remote control. Remote users must be...

User Guide
Page 44
... NAT (Network Address Translation) services for this feature be set to confirm the DDNS settings. The DVR name. PASSWORD - Contact the network administrator for the DDNS server account. IP ADDRESS - This is important if your router is configured. User must manually define a static IP address. Setup Network Network Configuration Configure network settings. When set to the DDNS service. The current DDNS server. If you are unsure of your network configuration, Honeywell recommends this...
... NAT (Network Address Translation) services for this feature be set to confirm the DDNS settings. The DVR name. PASSWORD - Contact the network administrator for the DDNS server account. IP ADDRESS - This is important if your router is configured. User must manually define a static IP address. Setup Network Network Configuration Configure network settings. When set to the DDNS service. The current DDNS server. If you are unsure of your network configuration, Honeywell recommends this...

User Guide
Page 59
... play controls to a specific time. Upgrade Firmware from the DVR Obtain the latest software release and save the file to the PC. 2. See the remote software section. 1. Remove the upgrade media and select OK when the Upgrade Success window appears. 6. Insert CD, DVD or connect external USB device to a USB Device. Performance Series DVR User Guide Play Back Backup Image Play recorded video on the CD, DVD, or USB drive. 3. Select SYSTEM > SHUTDOWN and select RESTART. 3. Select OK to locate the desired backup file saved by Date...
... play controls to a specific time. Upgrade Firmware from the DVR Obtain the latest software release and save the file to the PC. 2. See the remote software section. 1. Remove the upgrade media and select OK when the Upgrade Success window appears. 6. Insert CD, DVD or connect external USB device to a USB Device. Performance Series DVR User Guide Play Back Backup Image Play recorded video on the CD, DVD, or USB drive. 3. Select SYSTEM > SHUTDOWN and select RESTART. 3. Select OK to locate the desired backup file saved by Date...
User Guide
Page 60
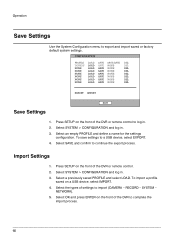
... import process. 60 Operation Save Settings Use the System Configuration menu to log in. 2. SYSTEM - Select OK and press ENTER on the front of the DVR to import (CAMERA - Press SETUP on a USB device, select IMPORT. 4. NETWORK). 5. Select the types of the DVR or remote control. 2. Select a previously saved PROFILE and select LOAD. RECORD - CONFIGUR ATION PROFILE LOAD SAVE SAVE DATE DEL DEFAULT LOAD SAVE NONE...
... import process. 60 Operation Save Settings Use the System Configuration menu to log in. 2. SYSTEM - Select OK and press ENTER on the front of the DVR to import (CAMERA - Press SETUP on a USB device, select IMPORT. 4. NETWORK). 5. Select the types of the DVR or remote control. 2. Select a previously saved PROFILE and select LOAD. RECORD - CONFIGUR ATION PROFILE LOAD SAVE SAVE DATE DEL DEFAULT LOAD SAVE NONE...
User Guide
Page 63
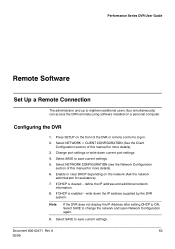
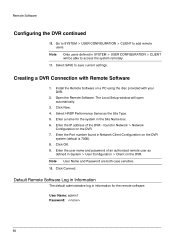
... SETUP on a personal computer. Select NETWORK CONFIGURATION (see the Network Configuration section of the DVR or remote control to save current settings. If DHCP is cleared - write down current port settings. 4. Select SAVE to log in. 2. Performance Series DVR User Guide Remote Software Set Up a Remote Connection The administrator and up to eighteen additional users (four simultaneously) can access the DVR remotely using software installed on the front of this manual for assistance). 7. define the IP address...
... SETUP on a personal computer. Select NETWORK CONFIGURATION (see the Network Configuration section of the DVR or remote control to save current settings. If DHCP is cleared - write down current port settings. 4. Select SAVE to log in. 2. Performance Series DVR User Guide Remote Software Set Up a Remote Connection The administrator and up to eighteen additional users (four simultaneously) can access the DVR remotely using software installed on the front of this manual for assistance). 7. define the IP address...
User Guide
Page 64
... IP address of an authorized remote user as the Site Type. 5. Enter the user name and password of the DVR - Go to SYSTEM > USER CONFIGURATION > CLIENT to save current settings. Click OK. 9. Note Only users defined in Network > Network Configuration on a PC using the disc provided with Remote Software 1. Enter the Port number found in SYSTEM > USER CONFIGURATION > CLIENT will open automatically. 3. Click Connect. Install the Remote Software on the DVR. 7. Select HRDP Performance Series...
... IP address of an authorized remote user as the Site Type. 5. Enter the user name and password of the DVR - Go to SYSTEM > USER CONFIGURATION > CLIENT to save current settings. Click OK. 9. Note Only users defined in Network > Network Configuration on a PC using the disc provided with Remote Software 1. Enter the Port number found in SYSTEM > USER CONFIGURATION > CLIENT will open automatically. 3. Click Connect. Install the Remote Software on the DVR. 7. Select HRDP Performance Series...

User Guide
Page 69
... Screen mode by clicking Full Screen within the Screen Division Menu. For example, selecting channel 1 and then the Rotate button will sequence through the Screen Divisions sets. The button options are visible. You can activate the Full Screen Option by rightclicking on the monitor. The Full Screen Option allows you to view cameras in the Video Display Area. Performance Series DVR User Guide Screen Division Buttons The Screen Division buttons allow you to view the Video Display...
... Screen mode by clicking Full Screen within the Screen Division Menu. For example, selecting channel 1 and then the Rotate button will sequence through the Screen Divisions sets. The button options are visible. You can activate the Full Screen Option by rightclicking on the monitor. The Full Screen Option allows you to view cameras in the Video Display Area. Performance Series DVR User Guide Screen Division Buttons The Screen Division buttons allow you to view the Video Display...
User Guide
Page 77
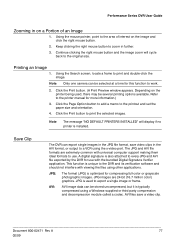
... being used to export a single image or frame. Printing an Image 1. Click the Page Option button to add a memo to print and double-click the image. Using the Search screen, locate a frame to the printout and set the paper size and orientation. 4. JPG images are extremely common with viewing the files using other applications. Performance Series DVR User Guide Zooming in the AVI format, or output to a VCR using the s-video port. Save...
... being used to export a single image or frame. Printing an Image 1. Click the Page Option button to add a memo to print and double-click the image. Using the Search screen, locate a frame to the printout and set the paper size and orientation. 4. JPG images are extremely common with viewing the files using other applications. Performance Series DVR User Guide Zooming in the AVI format, or output to a VCR using the s-video port. Save...
User Guide
Page 93
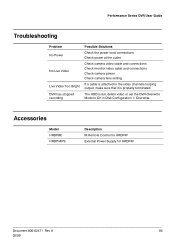
... DVR User Guide Troubleshooting Problem No Power No Live Video Live Video Too Bright DVR has stopped recording Possible Solutions Check the power cord connections Check power at the outlet Check camera video cable and connections Check monitor video cable and connections Check camera power Check camera lens setting If a cable is attached to the video channels looping output, make sure that it is full, delete video or set the DVR Overwrite Mode to On in Disk Configuration > Overwrite. The HDD is properly terminated. Accessories Model HRDPRC HRDP4FPS Description IR Remote Control...
... DVR User Guide Troubleshooting Problem No Power No Live Video Live Video Too Bright DVR has stopped recording Possible Solutions Check the power cord connections Check power at the outlet Check camera video cable and connections Check monitor video cable and connections Check camera power Check camera lens setting If a cable is attached to the video channels looping output, make sure that it is full, delete video or set the DVR Overwrite Mode to On in Disk Configuration > Overwrite. The HDD is properly terminated. Accessories Model HRDPRC HRDP4FPS Description IR Remote Control...

User Guide
Page 95
...(704x480) PAL: CIF(352x288), 2CIF (704x288), 4CIF(704x576) Compression Enhanced MPEG-4 Recording Mode Motion detection, Sensor, Schedule Variable compression rates, recording frame, motion sensitivity Storage media Internal Hard Disk Drive USB Audio 1 Channel (mono), G.726 Compression Playback Mode Searching Remote Monitoring S/W Alarm Multi-channel playback (Max 4ch), Simultaneous/Panorama/Smart playback By Channel, Time, Date, Motion Detection, Sensor Events Remote Software Web based viewer 1 Sensor Camera Control 4 Pan/Tilt, Zoom, Focus, Iris Back-up USB Hardware Spec.
...(704x480) PAL: CIF(352x288), 2CIF (704x288), 4CIF(704x576) Compression Enhanced MPEG-4 Recording Mode Motion detection, Sensor, Schedule Variable compression rates, recording frame, motion sensitivity Storage media Internal Hard Disk Drive USB Audio 1 Channel (mono), G.726 Compression Playback Mode Searching Remote Monitoring S/W Alarm Multi-channel playback (Max 4ch), Simultaneous/Panorama/Smart playback By Channel, Time, Date, Motion Detection, Sensor Events Remote Software Web based viewer 1 Sensor Camera Control 4 Pan/Tilt, Zoom, Focus, Iris Back-up USB Hardware Spec.
