Warranty Guide
Page 2
... duration begins on label, for example: 1YR = 1 year, 3YR = 3 years Limited parts & labor warranty HP Digital Projector Lamp Module (included with the projector or purchased separately) 90 days or 500 hours of use . 9. or • Operation outside the product's specifications. 4. product HP Digital Projector mp3220 series warranty period marked on bottom label (excluding items listed below) warranty period...
... duration begins on label, for example: 1YR = 1 year, 3YR = 3 years Limited parts & labor warranty HP Digital Projector Lamp Module (included with the projector or purchased separately) 90 days or 500 hours of use . 9. or • Operation outside the product's specifications. 4. product HP Digital Projector mp3220 series warranty period marked on bottom label (excluding items listed below) warranty period...
User Guide
Page 4
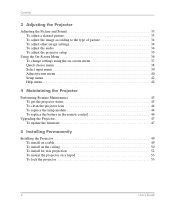
... Select input menu 39 Adjust picture menu 40 Setup menu 42 Help menu 42 4 Maintaining the Projector Performing Routine Maintenance 43 To get the projector status 43 To clean the projector lens 44 To replace the lamp module 44 To replace the battery in the remote control 46 Upgrading the... Projector 47 To update the firmware 47 5 Installing Permanently Installing the Projector 49 To install on a table 49 ...
... Select input menu 39 Adjust picture menu 40 Setup menu 42 Help menu 42 4 Maintaining the Projector Performing Routine Maintenance 43 To get the projector status 43 To clean the projector lens 44 To replace the lamp module 44 To replace the battery in the remote control 46 Upgrading the... Projector 47 To update the firmware 47 5 Installing Permanently Installing the Projector 49 To install on a table 49 ...
User Guide
Page 11
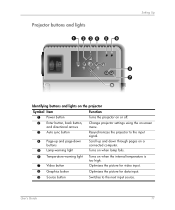
... using the on-screen and directional arrows menu. 3 Auto sync button Resynchronizes the projector to the input signal. 4 Page-up and page-down buttons Scroll up and down through pages on a connected computer. 5 Lamp-warning light Turns on when lamp fails. 6 Temperature-warning light Turns on when the internal temperature is too high...
... using the on-screen and directional arrows menu. 3 Auto sync button Resynchronizes the projector to the input signal. 4 Page-up and page-down buttons Scroll up and down through pages on a connected computer. 5 Lamp-warning light Turns on when lamp fails. 6 Temperature-warning light Turns on when the internal temperature is too high...
User Guide
Page 14
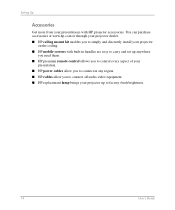
... mount kit enables you to connect all audio-video equipment. ■ HP replacement lamp brings your projector up anywhere you need them. ■ HP premium remote control allows you to control every aspect of your projector on the ceiling. ■ HP mobile screens with HP projector accessories. Setting Up Accessories Get more from your presentations with built-in...
... mount kit enables you to connect all audio-video equipment. ■ HP replacement lamp brings your projector up anywhere you need them. ■ HP premium remote control allows you to control every aspect of your projector on the ceiling. ■ HP mobile screens with HP projector accessories. Setting Up Accessories Get more from your presentations with built-in...
User Guide
Page 25
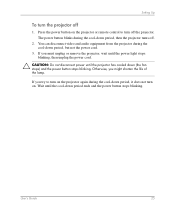
..., but not the power cord. 3. Press the power button on . Setting Up To turn off the projector. If you might shorten the life of the lamp. Otherwise, you must unplug or remove the projector, wait until the power light stops blinking, then unplug the power cord. Ä CAUTION: Do not ...disconnect power until the cool-down period, then the projector turns off 1. You can disconnect video and audio ...
..., but not the power cord. 3. Press the power button on . Setting Up To turn off the projector. If you might shorten the life of the lamp. Otherwise, you must unplug or remove the projector, wait until the power light stops blinking, then unplug the power cord. Ä CAUTION: Do not ...disconnect power until the cool-down period, then the projector turns off 1. You can disconnect video and audio ...
User Guide
Page 35
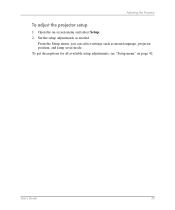
Adjusting the Projector To adjust the projector setup 1. To get descriptions for all available setup adjustments, see "Setup menu" on -screen menu and select Setup. 2. Set the setup adjustments as menu language, projector position, and lamp saver mode. Open the on page 42. From the Setup menu, you can select settings such as needed. User's Guide 35
Adjusting the Projector To adjust the projector setup 1. To get descriptions for all available setup adjustments, see "Setup menu" on -screen menu and select Setup. 2. Set the setup adjustments as menu language, projector position, and lamp saver mode. Open the on page 42. From the Setup menu, you can select settings such as needed. User's Guide 35
User Guide
Page 42
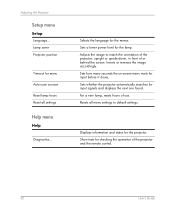
... Adjusts the image to default settings. Sets whether the projector automatically searches for the lamp. Show tests for checking the operation of use. For a new lamp, resets hours of the projector and the remote control. 42 User's Guide Lamp saver Projector position Timeout for the menus. Sets a lower power ...Help Diagnostics... Sets how many seconds the on-screen menu waits for the projector. Selects the language for menu Auto-scan sources Reset lamp hours Reset all menu settings to match the orientation of the projector: upright or upside-down, in front of or behind the screen.
... Adjusts the image to default settings. Sets whether the projector automatically searches for the lamp. Show tests for checking the operation of use. For a new lamp, resets hours of the projector and the remote control. 42 User's Guide Lamp saver Projector position Timeout for the menus. Sets a lower power ...Help Diagnostics... Sets how many seconds the on-screen menu waits for the projector. Selects the language for menu Auto-scan sources Reset lamp hours Reset all menu settings to match the orientation of the projector: upright or upside-down, in front of or behind the screen.

User Guide
Page 43
... 47 Performing Routine Maintenance This section provides instructions on performing routing maintenance. ■ "To get the projector status" on page 43 ■ "To clean the projector lens" on page 44 ■ "To replace the lamp module" on page 44 ■ "To replace the battery in the remote control" on page 46... To get the projector status ■ Open the on-screen menu and select Help. This screen shows information...
... 47 Performing Routine Maintenance This section provides instructions on performing routing maintenance. ■ "To get the projector status" on page 43 ■ "To clean the projector lens" on page 44 ■ "To replace the lamp module" on page 44 ■ "To replace the battery in the remote control" on page 46... To get the projector status ■ Open the on-screen menu and select Help. This screen shows information...
User Guide
Page 44
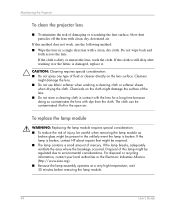
... very high temperature, wait 30 minutes before removing the lamp module. 44 User's Guide If the cloth is still dirty after washing it or the fabric is broken. Chemicals on the lens surface. Maintaining the Projector To clean the projector lens ■ To minimize the risk of damaging or ...cloth or softener sheets when drying the cloth. If the cloth is broken, contact HP about repairs that might damage the lens. ■ Do not use the following method: ■ Wipe the lens in the open air. If the lamp breaks, adequately ventilate the area where the breakage occurred.
... very high temperature, wait 30 minutes before removing the lamp module. 44 User's Guide If the cloth is still dirty after washing it or the fabric is broken. Chemicals on the lens surface. Maintaining the Projector To clean the projector lens ■ To minimize the risk of damaging or ...cloth or softener sheets when drying the cloth. If the cloth is broken, contact HP about repairs that might damage the lens. ■ Do not use the following method: ■ Wipe the lens in the open air. If the lamp breaks, adequately ventilate the area where the breakage occurred.
User Guide
Page 45
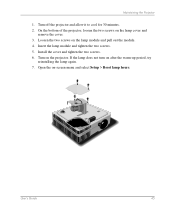
Maintaining the Projector 1. Turn on the lamp cover and remove the cover. 3. User's Guide 45 On the bottom of the projector, loosen the two screws on the projector. Insert the lamp module and tighten the two screws. 5. Install the cover and tighten the two screws. 6. Turn off the projector and allow it to cool for 30 minutes. 2. If the lamp does not turn on -screen menu and select Setup > Reset lamp hours. Open the on after the warm-up period, try reinstalling the lamp again. 7. Loosen the two screws on the lamp module and pull out the module. 4.
Maintaining the Projector 1. Turn on the lamp cover and remove the cover. 3. User's Guide 45 On the bottom of the projector, loosen the two screws on the projector. Insert the lamp module and tighten the two screws. 5. Install the cover and tighten the two screws. 6. Turn off the projector and allow it to cool for 30 minutes. 2. If the lamp does not turn on -screen menu and select Setup > Reset lamp hours. Open the on after the warm-up period, try reinstalling the lamp again. 7. Loosen the two screws on the lamp module and pull out the module. 4.
User Guide
Page 56
If the warning light turns on or blinks again, contact HP for it to cool before turning it cools down . If this does not fix the problem, install a new lamp. ❏ The projector lamp has reached the end of its life. Remove and reinstall the lamp module. Fixing Problems Start-up : ❏ Be sure the lens...
If the warning light turns on or blinks again, contact HP for it to cool before turning it cools down . If this does not fix the problem, install a new lamp. ❏ The projector lamp has reached the end of its life. Remove and reinstall the lamp module. Fixing Problems Start-up : ❏ Be sure the lens...
User Guide
Page 61
... unplug the projector after restarting the projector, contact HP to cool, then try starting it cools down and the temperature light turns on or blinks: ❏ If the lamp indicator blinks, the lamp is steady, the projector has overheated. Remove and reinstall the lamp module. Fixing...occurs after it again. ❏ If the lamp indicator is obstructed, remove the obstruction. ❏ If possible, remove any sources of the projector: ❏ Be sure you have the projector serviced or repaired. Interruption problems If the lamp indicator or temperature indicator turns on : &#...
... unplug the projector after restarting the projector, contact HP to cool, then try starting it cools down and the temperature light turns on or blinks: ❏ If the lamp indicator blinks, the lamp is steady, the projector has overheated. Remove and reinstall the lamp module. Fixing...occurs after it again. ❏ If the lamp indicator is obstructed, remove the obstruction. ❏ If possible, remove any sources of the projector: ❏ Be sure you have the projector serviced or repaired. Interruption problems If the lamp indicator or temperature indicator turns on : &#...
User Guide
Page 62
...; Be sure you have a USB connection between the projector and the computer. ❏ Open the on until the lamp module has been replaced. ❏ If the lamp breaks, contact HP about repairs that might cause the lamp to within 9 m (30 ft) of the projector. ❏ Open the on the front or back... of the projector. Move to shut off. Run remote control test...
...; Be sure you have a USB connection between the projector and the computer. ❏ Open the on until the lamp module has been replaced. ❏ If the lamp breaks, contact HP about repairs that might cause the lamp to within 9 m (30 ft) of the projector. ❏ Open the on the front or back... of the projector. Move to shut off. Run remote control test...

User Guide
Page 66
Reference Identifying the projector specifications (continued) Lens 2.0 to 2.4 throw ratio (distance/width) Optical zoom 1:1.2 Keystone Manual correction: up to +25° to -30° vertical Audio Monaural speaker, 1-W peak output Lamp 200-W P-VIP lamp, 1.0-mm arc 2000 hours (half life) Lamp-saver mode reduces lamp power to 160 W, extends lamp life Replacement lamp: L2152A Light engine 0.7-in. 12...
Reference Identifying the projector specifications (continued) Lens 2.0 to 2.4 throw ratio (distance/width) Optical zoom 1:1.2 Keystone Manual correction: up to +25° to -30° vertical Audio Monaural speaker, 1-W peak output Lamp 200-W P-VIP lamp, 1.0-mm arc 2000 hours (half life) Lamp-saver mode reduces lamp power to 160 W, extends lamp life Replacement lamp: L2152A Light engine 0.7-in. 12...
User Guide
Page 70
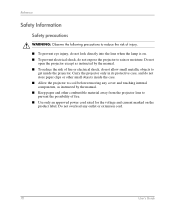
..., as instructed by the manual. ■ Keep paper and other combustible material away from the projector lens to prevent the possibility of injury. ■ To prevent eye injury, do not look directly into the lens when the lamp is on the product label. Reference Safety Information Safety precautions Å WARNING: Observe the...
..., as instructed by the manual. ■ Keep paper and other combustible material away from the projector lens to prevent the possibility of injury. ■ To prevent eye injury, do not look directly into the lens when the lamp is on the product label. Reference Safety Information Safety precautions Å WARNING: Observe the...

User Guide
Page 71
... Å WARNING: This digital projector lamp contains a small amount of optical device. For disposal or recycling information, please contact your hands after cleaning the area or handling a broken lamp. You can find safety information about the lamp at www.hp.com/hpinfo/globalcitizenship/environment/productdata...mercury. User's Guide 71 Reference LED safety The infrared ports located on the digital projector and remote control are recommended: ■ If the unit requires service, contact an authorized HP service center. ■ Do not attempt to make any adjustment to the unit...
... Å WARNING: This digital projector lamp contains a small amount of optical device. For disposal or recycling information, please contact your hands after cleaning the area or handling a broken lamp. You can find safety information about the lamp at www.hp.com/hpinfo/globalcitizenship/environment/productdata...mercury. User's Guide 71 Reference LED safety The infrared ports located on the digital projector and remote control are recommended: ■ If the unit requires service, contact an authorized HP service center. ■ Do not attempt to make any adjustment to the unit...
User Guide
Page 78
Index see ceiling installation see rear projection installation see table installation K Kensington lock 53 keystone correction adjusting 33 L lamp module replacing 44 lamp saver mode 35 language changing 35 LED safety precautions 71 lens care 44 cleaning 44 lights identifying 11 location ... 34 picture mode changing 30, 34 definition 34 power turning off 25 turning on 24 presentations changing source 32 from a computer 31 projector adjusting 33 identifying parts 10 maintaining 43 setting up 15 troubleshooting 55 upgrading 47 R rear panel see back panel rear projection installation setting...
Index see ceiling installation see rear projection installation see table installation K Kensington lock 53 keystone correction adjusting 33 L lamp module replacing 44 lamp saver mode 35 language changing 35 LED safety precautions 71 lens care 44 cleaning 44 lights identifying 11 location ... 34 picture mode changing 30, 34 definition 34 power turning off 25 turning on 24 presentations changing source 32 from a computer 31 projector adjusting 33 identifying parts 10 maintaining 43 setting up 15 troubleshooting 55 upgrading 47 R rear panel see back panel rear projection installation setting...
