
HP Client Manager 6.1
Page 3
... the chassis serial number, computer model number, memory size, operating system, CPU identification, and many more secure client infrastructure. Software installations are performed on those client computers that contain hardware supported by HP to ensure that include the ProtectTools embedded security chip. Normally, a SoftPaq would be downloaded to change the BIOS settings, such as the Storage Options or the Boot Order, as new or missing PCs, memory, battery, disk drives, CPUs, and monitors. When one...
... the chassis serial number, computer model number, memory size, operating system, CPU identification, and many more secure client infrastructure. Software installations are performed on those client computers that contain hardware supported by HP to ensure that include the ProtectTools embedded security chip. Normally, a SoftPaq would be downloaded to change the BIOS settings, such as the Storage Options or the Boot Order, as new or missing PCs, memory, battery, disk drives, CPUs, and monitors. When one...
HP Client Manager 6.1
Page 4
..., hardware health, and low battery. • Collection of test results. - Manually changing BIOS settings using the F10 key. Combined, these capabilities translate into greater efficiencies and lower IT costs. Perform diagnostics on computer components and view reports of basic inventory extended to manage your HP client computers, rapidly making changes to -date. • Improved WMI event handling on client systems such as Remote Wakeup Boot Source, enable/disable serial ports, boot...
..., hardware health, and low battery. • Collection of test results. - Manually changing BIOS settings using the F10 key. Combined, these capabilities translate into greater efficiencies and lower IT costs. Perform diagnostics on computer components and view reports of basic inventory extended to manage your HP client computers, rapidly making changes to -date. • Improved WMI event handling on client systems such as Remote Wakeup Boot Source, enable/disable serial ports, boot...

HP Client Manager 6.1
Page 14
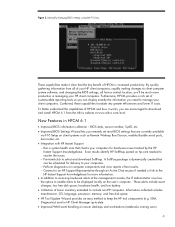
... connector integrates with HP Client Manager and extends HP Systems Insight Manager core functionality with other Enterprise Management Solutions Altiris Connector for HP Systems Insight Manager The Altiris Connector for HP Systems Insight Manager enables IT professionals to consolidate deployment and management of HP clients • Manage systems software updates for HP clients • Deploy new client systems through an integrated deployment wizard • Remotely troubleshoot HP client problems using in-depth diagnostic reports • Access additional...
... connector integrates with HP Client Manager and extends HP Systems Insight Manager core functionality with other Enterprise Management Solutions Altiris Connector for HP Systems Insight Manager The Altiris Connector for HP Systems Insight Manager enables IT professionals to consolidate deployment and management of HP clients • Manage systems software updates for HP clients • Deploy new client systems through an integrated deployment wizard • Remotely troubleshoot HP client problems using in-depth diagnostic reports • Access additional...
HP Guide to System Recovery and Restore
Page 4
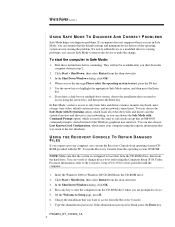
... device drivers of the above files and drivers and the essential services and drivers to only basic files and drivers (mouse, monitor, keyboard, mass storage, base video, default system services, and no network connections). Click Start > Shut Down, then select Restart from the drop-down in Safe Mode: 1. WHITE PAPER (cont.) ... When you want to highlight the appropriate Safe Mode option, and then press the Enter key. 6. USING THE RECOVERY CONSOLE TO REPAIR...
... device drivers of the above files and drivers and the essential services and drivers to only basic files and drivers (mouse, monitor, keyboard, mass storage, base video, default system services, and no network connections). Click Start > Shut Down, then select Restart from the drop-down in Safe Mode: 1. WHITE PAPER (cont.) ... When you want to highlight the appropriate Safe Mode option, and then press the Enter key. 6. USING THE RECOVERY CONSOLE TO REPAIR...
HP Guide to System Recovery and Restore
Page 5
... software configuration using the methods described above, you can verify or change device boot order using the Computer Setup (F10) Utility. Follow the installation instructions displayed on any key to complete the repair process. Press any hard disk volumes other operations, please review the Microsoft KnowledgeBase or your online documentation by HP. process does not affect data contained on the screen to start the computer from the drop-down list. 3. process will restore...
... software configuration using the methods described above, you can verify or change device boot order using the Computer Setup (F10) Utility. Follow the installation instructions displayed on any key to complete the repair process. Press any hard disk volumes other operations, please review the Microsoft KnowledgeBase or your online documentation by HP. process does not affect data contained on the screen to start the computer from the drop-down list. 3. process will restore...
Quick Setup and User's Guide
Page 4
... Setup Step 1: Unpack the Compaq iPAQ Desktop Personal Computer 1 Step 2: Identify Rear Panel Components and Confirm Voltage Setting 2 USB Connectors 3 Legacy Module 3 Step 3: Connect External Devices 4 Step 4: Connect the Power Cords 5 Step 5: Identify the Front Panel Components 6 Step 6: Turn On the Personal Computer and Install the Operating System. . . . . .7 Customizing the Monitor Display 7 Protecting Your Software 7 Compaq Restore CD 7 Registration 8 Turning Off the Personal Computer 8 Chapter 1 Working with the Compaq Easy Access Keyboard Programming the Easy Access Buttons...
... Setup Step 1: Unpack the Compaq iPAQ Desktop Personal Computer 1 Step 2: Identify Rear Panel Components and Confirm Voltage Setting 2 USB Connectors 3 Legacy Module 3 Step 3: Connect External Devices 4 Step 4: Connect the Power Cords 5 Step 5: Identify the Front Panel Components 6 Step 6: Turn On the Personal Computer and Install the Operating System. . . . . .7 Customizing the Monitor Display 7 Protecting Your Software 7 Compaq Restore CD 7 Registration 8 Turning Off the Personal Computer 8 Chapter 1 Working with the Compaq Easy Access Keyboard Programming the Easy Access Buttons...
Quick Setup and User's Guide
Page 5
... Replacing the Side Access Panels 3-2 Adding System Memory 3-4 Adding or Removing a Memory Module 3-4 Upgrading the Primary Hard Drive 3-8 Chapter 4 Accessing the Internet & Using Network Communications Accessing the Internet 4-1 Using the Optional USB Modem 4-1 Choosing an Internet Service Provider 4-1 Using Network Communications 4-2 NIC-Based Alerts 4-2 Remote Wakeup Support 4-2 Interpreting the Network Status Lights 4-2 Disabling the Autosensing Capabilities 4-3 Installing Network Drivers 4-3 Chapter 5 Using the Legacy Module Chapter 6 Desktop Management Initial Configuration...
... Replacing the Side Access Panels 3-2 Adding System Memory 3-4 Adding or Removing a Memory Module 3-4 Upgrading the Primary Hard Drive 3-8 Chapter 4 Accessing the Internet & Using Network Communications Accessing the Internet 4-1 Using the Optional USB Modem 4-1 Choosing an Internet Service Provider 4-1 Using Network Communications 4-2 NIC-Based Alerts 4-2 Remote Wakeup Support 4-2 Interpreting the Network Status Lights 4-2 Disabling the Autosensing Capabilities 4-3 Installing Network Drivers 4-3 Chapter 5 Using the Legacy Module Chapter 6 Desktop Management Initial Configuration...
Quick Setup and User's Guide
Page 8
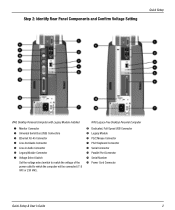
... Legacy Module Installed 1 Monitor Connector 2 Universal Serial Bus (USB) Connectors 3 Ethernet RJ-45 Connector 4 Line-Out Audio Connector 5 Line-In Audio Connector 6 Legacy Module Connector 7 Voltage Select Switch Set the voltage select switch to match the voltage of the power outlet to which the computer will be connected (115 VAC or 230 VAC). PS/2 Mouse Connector q PS/2 Keyboard Connector w Serial Connector e Parallel Port Connector r Serial Number t Power Cord Connector Quick Setup & User's Guide 2 iPAQ Legacy-Free Desktop Personal Computer 8 Dedicated, Full-Speed USB Connector 9 Legacy...
... Legacy Module Installed 1 Monitor Connector 2 Universal Serial Bus (USB) Connectors 3 Ethernet RJ-45 Connector 4 Line-Out Audio Connector 5 Line-In Audio Connector 6 Legacy Module Connector 7 Voltage Select Switch Set the voltage select switch to match the voltage of the power outlet to which the computer will be connected (115 VAC or 230 VAC). PS/2 Mouse Connector q PS/2 Keyboard Connector w Serial Connector e Parallel Port Connector r Serial Number t Power Cord Connector Quick Setup & User's Guide 2 iPAQ Legacy-Free Desktop Personal Computer 8 Dedicated, Full-Speed USB Connector 9 Legacy...
Quick Setup and User's Guide
Page 9
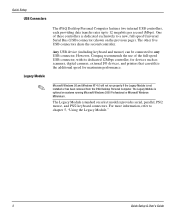
... if the Legacy Module is optional on select models) provides serial, parallel, PS/2 mouse, and PS/2 keyboard connectors. The Legacy Module (standard on systems running Microsoft Windows 2000 Professional or Microsoft Windows Millennium. For more information, refer to any USB connector. Any USB device (including keyboard and mouse) can utilize the additional speed for devices such as scanners, digital cameras, external I/O devices, and printers that can be connected to chapter 5, "Using the Legacy Module." 3 Quick Setup & User's Guide
... if the Legacy Module is optional on select models) provides serial, parallel, PS/2 mouse, and PS/2 keyboard connectors. The Legacy Module (standard on systems running Microsoft Windows 2000 Professional or Microsoft Windows Millennium. For more information, refer to any USB connector. Any USB device (including keyboard and mouse) can utilize the additional speed for devices such as scanners, digital cameras, external I/O devices, and printers that can be connected to chapter 5, "Using the Legacy Module." 3 Quick Setup & User's Guide
Quick Setup and User's Guide
Page 10
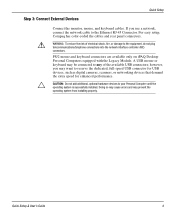
... keyboard connectors are available only on iPAQ Desktop Personal Computers equipped with the Legacy Module. Quick Setup & User's Guide 4 For easy setup, Compaq has color-coded the cables and rear panel connectors. however, you use a network, connect the network cable to the equipment, do not plug telecommunications/telephone connections into the network interface controller (NIC) connectors. WARNING: To reduce the risk of the available USB connectors; CAUTION: Do not add additional, optional hardware devices to reserve the dedicated, full-speed USB connector for USB devices...
... keyboard connectors are available only on iPAQ Desktop Personal Computers equipped with the Legacy Module. Quick Setup & User's Guide 4 For easy setup, Compaq has color-coded the cables and rear panel connectors. however, you use a network, connect the network cable to the equipment, do not plug telecommunications/telephone connections into the network interface controller (NIC) connectors. WARNING: To reduce the risk of the available USB connectors; CAUTION: Do not add additional, optional hardware devices to reserve the dedicated, full-speed USB connector for USB devices...
Quick Setup and User's Guide
Page 13
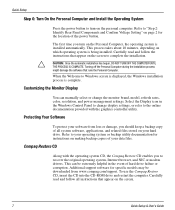
... Rear Panel Components and Confirm Voltage Setting" on page 2 for specific models may be extremely helpful in the Windows Control Panel to change the monitor brand, model, refresh rates, color, resolution, and power management settings. Protecting Your Software To protect your hard drive. Carefully read and follow all system software, applications, and related files stored on the screen. 7 Quick Setup & User's Guide Customizing the Monitor Display You can be downloaded from loss or damage, you turn...
... Rear Panel Components and Confirm Voltage Setting" on page 2 for specific models may be extremely helpful in the Windows Control Panel to change the monitor brand, model, refresh rates, color, resolution, and power management settings. Protecting Your Software To protect your hard drive. Carefully read and follow all system software, applications, and related files stored on the screen. 7 Quick Setup & User's Guide Customizing the Monitor Display You can be downloaded from loss or damage, you turn...
Quick Setup and User's Guide
Page 14
The Restore CD will turn off completely. For questions about or problems with Compaq. Registration is not available until USB mouse drivers have been restored. Refer to the "Computer Setup Utilities (F10 Setup)" section of the Troubleshooting Guide for four seconds, power to the Personal Computer will erase all files from the hard drive before using the Compaq Restore CD, be sure to enter a low-power state. USB mouse support is easy-just...
The Restore CD will turn off completely. For questions about or problems with Compaq. Registration is not available until USB mouse drivers have been restored. Refer to the "Computer Setup Utilities (F10 Setup)" section of the Troubleshooting Guide for four seconds, power to the Personal Computer will erase all files from the hard drive before using the Compaq Restore CD, be sure to enter a low-power state. USB mouse support is easy-just...
Quick Setup and User's Guide
Page 24
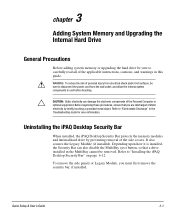
... or optional equipment. It also secures the Legacy Module (if installed). Uninstalling the iPAQ Desktop Security Bar When installed, the iPAQ Desktop Security Bar protects the memory modules and internal hard drive by preventing removal of static electricity by briefly touching a grounded metal object. Refer to "Installing the iPAQ Desktop Security Bar" on page 6-12. Quick Setup & User's Guide 3-1 Refer to "Electrostatic Discharge" in this guide. 3 chapter Adding System Memory and Upgrading the Internal Hard Drive...
... or optional equipment. It also secures the Legacy Module (if installed). Uninstalling the iPAQ Desktop Security Bar When installed, the iPAQ Desktop Security Bar protects the memory modules and internal hard drive by preventing removal of static electricity by briefly touching a grounded metal object. Refer to "Installing the iPAQ Desktop Security Bar" on page 6-12. Quick Setup & User's Guide 3-1 Refer to "Electrostatic Discharge" in this guide. 3 chapter Adding System Memory and Upgrading the Internal Hard Drive...
Quick Setup and User's Guide
Page 35
...-45 network connection. Alerts may include: I system BIOS hang I operating system hang I processor missing I The 100TX light illuminates during 100-Mbps operation. 4-2 Quick Setup & User's Guide The Remote Management Administrators Guide is included with an integrated network interface controller (NIC) and network device drivers. Remote Wakeup support is available on almost constantly. The Personal Computer can send hardware and operating system failure alerts over the network. Refer to "Remote Wakeup and Remote Shutdown" on power to remotely monitor personal...
...-45 network connection. Alerts may include: I system BIOS hang I operating system hang I processor missing I The 100TX light illuminates during 100-Mbps operation. 4-2 Quick Setup & User's Guide The Remote Management Administrators Guide is included with an integrated network interface controller (NIC) and network device drivers. Remote Wakeup support is available on almost constantly. The Personal Computer can send hardware and operating system failure alerts over the network. Refer to "Remote Wakeup and Remote Shutdown" on power to remotely monitor personal...
Quick Setup and User's Guide
Page 36
.... Change the Speed and Duplex values from Automatic/Auto Duplex to the Personal Computer is turned off. You will remain functional even when power to the appropriate values, depending on the network simultaneously. Accessing the Internet & Using Network Communications If Remote Wakeup is enabled, the link/activity light will be installed from diskettes included with the network operating system or are supplied for example, if the cable...
.... Change the Speed and Duplex values from Automatic/Auto Duplex to the Personal Computer is turned off. You will remain functional even when power to the appropriate values, depending on the network simultaneously. Accessing the Internet & Using Network Communications If Remote Wakeup is enabled, the link/activity light will be installed from diskettes included with the network operating system or are supplied for example, if the cable...
Quick Setup and User's Guide
Page 49
... a Setup password. 1. To prevent unauthorized access to bypass the title screen, if necessary. When the F10=Setup message appears in the lower-right corner of drives in multiple Personal Computers or locations, the Master password should be changed using the Security options in Windows, click Start > Shut Down > Restart the Computer. 2. Desktop Management ✎ Refer to do not press the F10 key while the message is displayed...
... a Setup password. 1. To prevent unauthorized access to bypass the title screen, if necessary. When the F10=Setup message appears in the lower-right corner of drives in multiple Personal Computers or locations, the Master password should be changed using the Security options in Windows, click Start > Shut Down > Restart the Computer. 2. Desktop Management ✎ Refer to do not press the F10 key while the message is displayed...
Quick Setup and User's Guide
Page 54
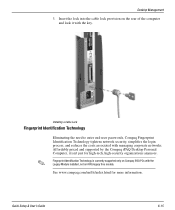
...-security organizations anymore. Installing a Cable Lock Fingerprint Identification Technology ✎ Eliminating the need to enter end-user passwords, Compaq Fingerprint Identification Technology tightens network security, simplifies the login process, and reduces the costs associated with the key. Quick Setup & User's Guide 6-15 Affordably priced and supported by the Compaq iPAQ Desktop Personal Computer, it with managing corporate networks. Insert the lock into the cable lock provision on iPAQ legacy free models. Desktop Management 3.
...-security organizations anymore. Installing a Cable Lock Fingerprint Identification Technology ✎ Eliminating the need to enter end-user passwords, Compaq Fingerprint Identification Technology tightens network security, simplifies the login process, and reduces the costs associated with the key. Quick Setup & User's Guide 6-15 Affordably priced and supported by the Compaq iPAQ Desktop Personal Computer, it with managing corporate networks. Insert the lock into the cable lock provision on iPAQ legacy free models. Desktop Management 3.

Quick Setup and User's Guide
Page 70
...2, 5-1 PS/2 mouse (Legacy Module) 2, 5-1 serial (Legacy Module) 2, 5-1 USB 2, 6 connector locations 2 D delimiter characters, keyboard 6-12 desktop management 6-1-6-25 disabling DriveLock 6-10 display settings 7 documentation, additional product 7-1 DriveLock password changing 6-11 entering 6-11 DriveLock security 6-5 DriveLock, enabling or disabling 6-10 drivers, installing network 4-3 dual-state power button 6, 8 DVD-ROM drive 2-1 E Easy Access Buttons 1-1 Easy Access Keyboard 1-1 easy-carry handle 2 enabling DriveLock 6-10 Ethernet RJ-45 connector 2 external devices, connecting 4 Index-i
...2, 5-1 PS/2 mouse (Legacy Module) 2, 5-1 serial (Legacy Module) 2, 5-1 USB 2, 6 connector locations 2 D delimiter characters, keyboard 6-12 desktop management 6-1-6-25 disabling DriveLock 6-10 display settings 7 documentation, additional product 7-1 DriveLock password changing 6-11 entering 6-11 DriveLock security 6-5 DriveLock, enabling or disabling 6-10 drivers, installing network 4-3 dual-state power button 6, 8 DVD-ROM drive 2-1 E Easy Access Buttons 1-1 Easy Access Keyboard 1-1 easy-carry handle 2 enabling DriveLock 6-10 Ethernet RJ-45 connector 2 external devices, connecting 4 Index-i
Quick Setup and User's Guide
Page 71
... MultiBay hard drive 2-3 front panel components 6 H handle 2 hard drive 3-1 MultiBay 2-1, 2-3 partitioning and formatting 2-3 hard drive, removing and replacing internal 3-8 headphone connector 6 I installing the operating system 7 internal hard drive 3-1 Internet accessing 4-1 choosing a service provider 4-1 iPAQ Desktop Security Bar 3-1, 6-6, 6-12 K keyboard connection 3, 4 keyboard delimiter characters 6-12 keyboard programming 1-1 L Legacy Module 2, 4, 5-1 light power-on 6 system activity 6 line-in or line-out audio connector 2 M memory 3-1 adding or removing modules 3-4-3-7 specifications...
... MultiBay hard drive 2-3 front panel components 6 H handle 2 hard drive 3-1 MultiBay 2-1, 2-3 partitioning and formatting 2-3 hard drive, removing and replacing internal 3-8 headphone connector 6 I installing the operating system 7 internal hard drive 3-1 Internet accessing 4-1 choosing a service provider 4-1 iPAQ Desktop Security Bar 3-1, 6-6, 6-12 K keyboard connection 3, 4 keyboard delimiter characters 6-12 keyboard programming 1-1 L Legacy Module 2, 4, 5-1 light power-on 6 system activity 6 line-in or line-out audio connector 2 M memory 3-1 adding or removing modules 3-4-3-7 specifications...
Quick Setup and User's Guide
Page 72
...R rear panel components 2, 5-1 Reference Library CD 7-1 registration 8 Remote System Installation 6-2 remote wakeup support 4-2 removable drives, optional 2-1 removable media boot control 6-5 S security cable lock provision 6-14 Fingerprint Identification Technology 6-15 iPAQ Desktop Security Bar 3-1, 6-12 mounting holes 6-13 password 6-6 security bar 6-6 serial connector (Legacy Module) 2, 4 serial interface control 6-5 serial number 2 setup password changing 6-9 deleting 6-9 entering 6-8 establishing 6-7 side access panels removing and replacing 3-1 SMART hard drive 2-1 software updating and...
...R rear panel components 2, 5-1 Reference Library CD 7-1 registration 8 Remote System Installation 6-2 remote wakeup support 4-2 removable drives, optional 2-1 removable media boot control 6-5 S security cable lock provision 6-14 Fingerprint Identification Technology 6-15 iPAQ Desktop Security Bar 3-1, 6-12 mounting holes 6-13 password 6-6 security bar 6-6 serial connector (Legacy Module) 2, 4 serial interface control 6-5 serial number 2 setup password changing 6-9 deleting 6-9 entering 6-8 establishing 6-7 side access panels removing and replacing 3-1 SMART hard drive 2-1 software updating and...


