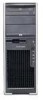
HP xw Workstation series Setup and Troubleshooting Guide
Page 50
... have either a 4-pin, 6-pin, or 8-pin configuration, depending on clearing CMOS. 2. Check the power supply functionality. Contact HP for assistance. To prevent damage, disconnect the workstation power cord before you remove a component. 1. Replace third-party memory with HP memory. 4. CAUTION: Internal components might be powered even when the system is causing the problem by a two-second pause. Contact...
HP xw4550 Workstation - Service and Technical Reference Guide
Page 6
... ...54 Lithium coin cell battery 54 Customer Self-Repair ...55 Predisassembly procedures ...55 System board components ...56 Steps for removing and replacing components 57 Disassembly order ...57 The optional security lock 59 The optional cable lock ...59 Side access panel ...59 Optional hood sensor...65 System speaker ...65 Optical drive (minitower configuration 66 Optical drive (desktop configuration 69 Diskette drive (optional) ...72 Power supply ...74 Workstation power connections to drives and the system board 75 System fan assembly ...76 Memory ...77 Memory module features 78 Memory ...
HP xw4550 Workstation - Service and Technical Reference Guide
Page 11
Figure 1-2 HP xw4550 Workstation component view Table 1-1 Component view Item Description Item Description 1 Power supply 9 Processor 2 Hard drive 10 Memory module 3 Optical drive 11 System board 4 Side access panel 12 PCI Express card 5 System fan 13 PCI card 6 Chassis 14 Speaker 7 Diskette drive 15 Front bezel 8 Processor heatsink ENWW Product features 3 For information about supported replacement parts, see: http://partsurfer.hp.com.
HP xw4550 Workstation - Service and Technical Reference Guide
Page 66
... on page 65) Optical drive (Optical drive (minitower configuration) on page 66) Diskette drive (Diskette drive (optional) on page 72) Power supply (Power supply on page 74) System fan (System fan assembly on page 76) Memory (Memory on page 77) PCI retainer (PCI retainer on page 81) PCI or ... page 88) Processor heatsink (Processor heatsink on page 92) Processor (Processor on page 94) System board (System board on page 95) 58 Chapter 4 Removal and replacement procedures ENWW
HP xw4550 Workstation - Service and Technical Reference Guide
Page 82
Figure 4-26 Removing the power supply To replace the power supply, reverse the previous steps. 74 Chapter 4 Removal and replacement procedures ENWW Disconnect all cables from the back panel. 4. Remove the four screws (1) from the system board, drives, or cards. 3. TIP: This next step requires disconnecting several power cables. Slide the power supply toward the front and lift it is...
HP xw4550 Workstation - Service and Technical Reference Guide
Page 83
... to second hard drive ENWW Steps for removing and replacing components 75 Figure 4-27 Power connections for a typical HP xw4550 Workstation configuration Table 4-4 HP xw4550 Workstation power connections Item Description Item Description 1 Workstation power supply 10 First hard drive 2 Power connector P6 (for 11 optional PCI card power) Second hard drive 3 Power connector P7 to first 12 optical drive Power connector P5 to the following information.
HP xw4550 Workstation - Service and Technical Reference Guide
Page 89
... system power supply. Table 4-5 PCI slots Slot Type Slot power (Maximum) 1 PCI Express x16 75 W* 2 PCI Express x4(1) 25 W* 3 PCI 32/33 25 W* 4 PCI 32/33 25 W* * In addition to prevent movement during shipping. Remove the two screws (1) retaining the retainer and lift it down (2) into position. . ENWW Steps for removing and replacing components...
HP xw4550 Workstation - Service and Technical Reference Guide
Page 106
... provides an overview of the diagnostic LEDs and error codes that the fan assembly properly attached. If HDD LED = GREEN, then: 1. Replace the system board. If it does not spin, ensure the fan cable is running. 2. If the fan is properly connected to the ...at a time. 2. Verify that , only the flashing LEDs continue to your workstation from the HP support site. Install processor. 2. OR Press the power button. Blinks red 2 times, once per Processor not installed. Following that the power supply cables are not blocked and the cooling fan is plugged into a working AC ...
HP xw4550 Workstation - Service and Technical Reference Guide
Page 107
... then 2-second pause, 4 beeps Power supply failure. 1. Replace the graphic card. 3. Disconnect electrical plug from outlet. Locate faulty device by removing all are functioning properly. Solving minor problems Table 5-2 Minor problems Problem Cause Workstation appears locked up and will not shut... access panel and ensure the four-wire power supply cable is not functional. For systems with HP memory. 4. second, then 2-second pause, 9 beeps 1. Table 5-1 Diagnostic LED codes (continued) Chassis indicator LEDs Power LED and audible beep activity Diagnosis and service...
HP xw4550 Workstation - Service and Technical Reference Guide
Page 108
.... 1. Workstation powered off automatically and the Power LED flashes red 2 times, once every second, followed by a 2-second pause, and two simultaneous audible beeps. OR The processor heatsink is hot. 1. Replace the processor fan. 4. Replace the RTC battery. Workstation appears to... hold the power button for power supply problems. 100 Chapter 5 System diagnostics and troubleshooting ENWW Solving power supply problems This section presents troubleshooting information for less than 4 seconds. The Num Lock key can be on the front of the workstation are connected...
HP xw4550 Workstation - Service and Technical Reference Guide
Page 109
.... Diskette is incorrectly inserted. Power supply fault. After AC power is running. and the cooling fan is applied, system powers up for 2-3 seconds and then powers down intermittently. assembly is causing the problem: Power off the workstation, reinstall the next device that the workstation air vents are connected. Replace the processor fan. 4. Power failure (power supply is enabled. Diskette drive cannot write...
HP xw4550 Workstation - Service and Technical Reference Guide
Page 140
...any external devices from the power outlets. 2. The password header is turned off the workstation and any external devices. Remove the jumper from the line voltage power outlet and allow the internal system components to the workstation. Plug in , the power supply always has voltage applied ...external devices that you are connected to cool before touching. Reconnect the external equipment. 8. To establish new passwords, repeat steps 1 through 4, replace the password jumper on pins 1 and 2 (connecting both ), and repeat steps 6 through 8. Remove the access panel. 4. Allow the...